基于docker-Kubernetes的web集群项目
项目过程
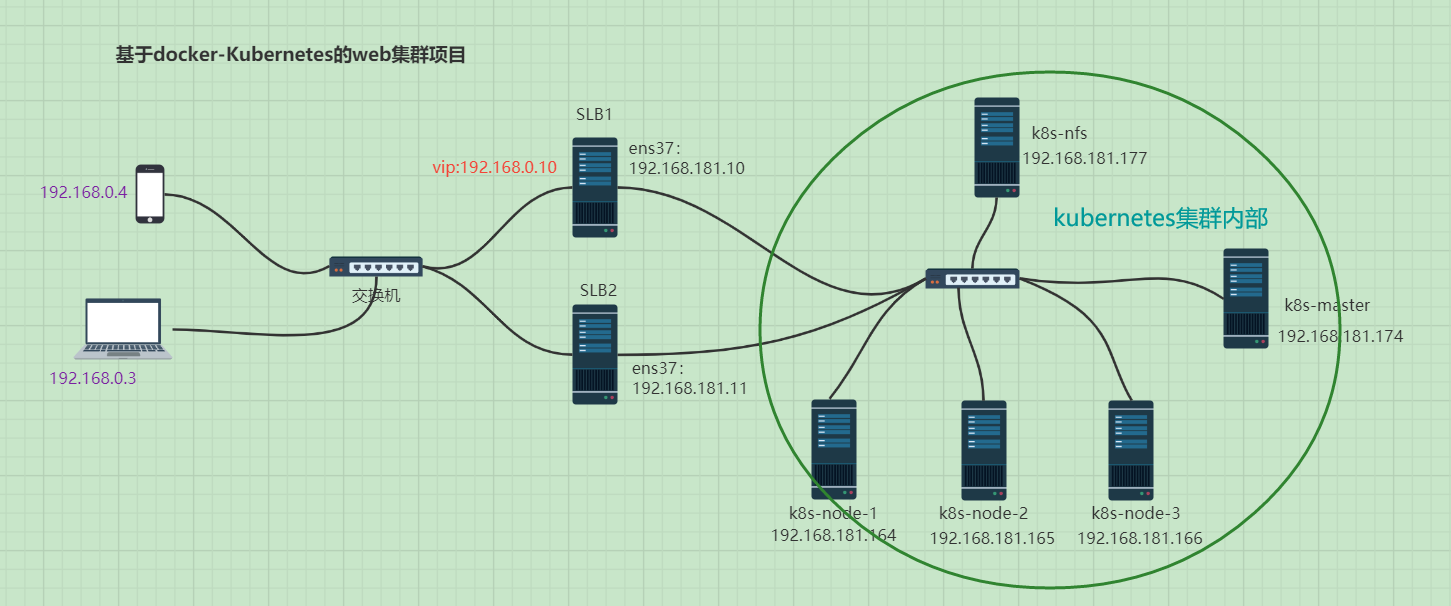
实验拓扑图
版本说明
6台Linux服务器(均为2G内存,1核cpu),centos 7.7,keepalived 1.3.5,nfs v4,docker 20.10.6,nginx 1.19.0,keepalived 1.3.5,kubernetes 1.21.3
角色规划和分配
| 角色 | IP地址 | 备注 |
|---|---|---|
| k8s-master | 192.168.181.174 | |
| k8s-node-1 | 192.168.181.164 | |
| k8s-node-2 | 192.168.181.165 | |
| k8s-node-3 | 192.168.181.166 | |
| k8s-nfs | 192.168.181.177 | |
| LB1 | 192.168.0.5/192.168.181.10 | 两块网卡 |
| LB2 | 192.168.0.6/192.168.181.11 | 两块网卡 |
| 192.168.0.10 | vip地址 |
安装步骤
准备工作
- 修改主机名
[root@localhost ~]# hostnamectl set-hostname k8s-master
[root@localhost ~]# su - root
上一次登录:日 6月 13 09:25:54 CST 2021从 desktop-em27t6u.lanpts/0 上
[root@k8s-master ~]#
[root@localhost ~]# hostnamectl set-hostname k8s-node-2
[root@localhost ~]# sed -i 41s/W/w/ /etc/bashrc     #指定文件/etc/bahsrc的41行替换(个人习惯)
[root@localhost ~]# su - root
上一次登录:日 6月 13 09:25:45 CST 2021从 desktop-em27t6u.lanpts/0 上
[root@k8s-node-1 ~]#
- 关闭防火墙和selinux
#关闭防火墙
systemctl stop  firewalld
systemctl disable  firewalld
#临时关闭selinux
setenforce 0
#永久关闭selinux
sed -i  '/^SELINUX/ s/enforcing/disabled/' /etc/selinux/config
安装docker(脚本)
#!/bin/bash

#解决依赖关系
yum install -y yum-utils zlib zlib-devel openssl openssl-devel pcre pcre-devel gcc gcc-c++ autoconf automake make  psmisc  lsof  net-tools vim python3

#安装docker
##卸载旧版本
yum remove docker \
                  docker-client \
                  docker-client-latest \
                  docker-common \
                  docker-latest \
                  docker-latest-logrotate \
                  docker-logrotate \
                  docker-engine
##安装yum-utils软件包
yum install -y yum-utils
yum-config-manager \
      --add-repo \
          http://mirrors.aliyun.com/docker-ce/linux/centos/docker-ce.repo
##安装docker,设置开机自启
yum install -y docker-ce docker-ce-cli containerd.io
systemctl start docker
systemctl enable docker
##配置 Docker使用systemd作为默认Cgroup驱动
cat <<EOF > /etc/docker/daemon.json
{
   "exec-opts": ["native.cgroupdriver=systemd"]
}
EOF
#重启docker
systemctl restart docker
#临时/永久关闭swap分区
swapoff -a
sed -i '/ swap / s/^\(.*\)$/#\1/g' /etc/fstab
#修改hosts文件
cat >> /etc/hosts << EOF
192.168.181.174 k8s-master
192.168.181.164 k8s-node-1
192.168.181.165 k8s-node-2
192.168.181.166 k8s-node-3
EOF
安装kubeadm和相关工具
# 添加kubernetes YUM软件源
cat > /etc/yum.repos.d/kubernetes.repo << EOF
[kubernetes]
name=Kubernetes
baseurl=https://mirrors.aliyun.com/kubernetes/yum/repos/kubernetes-el7-x86_64
enabled=1
gpgcheck=0
repo_gpgcheck=0
gpgkey=https://mirrors.aliyun.com/kubernetes/yum/doc/yum-key.gpg https://mirrors.aliyun.com/kubernetes/yum/doc/rpm-package-key.gpg
EOF
#安装kubeadm,kubelet和kubectl
yum install -y kubelet kubeadm kubectl
#设置开机自启
systemctl enable --now kubelet
运行kubeadm init命令安装Master
- 在master节点操作
[root@k8s-master ~]# kubeadm init \
> --apiserver-advertise-address=192.168.181.174 \
> --image-repository registry.aliyuncs.com/google_containers \
> --service-cidr=10.1.0.0/16 \
> --pod-network-cidr=10.244.0.0/16
- 成功后输入一下结果
Your Kubernetes control-plane has initialized successfully!

To start using your cluster, you need to run the following as a regular user:

  mkdir -p $HOME/.kube
  sudo cp -i /etc/kubernetes/admin.conf $HOME/.kube/config
  sudo chown $(id -u):$(id -g) $HOME/.kube/config

Alternatively, if you are the root user, you can run:

  export KUBECONFIG=/etc/kubernetes/admin.conf

You should now deploy a pod network to the cluster.
Run "kubectl apply -f [podnetwork].yaml" with one of the options listed at:
  https://kubernetes.io/docs/concepts/cluster-administration/addons/

Then you can join any number of worker nodes by running the following on each as root:

kubeadm join 192.168.181.174:6443 --token l2z66h.nzi1ne0fhypar9o4 \
	--discovery-token-ca-cert-hash sha256:6fa3d42ab22a789a92d915d438ed1a8dd47d1e6fca70d0ed79c30f26d46fa11d
- 继续根据提示操作
[root@k8s-master ~]#  mkdir -p $HOME/.kube
[root@k8s-master ~]#  sudo cp -i /etc/kubernetes/admin.conf $HOME/.kube/config
[root@k8s-master ~]#  sudo chown $(id -u):$(id -g) $HOME/.kube/config
安装Node,加入集群
- 安装kubeadm和kubelet
- 加入节点
kubeadm join 192.168.181.174:6443 --token l2z66h.nzi1ne0fhypar9o4 \
	--discovery-token-ca-cert-hash sha256:6fa3d42ab22a789a92d915d438ed1a8dd47d1e6fca70d0ed79c30f26d46fa11d
- 加入成功输出一下结果
[preflight] Running pre-flight checks
[preflight] Reading configuration from the cluster...
[preflight] FYI: You can look at this config file with 'kubectl -n kube-system get cm kubeadm-config -o yaml'
[kubelet-start] Writing kubelet configuration to file "/var/lib/kubelet/config.yaml"
[kubelet-start] Writing kubelet environment file with flags to file "/var/lib/kubelet/kubeadm-flags.env"
[kubelet-start] Starting the kubelet
[kubelet-start] Waiting for the kubelet to perform the TLS Bootstrap...

This node has joined the cluster:
* Certificate signing request was sent to apiserver and a response was received.
* The Kubelet was informed of the new secure connection details.

Run 'kubectl get nodes' on the control-plane to see this node join the cluster.
- 在master上查看效果(此时的状态都是notready,因为没有安装网络插件)
[root@k8s-master ~]# kubectl get node
NAME         STATUS     ROLES                  AGE     VERSION
k8s-master   NotReady   control-plane,master   4m24s   v1.21.3
k8s-node-1   NotReady   <none>                 37s     v1.21.3
k8s-node-2   NotReady   <none>                 29s     v1.21.3
安装CNI网络插件
[root@k8s-master ~]# cat kube-flannel.yaml
apiVersion: policy/v1beta1
kind: PodSecurityPolicy
metadata:
  name: psp.flannel.unprivileged
  annotations:
    seccomp.security.alpha.kubernetes.io/allowedProfileNames: docker/default
    seccomp.security.alpha.kubernetes.io/defaultProfileName: docker/default
    apparmor.security.beta.kubernetes.io/allowedProfileNames: runtime/default
    apparmor.security.beta.kubernetes.io/defaultProfileName: runtime/default
spec:
  privileged: false
  volumes:
  - configMap
  - secret
  - emptyDir
  - hostPath
  allowedHostPaths:
  - pathPrefix: "/etc/cni/net.d"
  - pathPrefix: "/etc/kube-flannel"
  - pathPrefix: "/run/flannel"
  readOnlyRootFilesystem: false
  # Users and groups
  runAsUser:
    rule: RunAsAny
  supplementalGroups:
    rule: RunAsAny
  fsGroup:
    rule: RunAsAny
  # Privilege Escalation
  allowPrivilegeEscalation: false
  defaultAllowPrivilegeEscalation: false
  # Capabilities
  allowedCapabilities: ['NET_ADMIN', 'NET_RAW']
  defaultAddCapabilities: []
  requiredDropCapabilities: []
  # Host namespaces
  hostPID: false
  hostIPC: false
  hostNetwork: true
  hostPorts:
  - min: 0
    max: 65535
  # SELinux
  seLinux:
    # SELinux is unused in CaaSP
    rule: 'RunAsAny'
---
kind: ClusterRole
apiVersion: rbac.authorization.k8s.io/v1
metadata:
  name: flannel
rules:
- apiGroups: ['extensions']
  resources: ['podsecuritypolicies']
  verbs: ['use']
  resourceNames: ['psp.flannel.unprivileged']
- apiGroups:
  - ""
  resources:
  - pods
  verbs:
  - get
- apiGroups:
  - ""
  resources:
  - nodes
  verbs:
  - list
  - watch
- apiGroups:
  - ""
  resources:
  - nodes/status
  verbs:
  - patch
---
kind: ClusterRoleBinding
apiVersion: rbac.authorization.k8s.io/v1
metadata:
  name: flannel
roleRef:
  apiGroup: rbac.authorization.k8s.io
  kind: ClusterRole
  name: flannel
subjects:
- kind: ServiceAccount
  name: flannel
  namespace: kube-system
---
apiVersion: v1
kind: ServiceAccount
metadata:
  name: flannel
  namespace: kube-system
---
kind: ConfigMap
apiVersion: v1
metadata:
  name: kube-flannel-cfg
  namespace: kube-system
  labels:
    tier: node
    app: flannel
data:
  cni-conf.json: |
    {
      "name": "cbr0",
      "cniVersion": "0.3.1",
      "plugins": [
        {
          "type": "flannel",
          "delegate": {
            "hairpinMode": true,
            "isDefaultGateway": true
          }
        },
        {
          "type": "portmap",
          "capabilities": {
            "portMappings": true
          }
        }
      ]
    }
  net-conf.json: |
    {
      "Network": "10.244.0.0/16",
      "Backend": {
        "Type": "vxlan"
      }
    }
---
apiVersion: apps/v1
kind: DaemonSet
metadata:
  name: kube-flannel-ds
  namespace: kube-system
  labels:
    tier: node
    app: flannel
spec:
  selector:
    matchLabels:
      app: flannel
  template:
    metadata:
      labels:
        tier: node
        app: flannel
    spec:
      affinity:
        nodeAffinity:
          requiredDuringSchedulingIgnoredDuringExecution:
            nodeSelectorTerms:
            - matchExpressions:
              - key: kubernetes.io/os
                operator: In
                values:
                - linux
      hostNetwork: true
      priorityClassName: system-node-critical
      tolerations:
      - operator: Exists
        effect: NoSchedule
      serviceAccountName: flannel
      initContainers:
      - name: install-cni
        image: quay.io/coreos/flannel:v0.13.1-rc2
        command:
        - cp
        args:
        - -f
        - /etc/kube-flannel/cni-conf.json
        - /etc/cni/net.d/10-flannel.conflist
        volumeMounts:
        - name: cni
          mountPath: /etc/cni/net.d
        - name: flannel-cfg
          mountPath: /etc/kube-flannel/
      containers:
      - name: kube-flannel
        image: quay.io/coreos/flannel:v0.13.1-rc2
        command:
        - /opt/bin/flanneld
        args:
        - --ip-masq
        - --kube-subnet-mgr
        resources:
          requests:
            cpu: "100m"
            memory: "50Mi"
          limits:
            cpu: "100m"
            memory: "50Mi"
        securityContext:
          privileged: false
          capabilities:
            add: ["NET_ADMIN", "NET_RAW"]
        env:
        - name: POD_NAME
          valueFrom:
            fieldRef:
              fieldPath: metadata.name
        - name: POD_NAMESPACE
          valueFrom:
            fieldRef:
              fieldPath: metadata.namespace
        volumeMounts:
        - name: run
          mountPath: /run/flannel
        - name: flannel-cfg
          mountPath: /etc/kube-flannel/
      volumes:
      - name: run
        hostPath:
          path: /run/flannel
      - name: cni
        hostPath:
          path: /etc/cni/net.d
      - name: flannel-cfg
        configMap:
          name: kube-flannel-cfg
[root@k8s-master ~]#

[root@k8s-master ~]# kubectl apply -f kube-flannel.yaml
Warning: policy/v1beta1 PodSecurityPolicy is deprecated in v1.21+, unavailable in v1.25+
podsecuritypolicy.policy/psp.flannel.unprivileged created
clusterrole.rbac.authorization.k8s.io/flannel created
clusterrolebinding.rbac.authorization.k8s.io/flannel created
serviceaccount/flannel created
configmap/kube-flannel-cfg created
daemonset.apps/kube-flannel-ds created
- 查看效果
[root@k8s-master ~]# kubectl get nodes
NAME         STATUS   ROLES                  AGE     VERSION
k8s-master   Ready    control-plane,master   9m46s   v1.21.3
k8s-node-1   Ready    <none>                 5m59s   v1.21.3
k8s-node-2   Ready    <none>                 5m51s   v1.21.3
[root@k8s-master ~]# ps aux|grep flannel
root       8345  0.3  1.1 1340152 21572 ?       Ssl  23:04   0:00 /opt/bin/flanneld --ip-masq --kube-subnet-mgr
root       9228  0.0  0.0 112824   984 pts/0    S+   23:05   0:00 grep --color=auto flannel
[root@k8s-master ~]#  kubectl get pod -n kube-system
NAME                                 READY   STATUS    RESTARTS   AGE
coredns-59d64cd4d4-d677g             1/1     Running   0          9m34s
coredns-59d64cd4d4-vkfkb             1/1     Running   0          9m34s
etcd-k8s-master                      1/1     Running   0          9m47s
kube-apiserver-k8s-master            1/1     Running   0          9m47s
kube-controller-manager-k8s-master   1/1     Running   0          9m48s
kube-flannel-ds-4dm2f                1/1     Running   0          3m21s
kube-flannel-ds-t4hzl                1/1     Running   0          3m21s
kube-flannel-ds-wbdgd                1/1     Running   0          3m21s
kube-proxy-48bbp                     1/1     Running   0          5m56s
kube-proxy-rw4vv                     1/1     Running   0          9m34s
kube-proxy-stqkd                     1/1     Running   0          6m4s
kube-scheduler-k8s-master            1/1     Running   0          9m49s
配置ServerLoadBalance
- 安装nginx
yum install -y nginx
systemctl stop firewalld
systemctl disable firewalld
- 启动nginx并且修改配置文件
systemctl start nginx

cat /etc/nginx/nginx.conf
	......
http {
    upstream web_pools {
	server 192.168.181.164:31002;
	server 192.168.181.165:31002;
	server 192.168.181.166:31002;
	}
    server {
	location / {
		proxy_pass http://web_pools;
			}
	}
	......
}
- 检查语法后重新启动
[root@k8s-SLB1 ~]# nginx -t
nginx: the configuration file /etc/nginx/nginx.conf syntax is ok
nginx: configuration file /etc/nginx/nginx.conf test is successful
[root@k8s-SLB1 ~]# nginx -s reload
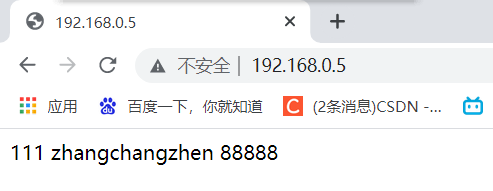
- 验证效果

配置keepailved
- 安装keepalived
[root@k8s-SLB1 ~]# yum install keepalived -y
[root@k8s-SLB1 ~]# keepalived --version
Keepalived v1.3.5 (03/19,2017), git commit v1.3.5-6-g6fa32f2

Copyright(C) 2001-2017 Alexandre Cassen, <acassen@gmail.com>

Build options:  PIPE2 LIBNL3 RTA_ENCAP RTA_EXPIRES RTA_PREF RTA_VIA FRA_OIFNAME FRA_SUPPRESS_PREFIXLEN FRA_TUN_ID RTAX_CC_ALGO RTAX_QUICKACK LIBIPTC LIBIPSET_DYNAMIC LVS LIBIPVS_NETLINK VRRP VRRP_AUTH VRRP_VMAC SOCK_NONBLOCK SOCK_CLOEXEC FIB_ROUTING INET6_ADDR_GEN_MODE SNMP_V3_FOR_V2 SNMP SNMP_KEEPALIVED SNMP_CHECKER SNMP_RFC SNMP_RFCV2 SNMP_RFCV3 SO_MARK
[root@localhost mysqlrouter]#
- 修改配置文件
master
[root@k8s-SLB1 keepalived]# cat keepalived.conf
! Configuration File for keepalived

global_defs {
   notification_email {
     acassen@firewall.loc
     failover@firewall.loc
     sysadmin@firewall.loc
   }
   notification_email_from Alexandre.Cassen@firewall.loc
   smtp_server 192.168.200.1
   smtp_connect_timeout 30
   router_id LVS_DEVEL
   vrrp_skip_check_adv_addr
   #vrrp_strict
   vrrp_garp_interval 0
   vrrp_gna_interval 0
}

vrrp_instance VI_1 {
    state MASTER
    interface ens33
    virtual_router_id 51
    priority 120
    advert_int 1
    authentication {
        auth_type PASS
        auth_pass 1111
    }
    virtual_ipaddress {
        192.168.0.10
    }
}
[root@k8s-SLB1 keepalived]#
------------------------------------
backup
[root@k8s-SLB1 keepalived]#  cat keepalived.conf
! Configuration File for keepalived

global_defs {
   notification_email {
     acassen@firewall.loc
     failover@firewall.loc
     sysadmin@firewall.loc
   }
   notification_email_from Alexandre.Cassen@firewall.loc
   smtp_server 192.168.200.1
   smtp_connect_timeout 30
   router_id LVS_DEVEL
   vrrp_skip_check_adv_addr
   # vrrp_strict
   vrrp_garp_interval 0
   vrrp_gna_interval 0
}

vrrp_instance VI_1 {
    state BACKUP
    interface ens33
    virtual_router_id 51
    priority 100
    advert_int 1
    authentication {
        auth_type PASS
        auth_pass 1111
    }
    virtual_ipaddress {
        192.168.0.10
    }
}

[root@k8s-SLB1 keepalived]#
部署prometheus和grafana
2.1、master/node节点环境部署
在【master】可以进行安装部署
安装git,并下载相关yaml文件
yum install git -y
git clone https://gitee.com/liugpwwwroot/k8s-prometheus-grafana.git
2.2、采用daemonset方式部署node-exporter组件
kubectl create -f k8s-prometheus-grafana/node-exporter.yaml
2.3、部署prometheus组件
2.3.1、rbac文件
kubectl create -f k8s-prometheus-grafana/prometheus/rbac-setup.yaml
2.3.2 以configmap的形式管理prometheus组件的配置文件
kubectl create -f k8s-prometheus-grafana/prometheus/configmap.yaml
2.3.3 Prometheus deployment 文件
kubectl create -f k8s-prometheus-grafana/prometheus/prometheus.deploy.yml
2.3.4 Prometheus service文件
kubectl create -f k8s-prometheus-grafana/prometheus/prometheus.svc.yml
2.4、部署grafana组件
2.4.1 grafana deployment配置文件
kubectl create -f k8s-prometheus-grafana/grafana/grafana-deploy.yaml
2.4.2 grafana service配置文件
kubectl create -f k8s-prometheus-grafana/grafana/grafana-svc.yaml
2.4.3 grafana ingress配置文件
kubectl create -f k8s-prometheus-grafana/grafana/grafana-ing.yaml
- 查看效果
[root@k8s-master ~]# kubectl get svc -n kube-system
NAME            TYPE        CLUSTER-IP     EXTERNAL-IP   PORT(S)                  AGE
grafana         NodePort    10.1.57.170    <none>        3000:30106/TCP           127m
kube-dns        ClusterIP   10.1.0.10      <none>        53/UDP,53/TCP,9153/TCP   7d18h
node-exporter   NodePort    10.1.224.117   <none>        9100:31672/TCP           131m
prometheus      NodePort    10.1.248.131   <none>        9090:30003/TCP           131m
[root@k8s-master ~]#
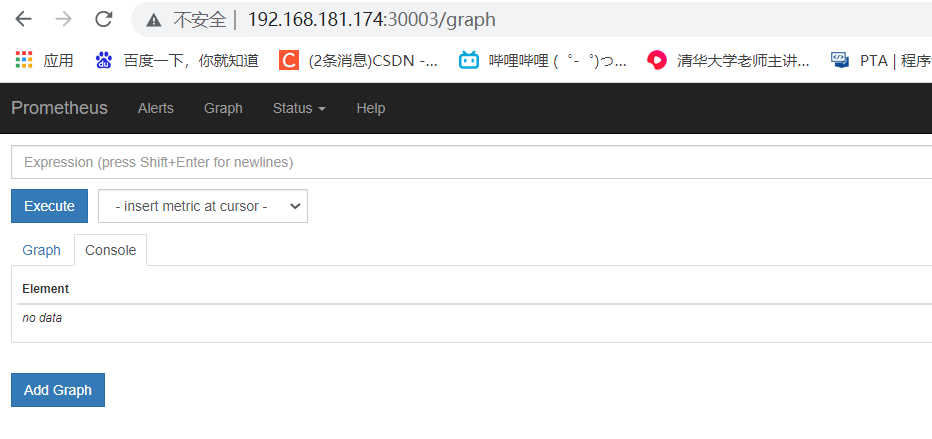
2.5.0 访问prometheus(对应的30003端口)
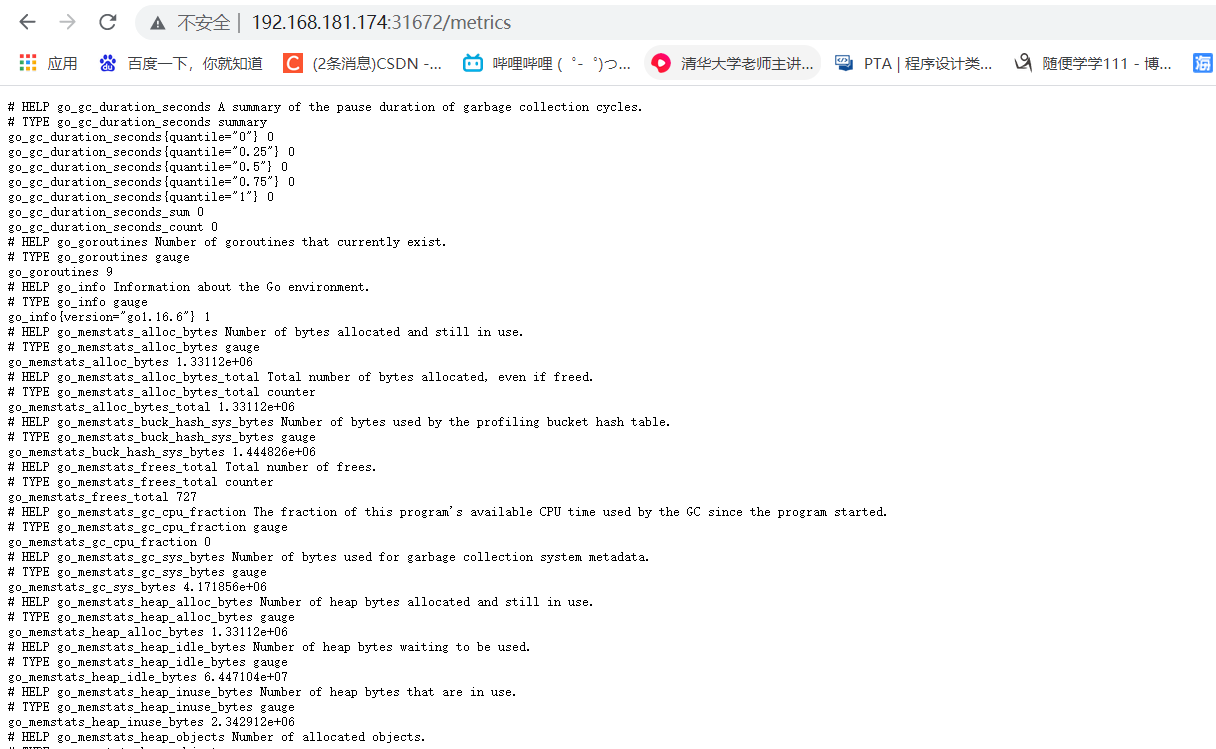
2.5.1、访问node-exporter(上图对应的端口:31672),这个采集器只是采集宿主机上的一些指标
http://192.168.181.174:31672/metrics
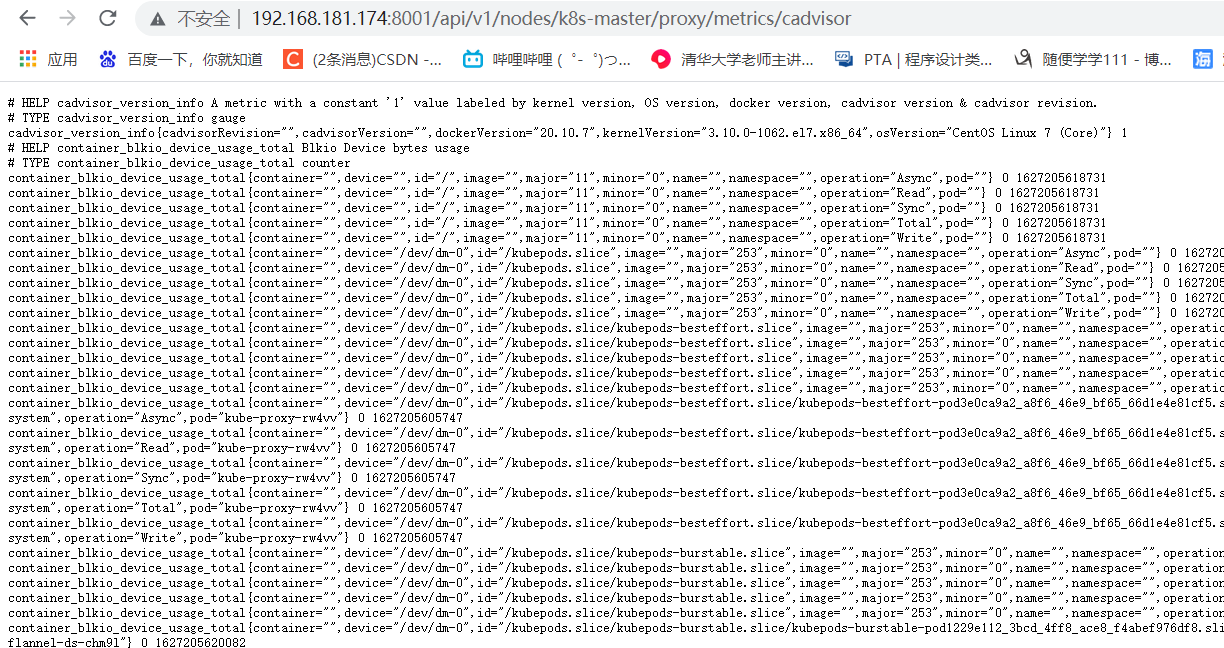
2.5.2、cAdvisor:一种用于监控资源使用情况并分析容器性能的开源代理,即容器指标采集器,cAdvisor集成在Kubelet中,所有安装了k8s就自动安装了cAdvisor,cAdvisor的UI已经差不多被弃用了,Kubernetes 1.12版本之后cAdvisor的UI会被彻底删除,但是可以用granfana展示图表,还有一个问题就是默认不被外部访问,但是可以通过代理方式访问。使用代理如下:
# 这种方式只允许宿主机上访问,也就是localost或者127.0.0.1访问
[root@k8s-master ~]# kubectl proxy
Starting to serve on 127.0.0.1:8001
# 设置API server接收所有主机的请求
[root@k8s-master ~]# kubectl proxy --address='0.0.0.0'  --accept-hosts='^*$'
Starting to serve on [::]:8001
示例:
# 访问cadvisor采集的指标数据
$ http://192.168.181.174:8001/api/v1/nodes/k8s-master/proxy/metrics/cadvisor
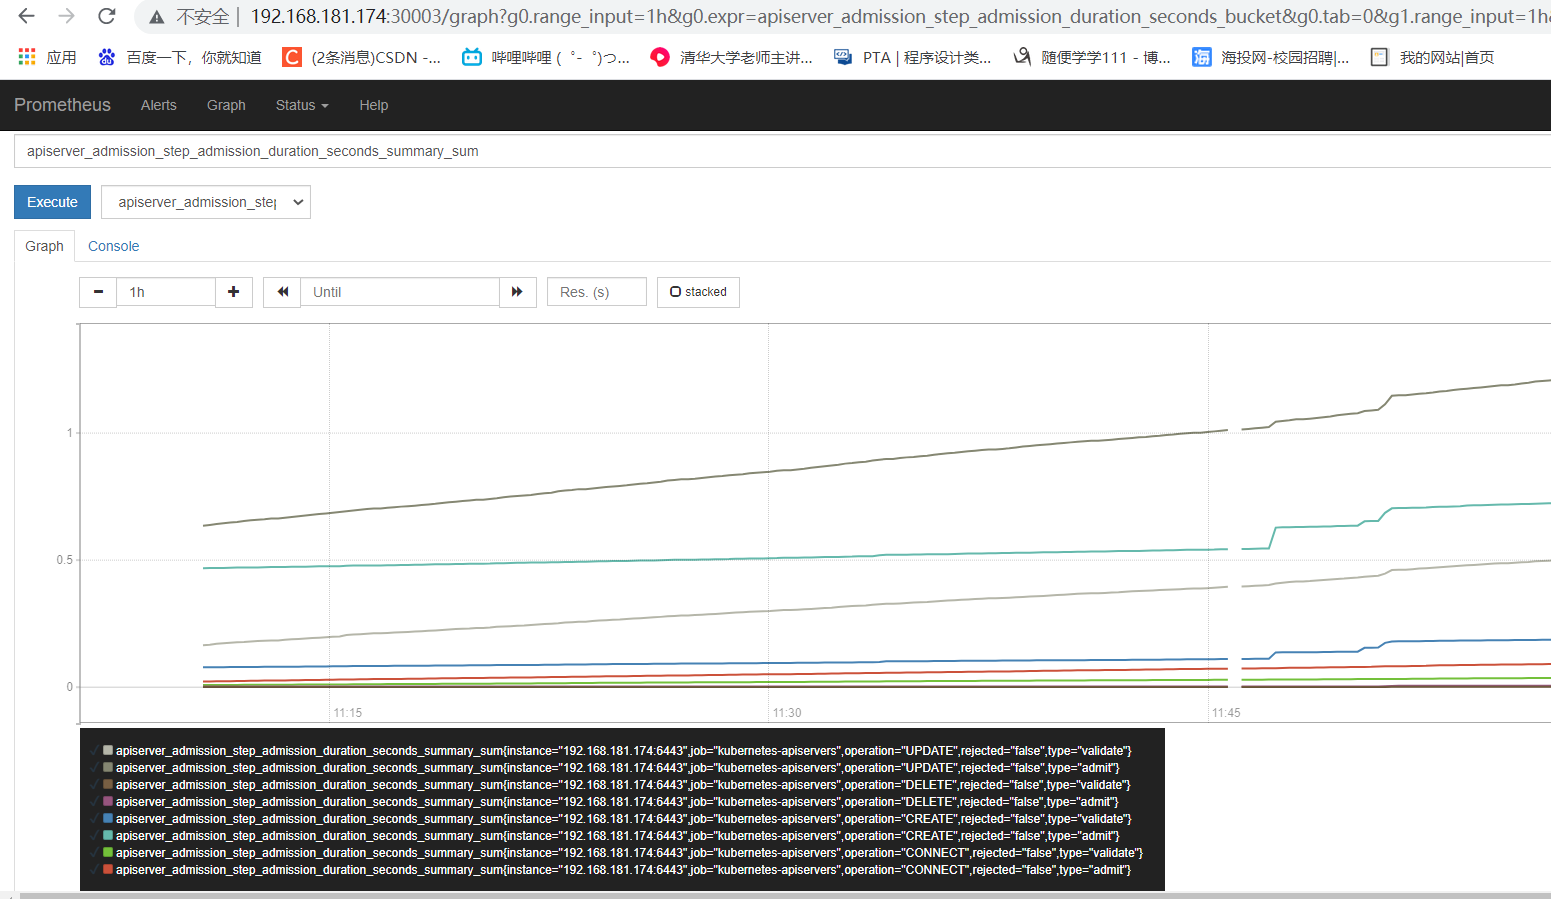
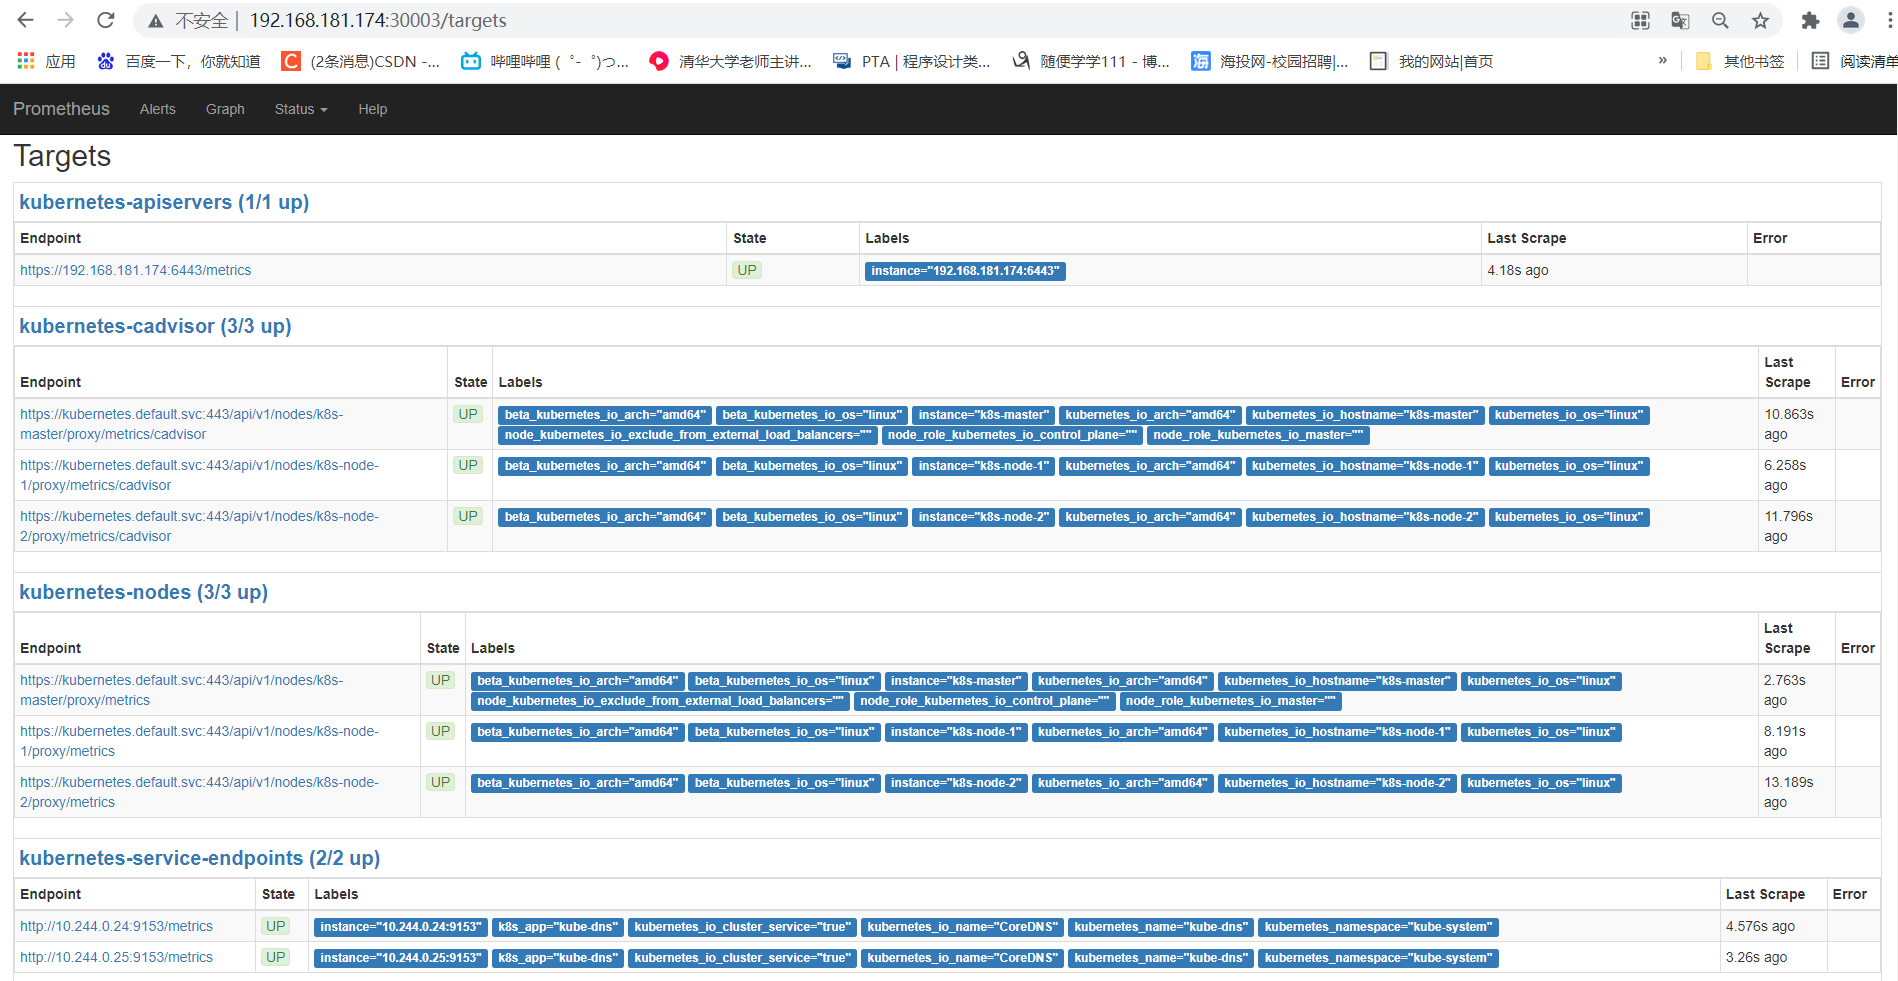
2.5.3、访问prometheus(上图对应的端口:30003)
http://192.168.181.174:30003/targets
2.5.4、访问granfana,默认用户名,密码均为admin(上图对应的端口:30106)
http://192.168.181.174:30106/?orgId=1
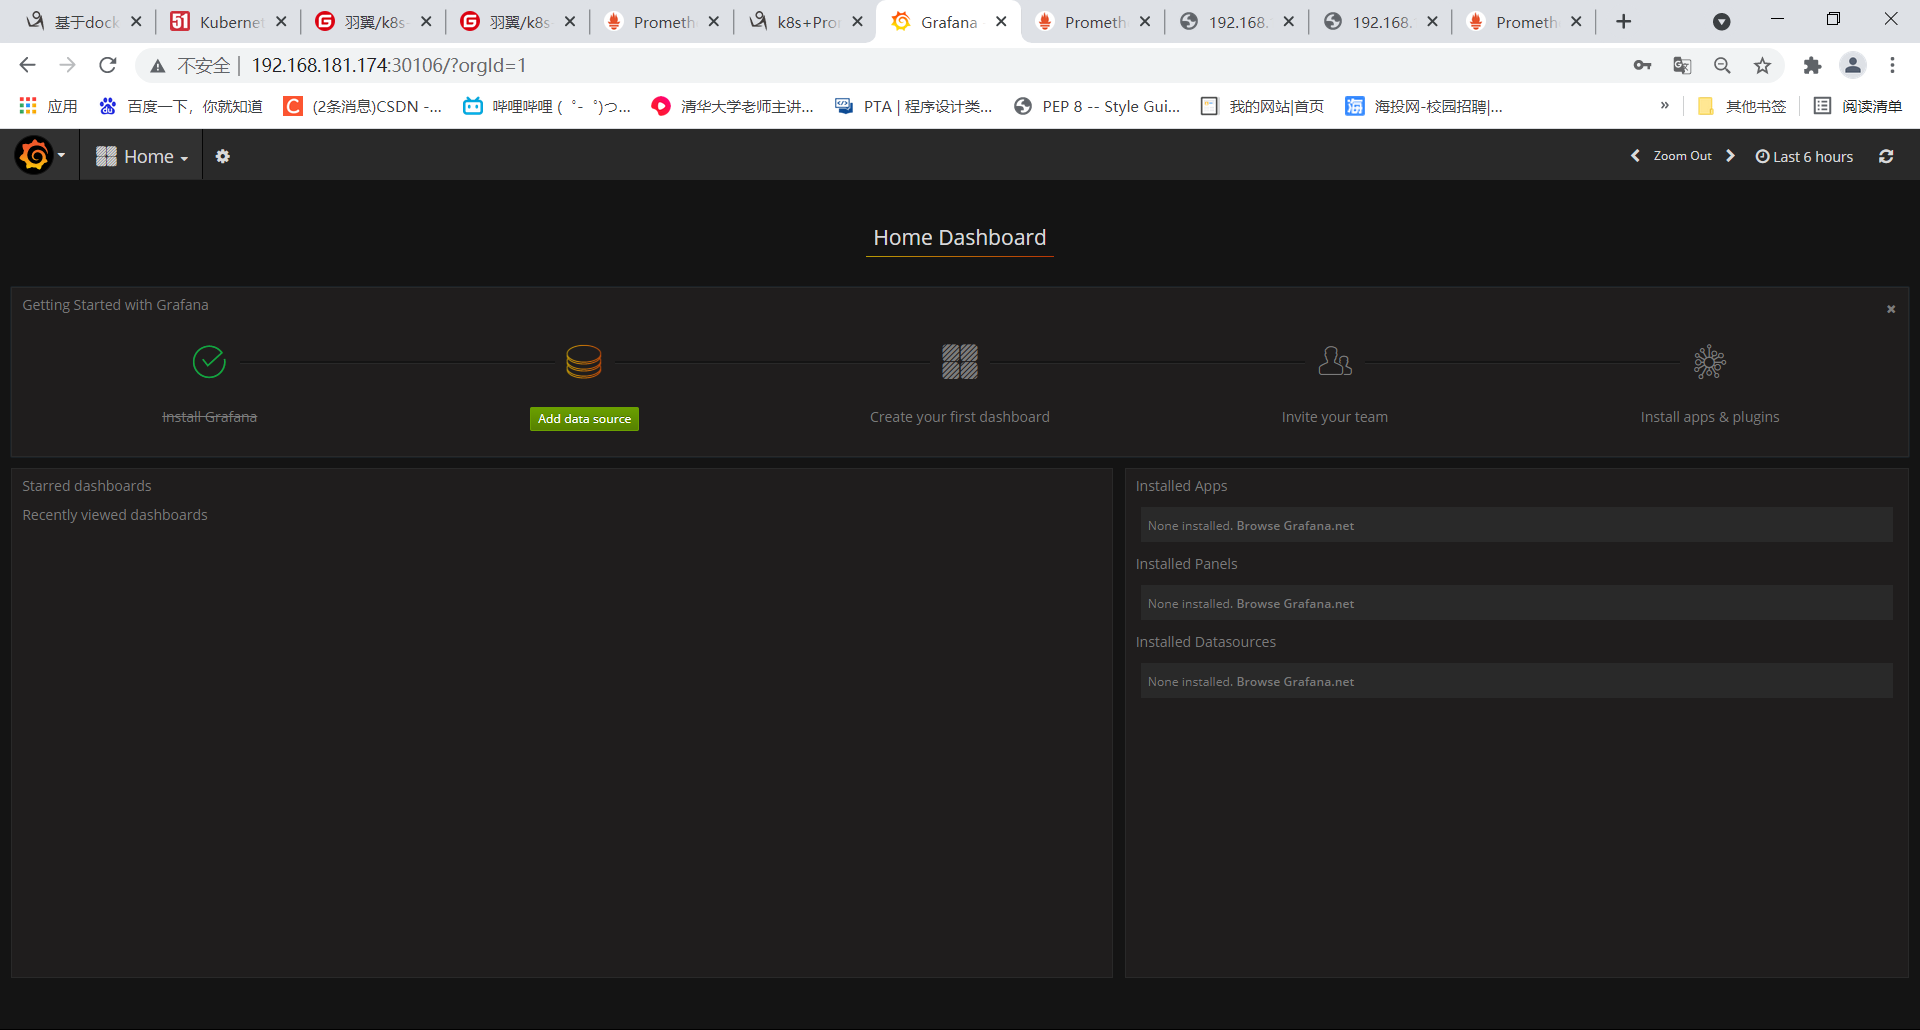
1.添加数据源,使用直接访问模式
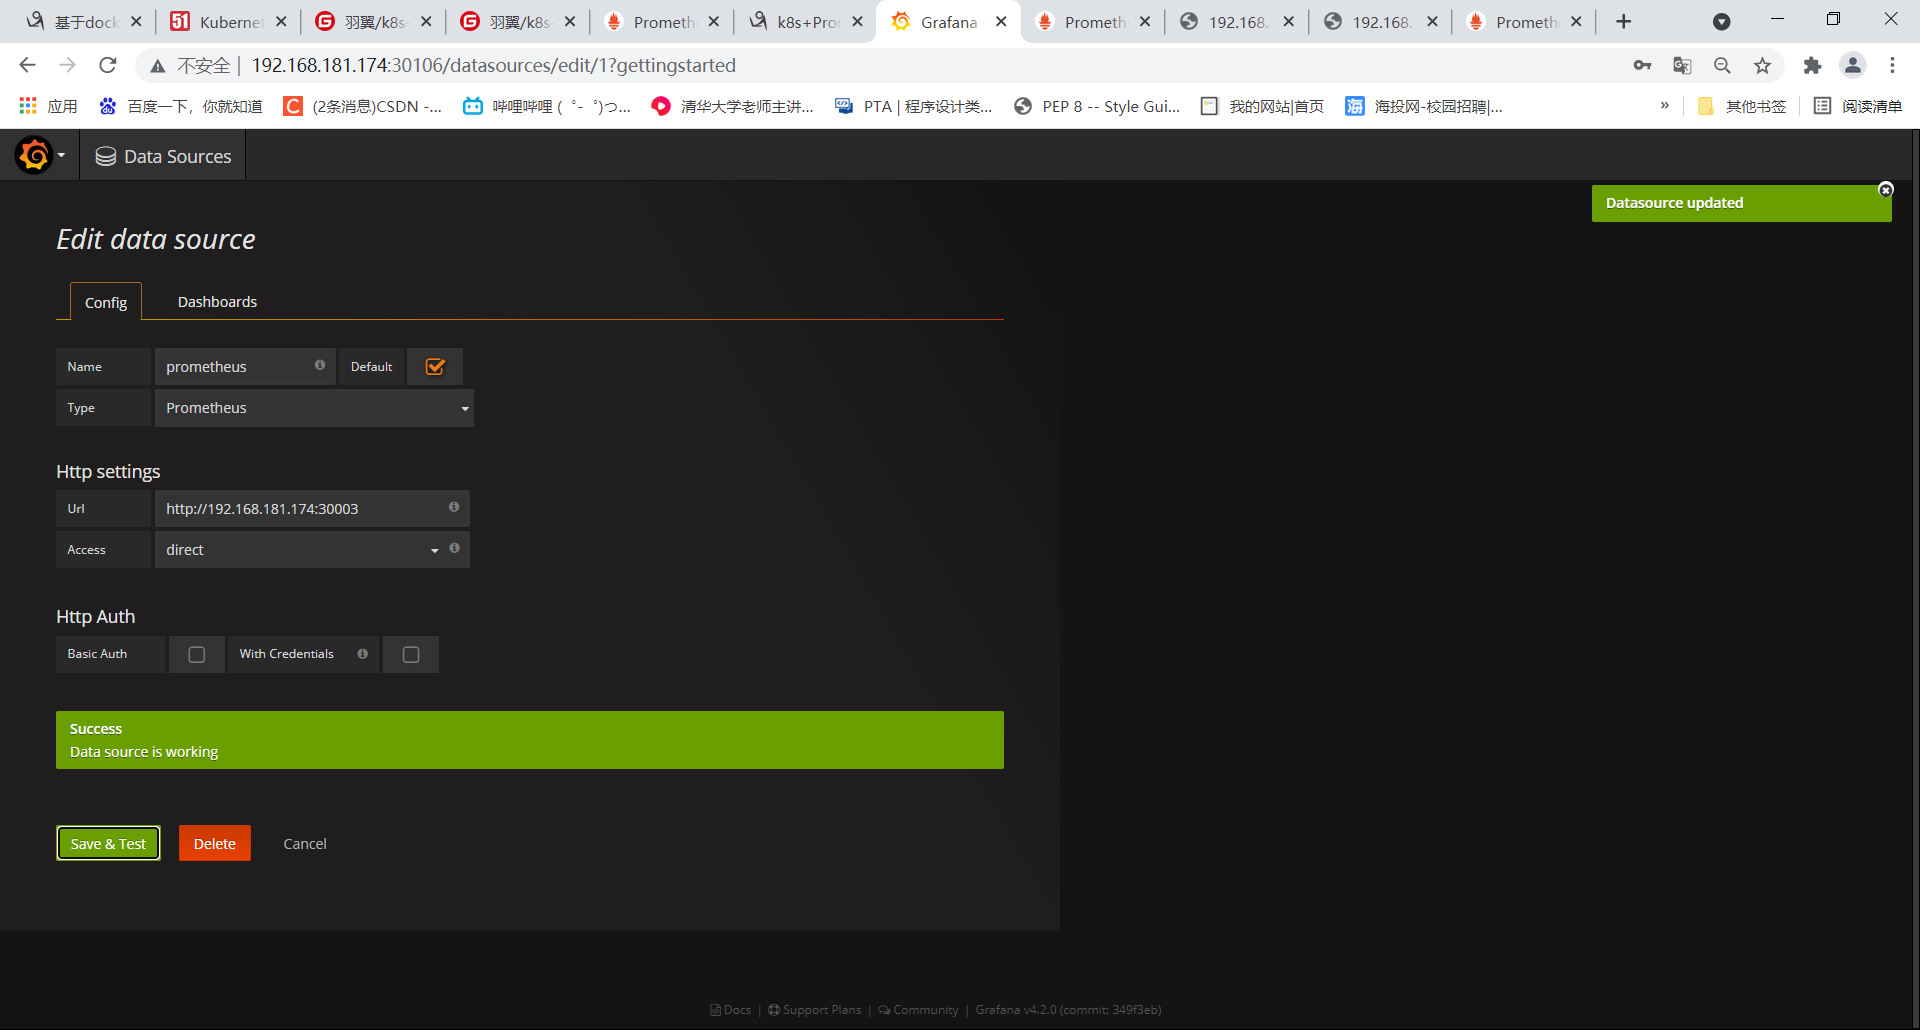
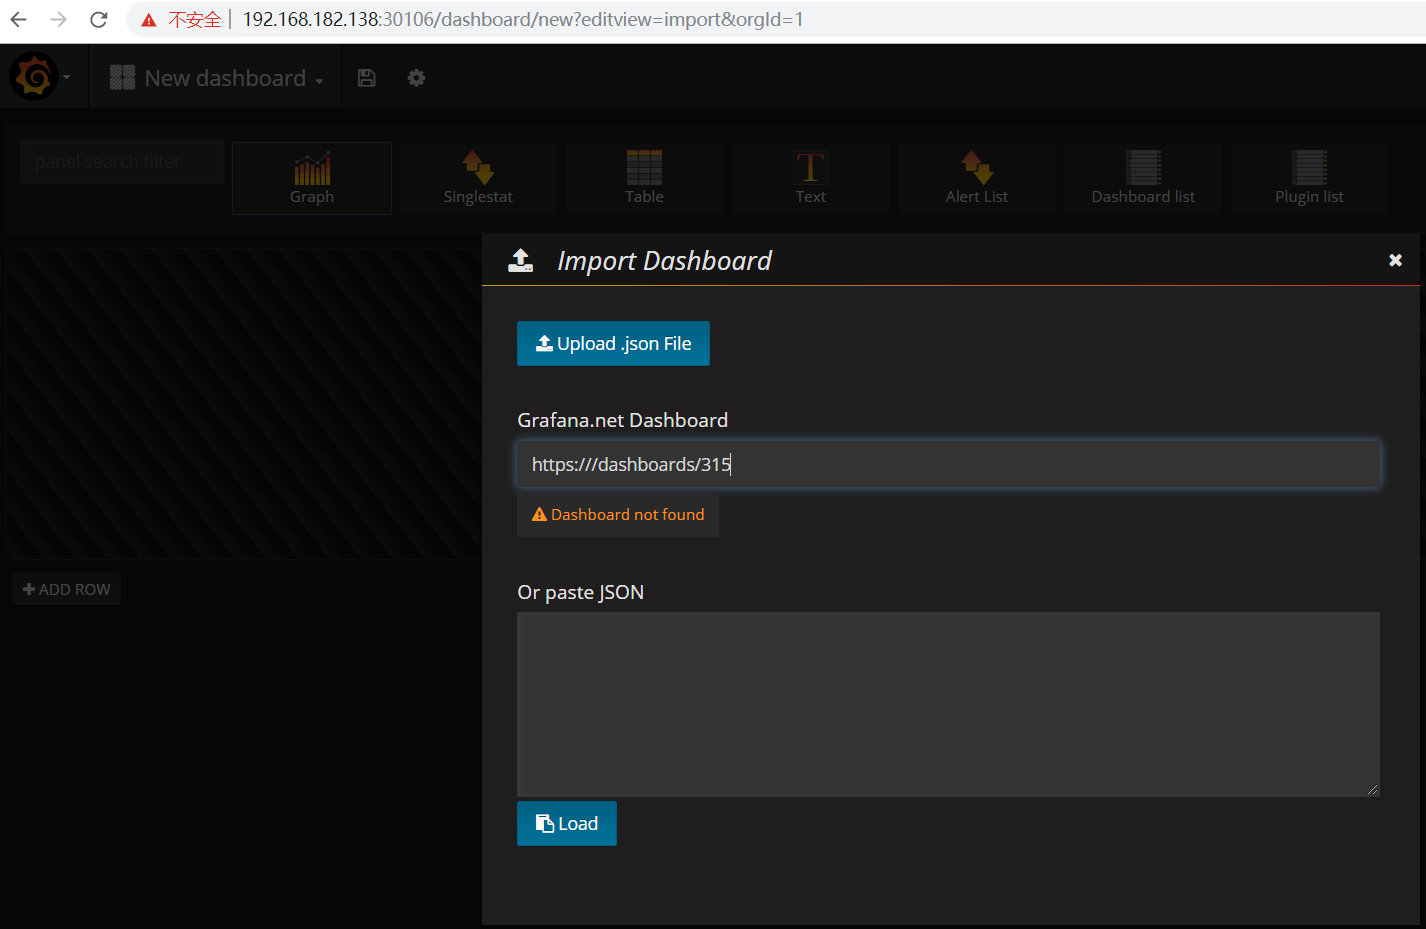
2、导入面板:Home->Dashboards->Import
导入面板,可以直接输入模板编号315在线导入,或者下载好对应的json模板文件本地导入,面板模板下载地址https://grafana.com/grafana/dashboards/315
稍等片刻,即可展示如下图,记得选择prometheus数据源为:prometheus
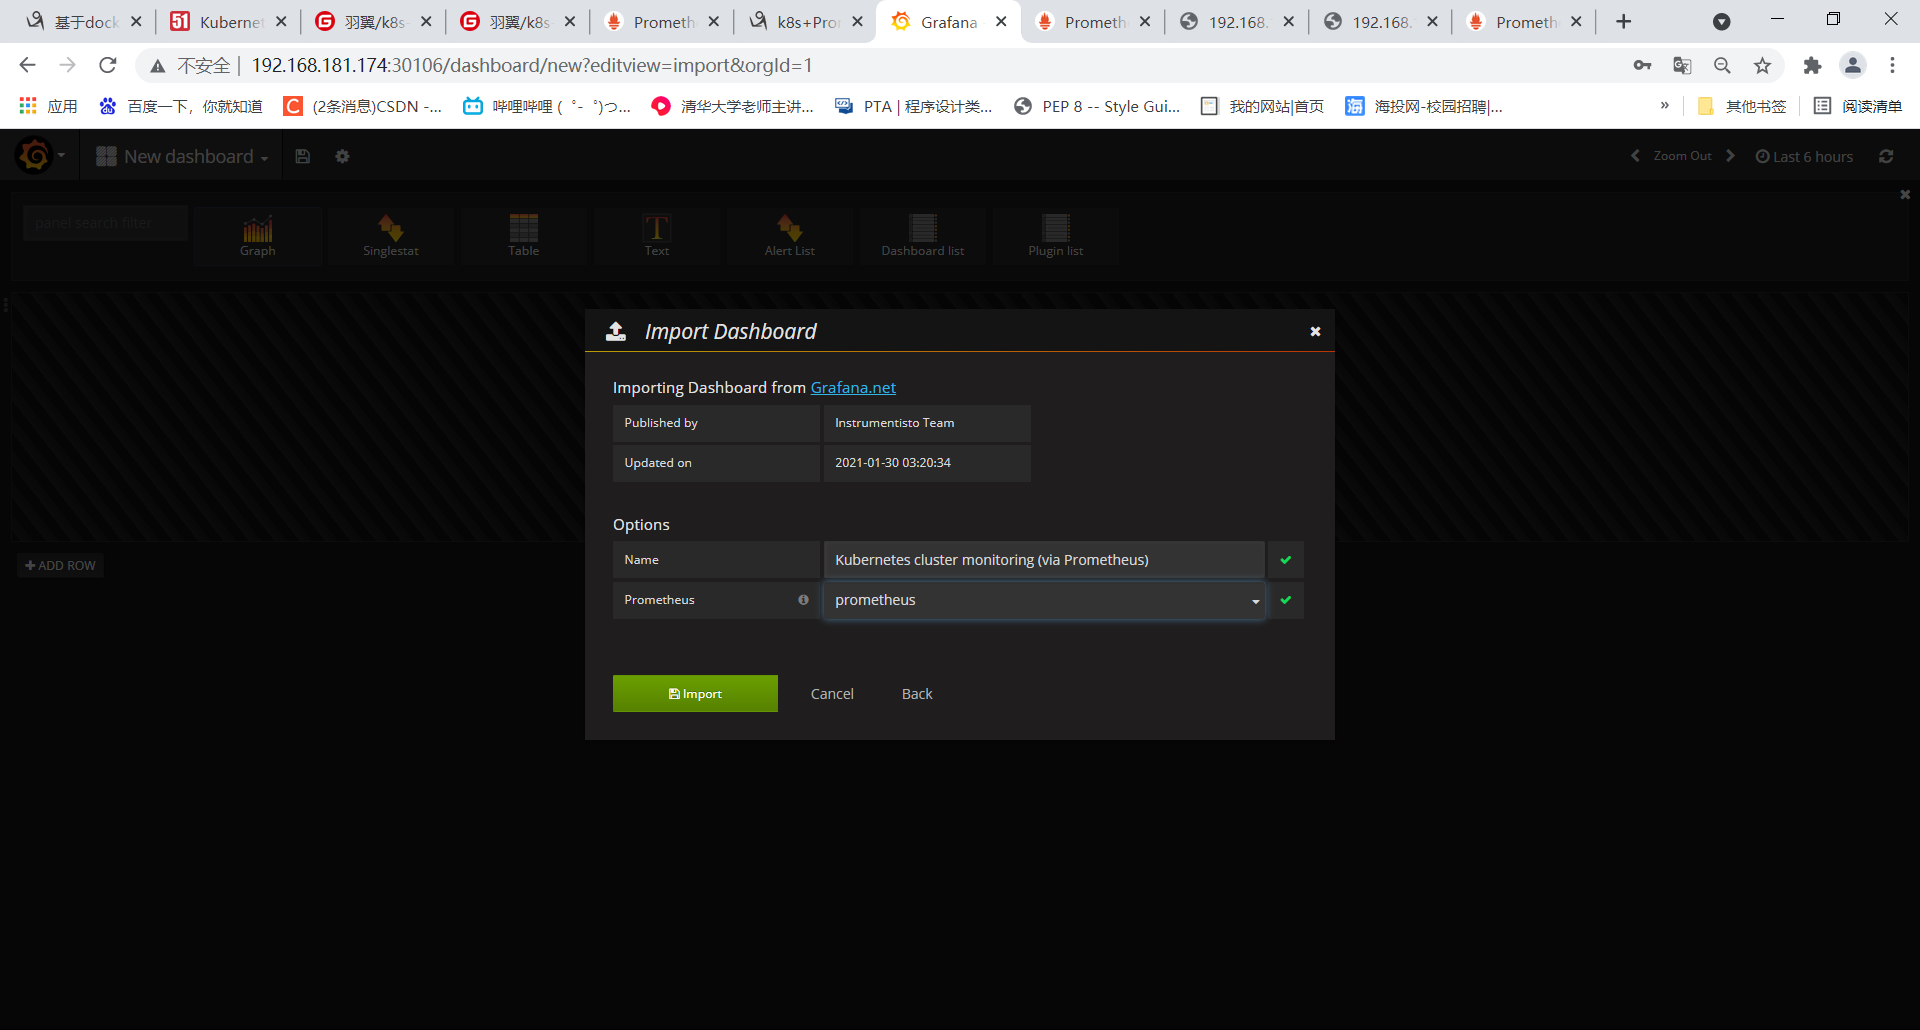
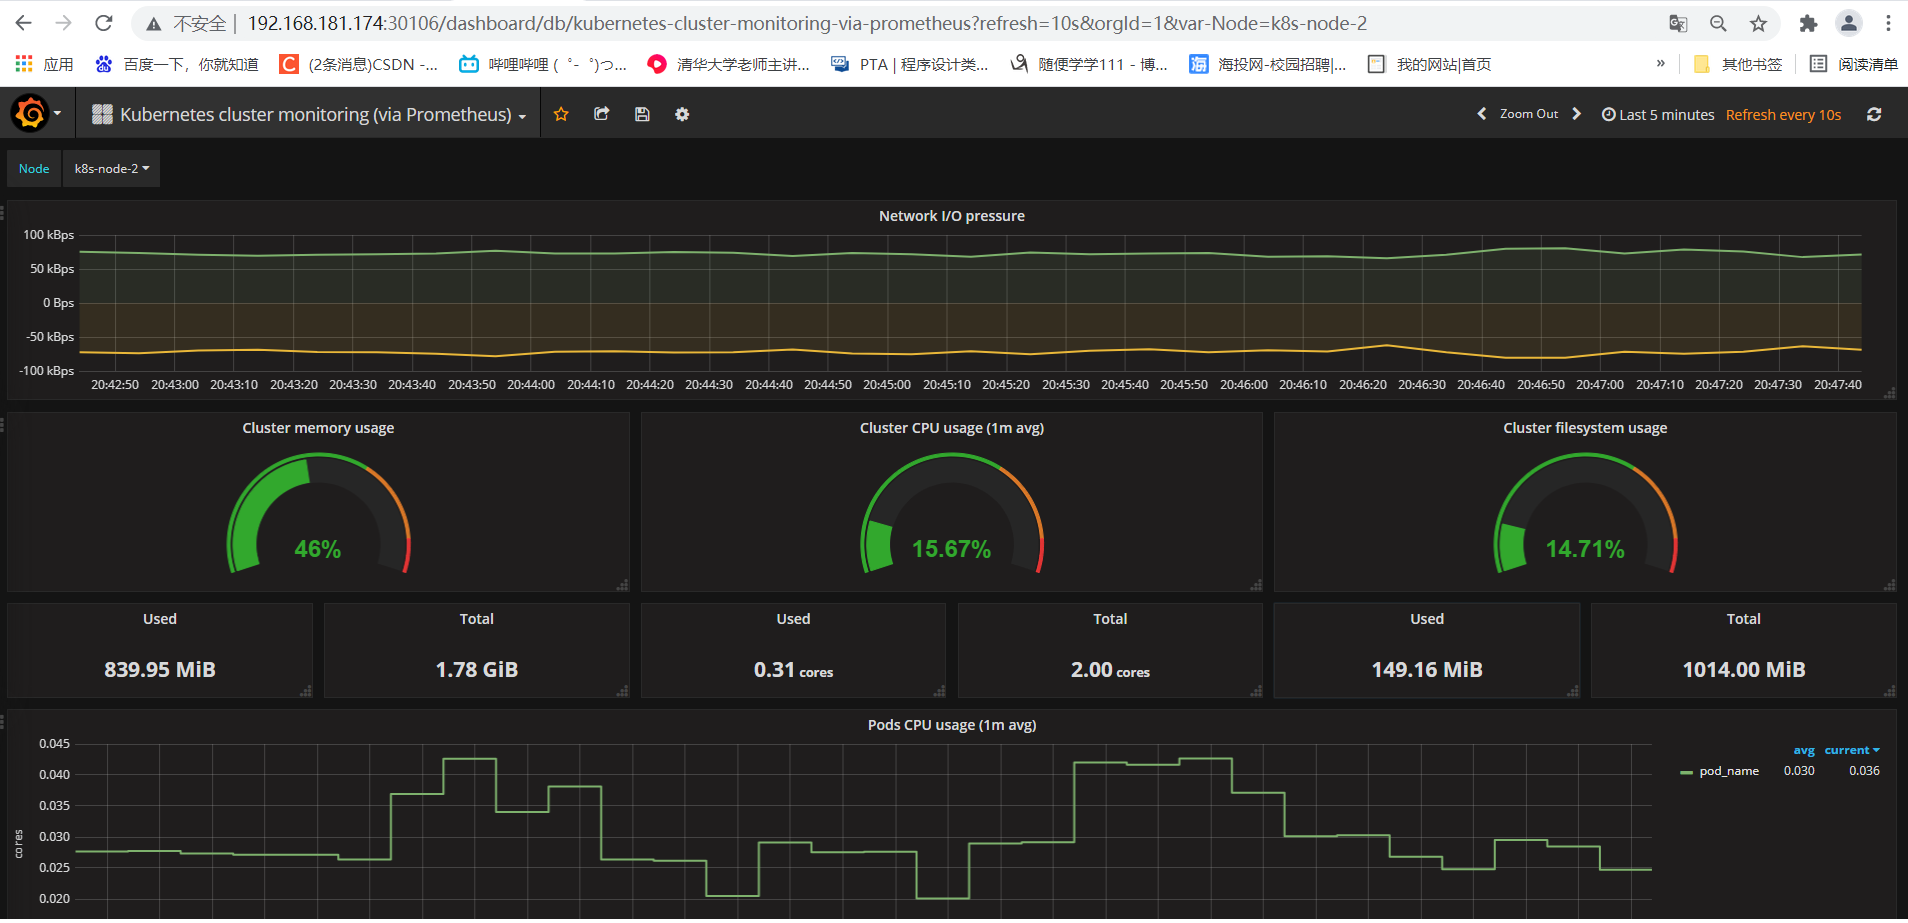
点击Import,即可查看展示效果
遇到的问题:
1.初始化的时候遇到镜像拉取失败的错误
出错提示: failed to pull image registry.aliyuncs.com/google_containers/coredns/coredns:v1.8.0

[root@k8s-master ~]# kubeadm init --apiserver-advertise-address=192.168.181.163 --image-repository registry.aliyuncs.com/google_containers --service-cidr=10.1.0.0/16 --pod-network-cidr=10.244.0.0/16
[init] Using Kubernetes version: v1.21.1
[preflight] Running pre-flight checks
[preflight] Pulling images required for setting up a Kubernetes cluster
[preflight] This might take a minute or two, depending on the speed of your internet connection
[preflight] You can also perform this action in beforehand using 'kubeadm config images pull'
error execution phase preflight: [preflight] Some fatal errors occurred:
[ERROR ImagePull]: failed to pull image registry.aliyuncs.com/google_containers/coredns/coredns:v1.8.0: output: Error response from daemon: pull access denied for registry.aliyuncs.com/google_containers/coredns/coredns, repository does not exist or may require 'docker login': denied: requested access to the resource is denied
, error: exit status 1
[preflight] If you know what you are doing, you can make a check non-fatal with `--ignore-preflight-errors=...`
To see the stack trace of this error execute with --v=5 or higher
[root@k8s-master ~]#
- 首先使用下面的命令获取需要拉取的docker镜像和已经拉取的镜像,这样能看出是最后一个镜像一直拉不成功。
[root@k8s-master ~]# kubeadm config images list
k8s.gcr.io/kube-apiserver:v1.21.3
k8s.gcr.io/kube-controller-manager:v1.21.3
k8s.gcr.io/kube-scheduler:v1.21.3
k8s.gcr.io/kube-proxy:v1.21.3
k8s.gcr.io/pause:3.4.1
k8s.gcr.io/etcd:3.4.13-0
k8s.gcr.io/coredns/coredns:v1.8.0
[root@k8s-master ~]# kubeadm config images pull --image-repository=registry.aliyuncs.com/google_containers
[config/images] Pulled registry.aliyuncs.com/google_containers/kube-apiserver:v1.21.3
[config/images] Pulled registry.aliyuncs.com/google_containers/kube-controller-manager:v1.21.3
[config/images] Pulled registry.aliyuncs.com/google_containers/kube-scheduler:v1.21.3
[config/images] Pulled registry.aliyuncs.com/google_containers/kube-proxy:v1.21.3
[config/images] Pulled registry.aliyuncs.com/google_containers/pause:3.4.1
[config/images] Pulled registry.aliyuncs.com/google_containers/etcd:3.4.13-0
failed to pull image "registry.aliyuncs.com/google_containers/coredns:v1.8.0": output: Error response from daemon: manifest for registry.aliyuncs.com/google_containers/coredns:v1.8.0 not found: manifest unknown: manifest unknown
, error: exit status 1
To see the stack trace of this error execute with --v=5 or higher
[root@k8s-master ~]#
- 解决办法
第一步:从其他仓库拉取该镜像
	[root@k8s-master ~]# docker pull coredns/coredns:1.8.0
第二步:根据选择的镜像源来重新打tag
	[root@k8s-master ~]# docker tag coredns/coredns:1.8.0 registry.aliyuncs.com/google_containers/coredns:v1.8.0
第三步:删掉不需要的镜像
	[root@k8s-master ~]# docker rmi coredns/coredns:1.8.0
第四步:重新执行初始化命令 kubectl init,即可成功
	[root@k8s-master ~]# kubeadm init \
	--apiserver-advertise-address=192.168.181.174 \
	--image-repository=registry.aliyuncs.com/google_containers \
	--service-cidr=10.1.0.0/16 \
	--pod-network-cidr=10.244.0.0/16
2.加入节点的时候遇到/proc/sys/net/bridge/bridge-nf-call-iptables没有设置为1的错误:
出错提示:/proc/sys/net/bridge/bridge-nf-call-iptables contents are not set to 1

[root@k8s-master ~]# kubeadm init --apiserver-advertise-address=192.168.181.163 --image-repository registry.aliyuncs.com/google_containers --service-cidr=10.1.0.0/16 --pod-network-cidr=10.244.0.0/16
[init] Using Kubernetes version: v1.21.1
[preflight] Running pre-flight checks
error execution phase preflight: [preflight] Some fatal errors occurred:
[ERROR FileContent--proc-sys-net-bridge-bridge-nf-call-iptables]: /proc/sys/net/bridge/bridge-nf-call-iptables contents are not set to 1
[preflight] If you know what you are doing, you can make a check non-fatal with `--ignore-preflight-errors=...`
To see the stack trace of this error execute with --v=5 or higher
[root@k8s-master ~]#
解决办法
[root@k8s-master ~]# echo 1 >/proc/sys/net/bridge/bridge-nf-call-iptables
[root@k8s-master ~]# cat /proc/sys/net/bridge/bridge-nf-call-iptables
1
[root@k8s-master ~]# echo 1 >/proc/sys/net/bridge/bridge-nf-call-ip6tables
[root@k8s-master ~]# cat /proc/sys/net/bridge/bridge-nf-call-ip6tables
1
3.coredns出现CrashLoopBackOff的错误
- 成功部署kubernetes集群之后挂起,在再次开启虚拟机后,coredns容器出现镜像拉取失败的现象,一直处于CrashLoopBackOff状态,陷入了不停错误重启的死循环中。
[root@k8s-master ~]# kubectl get pods -o wide -A
NAMESPACE     NAME                                 READY   STATUS    RESTARTS   AGE     IP                NODE         NOMINATED NODE   READINESS GATES
kube-system   coredns-59d64cd4d4-d677g             1/1     Running   126        3d13h   10.244.0.9        k8s-master   <none>           <none>
kube-system   coredns-59d64cd4d4-vkfkb             1/1     Running   126        3d13h   10.244.0.8        k8s-master   <none>           <none>
kube-system   etcd-k8s-master                      1/1     Running   3          3d13h   192.168.181.174   k8s-master   <none>           <none>
kube-system   kube-apiserver-k8s-master            1/1     Running   3          3d13h   192.168.181.174   k8s-master   <none>           <none>
[root@k8s-master ~]# kubectl logs -f coredns-59d64cd4d4-d677g -n kube-system
[root@k8s-master ~]# kubectl describe pod coredns-59d64cd4d4-d677g -n kube-system
解决办法:
- 重新启动一下docker和kubelet
[root@k8s-master ~]# systemctl stop kubelet
[root@k8s-master ~]# systemctl stop docker
[root@k8s-master ~]# iptables --flush
[root@k8s-master ~]# iptables -tnat --flush
[root@k8s-master ~]# systemctl start kubelet
[root@k8s-master ~]# systemctl start docker
- 查看效果
[root@k8s-master ~]# kubectl get pods -n kube-system
总结:尝试重新启动docker和kubelet,防火墙规则清一清,域名解析文件/etc/resolv.conf文件
4.flannel网络问题导致该master节点与其他node节点上的pod网络不通的问题
[root@k8s-master ~]# kubectl get pods
NAMESPACE     NAME                                 READY   STATUS    RESTARTS   AGE     IP                NODE         NOMINATED NODE   READINESS GATES
default       my-nginx-7f4fc68488-7cz7z            1/1     Running   2          4h36m   10.244.1.14       k8s-node-1   <none>           <none>
default       my-nginx-7f4fc68488-cbrjf            1/1     Running   2          4h36m   10.244.2.12       k8s-node-2   <none>           <none>
default       my-nginx-7f4fc68488-lpp4h            1/1     Running   2          4h36m   10.244.1.13       k8s-node-1   <none>           <none>
default       my-nginx-7f4fc68488-mdbmj            1/1     Running   2          4h36m   10.244.1.12       k8s-node-1   <none>           <none>
default       my-nginx-7f4fc68488-pnrgv            1/1     Running   2          4h36m   10.244.2.13       k8s-node-2   <none>           <none>
[root@k8s-master ~]#
[root@k8s-master ~]# curl 10.244.1.14
^C
[root@k8s-master ~]# curl 10.244.2.12
^C
解决办法:
- 将node节点的flannel.1网络删除,在node节点上执行
ip link delete flannel.1
- 在 /etc/sysctl.conf 中 设置 net.ipv4.ip_forward=1,开启路由功能。
echo 'net.ipv4.ip_forward=1' > /etc/sysctl.conf
重新启动服务器以应用更改,或执行sysctl -p以应用更改而不重新启动.他们将在重新启动时永久保持.
- 将网卡重新启动
systemctl restart network
- 在master节点上删掉flannel的Pod,重新启动flannel的yaml文件
kubectl delete -f kube-flannel.yaml
kubectl apply -f kube-flannel.yaml
- 通过ip a查看node节点的IP,发现flannel.1果然有IP地址了
4: flannel.1: <BROADCAST,MULTICAST,UP,LOWER_UP> mtu 1450 qdisc noqueue state UNKNOWN group default
    link/ether c2:cd:e3:2b:83:40 brd ff:ff:ff:ff:ff:ff
    inet 10.244.1.0/32 brd 10.244.1.0 scope global flannel.1
       valid_lft forever preferred_lft forever
    inet6 fe80::c0cd:e3ff:fe2b:8340/64 scope link
       valid_lft forever preferred_lft forever

4: flannel.1: <BROADCAST,MULTICAST,UP,LOWER_UP> mtu 1450 qdisc noqueue state UNKNOWN group default
    link/ether 2e:eb:d9:49:0a:d9 brd ff:ff:ff:ff:ff:ff
    inet 10.244.2.0/32 brd 10.244.2.0 scope global flannel.1
       valid_lft forever preferred_lft forever
    inet6 fe80::2ceb:d9ff:fe49:ad9/64 scope link
       valid_lft forever preferred_lft forever
- 检查效果
1.在master节点ping node1节点上的Pod发现可以ping通或者用curl访问也可以
[root@k8s-master ~]# ping 10.244.2.12 -c 1
PING 10.244.2.12 (10.244.2.12) 56(84) bytes of data.
64 bytes from 10.244.2.12: icmp_seq=1 ttl=63 time=2.74 ms

--- 10.244.2.12 ping statistics ---
1 packets transmitted, 1 received, 0% packet loss, time 0ms
rtt min/avg/max/mdev = 2.741/2.741/2.741/0.000 ms
[root@k8s-master ~]# ping 10.244.1.14 -c 1
PING 10.244.1.14 (10.244.1.14) 56(84) bytes of data.
64 bytes from 10.244.1.14: icmp_seq=1 ttl=63 time=1.37 ms

--- 10.244.1.14 ping statistics ---
1 packets transmitted, 1 received, 0% packet loss, time 0ms
rtt min/avg/max/mdev = 1.376/1.376/1.376/0.000 ms
[root@k8s-master ~]#
[root@k8s-master ~]# curl 10.244.1.14
<!DOCTYPE html>
<html>
<head>
<title>Welcome to nginx!</title>
<style>
    body {
        width: 35em;
        margin: 0 auto;
        font-family: Tahoma, Verdana, Arial, sans-serif;
    }
</style>
</head>
<body>
<h1>Welcome to nginx!</h1>
<p>If you see this page, the nginx web server is successfully installed and
working. Further configuration is required.</p>

<p>For online documentation and support please refer to
<a href="http://nginx.org/">nginx.org</a>.<br/>
Commercial support is available at
<a href="http://nginx.com/">nginx.com</a>.</p>

<p><em>Thank you for using nginx.</em></p>
</body>
</html>
[root@k8s-master ~]# curl 10.244.2.12
<!DOCTYPE html>
<html>
<head>
<title>Welcome to nginx!</title>
<style>
    body {
        width: 35em;
        margin: 0 auto;
        font-family: Tahoma, Verdana, Arial, sans-serif;
    }
</style>
</head>
<body>
<h1>Welcome to nginx!</h1>
<p>If you see this page, the nginx web server is successfully installed and
working. Further configuration is required.</p>

<p>For online documentation and support please refer to
<a href="http://nginx.org/">nginx.org</a>.<br/>
Commercial support is available at
<a href="http://nginx.com/">nginx.com</a>.</p>

<p><em>Thank you for using nginx.</em></p>
</body>
</html>
[root@k8s-master ~]#
2.使用 kubectl exec -it my-nginx-7f4fc68488-7cz7z /bin/bash 命令进入其中的一个pod使用
容器内安装ping命令和curl命令
root@my-nginx-7f4fc68488-7cz7z:/# apt install curl && ping -y

[root@k8s-master ~]# kubectl exec -it my-nginx-7f4fc68488-7cz7z /bin/bash
root@my-nginx-7f4fc68488-7cz7z:/# curl -l 10.244.2.12
<!DOCTYPE html>
<html>
<head>
<title>Welcome to nginx!</title>
<style>
    body {
        width: 35em;
        margin: 0 auto;
        font-family: Tahoma, Verdana, Arial, sans-serif;
    }
</style>
</head>
<body>
<h1>Welcome to nginx!</h1>
<p>If you see this page, the nginx web server is successfully installed and
working. Further configuration is required.</p>

<p>For online documentation and support please refer to
<a href="http://nginx.org/">nginx.org</a>.<br/>
Commercial support is available at
<a href="http://nginx.com/">nginx.com</a>.</p>

<p><em>Thank you for using nginx.</em></p>
</body>
</html>
root@my-nginx-7f4fc68488-7cz7z:/#
总结:中间还有一个插曲,在查看效果的时候ping的通node1,ping不同node2,最后是全部关机重新启动,问题解决。

 浙公网安备 33010602011771号