

startActivityForResult()方法
在启动另外一个Activity的时候,有两种方法,一种是直接使用startActivity,另外一种就是使用startActivityForResult。前一种想必大家都明白怎么使用了,我就不废话了。本文主要通过一个Demo来学习一下第二种。
startActivityForResult的主要作用就是它可以回传数据,假设我们有两个页面,首先进入第一个页面,里面有一个按钮,用于进入下一个页面,当进入下一个页面时,进行设置操作,并在其finish()动作或者back动作后,将设置的值回传给第一个页面,从而第一个页面来显示所得到的值。这个有一点像回调方法,就是在第二个页面finish()动作或者back动作后,会回调第一个页面的onActivityResult()方法,所以我们可以重写一下这个方法。直接看代码吧:
第一个页面代码:
- package org.sunchao;
- import android.app.Activity;
- import android.content.Intent;
- import android.os.Bundle;
- import android.view.View;
- import android.view.View.OnClickListener;
- import android.widget.Button;
- import android.widget.TextView;
- public class TestStartActivityForResultActivity extends Activity implements
- OnClickListener {
- private TextView mText01;
- private TextView mText02;
- private Button button01;
- private Button button02;
- private Intent mIntent;
- private int requestCode;
- /** Called when the activity is first created. */
- @Override
- public void onCreate(Bundle savedInstanceState) {
- super.onCreate(savedInstanceState);
- setContentView(R.layout.main);
- mText01 = (TextView) findViewById(R.id.mText01);
- mText02 = (TextView) findViewById(R.id.mText02);
- button01 = (Button) findViewById(R.id.mButton01);
- button02 = (Button) findViewById(R.id.mButton02);
- button01.setOnClickListener(this);
- button02.setOnClickListener(this);
- mText01.setText("01");
- mText02.setText("02");
- mIntent = new Intent();
- mIntent.setClass(TestStartActivityForResultActivity.this,
- Activity02.class);
- }
- @Override
- public void onClick(View v) {
- switch (v.getId()) {
- case R.id.mButton01:
- // 请求码的值随便设置,但必须>=0
- requestCode = 0;
- startActivityForResult(mIntent, requestCode);
- break;
- case R.id.mButton02:
- requestCode = 2;
- startActivityForResult(mIntent, requestCode);
- break;
- default:
- break;
- }
- }
- // 回调方法,从第二个页面回来的时候会执行这个方法
- @Override
- protected void onActivityResult(int requestCode, int resultCode, Intent data) {
- String change01 = data.getStringExtra("change01");
- String change02 = data.getStringExtra("change02");
- // 根据上面发送过去的请求吗来区别
- switch (requestCode) {
- case 0:
- mText01.setText(change01);
- break;
- case 2:
- mText02.setText(change02);
- break;
- default:
- break;
- }
- }
- }
第一个页面布局文件:
- <?xml version="1.0" encoding="utf-8"?>
- <LinearLayout xmlns:android="http://schemas.android.com/apk/res/android"
- android:orientation="vertical"
- android:layout_width="fill_parent"
- android:layout_height="fill_parent"
- >
- <TextView
- android:id="@+id/mText01"
- android:layout_width="fill_parent"
- android:layout_height="wrap_content"
- />
- <TextView
- android:id="@+id/mText02"
- android:layout_width="fill_parent"
- android:layout_height="wrap_content"
- />
- <Button
- android:id="@+id/mButton01"
- android:layout_width="fill_parent"
- android:layout_height="wrap_content"
- android:text="改变第一行文本的值"
- />
- <Button
- android:id="@+id/mButton02"
- android:layout_width="fill_parent"
- android:layout_height="wrap_content"
- android:text="改变第二行文本的值"
- />
- </LinearLayout>
第二个页面代码:
- package org.sunchao;
- import android.app.Activity;
- import android.content.Intent;
- import android.os.Bundle;
- public class Activity02 extends Activity {
- private int resultCode = 0;
- @Override
- protected void onCreate(Bundle savedInstanceState) {
- super.onCreate(savedInstanceState);
- setContentView(R.layout.activity02);
- Intent mIntent = new Intent();
- mIntent.putExtra("change01", "1000");
- mIntent.putExtra("change02", "2000");
- // 设置结果,并进行传送
- this.setResult(resultCode, mIntent);
- // this.finish();
- }
- }
第二个页面布局文件:
- <?xml version="1.0" encoding="utf-8"?>
- <LinearLayout xmlns:android="http://schemas.android.com/apk/res/android"
- android:orientation="vertical"
- android:layout_width="fill_parent"
- android:layout_height="fill_parent"
- >
- <TextView
- android:layout_width="fill_parent"
- android:layout_height="wrap_content"
- android:text="文本的值已经改变"
- />
- </LinearLayout>
AndroidManifest.xml:
- <?xml version="1.0" encoding="utf-8"?>
- <manifest xmlns:android="http://schemas.android.com/apk/res/android"
- package="org.sunchao"
- android:versionCode="1"
- android:versionName="1.0">
- <uses-sdk android:minSdkVersion="8" />
- <application android:icon="@drawable/icon" android:label="@string/app_name">
- <activity android:name=".TestStartActivityForResultActivity"
- android:label="@string/app_name">
- <intent-filter>
- <action android:name="android.intent.action.MAIN" />
- <category android:name="android.intent.category.LAUNCHER" />
- </intent-filter>
- </activity>
- <activity android:name=".Activity02" />
- </application>
- </manifest>
运行效果图: 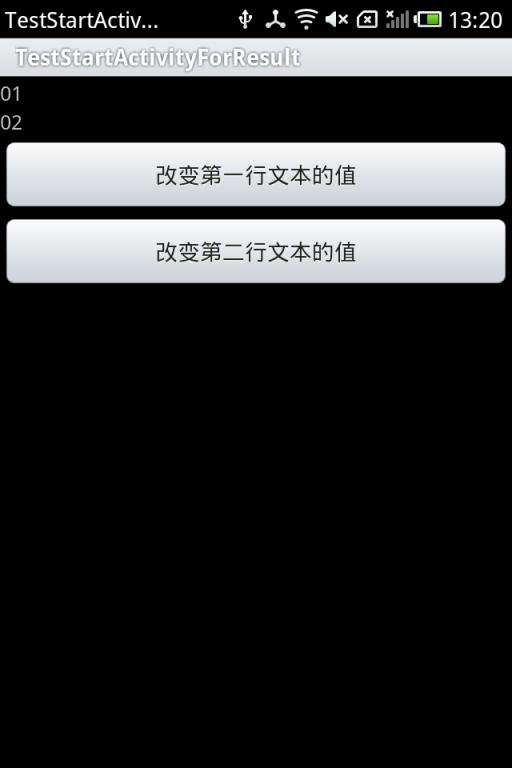


代码下载地址: http://download.csdn.net/source/3448804
| 假设:我这里有两个Activity:A和B,从A中向B中传递数据的时候采用的是Bundle封装数据,然后从A中跳转到B中,当B有需求将数据封装起来回传给A并跳转回A。那么A中接收数据时还要先判断Bundle是否为空,因为第一次访问A的时候(即B还没有回传的时候),Bundle是为空的,这样显然是比较麻烦的,不明智的做法。 还好startActivityForResult来做跳转给了我们更好的解决办法。 1.跳转的时候不是采用startActivity(intent) 这个方法,而是startActivityForResult(intent, 0)。 Intent intent=new Intent(); intent.setClass(A.this, B.class); Bundle bundle=new Bundle(); String str1="aaaaaa"; bundle.putString("str1", str1); intent.putExtras(bundle); startActivityForResult(intent, 0);//这里采用startActivityForResult来做跳转,此处的0为一个依据,可以写其他的值,但一定要>=0 2.重写onActivityResult方法,用来接收B回传的数据。 protected void onActivityResult(int requestCode, int resultCode, Intent data) { switch (resultCode) { //resultCode为回传的标记,我在B中回传的是RESULT_OK case RESULT_OK: Bundle b=data.getExtras(); //data为B中回传的Intent String str=b.getString("str1");//str即为回传的值 break; default: break; } } 3.在B中回传数据时采用setResult方法,并且之后要调用finish方法。 setResult(RESULT_OK, intent); //intent为A传来的带有Bundle的intent,当然也可以自己定义新的Bundle finish();//此处一定要调用finish()方法 这样当B中调用finish方法的时候,跳转到A时会自动调用onActivityResult方法,来获取B中回传的intent了。 |
