Charles 代理人
Charles 代理人 使用攻略
Charles是一个伟大的工具,可以用来调试网络接口,今天我想介绍一下关于它的一些使用技巧。
1,首先下载charles。下载地址如下,选择对应平台的软件
2,下载后的安装,点击对应的DMG文件,然后进行安装,相信使用mac电脑的用户安装不是问题,如果有问题的话可以查看下面的链接去做相应的学习
2.1 通过终端安装
2.2 视频学习安装
2.3 从AppStore下载进行相应的安装,当然因为charles没有在AppStore上架。
3,Charles的用途
Charles is a web proxy (HTTP Proxy / HTTP Monitor) that runs on your own computer. Your web browser (or any other Internet application) is then configured to access the Internet through Charles, and Charles is then able to record and display for you all of the data that is sent and received.
In Web and Internet development you are unable to see what is being sent and received between your web browser / client and the server. Without this visibility it is difficult and time-consuming to determine exactly where the fault is. Charles makes it easy to see what is happening, so you can quickly diagnose and fix problems.
Charles makes debugging quick, reliable and advanced; saving you time and frustration!
翻译过来的话大概是这样的
它是一个web代理人-在你电脑端运行。你的网络浏览器通过charles来进入网络,charles然后能路线并且呈现你发送和接收的数据。在web和网络开发中,你不能在你的web浏览器之间看发送了什么接收什么。没有可见性它是困难和耗时地去决定错误在哪里,charles使得容易看到发生了什么,因此你能迅速的捕捉并且修复问题。
确实很牛逼的工具,在这里要感谢开发这个工具的开发团队,给开发者带来了福音。
安装完毕后打开Charles,点击preference,选择viewer,去除combine request and response 勾选,点击OK
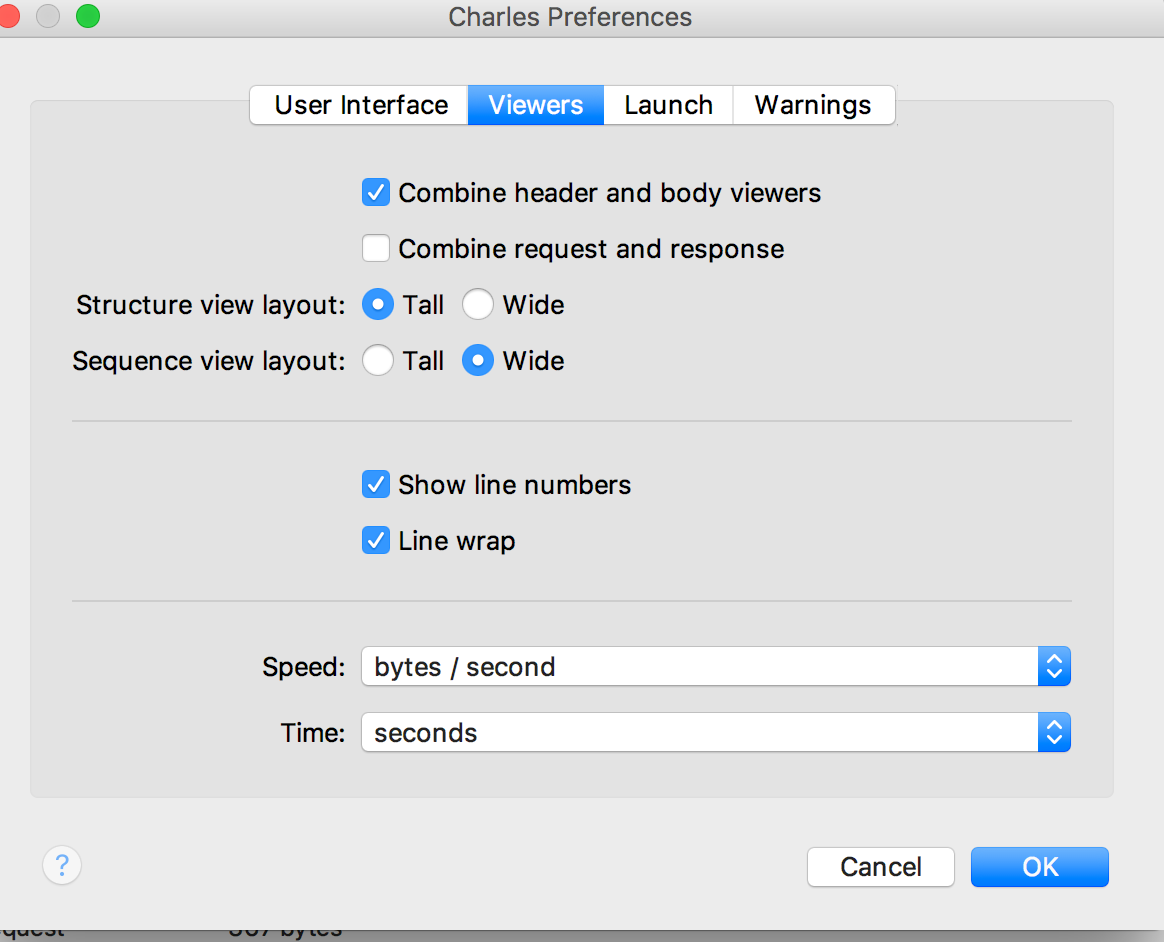
点击Ok,重启charles。
点击proxy,去除mac OS proxy,然后点击proxy setting
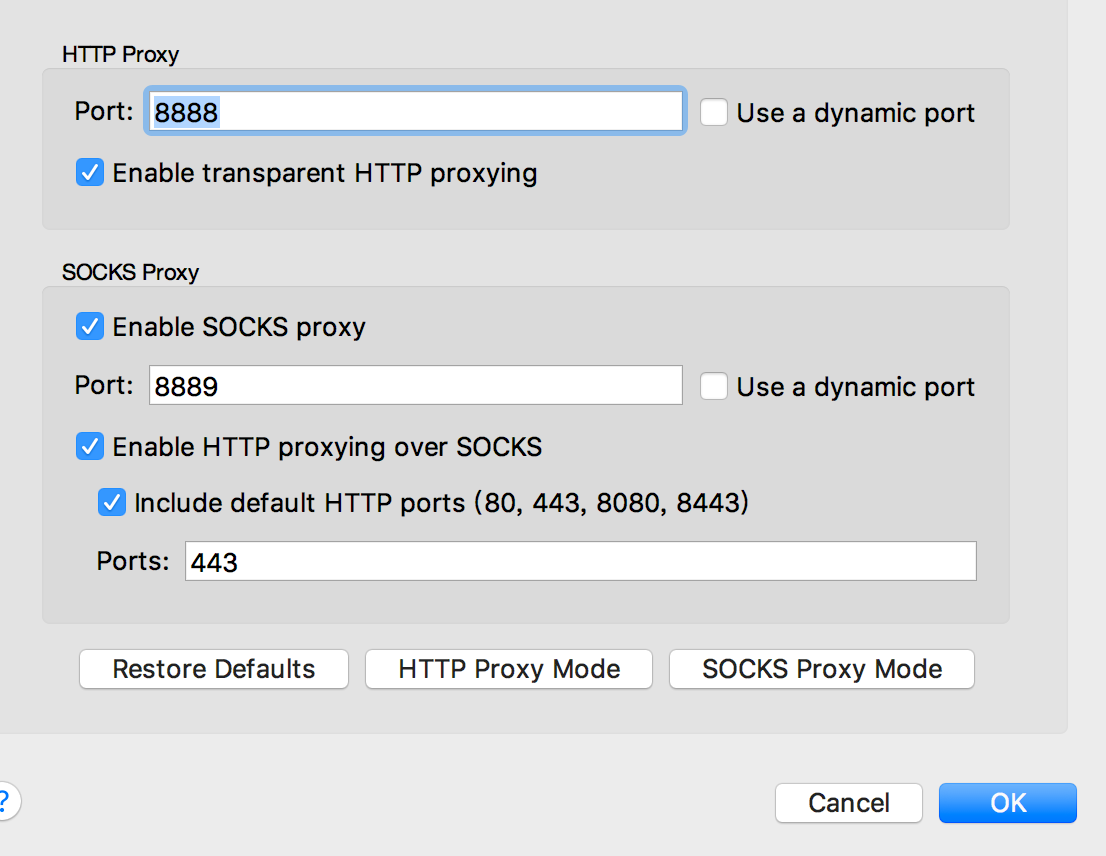
然后点击help中的local ip来查看对应的ip地址
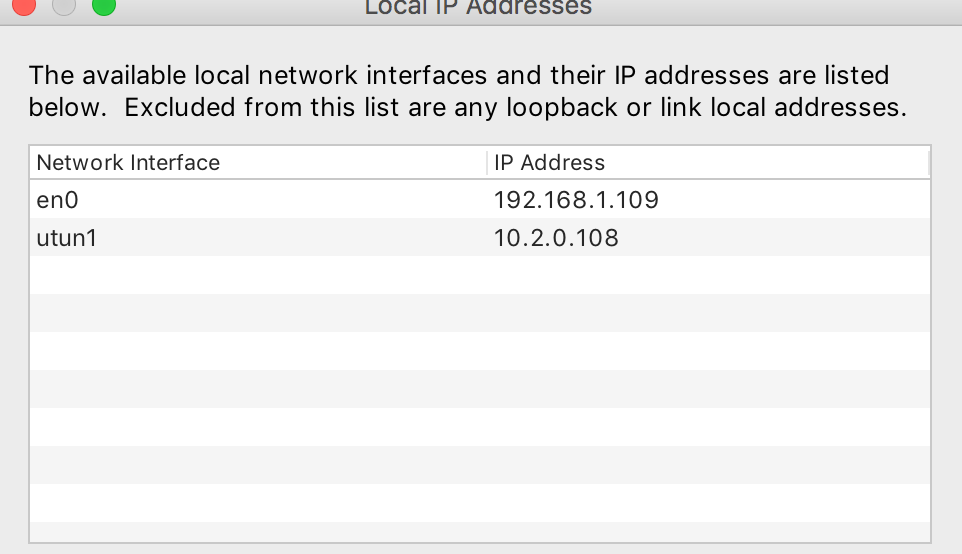
然后,进入iPhone的设置中,选择wifi,点击最右边进入设置页面,选择HTTP代理,手动设置好ip地址(必须和电脑ip一样),端口填写8888
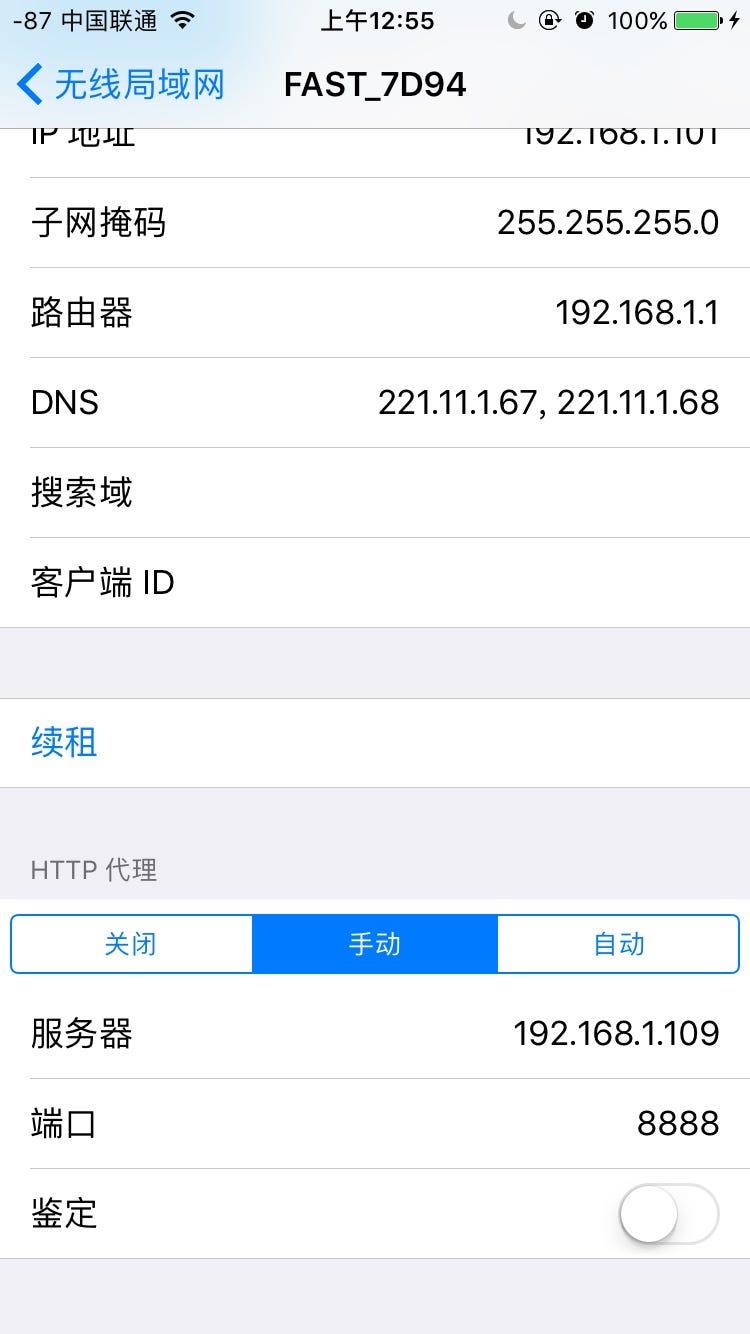
然后charles会有个弹出窗,点击allow即可。
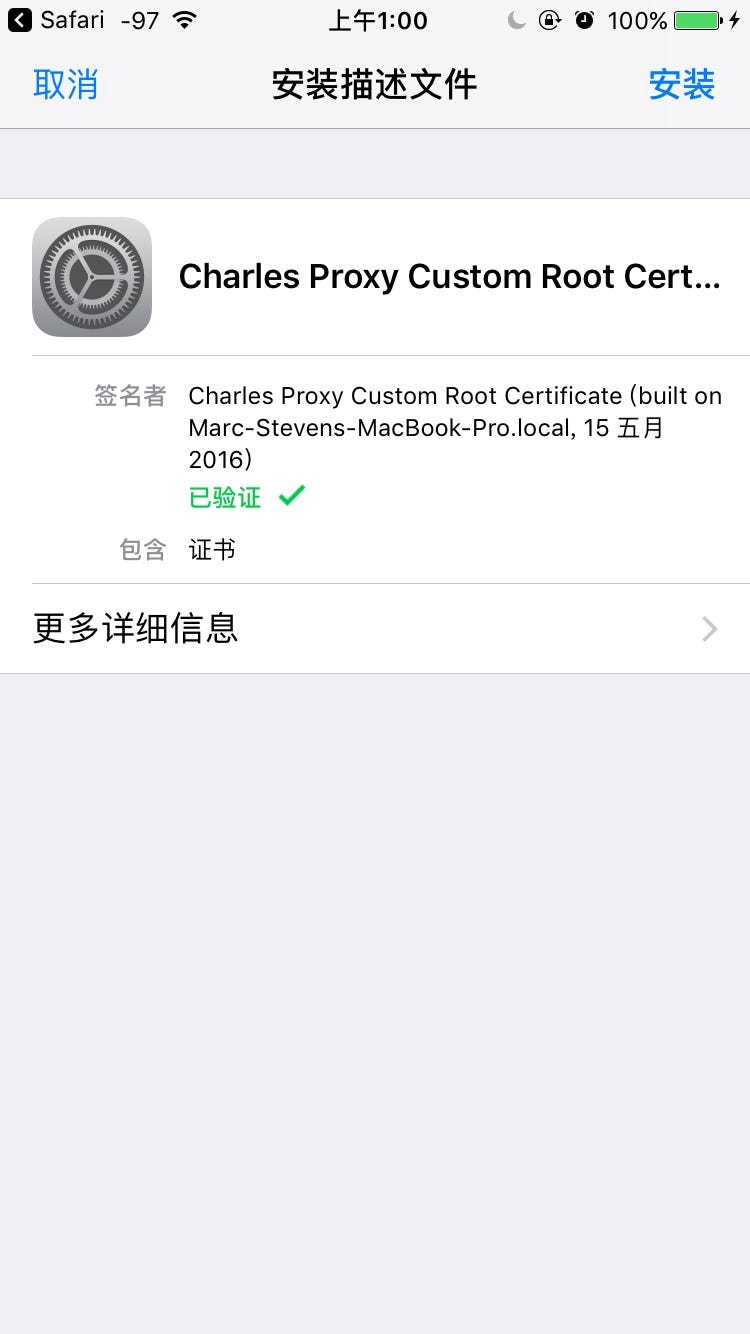
打开iPhone safari浏览器,输入charlesproxy.com/getssl,然后会弹出一个install安装框,点击install
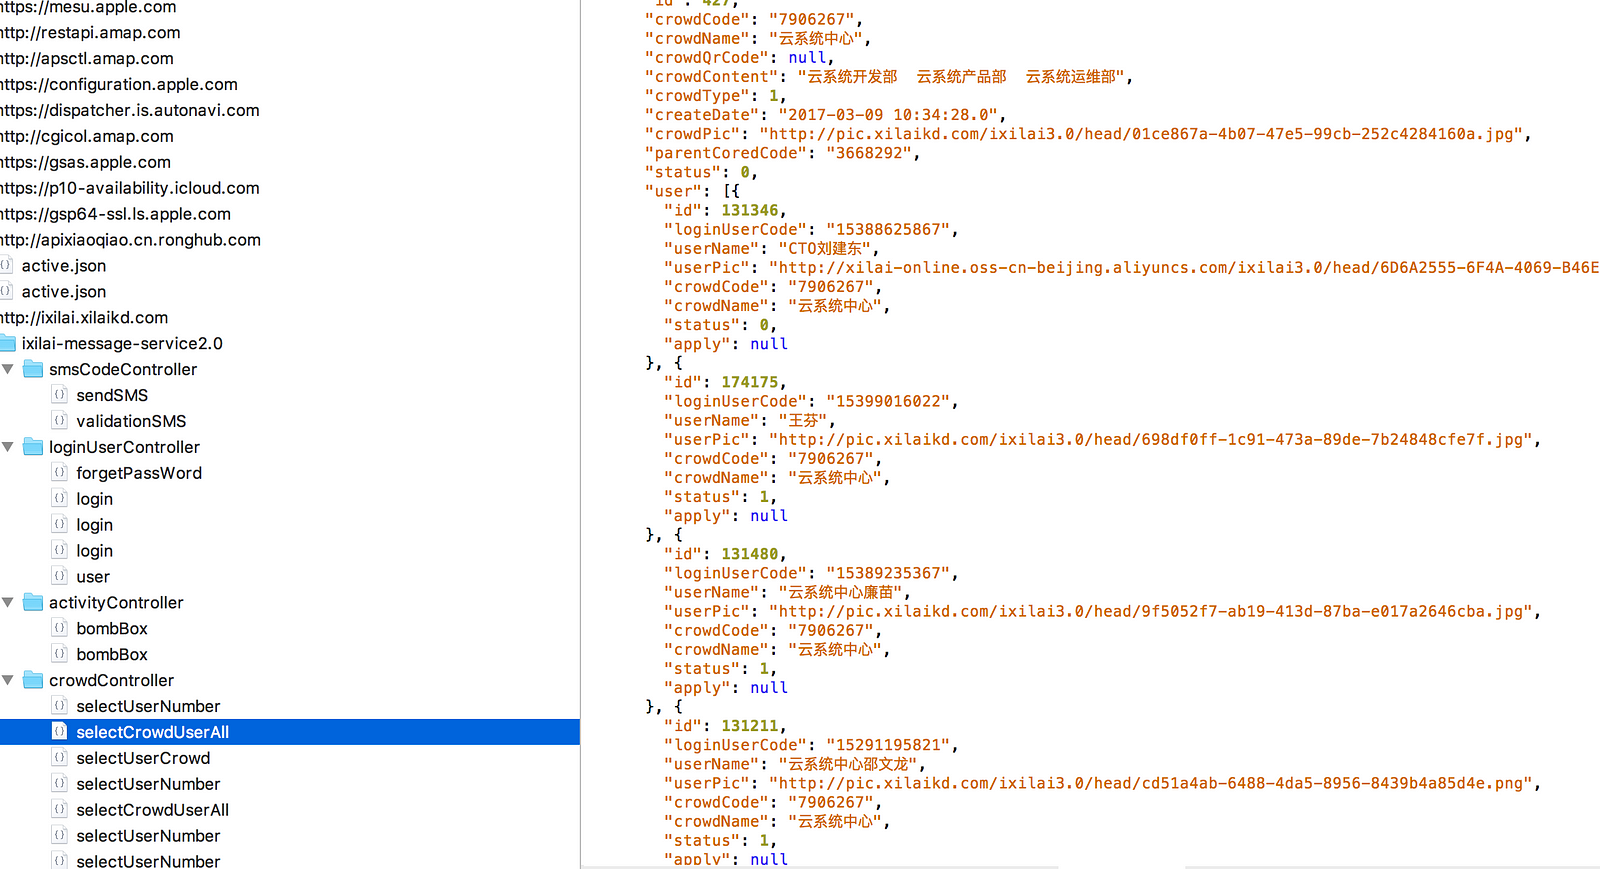
最后你就可以看到所有的在iPhone上的请求了,如图所示
Ok,great ,all is over ….
Thank for your reading …


