AutoResetEvent控制线程用法
本文主要来自一道面试题,由于之前对AutoResetEvent的概念比较模糊(即使已经使用过了)。面试题题目很简洁:两个线程交替打印0~100的奇偶数。你可以先动手试试,我主要是尝试在一个方法里面完成这个任务。
注: Suspend,Resume来控制线程已经在.net framework2.0被淘汰了,原因就是挂起之后,但因为异常而没有及时恢复,如果占用资源会导致死锁。
注: Suspend,Resume来控制线程已经在.net framework2.0被淘汰了,原因就是挂起之后,但因为异常而没有及时恢复,如果占用资源会导致死锁。
AutoResetEvent概念
- AutoResetEvent对象用来进行线程同步操作,AutoResetEvent类继承waitHandle类。waitOne()方法就继承来自waitHandle类。
- AutoResetEvent对象有终止和非终止两种状态,终止状态是线程继续执行,非终止状态使线程阻塞,可以调用set和reset方法使对象进入终止和非终止状态。-》可以简单理解如果AutoResetEvent对象是终止状态,就像不管别人了,任你撒野去(waitOne()得到的都是撒野信号)
- AutoResetEvent顾名思义,其对象在调用一次set之后会自动调用一次reset,进入非终止状态使调用了等待方法的线程进入阻塞状态。-》可以简单理解如果AutoResetEvent对象是非终止状态,就开始管理起别人来了,此时waitOne()得到的信号都是呆在原地不动信号。
- waitHandle对象的waitone可以使当前线程进入阻塞状态,等待一个信号。直到当前 waitHandle对象收到信号,才会继续执行。
- set可以发送一个信号,允许一个调用waitone而等待线程继续执行。 ManulResetEvent的set方法可以允许多个。但是要手动关闭,即调用reset();
- reset可以使因为调用waitone() 而等待线程都进入阻塞状态。
AutoResetEvent主要方法及实践
- AutoResetEvent(bool initialState):构造函数,用一个指示是否将初始状态设置为终止的布尔值初始化该类的新实例。 false:无信号,子线程的WaitOne方法不会被自动调用 true:有信号,子线程的WaitOne方法会被自动调用
- Reset ():将事件状态设置为非终止状态,导致线程阻止;如果该操作成功,则返回true;否则,返回false。
- Set ():将事件状态设置为终止状态,允许一个或多个等待线程继续;如果该操作成功,则返回true;否则,返回false。
- WaitOne(): 阻止当前线程,直到收到信号。
- WaitOne(TimeSpan, Boolean) :阻止当前线程,直到当前实例收到信号,使用 TimeSpan 度量时间间隔并指定是否在等待之前退出同步域。
有了上面的解释,开始展示代码(经过多次优化)
 //若要将初始状态设置为终止,则为 true;若要将初始状态设置为非终止,则为 false
        static AutoResetEvent oddResetEvent = new AutoResetEvent(false);
        static AutoResetEvent evenResetEvent = new AutoResetEvent(false);
        static int i = 0;
        static void Main(string[] args)
        {
            //ThreadStart是个委托
            Thread thread1 = new Thread(new ThreadStart(show));
            thread1.Name = "偶数线程";
            Thread thread2 = new Thread(new ThreadStart(show));
            thread2.Name = "奇数线程";
            thread1.Start();
           Thread.Sleep(2); //保证偶数线程先运行。
            thread2.Start();
            Console.Read();

        }
        public static void show()
        {
             while (i <= 100)
            {
                int num = i % 2;
                if (num == 0)
                {
                    Console.WriteLine("{0}:{1} {2}  ", Thread.CurrentThread.Name, i++, "evenResetEvent");
                    if(i!=1) evenResetEvent.Set();
                    oddResetEvent.WaitOne(); //当前线程阻塞

                }
               else
                {
                    Console.WriteLine("{0}:{1} {2} ", Thread.CurrentThread.Name, i++, "oddResetEvent");
                    //如果此时AutoResetEvent 为非终止状态,则线程会被阻止,并等待当前控制资源的线程通过调用 Set 来通知资源可用。否则不会被阻止
                     oddResetEvent.Set();
                    evenResetEvent.WaitOne();
                }
            }
        }
结果如下图所示:

注意点:
不要有一点点点点多余的evenResetEvent.Set(),他会让后续的 evenResetEvent.WaitOne();失效.
第二种方法Semaphore
此外,我们利用信号量也可以实现,信号量是一种内核模式锁,对性能要求比较高,特殊情况下才考虑使用,而且要避免在内核模式和用户模式下频繁相互切换线程。代码如下:
 private static readonly int MaxSize = 1;
        private static int i = 0;
        static Semaphore oddSemaphore = new Semaphore(0, MaxSize);
        static Semaphore evenSemaphore = new Semaphore(0, MaxSize);

        static void Main(string[] args)
        {
            System.Diagnostics.Stopwatch stopwatch = new System.Diagnostics.Stopwatch();
            stopwatch.Start();
            //ThreadStart是个委托
            Thread thread1 = new Thread(new ThreadStart(show));
            thread1.Name = "偶数线程";
            Thread thread2 = new Thread(new ThreadStart(show));
            thread2.Name = "奇数线程";
            thread1.Start();
            thread2.Start();
            thread1.Join();
            stopwatch.Stop();
            Console.WriteLine(stopwatch.Elapsed.TotalMilliseconds);
            Console.Read();
        }

        private static void show()
        {
            if(i==1) evenSemaphore.WaitOne();
            while (i <= 100)
            {
                int num = i % 2;
                if (num == 0)
                {
                    Console.WriteLine("{0}:{1}  {2}    ", Thread.CurrentThread.Name, i++, Thread.CurrentThread.ManagedThreadId);
                    evenSemaphore.Release();
                    oddSemaphore.WaitOne(); //当前线程阻塞
                }
                else
                {
                    Console.WriteLine("{0}:{1}  {2}    ", Thread.CurrentThread.Name, i++, Thread.CurrentThread.ManagedThreadId);
                    //释放一个偶数信号空位出来;
                    oddSemaphore.Release();
                    evenSemaphore.WaitOne(); //当前线程阻塞
                    //此时已经消耗了一个奇数信号空位
                }
            }
        }
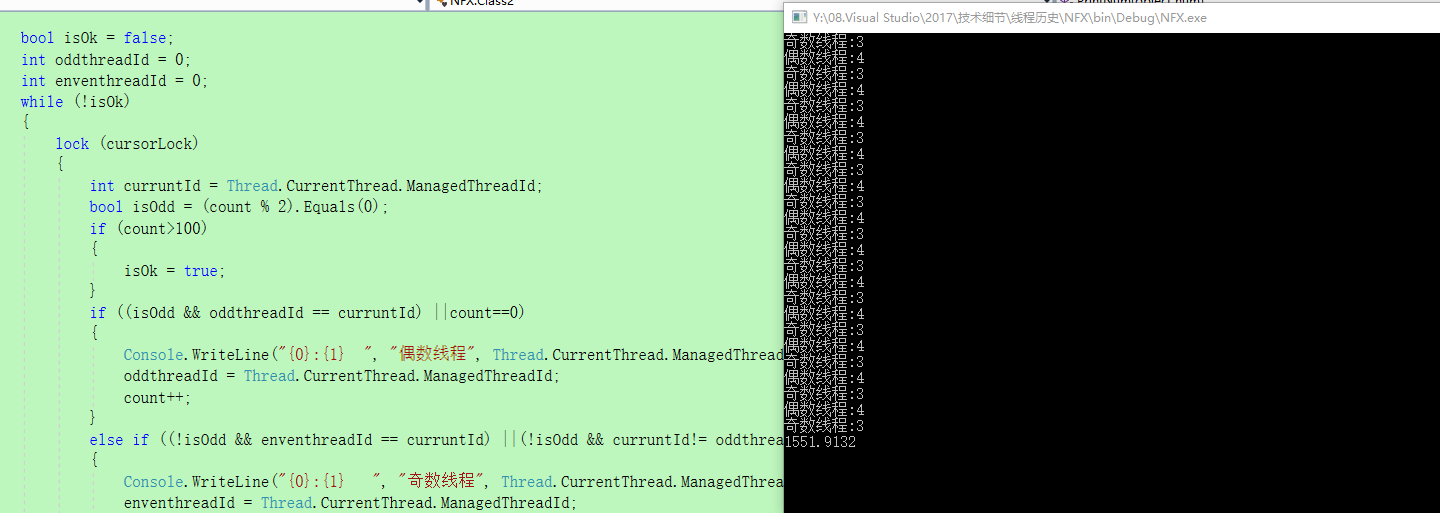
第三种方法,约定每个线程只干自己的事
这种方法利用线程池本身就是队列的方式,即先进先出。测试之后发现性能有下降,但是还是贴出来供参考。
      static int threadCount = 2;
        static int count = 0;
        static object cursorLock = new object();
        static void Main(string[] args)
        {
            System.Diagnostics.Stopwatch stopwatch = new System.Diagnostics.Stopwatch();
            stopwatch.Start();
            Task[] arr = new Task[2];
            for (int threadIndex = 0; threadIndex < threadCount; threadIndex++)
            {
                //这两种方法都可以
                arr[threadIndex] = Task.Factory.StartNew(PrintNum, threadIndex);
            }
            Task.WaitAll(arr);
            stopwatch.Stop();
            Console.WriteLine(stopwatch.Elapsed.TotalMilliseconds);
            Console.Read();
        }


        private static void PrintNum(object num)
        {
            bool isOk = false;
            while (!isOk)
            {
                lock (cursorLock)
                {
                    int index = count % 2;
                    if (count>100)
                    {
                        isOk = true;
                    }
                    else if (index == (int)num)
                    {
                        if (index == 0) Console.WriteLine("{0}:{1} {2} ", "偶数线程", Thread.CurrentThread.ManagedThreadId, count++);
                        else Console.WriteLine("{0}:{1} {2} ", "奇数线程", Thread.CurrentThread.ManagedThreadId, count++);
                    }
                }
            }
        }
结果如下:
第四种方法 Mutex
        private static int i = 0;
        static Mutex mutex = new Mutex();

        static void Main(string[] args)
        {
            System.Diagnostics.Stopwatch stopwatch = new System.Diagnostics.Stopwatch();
            stopwatch.Start();
            //ThreadStart是个委托
            Thread thread1 = new Thread(new ParameterizedThreadStart(show));
            thread1.Name = "偶数线程";
            Thread thread2 = new Thread(new ParameterizedThreadStart(show));
            thread2.Name = "奇数线程";
            thread1.Start(0);
            thread2.Start(1);
            thread2.Join();
            stopwatch.Stop();
            Console.WriteLine(stopwatch.Elapsed.TotalMilliseconds);
            Console.Read();
        }
        /// <summary>
        /// Mutex的释放与锁定 都只能在同一个线程中执行
        /// </summary>
        private static void show(object index)
        {
            while (i <= 100)
            {
                mutex.WaitOne();
                int num = i % 2;
                if (num == (int)index&&i<=100)
                {
                    Console.WriteLine("{0}:{1}  {2}  ", Thread.CurrentThread.Name, i++, Thread.CurrentThread.ManagedThreadId);
                }
                mutex.ReleaseMutex();
            }

        }
有关概念资料
https://www.cnblogs.com/michaelxu/archive/2008/09/20/1293716.html

 浙公网安备 33010602011771号