
八、JDBC
一、JDBC初步使用
JDBC即Java Database Connectivity,使用Java语言操作数据库。一般操作数据库的步骤如下:
- 加载驱动
- 连接数据库,获得Connection对象
- 获得执行数据库的Statement对象
- 执行sql语句,并获得结果
- 关闭连接
package com.jdbc.lesson1; import java.sql.*; public class FirstJdbcDemo { public static void main(String[] args) throws ClassNotFoundException, SQLException { Class.forName("com.mysql.jdbc.Driver"); // 加载驱动 String url = "jdbc:mysql://localhost:3306/westos?characterEncoding=utf8"; String username = "root"; String password = "****"; // 获取连接对象 Connection conn = DriverManager.getConnection(url, username, password); // 获取sql执行对象 Statement statement = conn.createStatement(); String sql = "SELECT * FROM student WHERE name='测试999'"; // 执行sql并获得返回结果 ResultSet resultSet = statement.executeQuery(sql); while (resultSet.next()) { int id = resultSet.getInt("id"); String name = resultSet.getString("name"); String sex = resultSet.getString("sex"); Date birthday = resultSet.getDate("birthday"); String address = resultSet.getString("address"); String email = resultSet.getString("email"); System.out.println(id); System.out.println(name); System.out.println(sex); System.out.println(birthday); System.out.println(address); System.out.println(email); System.out.println("==================="); } // 关闭连接 resultSet.close(); statement.close(); conn.close(); } }
二、封装DB配置和基本操作
因为数据库是十分常用的操作,所以将部分操作封装起来可以增加代码的复用性。对于上面的代码,我们做了一些改动:
- 将数据库连接需要的配置,放在配置文件中,在src下创建db.properties文件存放数据库配置
db.properties
driver=com.mysql.jdbc.Driver url=jdbc:mysql://localhost:3306/westos?characterEncoding=utf8 username=root password=****
- 将连接数据库的操作,改成从配置中读取
JdbcUtil.java
package com.jdbc.lesson2.utils; import java.io.IOException; import java.io.InputStream; import java.sql.*; import java.util.Properties; public class JdbcUtil { private static String driver = null; private static String url = null; private static String username = null; private static String password = null; static { try { // 在Jar包中获取配置,建议使用getResourceAsStream方式 InputStream input = JdbcUtil.class.getClassLoader().getResourceAsStream("db.properties"); Properties properties = new Properties(); properties.load(input); driver = properties.getProperty("driver"); url = properties.getProperty("url"); username = properties.getProperty("username"); password = properties.getProperty("password"); // 驱动只需要加载一次 Class.forName(driver); } catch (IOException e) { e.printStackTrace(); } catch (ClassNotFoundException e) { e.printStackTrace(); } } // 获取连接 public static Connection getConnection() throws SQLException { return DriverManager.getConnection(url,username,password); } // 获取sql执行对象 public static Statement getStatement(Connection conn) throws SQLException { return conn.createStatement(); } // 查询sql public static ResultSet querySql(Statement statement, String sql) { ResultSet result = null; try { result = statement.executeQuery(sql); } catch (SQLException throwables) { throwables.printStackTrace(); } return result; } // 执行sql public static int executeSql(Statement statement, String sql) { int row = 0; try { row = statement.executeUpdate(sql); } catch (SQLException throwables) { throwables.printStackTrace(); } return row; } // 释放资源 public static void release(Connection conn, Statement statement, ResultSet resultSet) { if (resultSet!=null) { try { resultSet.close(); } catch (SQLException throwables) { throwables.printStackTrace(); } } if (statement!=null) { try { statement.close(); } catch (SQLException throwables) { throwables.printStackTrace(); } } if (conn!=null) { try { conn.close(); } catch (SQLException throwables) { throwables.printStackTrace(); } } } }
- 然后我们使用上面的封装,重写初步使用的例子
package com.jdbc.lesson2; import com.jdbc.lesson2.utils.JdbcUtil; import java.sql.*; public class TestSelect { public static void main(String[] args) { Connection conn = null; Statement statement = null; ResultSet result = null; String sql = "SELECT * FROM student WHERE id<5"; try { conn = JdbcUtil.getConnection(); statement = JdbcUtil.getStatement(conn); result = JdbcUtil.querySql(statement, sql); while (result.next()) { int id = result.getInt("id"); String name = result.getString("name"); String sex = result.getString("sex"); Date birthday = result.getDate("birthday"); String address = result.getString("address"); String email = result.getString("email"); System.out.println("id: "+id); System.out.println("name: "+name); System.out.println("sex: "+sex); System.out.println("birth: "+birthday); System.out.println("address: "+address); System.out.println("email: "+email); System.out.println("==================="); } } catch (SQLException throwables) { throwables.printStackTrace(); } JdbcUtil.release(conn,statement,result); } }
三、SQL注入与PreparedStatement
SQL注入
SQL注入指的是利用sql语言的语法,可以的使用有特殊字符的输入,来获取非法的结果,看下面的例子。
例如我们使用用户名和密码查询库中是否有该用户,来实现登录的查询:
public static void login(Statement statement, String username, String password) throws SQLException { ResultSet result = null; // 使用拼接sql的方式会有sql注入的隐患,严禁使用 String sql = "select * from user where username='"+username+"' and password='"+password+"'"; System.out.println(sql); result = statement.executeQuery(sql); while (result.next()) { System.out.println(result.getString("username")); System.out.println(result.getString("password")); System.out.println("===================="); } result.close(); }
当我们在调用login方法时,传入name="' or 1=1#", password=''时,我们发现查询出所有的用户信息,因为这里的#是sql中的注释,会将后面拼接上的password当作注释而不校验,这是十分严重的安全问题。
PreparedStatement
针对上面的问题,Java可以使用PreparedStatement来执行sql语句,而不是使用拼接sql的方式,我们改造上面的代码:
public static void safeLogin(Connection conn, String name, String pwd) throws SQLException { ResultSet result = null; String sql = "select * from user where username=? and password=?"; // 使用PreparedStatement可以方式sql注入问题 PreparedStatement ps = conn.prepareStatement(sql); ps.setString(1, name); ps.setString(2, pwd); result = ps.executeQuery(); while (result.next()) { System.out.println(result.getString("username")); System.out.println(result.getString("password")); System.out.println("===================="); } result.close(); ps.close(); conn.close(); }
我们使用PreparedStatement执行对象,sql语句中需要替换的变量使用?占位;然后使用setString方法向占位符中填充数据,setString(1, name)中1代表就是第一个占位符,插入的数据是name。
经过这样的改造,我们再填入上面的注入用户名,发现无法查询出数据;所以在开发的过程中,都应该使用PreparedStatement进行sql的查询。
四、JDBC操作事务
JDBC操作事务与MySQL中操作事务的步骤是一模一样的,我们直接看例子,方法的名称也是见名知意的。
package com.jdbc.lesson4; import com.jdbc.lesson3.utils.JdbcUtil; import java.sql.Connection; import java.sql.PreparedStatement; import java.sql.SQLException; public class Transaction { public static void main(String[] args) throws SQLException { Connection conn = null; conn = JdbcUtil.getConnection(); conn.setAutoCommit(false); // 关闭自动提交,开启事务 PreparedStatement ps1 = conn.prepareStatement("update account set money=money-400 where id=1"); PreparedStatement ps2 = conn.prepareStatement("update account set money=money+400 where id,"); try { ps1.executeUpdate(); ps2.executeUpdate(); conn.commit(); } catch (SQLException e) { System.out.println("事务执行失败!回滚!"); // 如果执行失败就回滚 conn.rollback(); } finally { // 开启自动提交 conn.setAutoCommit(true); } if (ps1!=null) { ps1.close(); } if (ps2!=null) { ps2.close(); } if (conn!=null) { conn.close(); } } }
五、数据库连接池
在系统运行的过程中,需要经常连接数据库,而数据库连接的创建和释放是十分消耗系统资源的。因此,使用数据库连接池来优化。
数据库连接池,就是准备一个连接池,里面事先准备一些连接对象,如果有人需要就进池子里取,如果用完了就放回池子,给后面的人来用,这样来减少连接创建和释放的损耗。
我们常用的连接池有很多,下面已C3P0和Druid为例子使用下:
C3P0
配置文件:c3p0-config.xml
<c3p0-config> 2 <!-- 使用默认的配置读取连接池对象 --> 3 <default-config> 4 <!-- 连接参数 --> 5 <property name="driverClass">com.mysql.jdbc.Driver</property> 6 <property name="jdbcUrl">jdbc:mysql://localhost:3306/westos</property> 7 <property name="user">root</property> 8 <property name="password">****</property> 9 10 <!-- 连接池参数 --> 11 <!--初始化连接的数量--> 12 <property name="initialPoolSize">5</property> 13 <!--最大的连接数量--> 14 <property name="maxPoolSize">10</property> 15 <!--超时时间--> 16 <property name="checkoutTimeout">3000</property> 17 </default-config> 18 19 <!--通过指定的名字来获取连接的数据库--> 20 <named-config name="otherc3p0"> 21 <!-- 连接参数 --> 22 <property name="driverClass">com.mysql.jdbc.Driver</property> 23 <property name="jdbcUrl">jdbc:mysql://120.53.120.103:3306/westos</property> 24 <property name="user">root</property> 25 <property name="password">123456</property> 26 27 <!-- 连接池参数 --> 28 <property name="initialPoolSize">5</property> 29 <property name="maxPoolSize">8</property> 30 <property name="checkoutTimeout">1000</property> 31 </named-config> 32 </c3p0-config>
C3p0Demo.java
package com.jdbc.lesson5; import com.mchange.v2.c3p0.ComboPooledDataSource; import javax.sql.DataSource; import java.sql.Connection; import java.sql.PreparedStatement; import java.sql.ResultSet; import java.sql.SQLException; public class C3P0Demo { public static void main(String[] args) throws SQLException { // 创建数据库连接对象 DataSource ds = new ComboPooledDataSource(); Connection conn = ds.getConnection(); System.out.println(conn); PreparedStatement ps = conn.prepareStatement("select * from account"); ResultSet rs = ps.executeQuery(); while (rs.next()) { System.out.println(rs.getInt("id")); System.out.println(rs.getString("name")); System.out.println(rs.getInt("money")); System.out.println("=========="); } rs.close(); ps.close(); conn.close(); } }
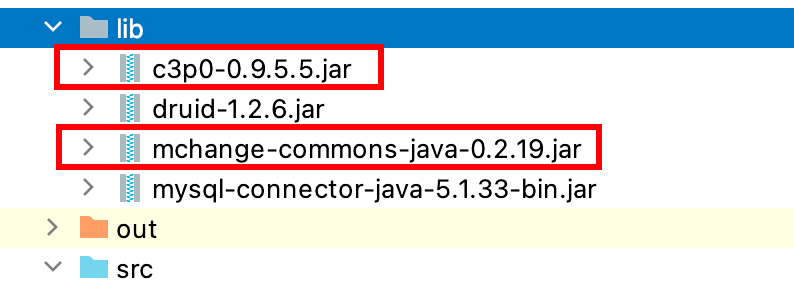
需要导入的包:
Druid
配置文件:druid.properties
driverClassName=com.mysql.jdbc.Driver url=jdbc:mysql://localhost:3306/westos username=root password=**** # 初始化连接数量 initialSize=5 # 最大连接数 maxActive=10 # 延迟时间 maxWait=3000
DruidDemo.java
package com.jdbc.lesson5; import com.alibaba.druid.pool.DruidDataSourceFactory; import javax.sql.DataSource; import java.io.IOException; import java.io.InputStream; import java.sql.Connection; import java.sql.PreparedStatement; import java.sql.ResultSet; import java.util.Properties; public class DruidDemo { public static void main(String[] args) throws Exception { InputStream input = DruidDemo.class.getClassLoader().getResourceAsStream("druid.properties"); Properties properties = new Properties(); properties.load(input); DataSource ds = DruidDataSourceFactory.createDataSource(properties); Connection conn = ds.getConnection(); PreparedStatement ps = conn.prepareStatement("select * from account"); ResultSet rs = ps.executeQuery(); while (rs.next()) { System.out.println(rs.getInt("id")); System.out.println(rs.getString("name")); System.out.println(rs.getInt("money")); System.out.println("=========="); } rs.close(); ps.close(); conn.close(); } }
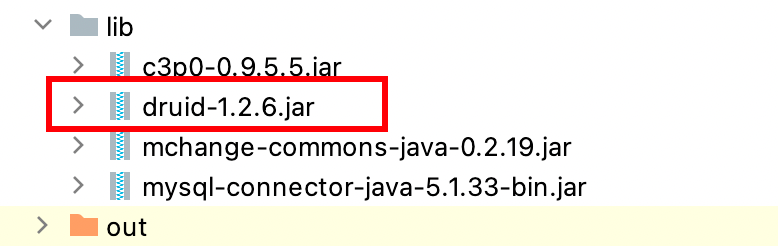
需要导入的包:


【推荐】国内首个AI IDE,深度理解中文开发场景,立即下载体验Trae
【推荐】博客园2025新款「AI繁忙」系列T恤上架,前往周边小店选购
【推荐】凌霞软件回馈社区,携手博客园推出1Panel与Halo联合会员
【推荐】轻量又高性能的 SSH 工具 IShell:AI 加持,快人一步
· Android编译时动态插入代码原理与实践
· 解锁.NET 9性能优化黑科技:从内存管理到Web性能的最全指南
· 通过一个DEMO理解MCP(模型上下文协议)的生命周期
· MySQL下200GB大表备份,利用传输表空间解决停服发版表备份问题
· 记一次 .NET某固高运动卡测试 卡慢分析
· .net clr 8年才修复的BUG,你让我损失太多了
· 做Docx预览,一定要做这个神库!!
· 一个开源的 Blazor 跨平台入门级实战项目
· Hangfire Redis 实现秒级定时任务、使用 CQRS 实现动态执行代码
· 微信小程序/H5 调起确认收款界面