使用预训练的YOLOv11模型进行屏幕检测
介绍
利用PyQt5搭建一个透明、置顶的画布,根据提供的信息绘制结果。信息包括:边框坐标、检测类别名称、置信度。
屏幕的信息通过mss库实时截屏获取,通过cv2库处理后输入模型进行处理,得到结果。
这里的YOLO v11模型的checkpoints由ultralytics提供,首次使用会自动下载.pt文件,该文件在COCO数据集预训练得到,支持80个类:
['person', 'bicycle', 'car', 'motorcycle', 'airplane', 'bus', 'train', 'truck', 'boat', 'traffic light', 'fire hydrant', 'stop sign', 'parking meter', 'bench', 'bird', 'cat', 'dog', 'horse', 'sheep', 'cow', 'elephant', 'bear', 'zebra', 'giraffe', 'backpack', 'umbrella', 'handbag', 'tie', 'suitcase', 'frisbee', 'skis', 'snowboard', 'sports ball', 'kite', 'baseball bat', 'baseball glove', 'skateboard', 'surfboard', 'tennis racket', 'bottle', 'wine glass', 'cup', 'fork', 'knife', 'spoon', 'bowl', 'banana', 'apple', 'sandwich', 'orange', 'broccoli', 'carrot', 'hot dog', 'pizza', 'donut', 'cake', 'chair', 'couch', 'potted plant', 'bed', 'dining table', 'toilet', 'tv', 'laptop', 'mouse', 'remote', 'keyboard', 'cell phone', 'microwave', 'oven', 'toaster', 'sink', 'refrigerator', 'book', 'clock', 'vase', 'scissors', 'teddy bear', 'hair drier', 'toothbrush']
代码
先设置绘制边框和信息的画布:
# windows.py
from PyQt5.QtWidgets import QMainWindow, QApplication
from PyQt5.QtGui import QPainter, QPen, QFont, QColor
from PyQt5.QtCore import Qt, QRect

monitor = {"top": 50, "left": 50, "width": 2500, "height": 1400}

class OverlayWindow(QMainWindow):
    def __init__(self):
        super().__init__()
        self.setWindowFlags(Qt.FramelessWindowHint | Qt.WindowStaysOnTopHint | Qt.Tool) # 无边框,置顶,不在任务栏
        self.setAttribute(Qt.WA_TranslucentBackground) # 设置窗口背景透明
        self.setGeometry(monitor["left"], monitor["top"], monitor["width"], monitor["height"]) # 设置窗口位置和大小
        self.setFixedSize(monitor["width"], monitor["height"]) # 固定窗口大小
        self.boxes = [] # 检测结果的矩形框坐标 (x, y, x1, y1)
        self.cls_name = [] # 检测结果的类别名称
        self.conf = []  # 检测结果的置信度

    def update_boxes(self, boxes, cls_name=None, conf=None):

        self.boxes = boxes
        self.cls_name = cls_name
        self.conf = conf
        self.update()  # 触发重绘

    def paintEvent(self, event):

        # 绘制边框
        border_painter = QPainter(self)
        border_painter.setRenderHint(QPainter.Antialiasing)
        pen = QPen(Qt.red)
        pen.setWidth(5)
        border_painter.setPen(pen)

        for box in self.boxes:
            x, y, x1, y1 = box
            width = x1 - x
            height = y1 - y
            rect = QRect(x, y, width, height)
            border_painter.drawRect(rect)

        border_painter.end()

        # 绘制文字和背景
        text_painter = QPainter(self)
        text_painter.setRenderHint(QPainter.Antialiasing)

        # 设置字体样式
        font = QFont("Arial", 10)
        font.setBold(True)  # 加粗
        text_painter.setFont(font)

        # 设置文本背景颜色(黑色半透明)
        text_painter.setBrush(QColor(0, 0, 0, 150))  # 背景颜色
        text_painter.setPen(Qt.NoPen)  # 禁用背景矩形边框

        text_margin = 4  # 文本与背景的边距
        for i, box in enumerate(self.boxes):

            x, y, _, _ = box
            if self.cls_name and self.conf:
                coordinate_text = f"{self.cls_name[i]}: {self.conf[i]:.2f}"
            else:
                coordinate_text = f"({x}, {y})"

            # 计算文本背景矩形
            text_width = text_painter.fontMetrics().boundingRect(coordinate_text).width()
            text_height = text_painter.fontMetrics().height()
            text_rect = QRect(x, y - text_height - text_margin, text_width + 2 * text_margin, text_height)

            # 绘制背景
            text_painter.drawRect(text_rect)

            # 绘制坐标文本
            text_painter.setPen(Qt.white)  # 设置字体颜色为白色
            text_painter.drawText(text_rect.left() + text_margin, text_rect.top() + text_height - text_margin, coordinate_text)

        text_painter.end()


if __name__ == "__main__":
    import sys

    app = QApplication(sys.argv)
    window = OverlayWindow()
    window.show()

    # 测试红框
    example_boxes = [
        (50, 50, 200, 150),  # 矩形框1
        (300, 300, 100, 200)  # 矩形框2
    ]
    window.update_boxes(example_boxes)

    sys.exit(app.exec_())
利用YOLO模型检测实时截图,设置time.sleep减少频率,让检测结果更加稳定。
# detect.py
from PyQt5.QtCore import QThread, pyqtSignal
import mss
import cv2
import numpy as np
from ultralytics import YOLO
from PyQt5.QtWidgets import QApplication
import sys
import time

from windows import OverlayWindow, monitor

class DetectionThread(QThread):
    update_signal = pyqtSignal(list, list, list)  # 信号传递检测结果

    def __init__(self, model, monitor):
        super().__init__()
        self.model = model
        self.monitor = monitor
        self.running = True

    def run(self):
        with mss.mss() as sct:
            while self.running:
                # 捕获屏幕内容
                screenshot = sct.grab(self.monitor)
                frame = np.array(screenshot)
                frame = cv2.cvtColor(frame, cv2.COLOR_BGRA2BGR)

                # 使用YOLO模型进行推理
                results = self.model.predict(source=frame, show=False, verbose=False)
                result = results[0]

                if result.boxes.cls.shape[0] == 0:
                    self.update_signal.emit([], [], [])  # 无检测结果
                    continue

                boxes = np.array(result.boxes.xyxy.cpu(), dtype=int).tolist()
                cls_name = [self.model.names[i.item()] for i in result.boxes.cls]
                conf = result.boxes.conf.tolist()
                self.update_signal.emit(boxes, cls_name, conf)  # 发送检测结果
                time.sleep(0.9)

    def stop(self):
        self.running = False
        self.wait()

def main():
    app = QApplication(sys.argv)
    window = OverlayWindow()
    window.show()

    # 初始化YOLO模型
    model = YOLO("yolo11n.pt")
    # 创建后台线程
    detection_thread = DetectionThread(model, monitor)
    detection_thread.update_signal.connect(window.update_boxes)  # 将检测结果连接到窗口
    detection_thread.start()

    # 退出时停止线程
    app.aboutToQuit.connect(detection_thread.stop)
    sys.exit(app.exec_())

if __name__ == "__main__":
    main()
运行程序:
python detect.py
结果展示
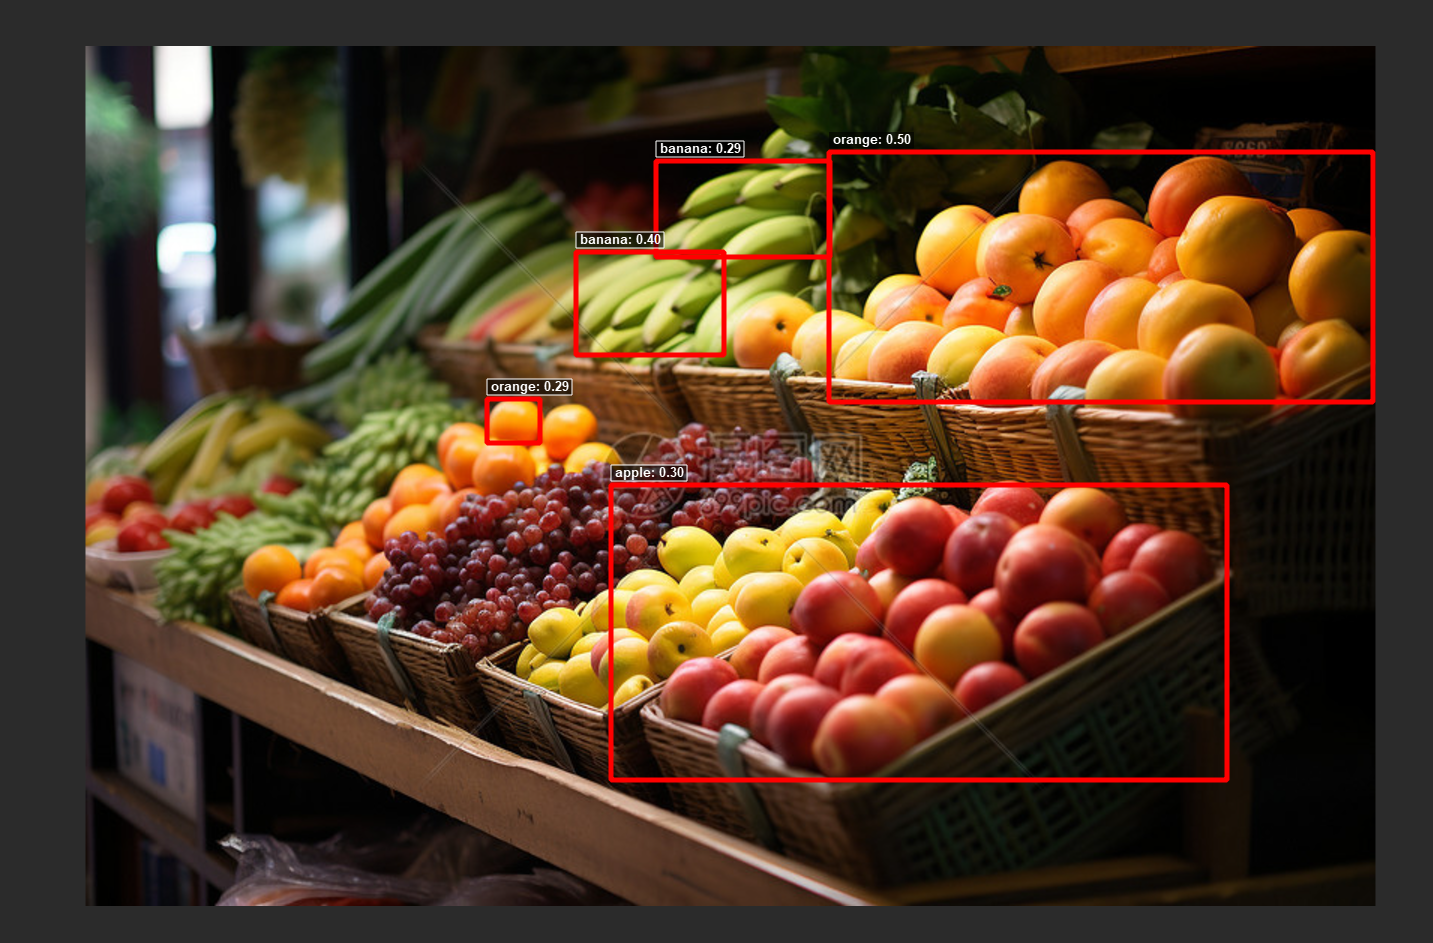
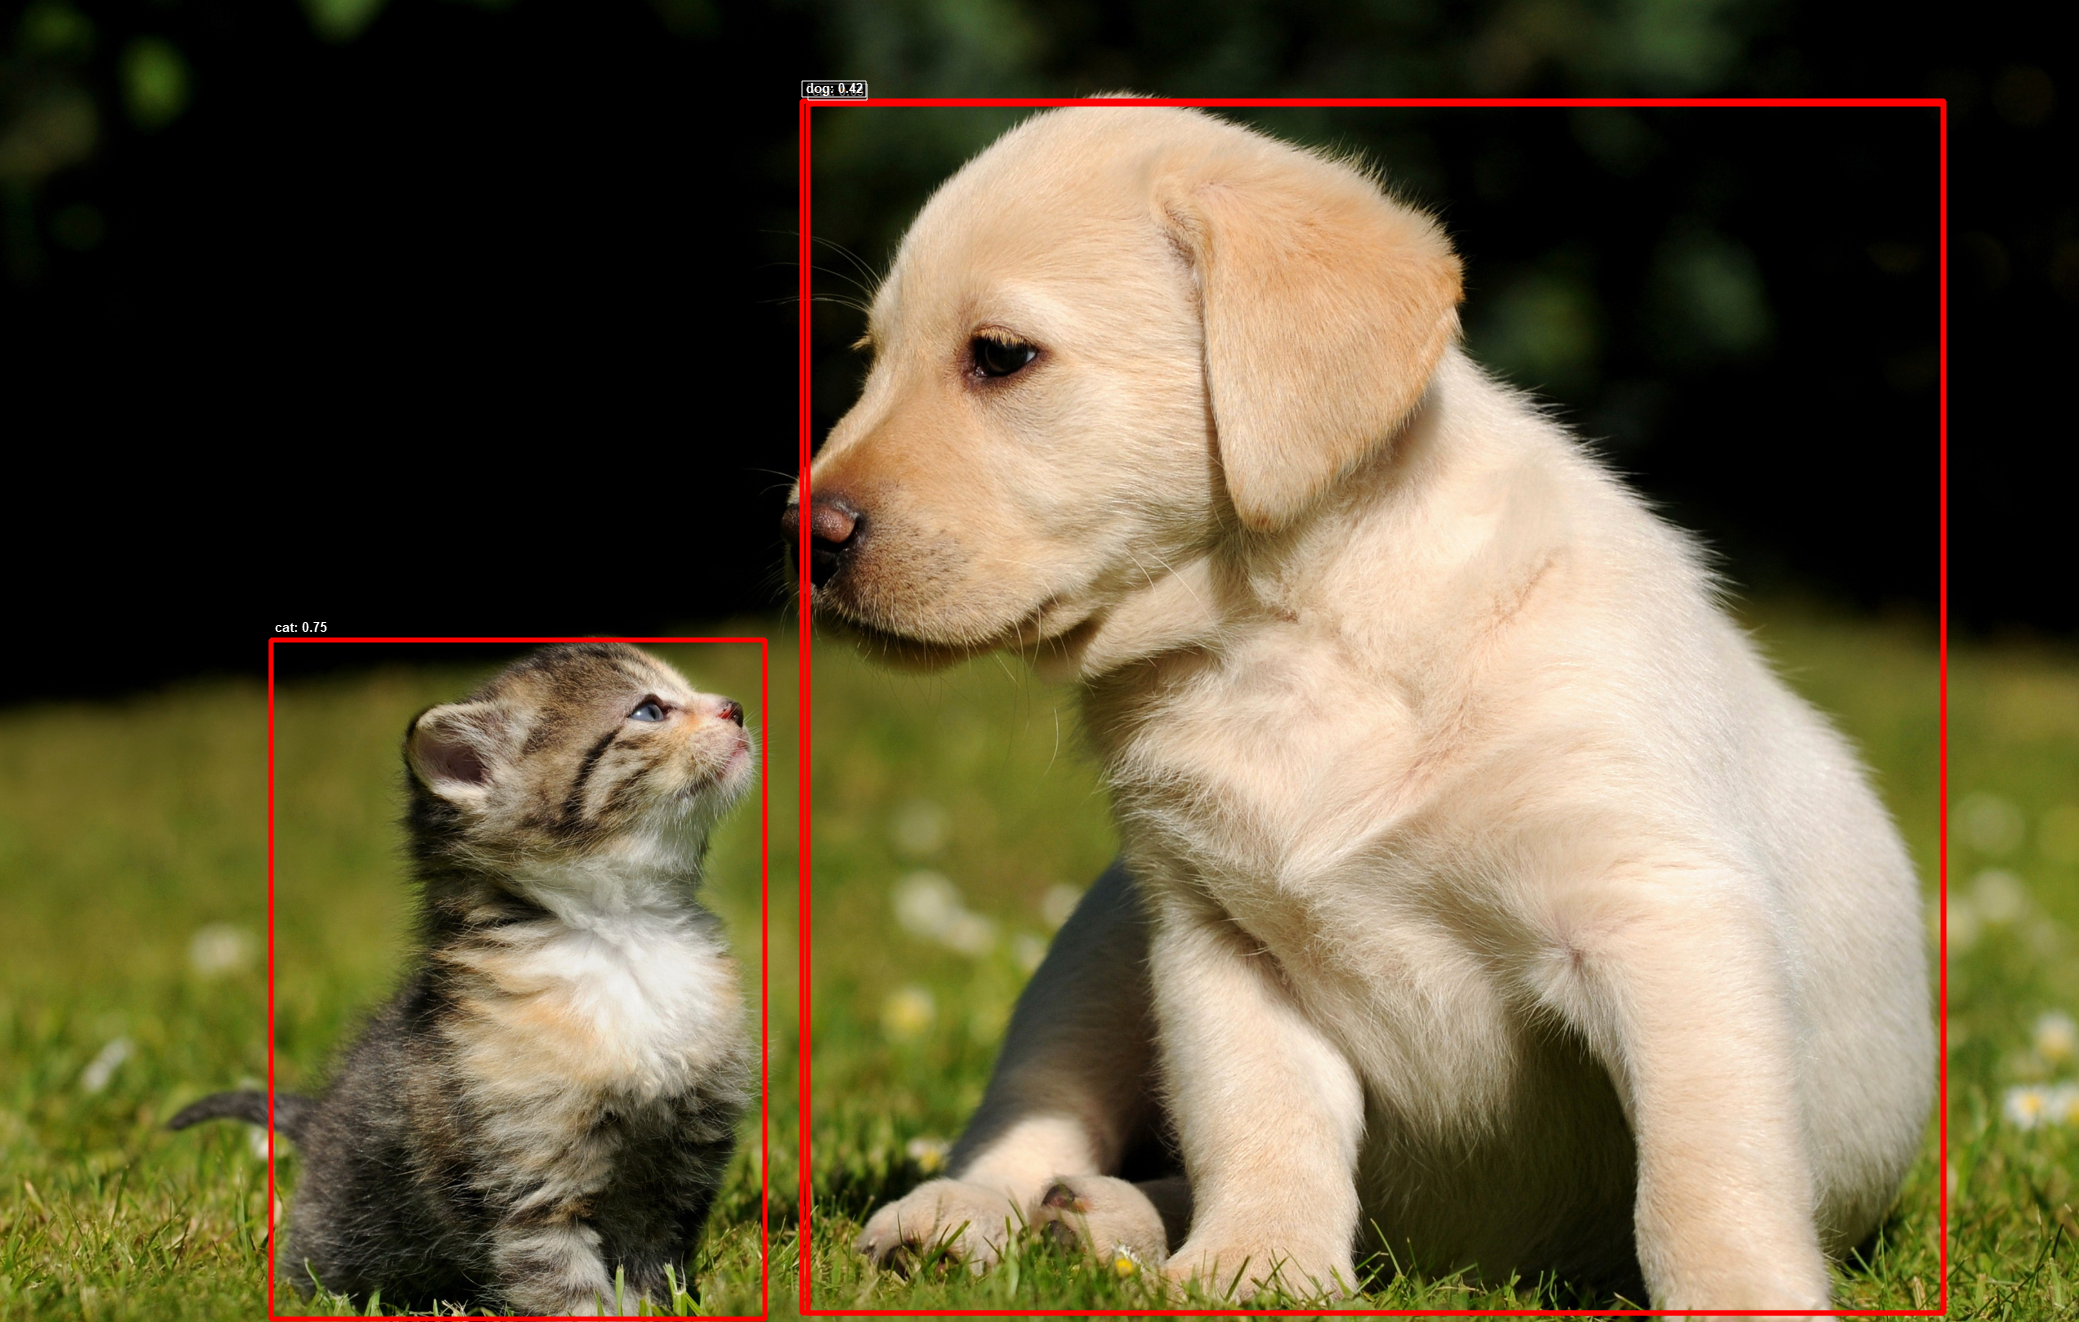
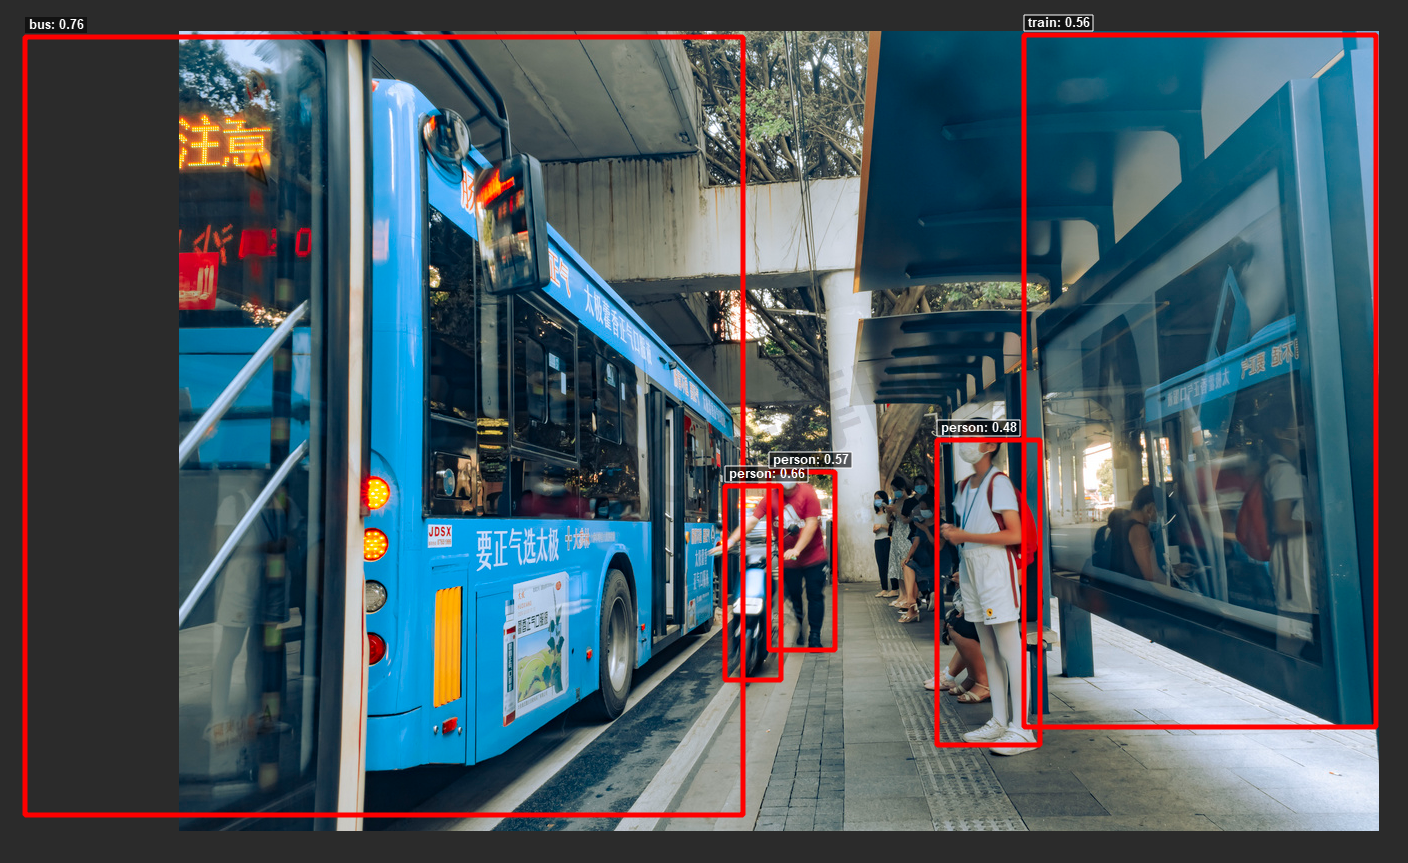
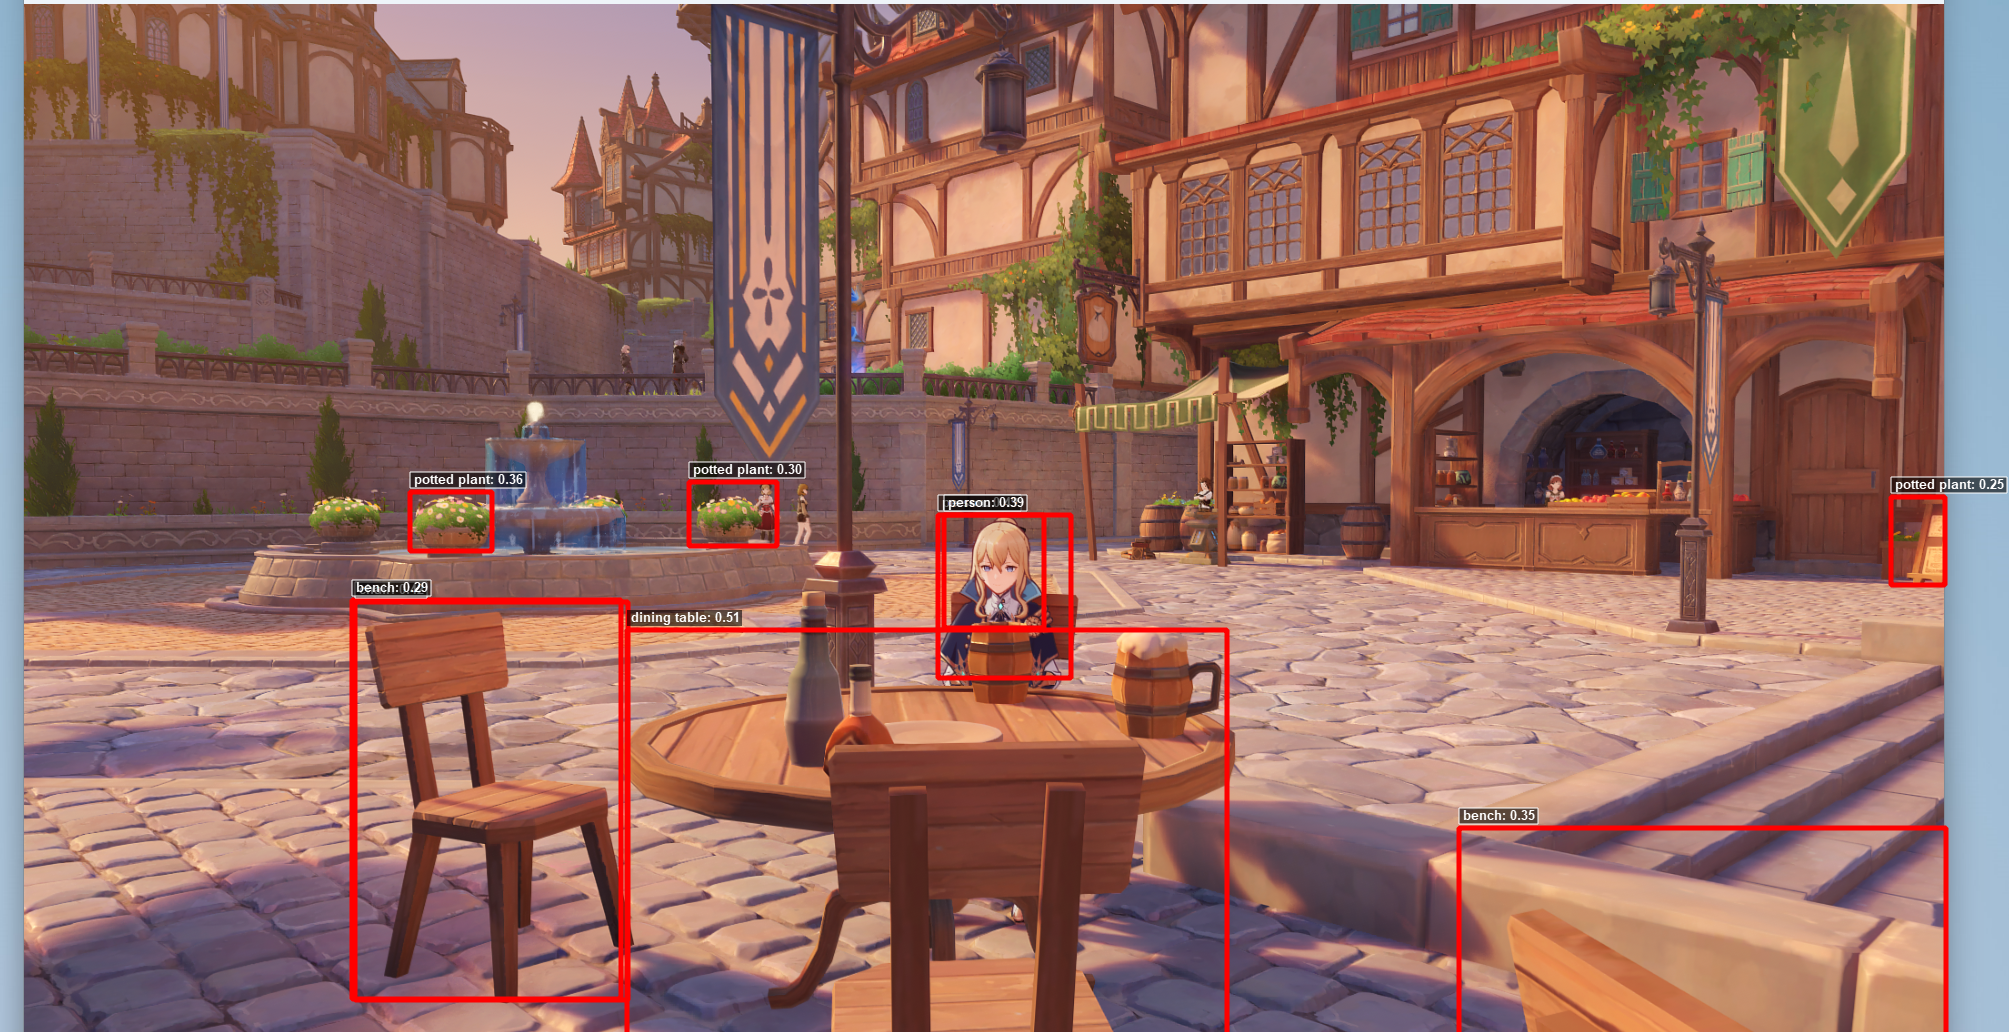
以下的结果都是在屏幕上实时检测出来的,我通过手动截图保存。可以看到部分结果并不准确,或许是模型本身对于该类训练不充分,或许是数据集中不包含此类。


参考文献
依赖:
Package                   Version
------------------------- -----------
opencv-python             4.10.0
PyQt5                     5.15.11
mss                       10.0.0
ultralytics               8.3.33


