HAProxy的安装和配置
1.1 地址规划
|
主机1 |
名称 |
地址 |
|
haproxy代理服务器 |
haproxy |
10.0.0.41/172.16.1.41 |
|
web服务器1 |
haproxy2 |
10.0.0.42/172.16.1.42 |
|
web服务器2 |
haproxy3 |
10.0.0.43/172.16.1.43 |
1.2 安装haproxy
[root@haproxy ~]# yum install -y haproxy
查看安装的内容

[root@haproxy ~]# rpm -ql haproxy
/etc/haproxy
/etc/haproxy/haproxy.cfg                     ##主配置文件
/etc/logrotate.d/haproxy
/etc/sysconfig/haproxy
/usr/bin/halog
/usr/bin/iprange
/usr/lib/systemd/system/haproxy.service
/usr/sbin/haproxy                                ##主程序
/usr/sbin/haproxy-systemd-wrapper
/usr/share/doc/haproxy-1.5.18
/usr/share/doc/haproxy-1.5.18/CHANGELOG
/usr/share/doc/haproxy-1.5.18/LICENSE
/usr/share/doc/haproxy-1.5.18/README
/usr/share/doc/haproxy-1.5.18/ROADMAP
/usr/share/doc/haproxy-1.5.18/VERSION
/usr/share/doc/haproxy-1.5.18/acl.fig
/usr/share/doc/haproxy-1.5.18/architecture.txt
/usr/share/doc/haproxy-1.5.18/close-options.txt
/usr/share/doc/haproxy-1.5.18/coding-style.txt
/usr/share/doc/haproxy-1.5.18/configuration.txt
/usr/share/doc/haproxy-1.5.18/cookie-options.txt
/usr/share/doc/haproxy-1.5.18/design-thoughts
/usr/share/doc/haproxy-1.5.18/design-thoughts/backends-v0.txt
/usr/share/doc/haproxy-1.5.18/design-thoughts/backends.txt
/usr/share/doc/haproxy-1.5.18/design-thoughts/be-fe-changes.txt
/usr/share/doc/haproxy-1.5.18/design-thoughts/binding-possibilities.txt
/usr/share/doc/haproxy-1.5.18/design-thoughts/buffer-redesign.txt
/usr/share/doc/haproxy-1.5.18/design-thoughts/buffers.fig
/usr/share/doc/haproxy-1.5.18/design-thoughts/config-language.txt
/usr/share/doc/haproxy-1.5.18/design-thoughts/connection-reuse.txt
/usr/share/doc/haproxy-1.5.18/design-thoughts/cttproxy-changes.txt
/usr/share/doc/haproxy-1.5.18/design-thoughts/entities-v2.txt
/usr/share/doc/haproxy-1.5.18/design-thoughts/how-it-works.txt
/usr/share/doc/haproxy-1.5.18/design-thoughts/http_load_time.url
/usr/share/doc/haproxy-1.5.18/design-thoughts/rate-shaping.txt
/usr/share/doc/haproxy-1.5.18/design-thoughts/sess_par_sec.txt
/usr/share/doc/haproxy-1.5.18/examples
/usr/share/doc/haproxy-1.5.18/examples/acl-content-sw.cfg
/usr/share/doc/haproxy-1.5.18/examples/auth.cfg
/usr/share/doc/haproxy-1.5.18/examples/build.cfg
/usr/share/doc/haproxy-1.5.18/examples/content-sw-sample.cfg
/usr/share/doc/haproxy-1.5.18/examples/cttproxy-src.cfg
/usr/share/doc/haproxy-1.5.18/examples/examples.cfg
/usr/share/doc/haproxy-1.5.18/examples/haproxy.cfg
/usr/share/doc/haproxy-1.5.18/examples/option-http_proxy.cfg
/usr/share/doc/haproxy-1.5.18/examples/ssl.cfg
/usr/share/doc/haproxy-1.5.18/examples/tarpit.cfg
/usr/share/doc/haproxy-1.5.18/examples/test-section-kw.cfg
/usr/share/doc/haproxy-1.5.18/examples/transparent_proxy.cfg
/usr/share/doc/haproxy-1.5.18/examples/url-switching.cfg
/usr/share/doc/haproxy-1.5.18/gpl.txt
/usr/share/doc/haproxy-1.5.18/haproxy-en.txt
/usr/share/doc/haproxy-1.5.18/haproxy-fr.txt
/usr/share/doc/haproxy-1.5.18/haproxy.1
/usr/share/doc/haproxy-1.5.18/internals
/usr/share/doc/haproxy-1.5.18/internals/acl.txt
/usr/share/doc/haproxy-1.5.18/internals/body-parsing.txt
/usr/share/doc/haproxy-1.5.18/internals/buffer-operations.txt
/usr/share/doc/haproxy-1.5.18/internals/buffer-ops.fig
/usr/share/doc/haproxy-1.5.18/internals/connect-status.txt
/usr/share/doc/haproxy-1.5.18/internals/connection-header.txt
/usr/share/doc/haproxy-1.5.18/internals/connection-scale.txt
/usr/share/doc/haproxy-1.5.18/internals/entities.fig
/usr/share/doc/haproxy-1.5.18/internals/entities.pdf
/usr/share/doc/haproxy-1.5.18/internals/entities.svg
/usr/share/doc/haproxy-1.5.18/internals/entities.txt
/usr/share/doc/haproxy-1.5.18/internals/hashing.txt
/usr/share/doc/haproxy-1.5.18/internals/header-parser-speed.txt
/usr/share/doc/haproxy-1.5.18/internals/header-tree.txt
/usr/share/doc/haproxy-1.5.18/internals/http-cookies.txt
/usr/share/doc/haproxy-1.5.18/internals/http-docs.txt
/usr/share/doc/haproxy-1.5.18/internals/http-parsing.txt
/usr/share/doc/haproxy-1.5.18/internals/naming.txt
/usr/share/doc/haproxy-1.5.18/internals/pattern.dia
/usr/share/doc/haproxy-1.5.18/internals/pattern.pdf
/usr/share/doc/haproxy-1.5.18/internals/polling-states.fig
/usr/share/doc/haproxy-1.5.18/internals/repartition-be-fe-fi.txt
/usr/share/doc/haproxy-1.5.18/internals/sequence.fig
/usr/share/doc/haproxy-1.5.18/internals/stats-v2.txt
/usr/share/doc/haproxy-1.5.18/internals/stream-sock-states.fig
/usr/share/doc/haproxy-1.5.18/internals/todo.cttproxy
/usr/share/doc/haproxy-1.5.18/lgpl.txt
/usr/share/doc/haproxy-1.5.18/proxy-protocol.txt
/usr/share/doc/haproxy-1.5.18/queuing.fig
/usr/share/haproxy
/usr/share/haproxy/400.http
/usr/share/haproxy/403.http
/usr/share/haproxy/408.http
/usr/share/haproxy/500.http
/usr/share/haproxy/502.http
/usr/share/haproxy/503.http
/usr/share/haproxy/504.http
/usr/share/haproxy/README
/usr/share/man/man1/halog.1.gz
/usr/share/man/man1/haproxy.1.gz
/var/lib/haproxy
1.3 安装httpd
两台web安装httpd

[root@haproxy2 ~]# yum install -y httpd

[root@haproxy2 ~]# echo "<h1>web1</h1>"> /var/www/html/index.html

[root@haproxy2 ~]# systemctl restart httpd.service

[root@haproxy2 ~]# ss -lnt

State      Recv-Q Send-Q Local Address:Port               Peer Address:Port

LISTEN     0      128           *:22                        *:*

LISTEN     0      100    127.0.0.1:25                        *:*

LISTEN     0      128          :::80                       :::*

LISTEN     0      128          :::22                       :::*

LISTEN     0      100         ::1:25                       :::*


[root@haproxy3 ~]# echo "<h1>web2</h1>"> /var/www/html/index.html

[root@haproxy3 ~]# systemctl restart httpd.service
1.4 修改haproxy配置文件
[root@haproxy haproxy]# cd /etc/haproxy/haproxy.cfg

[root@haproxy haproxy]# vim haproxy.cfg

#---------------------------------------------------------------------

# main frontend which proxys to the backends

#---------------------------------------------------------------------

frontend  main *:80               *表示本机所有地址

    default_backend             websrvs


#---------------------------------------------------------------------

# static backend for serving up images, stylesheets and such

#---------------------------------------------------------------------

backend websrvs

    balance     roundrobin

    server  web1 172.16.1.42:80 check

    server  web2 172.16.1.43:80 check

~
1.5 启动haproxy
[root@haproxy haproxy]# systemctl start haproxy.service

[root@haproxy haproxy]# ss -lntup

Netid  State      Recv-Q Send-Q                 Local Address:Port                                Peer Address:Port

udp    UNCONN     0      0                          127.0.0.1:323                                            *:*                   users:(("chronyd",pid=1220,fd=1))

udp    UNCONN     0      0                                  *:60472                                          *:*                   users:(("haproxy",pid=3172,fd=6),("haproxy",pid=3171,fd=6))

udp    UNCONN     0      0                                ::1:323                                           :::*                   users:(("chronyd",pid=1220,fd=2))

tcp    LISTEN     0      128                                *:80                                             *:*                   users:(("haproxy",pid=3172,fd=5))

tcp    LISTEN     0      128                                *:22                                             *:*                   users:(("sshd",pid=1519,fd=3))

tcp    LISTEN     0      128                               :::22                                            :::*                   users:(("sshd",pid=1519,fd=4))
1.6 网页测试
[root@haproxy haproxy]# curl 10.0.0.41

<h1>web1</h1>

[root@haproxy haproxy]# curl 10.0.0.41

<h1>web2</h1>
1.7 节点2宕机 测试健康状态检测
[root@haproxy3 ~]# systemctl stop httpd.service

[root@haproxy haproxy]# curl 10.0.0.41

<h1>web1</h1>

[root@haproxy haproxy]# curl 10.0.0.41

<h1>web1</h1>

[root@haproxy haproxy]# curl 10.0.0.41

<h1>web1</h1>
1.8 查看配置文件中的日志功能如何开启
[root@haproxy haproxy]# vim haproxy.cfg.bak

    # 2) configure local2 events to go to the /var/log/haproxy.log

    #   file. A line like the following can be added to

    #   /etc/sysconfig/syslog

    #

    #    local2.*                       /var/log/haproxy.log

log         127.0.0.1 local2
1.9 haproxy开启日志功能
[root@haproxy haproxy]# vim /etc/rsyslog.conf

# Provides UDP syslog reception

$ModLoad imudp

$UDPServerRun 514                                        ##监听UDP的514端口

# Save boot messages also to boot.log

local7.*                                                /var/log/boot.log


local2.*                                                /var/log/haproxy.log
1.10 重启rsyslog
[root@haproxy haproxy]# systemctl restart rsyslog.service

[root@haproxy haproxy]# ss -lnu

State      Recv-Q Send-Q Local Address:Port               Peer Address:Port

UNCONN     0      0             *:49297                     *:*

UNCONN     0      0             *:514                       *:*

UNCONN     0      0            :::514                      :::*
1.11 启动第二个web服务器 测试
[root@haproxy3 ~]# systemctl start httpd

[root@haproxy3 ~]# curl 10.0.0.5

<h1>node1</h1>

[root@haproxy3 ~]# curl 10.0.0.5

<h1>RS1 CentOS 6</h1>

[root@haproxy3 ~]# curl 10.0.0.5

<h1>node1</h1>

[root@haproxy3 ~]# curl 10.0.0.5

<h1>RS1 CentOS 6</h1>
1.12 查看代理服务器日志
[root@haproxy haproxy]# tailf /var/log/haproxy.log

Mar 14 12:39:44 localhost haproxy[2687]: 10.0.0.1:53008 [14/Mar/2018:12:39:40.587] main websrvs/web1 4180/0/1/0/4181 304 141 - - ---- 4/4/0/0/0 0/0 "GET / HTTP/1.1"

Mar 14 12:39:45 localhost haproxy[2687]: 10.0.0.1:53008 [14/Mar/2018:12:39:44.769] main websrvs/web2 687/0/1/0/688 200 273 - - ---- 4/4/0/1/0 0/0 "GET / HTTP/1.1"

Mar 14 12:39:46 localhost haproxy[2687]: 10.0.0.1:53008 [14/Mar/2018:12:39:45.457] main websrvs/web1 887/0/1/0/888 200 273 - - ---- 4/4/0/1/0 0/0 "GET / HTTP/1.1"

Mar 14 12:39:46 localhost haproxy[2687]: 10.0.0.1:53008 [14/Mar/2018:12:39:46.344] main websrvs/web2 567/0/0/1/568 200 273 - - ---- 4/4/0/1/0 0/0 "GET / HTTP/1.1"

Mar 14 12:39:47 localhost haproxy[2687]: 10.0.0.1:53008 [14/Mar/2018:12:39:46.912] main websrvs/web1 552/0/0/0/552 200 273 - - ---- 4/4/0/1/0 0/0 "GET / HTTP/1.1"


有轮询效果了
1.13 查看节点服务器日志
[root@haproxy2 ~]# tail /var/log/httpd/access_log

172.16.1.41 - - [14/Mar/2018:12:23:20 -0400] "GET / HTTP/1.1" 200 14 "-" "curl/7.29.0"

172.16.1.41 - - [14/Mar/2018:12:25:35 -0400] "GET / HTTP/1.1" 200 14 "-" "curl/7.29.0"

172.16.1.41 - - [14/Mar/2018:12:26:11 -0400] "GET / HTTP/1.1" 200 14 "-" "curl/7.29.0"

172.16.1.41 - - [14/Mar/2018:12:26:11 -0400] "GET / HTTP/1.1" 200 14 "-" "curl/7.29.0"

172.16.1.41 - - [14/Mar/2018:12:26:12 -0400] "GET / HTTP/1.1" 200 14 "-" "curl/7.29.0"

172.16.1.41 - - [14/Mar/2018:12:39:40 -0400] "GET / HTTP/1.1" 200 14 "-" "Mozilla/5.0 (Windows NT 10.0; Win64; x64) AppleWebKit/537.36 (KHTML, like Gecko) Chrome/58.0.3029.110 Safari/537.36"

172.16.1.41 - - [14/Mar/2018:12:39:45 -0400] "GET / HTTP/1.1" 304 - "-" "Mozilla/5.0 (Windows NT 10.0; Win64; x64) AppleWebKit/537.36 (KHTML, like Gecko) Chrome/58.0.3029.110 Safari/537.36"

172.16.1.41 - - [14/Mar/2018:12:39:46 -0400] "GET / HTTP/1.1" 200 14 "-" "Mozilla/5.0 (Windows NT 10.0; Win64; x64) AppleWebKit/537.36 (KHTML, like Gecko) Chrome/58.0.3029.110 Safari/537.36"

172.16.1.41 - - [14/Mar/2018:12:39:47 -0400] "GET / HTTP/1.1" 200 14 "-" "Mozilla/5.0 (Windows NT 10.0; Win64; x64) AppleWebKit/537.36 (KHTML, like Gecko) Chrome/58.0.3029.110 Safari/537.36"

记录的都是代理服务器地址
2 修改调度算法
2.1 改为source
[root@haproxy haproxy]# vim haproxy.cfg

backend websrvs

    balance     source

    server  web1 10.0.0.6:80 check

    server  web2 10.0.0.202:80 check

"haproxy.cfg" 72L, 2583C written
测试
[root@haproxy haproxy]# systemctl reload haproxy.service

[root@haproxy2 ~]# curl 10.0.0.42

<h1>web1</h1>

[root@haproxy2 ~]# curl 10.0.0.42

<h1>web1</h1>

[root@haproxy2 ~]# curl 10.0.0.42

<h1>web1</h1>

[root@haproxy2 ~]# curl 10.0.0.42

<h1>web1</h1>
2.2 测试调度算法uri改为consistent
[root@haproxy haproxy]# vim haproxy.cfg

backend websrvs

    balance     uri

    hash-type   consistent

    server      web1 172.16.1.42:80 check

    server      web2 172.16.1.43:80 check

"haproxy.cfg" 72L, 2587C written


[root@haproxy haproxy]# systemctl reload haproxy.service

[root@haproxy haproxy]# systemctl status haproxy.service

● haproxy.service - HAProxy Load Balancer

   Loaded: loaded (/usr/lib/systemd/system/haproxy.service; disabled; vendor preset: disabled)

   Active: active (running) since Thu 2018-03-15 11:02:55 EDT; 2h 54min ago

  Process: 2928 ExecReload=/bin/kill -USR2 $MAINPID (code=exited, status=0/SUCCESS)
2.2.1 生成页面并测试
[root@haproxy2 ~]# for i in {1..10};do echo "<h1>page $i on web1</h1>" > /var/www/html/test$i.html;done


[root@haproxy3 ~]# for i in {1..10};do echo "<h1>page $i on web2</h1>" > /var/www/html/test$i.html;done


[root@haproxy3 ~]# ll /var/www/html/

total 44

-rw-r--r-- 1 root root 14 Mar 14 12:07 index.html

-rw-r--r-- 1 root root 25 Mar 15 14:01 test10.html

-rw-r--r-- 1 root root 24 Mar 15 14:01 test1.html

-rw-r--r-- 1 root root 24 Mar 15 14:01 test2.html

-rw-r--r-- 1 root root 24 Mar 15 14:01 test3.html

-rw-r--r-- 1 root root 24 Mar 15 14:01 test4.html

-rw-r--r-- 1 root root 24 Mar 15 14:01 test5.html

-rw-r--r-- 1 root root 24 Mar 15 14:01 test6.html

-rw-r--r-- 1 root root 24 Mar 15 14:01 test7.html

-rw-r--r-- 1 root root 24 Mar 15 14:01 test8.html

-rw-r--r-- 1 root root 24 Mar 15 14:01 test9.html
访问测试

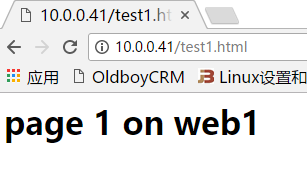
[root@haproxy haproxy]# curl 10.0.0.41/test1.html

<h1>page 1 on web1</h1>

[root@haproxy haproxy]# curl 10.0.0.41/test1.html

<h1>page 1 on web1</h1>

[root@haproxy haproxy]# curl 10.0.0.41/test2.html

<h1>page 2 on web1</h1>

[root@haproxy haproxy]# curl 10.0.0.41/test2.html

<h1>page 2 on web1</h1>

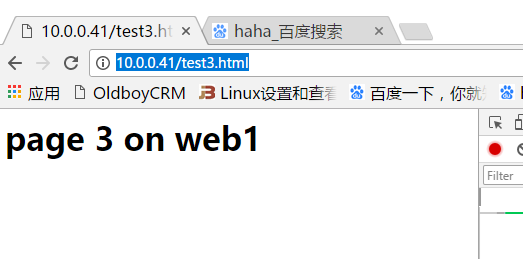
[root@haproxy haproxy]# curl 10.0.0.41/test3.html

<h1>page 3 on web2</h1>

[root@haproxy haproxy]# curl 10.0.0.41/test5.html

<h1>page 5 on web1</h1>

[root@haproxy haproxy]# curl 10.0.0.41/test4.html

<h1>page 4 on web2</h1>

[root@haproxy haproxy]# curl 10.0.0.41/test4.html

<h1>page 4 on web2</h1>

[root@haproxy haproxy]# curl 10.0.0.41/test4.html

<h1>page 4 on web2</h1>
2.2.2 让一个节点宕机 测试uri调度的consistent
[root@haproxy3 ~]# systemctl stop httpd.service

[root@haproxy haproxy]# curl 10.0.0.41/test4.html

<h1>page 4 on web1</h1>

[root@haproxy haproxy]# curl 10.0.0.41/test4.html

<h1>page 4 on web1</h1>
2.2.3 让节点上线 请求又回来了
[root@haproxy3 ~]# systemctl start httpd.service

[root@haproxy haproxy]# curl 10.0.0.41/test4.html

<h1>page 4 on web2</h1>

[root@haproxy haproxy]# curl 10.0.0.41/test4.html

<h1>page 4 on web2</h1>
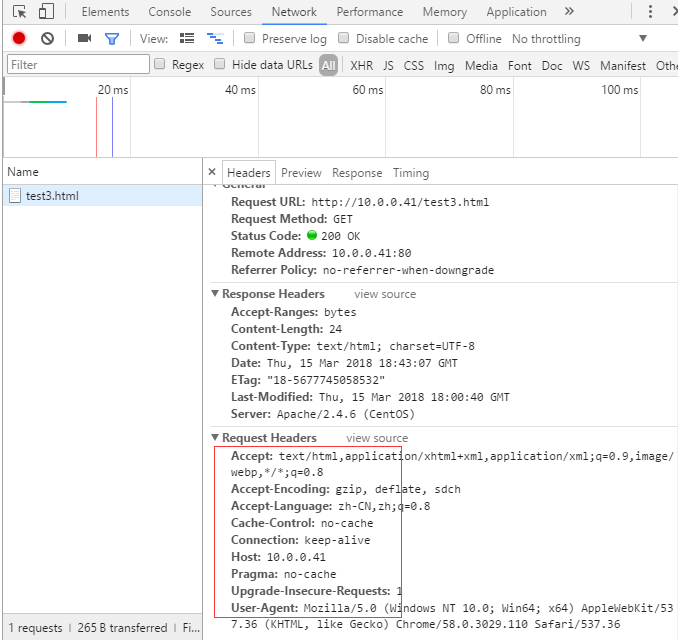
2.3 测试hdr(请求报文首部)

修改配置文件
[root@haproxy haproxy]# vim haproxy.cfg

backend websrvs

    balance     hdr(User-Agent)                        基于浏览器类型做负载

    hash-type   consistent

    server      web1 172.16.1.42:80 check

    server      web2 172.16.1.43:80 check

[root@haproxy haproxy]# systemctl reload haproxy.service
在谷歌浏览器测试

在360浏览器测试

[root@haproxy haproxy]# vim haproxy.cfg

backend websrvs

    balance     hdr(Host)

    hash-type   consistent

    server      web1 172.16.1.42:80 check

    server      web2 172.16.1.43:80 check

"haproxy.cfg" 73L, 2625C written

[root@haproxy haproxy]# systemctl reload haproxy.service

这种情况在两台haproxy做高可用的情况下会有效果
2.4 监听端口 bind
bind:Define one or several listening addresses and/or ports in a frontend.

bind [<address>]:<port_range> [, ...] [param*]

bind [<address>]:<port_range> [, ...] interface <interface>

listen http_proxy

    bind :80,:443

    bind 10.0.0.1:10080,10.0.0.1:10443

    bind /var/run/ssl-frontend.sock user root mode 600 accept-proxy

此指令仅能用于frontend和listen区段,用于定义一个或多个监听的套接字。

<address>:可选选项,其可以为主机名、ipv4地址、ipv6地址或*:若省略此选项、将其指定为*或0.0.0.0时,将监听在当前系统的所有IPv4地址

<port_range>:可以是一个特定的TCP端口,也可以是一个端口范围(如5005-5010),代理服务器将通过制定的端口来接收客户端请求;需要注意的是,每组监听的套接字<address:port>在同一个实例上只能使用一次,而且小于1024的端口需要有特定权限的用户才能使用,这可能需要通过uid参数来定义

<interface>:制定物理接口的名称,仅能在linux系统上使用:其不能使用接口别名,而仅能使用物理接口名称,而且只有管理有权限制定绑定的物理接口
2.4.1 测试bind
[root@haproxy haproxy]# vim haproxy.cfg

frontend  main

    bind  *:80

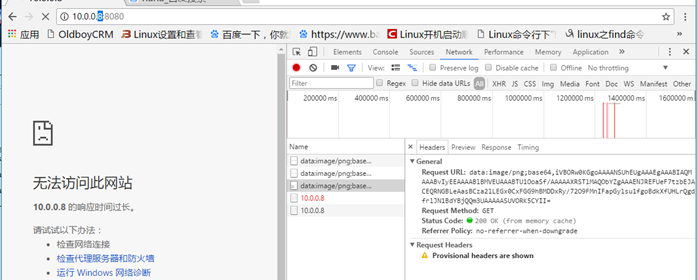
    bind  8:8080

    default_backend             websrvs


#---------------------------------------------------------------------

# static backend for serving up images, stylesheets and such

#---------------------------------------------------------------------

backend websrvs

    balance     hdr(Host)

    hash-type   consistent

"haproxy.cfg" 75L, 2657C written

[root@haproxy haproxy]# systemctl reload haproxy.service

[root@haproxy haproxy]# ss -lnt

State      Recv-Q Send-Q Local Address:Port               Peer Address:Port

LISTEN     0      128     0.0.0.8:8080                      *:*

LISTEN     0      128           *:80                        *:*

LISTEN     0      128           *:80                        *:*

LISTEN     0      128           *:22                        *:*

LISTEN     0      100    127.0.0.1:25                        *:*

LISTEN     0      128          :::22                       :::*

LISTEN     0      100         ::1:25                       :::*

访问状态码是对的 显示200 但是因为没有这个地址 所以没相应内容
修改回来
[root@haproxy haproxy]# vim haproxy.cfg

frontend  main

    bind  *:80

    bind  :8080                   不写*也代表所有IPV4地址

    default_backend             websrvs

"haproxy.cfg" 75L, 2652C written

[root@haproxy haproxy]# systemctl reload haproxy.service

[root@haproxy haproxy]# ss -lntp

State      Recv-Q Send-Q Local Address:Port               Peer Address:Port

LISTEN     0      128           *:8080                      *:*                   users:(("haproxy",pid=3089,fd=6))

LISTEN     0      128           *:80                        *:*                   users:(("haproxy",pid=3089,fd=5))

LISTEN     0      128           *:22                        *:*                   users:(("sshd",pid=1432,fd=3))

LISTEN     0      100    127.0.0.1:25                        *:*                   users:(("master",pid=2530,fd=13))

LISTEN     0      128          :::22                       :::*                   users:(("sshd",pid=1432,fd=4))

LISTEN     0      100         ::1:25                       :::*                   users:(("master",pid=2530,fd=14))
1.5 mode定义haproxy的工作模式
mode { tcp|http|health }
tcp:基于layer4实现代理;可代理mysql, pgsql, ssh, ssl等协议;
http:仅当代理的协议为http时使用;
设定实例的运行模式或协议,当实现内容交换时,前段和后端必须工作于同一种模式(一般说来都是HTTP模式),否则将无法启动实例。
tcp:实例运行于TCP模式,在客户端和服务器之间将建立一个全双工的连接,且不会对7层报文做任何类型的检查;此为默认模式,通常用于SSL/SSH/SMTP等应用
http:实例运行于HTTP模式,客户端请求在转发至后端服务器之前将被深度分析,所有不与RFC格式兼容的请求都会被拒绝
health:实例工作于health模式,其对入站请求仅相应“OK”信息并关闭连接,切不会记录任何日志信息,此模式将用于响应外部组件的健康状态检查请求,目前此功能已经废弃,因为tcp或http模式中的monitor关键字可完成类似功能
1.6 hash-type
hash-type <method>
定义用于将hash码映射至后端服务器的方法,其不能用于frontend区段,可用方法有map-based和consistent,在大多数场景下推荐使用默认的map-based方法。
map-based:hash表是一个包含了所有在线主机的静态数组,其hash值将会非常平滑,会将权重考虑在内,但其为静态方法,对在线服务器的权重进行调整将不会生效,这意味着其不支持慢速启动。此外,挑选服务器是根据其在数组中的位置进行的,因此,当一台服务器宕机或添加了一台新服务器时,大多数链接将会被重新派发至一个与此前不同的服务器上,对于缓存服务器的工作场景,不适用此方法。
consistent:
hash表是一个由各服务器填充而成的树状结构,基于hash键在hash树中查找相应的服务器时,最近的服务器被选中。此方法是动态的,支持在运行时修改服务器权重,因此兼容慢速启动的特性,添加一个新服务器时,仅会对一小部分请求产生影响,因此,尤其适用于后端服务器为cache的场景。
1.7 log日志系统
log global
log <address> [len <length>] <facility> [<level> [<minlevel>]]
no log
为每个实例启用事件和流量日志,因此可用于所有区段,每个实例(frontend)最多可以指定两个log参数,不过,如果使用了“log global”且“global”段已经定义了两个log参数时,多余的log参数将被忽略。
global:当前实例的日志系统参数与“global”段中的定义相同时,将使用此格式,每个实例仅能定义一次“log global”语句,且其没有任何额外参数。
<address>:定义日志发往的位置
格式一:<IPv4_address:PORT>,其中的port为UDP协议端口,默认为514
格式二:Unix套接字文件路径,但需要留心chroot应用及用户的读写权限;
<facility>:可以为syslog系统的标准facility之一;
<level>:定义日志级别,即输出信息过滤器,默认为所有信息,指定级别时,所有等于或高于此级别的日志信息将会被发送
defaults
# need to:
#
# 1) configure syslog to accept network log events. This is done
# by adding the '-r' option to the SYSLOGD_OPTIONS in
# /etc/sysconfig/syslog
#
# 2) configure local2 events to go to the /var/log/haproxy.log
# file. A line like the following can be added to
# /etc/sysconfig/syslog
#
# local2.* /var/log/haproxy.log
#
log 127.0.0.1 local2
log 127.0.0.2 local2
chroot /var/lib/haproxy
pidfile /var/run/haproxy.pid
maxconn 4000
user haproxy
group haproxy
daemon
# turn on stats unix socket
stats socket /var/lib/haproxy/stats
#---------------------------------------------------------------------
# common defaults that all the 'listen' and 'backend' sections will
# use if not designated in their block
#---------------------------------------------------------------------
defaults
mode http
log global
option httplog
option dontlognull
#
# local2.* /var/log/haproxy.log
#
log 127.0.0.1 local2
log 127.0.0.2 local2 ##这里定义了两个日志服务器虽然都是同一台机器
chroot /var/lib/haproxy
pidfile /var/run/haproxy.pid
maxconn 4000
user haproxy
group haproxy
daemon
# turn on stats unix socket
stats socket /var/lib/haproxy/stats
#---------------------------------------------------------------------
# common defaults that all the 'listen' and 'backend' sections will
# use if not designated in their block
#---------------------------------------------------------------------
defaults
mode http
log global
option httplog
option dontlognull
option http-server-close
option forwardfor except 127.0.0.0/8
option redispatch
retries 3
timeout http-request 10s
timeout queue 1m
timeout connect 10s
timeout client 1m
timeout server 1m
timeout http-keep-alive 10s
timeout check 10s
maxconn 3000
#---------------------------------------------------------------------
# main frontend which proxys to the backends
#---------------------------------------------------------------------
frontend main
bind *:80
bind :8080
default_backend websrvs
log global
log /root/logs
##虽然每个配置段都可以定义两个日志输出路径,但是在global配置段已经定义了两个日志路径,log global又调用了global配置段的设置,所以下面的log /root/logs就没用了
1.8 maxconn最大并发连接数
maxconn <conns>
为指定的frontend定义其最大并发连接数;默认为2000
backend设定的最大连接值应该大于等于frontend的值,否则请求只能等待了
设定一个前端的最大并发连接数。不能用于backend区段,对于大型站点来说,可以尽可能提高此值以便让haproxy管理连接队列,从而避免无法应答用户请求。当然,此最大值不能超出“global”段中的定义。需要注意的是,haproxy会为每个连接维持两个缓冲,每个缓冲的大小为8KB,再加上其他的数据,每个连接将大约占用17KB的RAM空间,这意味着经过适当优化后,有着1GB的可用RAM空间时,将能维护40000-50000并发连接。
1.9 default_backend
default_backend <backend>
在没有匹配的规则时,为实例制定使用的默认后端,因此,其不可用于backend区段,在"frontend"和"backend"之间进行内容交换时,通常使用"use_backend"定义其匹配规则,而没有被规则匹配到的请求将由此参数指定的后端接受
<backend>:指定使用的后端名称
使用案例:
use_backend dynamic if url_dyn
use_backend static if url_css url_img extension_img
default_backend dynamic
如果use_backend都不匹配 则使用dynamic
1.10 server
server <name> <address>[:[port]] [param*]
定义后端主机的各服务器及其选项;
server <name> <address>[:port] [settings ...]
default-server [settings ...]
<name>:服务器在haproxy上的内部名称;出现在日志及警告信息;如果设定了"http-send-server-name",他还将被添加至发往此服务器的请求首部中
<address>:服务器地址,支持使用主机名;
[:[port]]:端口映射;省略时,表示同bind中绑定的端口;
[param*]:参数
maxconn <maxconn>:当前server的最大并发连接数;
backlog <backlog>:当前server的连接数达到上限后的后援队列长度;
backup:设定当前server为备用服务器;
check:对当前server做健康状态检测;
addr :检测时使用的IP地址;
port :针对此端口进行检测;
inter <delay>:连续两次检测之间的时间间隔,默认为2000ms;
rise <count>:连续多少次检测结果为“成功”才标记服务器为可用;默认为2;
fall <count>:连续多少次检测结果为“失败”才标记服务器为不可用;默认为3;
maxqueue <maxqueue>:请求队列的最大长度
cookie <value>:为当前server指定其cookie值,用于实现基于cookie的会话黏性;disabled:标记为不可用;
redir <prefix>:将发往此server的所有GET和HEAD类的请求重定向至指定的URL;
例如:server web1 72.16.1.42:80 redir http://www.baidu.com check
weight <weight>:权重,默认为1;最大值256;0表示不参与负载均衡
注意:httpchk,"smtpchk", "mysql-check", "pgsql-check" and "ssl-hello-chk" 用于定义应用层检测方法;
测试权重
[root@haproxy haproxy]# vim haproxy.cfg
backend websrvs
balance roundrobin
server web1 172.16.1.42:80 check weight 1
server web2 172.16.1.43:80 check weight 2
[root@haproxy haproxy]# systemctl restart haproxy.service
[root@haproxy haproxy]# !curl
curl 10.0.0.41/index.html
<h1>web2</h1>
[root@haproxy haproxy]# curl 10.0.0.41/index.html
<h1>web2</h1>
[root@haproxy haproxy]# curl 10.0.0.41/index.html
<h1>web1</h1>
语法检测
[root@haproxy haproxy]# /usr/sbin/haproxy -f /etc/haproxy/haproxy.cfg
1.11 检查方法
1.11.1 对后端服务器做http协议的健康状态检测:
option httpchk
option httpchk <uri>
option httpchk <method> <uri>
option httpchk <method> <uri> <version>
实例:
backend https_relay
mode tcp
option httpchk OPTIONS * HTTP/1.1\r\nHost:\ www.baidu.com ###\r回车 \n换行
server web1 10.0.0.42:80 check prot 80
定义基于http协议的7层健康状态检测机制;
http-check expect [!] <match> <pattern>
Make HTTP health checks consider response contents or specific status codes.
使用方法:
server first 10.0.0.6:8080 cookie first check inter 1000
server second 10.0.0.202:8080 cookie second check inter 1000
1.12 cookie
cookie <name> [ rewrite | insert | prefix ] [ indirect ] [ nocache ] [ postonly ] [ preserve ] [ httponly ] [ secure ] [ domain <domain> ]* [ maxidle <idle> ] [ maxlife <life> ]
<name>:is the name of the cookie which will be monitored, modified or inserted in order to bring persistence.
nocache 不允许缓存
rewirte:重写;
insert:插入; 推荐使用
prefix:前缀;
基于cookie的session sticky的实现:
[root@haproxy haproxy]# vim haproxy.cfg
backend websrvs
balance roundrobin
cookie WEBSRV insert nocache indirect
server web1 172.16.1.42:80 check weight 1 rise 2 fall 3 maxconn 3000 cook
ie server1
server web2 172.16.1.43:80 check weight 3 rise 2 fall 3 maxconn 3000 cook
ie server2
~
"haproxy.cfg" 75L, 2774C written
cookie信息 server1或server2的至会被插入至WEBSRV中
1.13 测试cookie绑定
在同一个浏览器测试结果都是一个服务器端响应
要点:
(1)每个server要有自己唯一的cookie标识
(2)在backend中定义为用户请求调度完成后操纵其cookie
1.14 stats enable统计数据
统计接口启用相关的参数:
stats enable
启用基于程序编译时默认设置的统计报告,不能用于“frontend”区段,只要没有另外的其他设定,就会使用如下配置:
启用统计页;基于默认的参数启用stats page;
- stats uri : /haproxy?stats 请求stats页面的默认位置
- stats realm : "HAProxy Statistics"
- stats auth : no authentication
- stats scope : no restriction
尽管“stats enable”一条就能够启用统计报告,但还是建议设定其他所有参数,以免其依赖于默认设定而带来非期望后果,下面是一个配置案例:
backend public_www
server websrv1 10.0.0.202:80
stats enable
stats hide-version
stats scope
stats uri /haproxyadmin?stats 请求页面的位置
stats realm Haproxy\ Statistics
stats auth statsadmin:password
stats auth statsmaster:password
1.14.1 stats hide-version
启用统计报告并隐藏HAProxy版本报告,不能用于“frontend”区段。默认情况下,统计页面会显示一些有用信息,包括HAProxy的版本号,然而,向所有人公开HAProxy的精确版本号是非常有风险的,因为他能帮助恶意用户快速定位版本的缺陷和漏洞。
stats auth <user>:<passwd>
认证时的账号和密码,可使用多次;
stats realm <realm>
启动认证报告并高精度认证领域,不能用于frontend区段,haproxy在读取realm时会将其是为一个单词,因此,中间的任何空白字符都必须使用反斜线进行转义,此参数仅在与“stats auth”配置使用时才有意义。
<realm>:实现HTTP基本认证时显示在浏览器中的领域名称,用于提示用户输入一个用户名和密码
1.14.2 stats uri <prefix>
自定义stats page uri
1.14.3 stats scope
stats scope { <name> | "."}
启用统计报告并限定报告的区段,不能用于“frontend”区段,当指定此语句时,统计报告仅显示其列举出区段的报告信息,所有其他区段的信息将被隐藏,如果需要显示多个区段的统计报告,此语句可以定义多次,需要注意的是,区段名称检测仅仅是以字符串比较的方式进行,它不会真检测制定的区段是否真正存在。
<name>:可以是一个"listen"、"frontend"或"backend"区段的名称,而"."则表示 stats scope语句所定义的当前区段
stats refresh <delay>
设定自动刷新时间间隔;
1.14.4 stats admin { if | unless } <cond>
启用stats page中的管理功能
[root@haproxy haproxy]# vim haproxy.cfg
timeout http-request 10s
timeout queue 1m
timeout connect 10s
timeout client 1m
timeout server 1m
timeout http-keep-alive 10s
timeout check 10s
maxconn 3000
#---------------------------------------------------------------------
# main frontend which proxys to the backends
#---------------------------------------------------------------------
frontend main
bind *:80
bind :8080
default_backend websrvs
listen statistics
bind *:9090
stats enable
stats hide-version
stats scope .
[root@haproxy haproxy]# systemctl reload haproxy.service
在指定的条件满足时启用统计报告页面的管理级别功能,它允许通过web接口启用或禁用服务器。不过,基于安全的角度考虑,统计报告页面应该尽可能是只读的 不要监听80端口
配置示例:
frontend main *:80
bind :80,:8080
default_backend websrvs
listen statistics
bind *:9090
stats enable
stats hide-version
# stats scope .
stats uri /haproxyadmin?stats
stats realm "HAProxy\ Statistics"
stats auth admin:zhanghao
stats admin if TRUE
这个极其危险
1.14.5 配置实例(修改请求路径,添加认证)
[root@haproxy haproxy]# vim haproxy.cfg
timeout check 10s
maxconn 3000
#---------------------------------------------------------------------
# main frontend which proxys to the backends
#---------------------------------------------------------------------
frontend main
bind *:80
bind :8080
default_backend websrvs
listen statistics
bind *:9090
stats enable
stats hide-version
stats scope .
stats uri /haproxyhaha?stats
stats realm "haproxy statistics"
stats auth admin:123456
#---------------------------------------------------------------------
# static backend for serving up images, stylesheets and such
#---------------------------------------------------------------------
backend websrvs
"haproxy.cfg" 79L, 2778C written
[root@haproxy haproxy]# systemctl reload haproxy.service
[root@haproxy haproxy]# ss -lnt
State Recv-Q Send-Q Local Address:Port Peer Address:Port
LISTEN 0 128 *:8080 *:*
LISTEN 0 128 *:80 *:*
LISTEN 0 128 *:80 *:*
LISTEN 0 128 *:22 *:*
LISTEN 0 128 *:9090 *:*
LISTEN 0 128 :::22 :::*
1.14.6 网页测试
配置信息少,不是管理员,所以显示不全
1.14.7 添加管理员权限
[root@haproxy haproxy]# vim haproxy.cfg
#---------------------------------------------------------------------
# main frontend which proxys to the backends
#---------------------------------------------------------------------
frontend main
bind *:80
bind :8080
default_backend websrvs
listen statistics
bind *:9090
stats enable
stats hide-version
stats scope . 这个表示只对当前区段生效 应该去掉
stats uri /haproxyhaha?stats
stats realm "haproxy\ statistics"
stats auth admin:123456
stats admin if TRUE 必须大写,只有管理认证成功,才能看到信息 如果不加这一行 管理界面不会出
[root@haproxy haproxy]# systemctl restart haproxy.service
[root@haproxy haproxy]# ss -lnt
State Recv-Q Send-Q Local Address:Port Peer Address:Port
LISTEN 0 128 *:8080 *:*
LISTEN 0 128 *:80 *:*
LISTEN 0 128 *:22 *:*
LISTEN 0 100 127.0.0.1:25 *:*
LISTEN 0 128 *:9090 *:*
LISTEN 0 128 :::22 :::*
LISTEN 0 100 ::1:25 :::*
1.14.8 网页测试
1.15 forwardfor
option forwardfor [ except <network> ] [ header <name> ] [ if-none ]
Enable insertion of the X-Forwarded-For header to requests sent to servers
在由haproxy发往后端主机的请求报文中添加“X-Forwarded-For”首部,其值前端客户端的地址;用于向后端主发送真实的客户端IP;
[ except <network> ]:请求报请来自此处指定的网络时不予添加此首部;
[ header <name> ]:使用自定义的首部名称,而非“X-Forwarded-For”;
posted on 2020-05-18 00:40 hopeless-dream 阅读(634) 评论(0) 编辑 收藏 举报


