android:碎片的使用方式
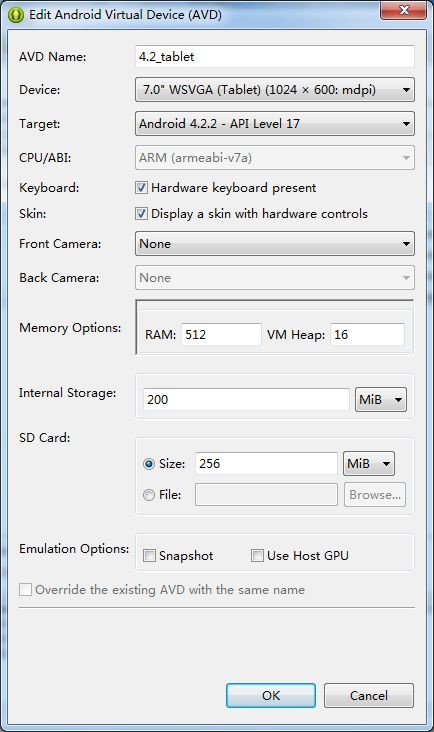
介绍了这么多抽象的东西,也是时候应该学习一下碎片的具体用法了。你已经知道,碎 片通常都是在平板开发中才会使用的,因此我们首先要做的就是新建一个平板电脑的模拟 器。由于 4.0 系统的平板模拟器好像存在 bug,这里我就新建一个 4.2 系统的平板模拟器,如 图 4.4 所示。

图 4.4
现在启动这个平板模拟器,效果如图 4.5 所示。

图 4.5
好了,准备工作都完成了,接着新建一个 FragmentTest 项目,然后开始我们的碎片探索
之旅吧。
4.2.1 碎片的简单用法
这里我们准备先写一个最简单的碎片示例来练练手,在一个活动当中添加两个碎片,并 让这两个碎片平分活动空间。
新建一个左侧碎片布局 left_fragment.xml,代码如下所示:
<LinearLayout xmlns:android="http://schemas.android.com/apk/res/android" android:layout_width="match_parent" android:layout_height="match_parent"
android:orientation="vertical" >
<Button android:id="@+id/button" android:layout_width="wrap_content" android:layout_height="wrap_content" android:layout_gravity="center_horizontal" android:text="Button"
/>
</LinearLayout>
这个布局非常简单,只放置了一个按钮,并让它水平居中显示。然后新建右侧碎片布局
right_fragment.xml,代码如下所示:
<LinearLayout xmlns:android="http://schemas.android.com/apk/res/android" android:layout_width="match_parent" android:layout_height="match_parent"
android:background="#00ff00" android:orientation="vertical" >
<TextView android:layout_width="wrap_content" android:layout_height="wrap_content" android:layout_gravity="center_horizontal" android:textSize="20sp"
android:text="This is right fragment"
/>
</LinearLayout>
可以看到,我们将这个布局的背景色设置成绿色,并放置了一个 TextView 用于显示一
段文本。接着新建一个 LeftFragment 类,继承自 Fragment。注意,这里可能会有两个不同包 下的 Fragment 供你选择,建议使用 android.app.Fragment,因为我们的程序是面向 Android 4.0 以上系统的,另一个包下的 Fragment 主要是用于兼容低版本的 Android 系统。LeftFragment 的代码如下所示:
public class LeftFragment extends Fragment {
@Override
public View onCreateView(LayoutInflater inflater, ViewGroup container, Bundle savedInstanceState) {
View view = inflater.inflate(R.layout.left_fragment, container, false);
return view;
}
}
这里仅仅是重写了 Fragment 的 onCreateView()方法,然后在这个方法中通过 LayoutInflater 的 inflate()方法将刚才定义的 left_fragment 布局动态加载进来,整个方法简单明了。接着我 们用同样的方法再新建一个 RightFragment,代码如下所示:
public class RightFragment extends Fragment {
@Override
public View onCreateView(LayoutInflater inflater, ViewGroup container, Bundle savedInstanceState) {
View view = inflater.inflate(R.layout.right_fragment, container, false);
return view;
}
}
基本上代码都是相同的,相信已经没有必要再做什么解释了。接下来修改 activity_main.xml
中的代码,如下所示:
<LinearLayout xmlns:android="http://schemas.android.com/apk/res/android" android:layout_width="match_parent" android:layout_height="match_parent" >
<fragment android:id="@+id/left_fragment"
android:name="com.example.fragmenttest.LeftFragment" android:layout_width="0dp" android:layout_height="match_parent" android:layout_weight="1" />
<fragment android:id="@+id/right_fragment" android:name="com.example.fragmenttest.RightFragment" android:layout_width="0dp" android:layout_height="match_parent" android:layout_weight="1" />
</LinearLayout>
可以看到,我们使用了<fragment>标签在布局中添加碎片,其中指定的大多数属性你都 是熟悉的,只不过这里还需要通过 android:name 属性来显式指明要添加的碎片类名,注意一 定要将类的包名也加上。
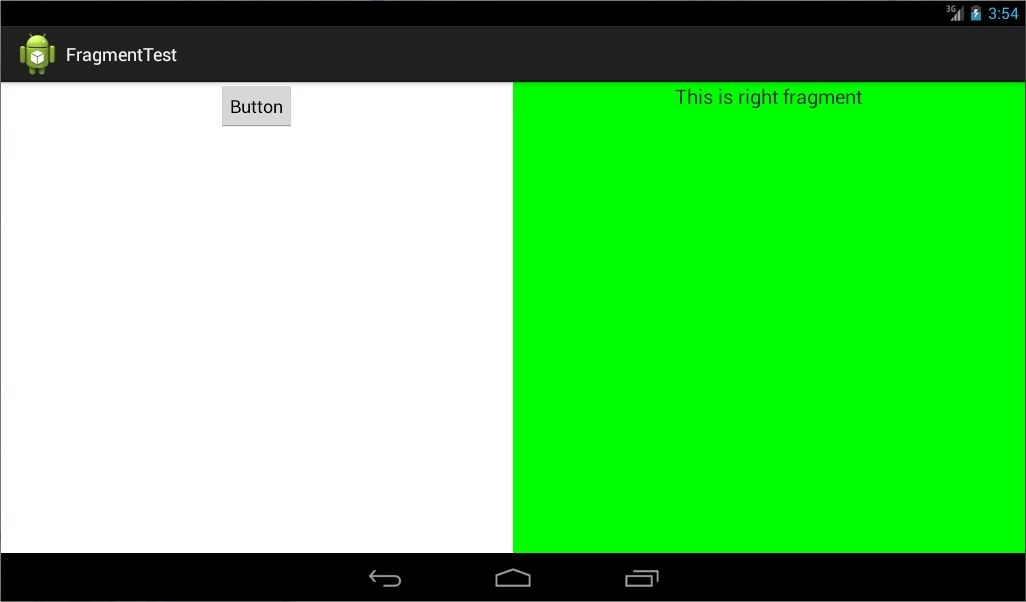
这样最简单的碎片示例就已经写好了,现在运行一下程序,效果如图 4.6 所示。

图 4.6
正如我们所期待的一样,两个碎片平分了整个活动的布局。不过这个例子实在是太简单 了,在真正的项目中很难有什么实际的作用,因此我们马上来看一看,关于碎片更加高级的 使用技巧。
4.2.2 动态添加碎片
在上一节当中,你已经学会了在布局文件中添加碎片的方法,不过碎片真正的强大之处 在于,它可以在程序运行时动态地添加到活动当中。根据具体情况来动态地添加碎片,你就 可以将程序界面定制得更加多样化。
我们还是在上一节代码的基础上继续完善,新建 another_right_fragment.xml,代码如下 所示:
<LinearLayout xmlns:android="http://schemas.android.com/apk/res/android" android:layout_width="match_parent" android:layout_height="match_parent"
android:background="#ffff00" android:orientation="vertical" >
<TextView android:layout_width="wrap_content" android:layout_height="wrap_content" android:layout_gravity="center_horizontal" android:textSize="20sp"
android:text="This is another right fragment"
/>
</LinearLayout>
这个布局文件的代码和 right_fragment.xml 中的代码基本相同,只是将背景色改成了黄 色,并将显示的文字改了改。然后新建 AnotherRightFragment 作为另一个右侧碎片,代码如 下所示:
public class AnotherRightFragment extends Fragment {
@Override
public View onCreateView(LayoutInflater inflater, ViewGroup container, Bundle savedInstanceState) {
View view = inflater.inflate(R.layout.another_right_fragment,
container, false);
return view;
}
}
代码同样非常简单,在 onCreateView()方法中加载了刚刚创建的 another_right_fragment
布局。这样我们就准备好了另一个碎片,接下来看一下如何将它动态地添加到活动当中。修
改 activity_main.xml,代码如下所示:
<LinearLayout xmlns:android="http://schemas.android.com/apk/res/android" android:layout_width="match_parent" android:layout_height="match_parent">
<fragment android:id="@+id/left_fragment" android:name="com.example.fragmenttest.LeftFragment" android:layout_width="0dp" android:layout_height="match_parent" android:layout_weight="1" />
<FrameLayout android:id="@+id/right_layout" android:layout_width="0dp" android:layout_height="match_parent" android:layout_weight="1" >
<fragment android:id="@+id/right_fragment" android:name="com.example.fragmenttest.RightFragment" android:layout_width="match_parent" android:layout_height="match_parent" />
</FrameLayout>
</LinearLayout>
可以看到,现在将右侧碎片放在了一个 FrameLayout 中,还记得这个布局吗?在上一章 中我们学过,这是 Android 中最简单的一种布局,它没有任何的定位方式,所有的控件都会 摆放在布局的左上角。由于这里仅需要在布局里放入一个碎片,因此非常适合使用 FrameLayout。
之后我们将在代码中替换 FrameLayout 里的内容,从而实现动态添加碎片的功能。修改
MainActivity 中的代码,如下所示:
public class MainActivity extends Activity implements OnClickListener {
@Override
protected void onCreate(Bundle savedInstanceState) { super.onCreate(savedInstanceState); setContentView(R.layout.activity_main);
Button button = (Button) findViewById(R.id.button);
button.setOnClickListener(this);
}
@Override
public void onClick(View v) {
switch (v.getId()) {
case R.id.button:
AnotherRightFragment fragment = new AnotherRightFragment(); FragmentManager fragmentManager = getFragmentManager(); FragmentTransaction transaction = fragmentManager.
beginTransaction();
transaction.replace(R.id.right_layout, fragment);
transaction.commit();
break;
default:
break;
}
}
}
可以看到,首先我们给左侧碎片中的按钮注册了一个点击事件,然后将动态添加碎片的 逻辑都放在了点击事件里进行。结合代码可以看出,动态添加碎片主要分为 5 步。
1. 创建待添加的碎片实例。
2. 获取到 FragmentManager,在活动中可以直接调用 getFragmentManager()方法得到。
3. 开启一个事务,通过调用 beginTransaction()方法开启。
4. 向容器内加入碎片,一般使用 replace()方法实现,需要传入容器的 id 和待添加的碎 片实例。
5. 提交事务,调用 commit()方法来完成。 这样就完成了在活动中动态添加碎片的功能,重新运行程序,可以看到和之前相同的界
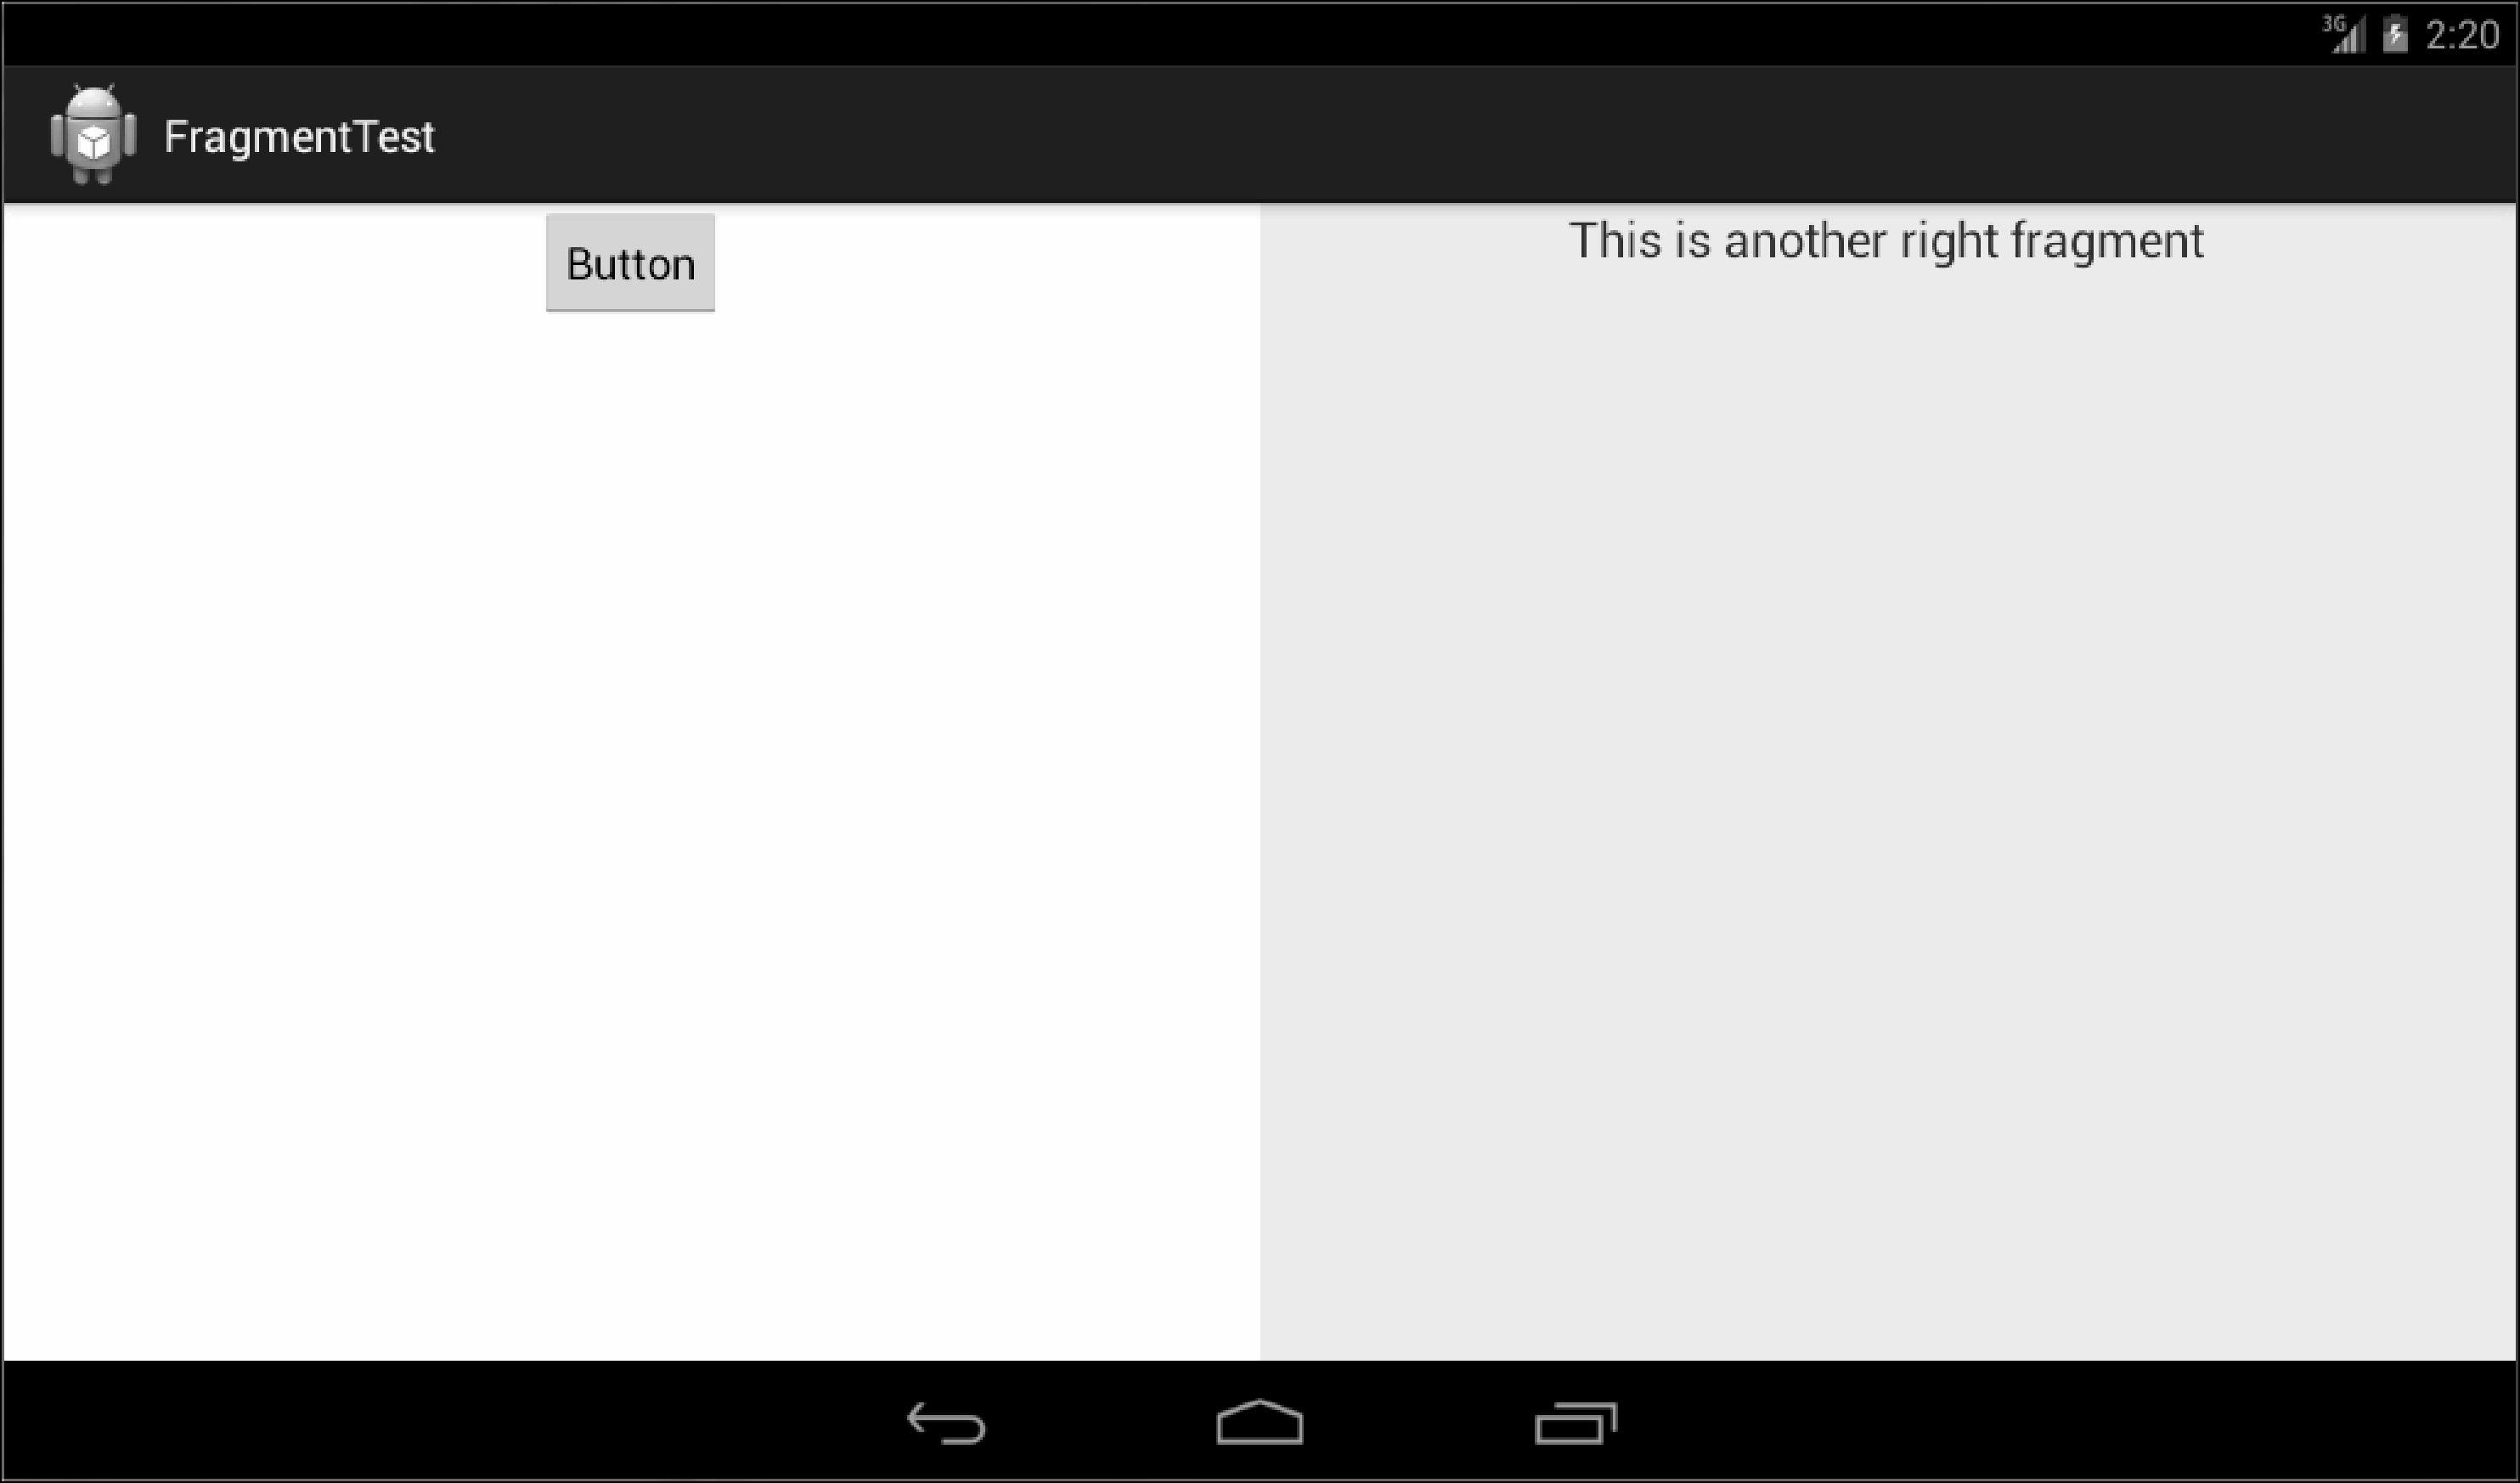
面,然后点击一下按钮,效果如图 4.7 所示。

图 4.7
4.2.3 在碎片中模拟返回栈
在上一小节中,我们成功实现了向活动中动态添加碎片的功能,不过你尝试一下就会发 现,通过点击按钮添加了一个碎片之后,这时按下 Back 键程序就会直接退出。如果这里我 们想模仿类似于返回栈的效果,按下 Back 键可以回到上一个碎片,该如何实现呢?
其实很简单,FragmentTransaction 中提供了一个 addToBackStack()方法,可以用于将一 个事务添加到返回栈中,修改 MainActivity 中的代码,如下所示:
public class MainActivity extends Activity implements OnClickListener {
……
@Override
public void onClick(View v) {
switch (v.getId()) {
case R.id.button:
AnotherRightFragment fragment = new AnotherRightFragment(); FragmentManager fragmentManager = getFragmentManager(); FragmentTransaction transaction = fragmentManager.
beginTransaction();
transaction.replace(R.id.right_layout, fragment); transaction.addToBackStack(null); transaction.commit();
break;
default:
break;
}
}
}
这里我们在事务提交之前调用了 FragmentTransaction 的 addToBackStack()方法,它可以 接收一个名字用于描述返回栈的状态,一般传入 null 即可。现在重新运行程序,并点击按钮 将 AnotherRightFragment 添加到活动中,然后按下 Back 键,你会发现程序并没有退出,而 是回到了 RightFragment 界面,再次按下 Back 键程序才会退出。
4.2.4 碎片和活动之间进行通信
虽然碎片都是嵌入在活动中显示的,可是实际上它们的关系并没有那么亲密。你可以看 出,碎片和活动都是各自存在于一个独立的类当中的,它们之间并没有那么明显的方式来直 接进行通信。如果想要在活动中调用碎片里的方法,或者在碎片中调用活动里的方法,应该 如何实现呢?
为了方便碎片和活动之间进行通信,FragmentManager 提供了一个类似于 findViewById()
的方法,专门用于从布局文件中获取碎片的实例,代码如下所示:
RightFragment rightFragment = (RightFragment) getFragmentManager()
.findFragmentById(R.id.right_fragment);
调用 FragmentManager 的 findFragmentById()方法,可以在活动中得到相应碎片的实例, 然后就能轻松地调用碎片里的方法了。
掌握了如何在活动中调用碎片里的方法,那在碎片中又该怎样调用活动里的方法呢?其 实这就更简单了,在每个碎片中都可以通过调用 getActivity()方法来得到和当前碎片相关联 的活动实例,代码如下所示:
MainActivity activity = (MainActivity) getActivity();
有了活动实例之后,在碎片中调用活动里的方法就变得轻而易举了。另外当碎片中需要 使用 Context 对象时,也可以使用 getActivity()方法,因为获取到的活动本身就是一个 Context 对象了。
这时不知道你心中会不会产生一个疑问,既然碎片和活动之间的通信问题已经解决了, 那么碎片和碎片之间可不可以进行通信呢?
说实在的,这个问题并没有看上去的复杂,它的基本思路非常简单,首先在一个碎片中 可以得到与它相关联的活动,然后再通过这个活动去获取另外一个碎片的实例,这样也就实 现了不同碎片之间的通信功能,因此这里我们的答案是肯定的。


