cesium基础
Cesium 使用笔记
一、cesium中的几种坐标和相互转换
1、平面坐标系(Cartesian2)
new Cesium.Cartesian2(x, y)
2、笛卡尔空间直角坐标系-世界坐标系(Cartesian3)
new Cesium.Cartesian3(x, y, z)
3、弧度(Cartographic)
new Cesium.Cartographic(longitude, latitude, height) 注:这里的经纬度是用弧度表示的,经纬度其实就是角度, 弧度即角度对应弧长是半径的倍数。 角度转弧度: π / 180 × 角度 弧度变角度: 180 / π × 弧度
经纬度(longitude, latitude)
地理坐标系,坐标原点在椭球的质心。 经度:参考椭球面上某点的大地子午面与本初子午面间的两面角。东正西负。 纬度:参考椭球面上某点的法线与赤道平面的夹角。北正南负。
坐标转换
1.经纬度转换为世界坐标
第一种方式:直接转换: Cesium.Cartesian3.fromDegrees(longitude, latitude, height, ellipsoid, result) 第二种方式:先转换成弧度再转换 var ellipsoid = viewer.scene.globe.ellipsoid; var cartographic = Cesium.Cartographic.fromDegrees(lng,lat,alt); var cartesian3 = ellipsoid.cartographicToCartesian(cartographic);
2.世界坐标转换为经纬度
var ellipsoid = viewer.scene.globe.ellipsoid; var cartesian3 = new Cesium.cartesian3(x,y,z); var cartographic = ellipsoid.cartesianToCartographic(cartesian3); var lat = Cesium.Math.toDegrees(cartograhphic.latitude); var lng = Cesium.Math.toDegrees(cartograhpinc.longitude); var alt = cartographic.height;
3.弧度和经纬度
经纬度转弧度: Cesium.CesiumMath.toRadians(degrees) 弧度转经纬度: Cesium.CesiumMath.toDegrees(radians)
4.屏幕坐标和世界坐标相互转换
屏幕转世界坐标: var pick1= new Cesium.Cartesian2(0,0); var cartesian = viewer.scene.globe.pick(viewer.camera.getPickRay(pick1),viewer.scene); 注意这里屏幕坐标一定要在球上,否则生成出的cartesian对象是undefined 世界坐标转屏幕坐标 Cesium.SceneTransforms.wgs84ToWindowCoordinates(scene, Cartesian3); 结果是Cartesian2对象,取出X,Y即为屏幕坐标。
5.Cartesian2
Cesium.Cartesian2.fromCartesian3(cartesian, result)→ Cartesian2
6.Cartesian3
I:经纬度坐标(WGS84)→ Cartesian3 Cesium.Cartesian3.fromDegrees(longitude, latitude, height, ellipsoid, result) → Cartesian3 II:弧度坐标→ Cartesian3 Cesium.Cartesian3.fromRadians(longitude, latitude, height, ellipsoid, result) → Cartesian3
7.Cartographic
I:Cartesian3→ Cartographic Cesium.Cartographic.fromCartesian(cartesian, ellipsoid, result) → Cartographic II:经纬度坐标(WGS84)→ Cartographic Cesium.Cartographic.fromDegrees(longitude, latitude, height, result) → Cartographic 另外,经纬度坐标和弧度坐标也可以通过Cesium.Math来转换 Cesium.CesiumMath.toDegrees(radians) → Number Cesium.CesiumMath.toRadians(degrees) → Number
二、关于贴地
前提
this.viewer.scene.globe.depthTestAgainstTerrain = true; *//开启深度检测*
线的贴地
原生cesium 中
this.lineStraightArrowEntity = this.viewer.entities.add({ plotType: "MilitaryPlot", plotCode: this.properties.plotCode, polyline: { positions: new Cesium.CallbackProperty(e => { return this.positions; }, false), width: this.properties.style.width, clampToGround: true, // 只添加这一行就实现了贴地 material: new Cesium.PolylineArrowMaterialProperty(Cesium.Color.fromCssColorString(this.properties.style.color) ) });
超图cesium 中
this.lineStraightArrowEntity = this.viewer.entities.add({ plotType: "MilitaryPlot", plotCode: this.properties.plotCode, polyline: { positions: new Cesium.CallbackProperty(e => { return this.positions; }, false), width: this.properties.style.width, clampToGround: true, // 和classificationType这两个属性要同时存在 material: new Cesium.PolylineArrowMaterialProperty(Cesium.Color.fromCssColorString(this.properties.style.color) ), classificationType:Cesium.ClassificationType.S3M_TILE, // 超图线贴地要同时和clampToGround 同时存在 }, });
面的贴地
原生cesium 中
this.polygonEntity = this.viewer.entities.add({ plotType: this.properties.plotBase, plotCode: this.properties.plotCode, polygon: { hierarchy: new Cesium.PolygonHierarchy(this.positions || []), material: Cesium.Color.YELLOW.withAlpha(0.6), classificationType: Cesium.ClassificationType.BOTH, }, });
超图cesium 中
this.polygonEntity = this.viewer.entities.add({ plotType: this.properties.plotBase, plotCode: this.properties.plotCode, polygon: { hierarchy: new Cesium.PolygonHierarchy(this.positions || []), material: Cesium.Color.YELLOW.withAlpha(0.6), classificationType: Cesium.ClassificationType.BOTH, // clampToS3M: true 实在没办法了可以试试这个属性 }, classificationType:Cesium.ClassificationType.S3M_TILE, // 这行是必须要加的,注意是在polygon的外 侧 });
模型的贴地形
addGltfEntity() { this.gltfEntity = this.viewer.entities.add({ type: "GltfPlot", plotCode: this.properties.plotCode, position: this.position, orientation: this.orientation, model: { uri: this.properties.modelUrl, colorBlendMode: Cesium.ColorBlendMode.HIGHLIGHT, color: Cesium.Color.WHITE, //.withAlpha(0.5), scale: this.style.scale, maximumScale: this.style.scale, heightReference: Cesium.HeightReference.CLAMP_TO_GROUND, // 让模型在地形上紧贴 } }); }
三、关于取消超图的log
// 删除超图的log const credit = this.viewer.scene.frameState.creditDisplay credit.container.removeChild(credit._cesiumCreditContainer)
四、 Cesium鼠标事件
鼠标事件
var handler = new Cesium.ScreenSpaceEventHandler(viewer.scene.canvas);
删除事件
handler.removeInputAction(Cesium.ScreenSpaceEventType.LEFT_CLICK);
左键单击事件
handler.setInputAction(function(click){ console.log('左键单击事件'); },Cesium.ScreenSpaceEventType.LEFT_CLICK);
左键双击事件
handler.setInputAction(function(click){ console.log('左键双击事件'); },Cesium.ScreenSpaceEventType.LEFT_DOUBLE_CLICK);
左键按下事件
handler.setInputAction(function(click){ console.log('左键按下事件'); },Cesium.ScreenSpaceEventType.LEFT_DOWN);
左键弹起事件
handler.setInputAction(function(click){ console.log('左键弹起事件'); },Cesium.ScreenSpaceEventType.LEFT_UP);
中键单击事件
handler.setInputAction(function(click){ console.log('中键单击事件'); },Cesium.ScreenSpaceEventType.MIDDLE_CLICK);
中键按下事件
handler.setInputAction(function(click){ console.log('中键按下事件'); },Cesium.ScreenSpaceEventType.MIDDLE_DOWN);
中键弹起事件
handler.setInputAction(function(click){ console.log('中键弹起事件'); },Cesium.ScreenSpaceEventType.MIDDLE_UP);
移动事件
handler.setInputAction(function(movement){ console.log('移动事件'); },Cesium.ScreenSpaceEventType.MOUSE_MOVE);
右键单击事件
handler.setInputAction(function(click){console.log('右键单击事件');},Cesium.ScreenSpaceEventType.RIGHT_CLICK);
右键按下事件
handler.setInputAction(function(click){ console.log('右键按下事件'); },Cesium.ScreenSpaceEventType.RIGHT_DOWN);
右键弹起事件
handler.setInputAction(function(click){ console.log('右键弹起事件'); },Cesium.ScreenSpaceEventType.RIGHT_UP);
滚轮事件
handler.setInputAction(function(wheelment){ console.log('滚轮事件'); },Cesium.ScreenSpaceEventType.WHEEL);
五、Cesium 中的pick
在cesium中,想获取不同的对象,需要通过pick方法来进行拾取,但是Cesium中有多种pick的方法,例如 scene中有 pick、pickPosition、及drillPick等,camera中有getPickRay、pickEllipsoid等,globel中有pick;
先来分类说一下各个pick的作用:
scene中(一般用来获取entity对象):
pick : scene.pick 可 以 通 过 此 方 法 获 取 到 pick 对 象 , 通 过 pick.id 即 可 拾 取 当 前 的 entity 对 象 , 也 可 以 获 取 Cesium3DTileFeature 对象;
drillPick:scene.drillPick(click.position)是从当前鼠标点击位置获取entity的集合,然后通过for循环可以获取当前坐标 下的所有entity;
pickPosition:通过viewer.scene.pickPosition(movement.position)获取,可以获取场中任意点击处的对应的世界坐标。 (高程不精确)
pick与drillPick的区别:pick只可获取一个entity对象(如该位置存在多个entity,哪怕面点线不在同一高度,面entity 都可能会盖住点线entity),但drillPick可获取当前坐标下的多个对象;
camera和globel中的pick:
这两个里面的pick一般搭配使用,通过camera中的getPickRay获取ray(射线),然后通过globel中的pick方法,获取 世界坐标,如下面的地形坐标的获取;
1、通过pick进行地形上的坐标的获取
这个是常用的方法,当你想获取当前鼠标位置的三维坐标时,经常使用到这个方法:
第一步:通过camera的getPickRay,将当前的屏幕坐标转为ray(射线);
viewer.camera.getPickRay(windowCoordinates);
第二步:找出ray和地形的交点,即可求出三维世界坐标
globe.pick(ray, scene);
2、通过pick获取entity
viewer.entities.add({ id:'id', position: Cesium.Cartesian3.fromDegrees(103.0, 40.0), name: 'Red ellipse on surface with outline', ellipse: { semiMinorAxis: 250000.0, semiMajorAxis: 400000.0, height: 200000.0, extrudedHeight: 400000.0, fill: true, material: Cesium.Color.RED.withAlpha(0.5), outline: true, //必须设置height,否则ouline无法显示 outlineColor: Cesium.Color.BLUE.withAlpha(0.5), outlineWidth: 10.0//windows系统下不能设置固定为1 } }); var handler = new Cesium.ScreenSpaceEventHandler(viewer.scene.canvas); handler.setInputAction(function (movement) { var pick = viewer.scene.pick(movement.position); if (Cesium.defined(pick) && (pick.id.id === 'id')) { .... } }, Cesium.ScreenSpaceEventType.LEFT_CLICK);
六、Cesium的坐标拾取
首先,Cesium 中的坐标可分为两种情况:二维和三维,三维又有地形和模型之分;
1、二维坐标,获取椭球体表面的经纬度坐标:
var handler = new Cesium.ScreenSpaceEventHandler(scene.canvas); handler.setInputAction(function(evt) { var cartesian=viewer.camera.pickEllipsoid(evt.position,viewer.scene.globe.ellipsoid); var cartographic=Cesium.Cartographic.fromCartesian(cartesian); var lng=Cesium.Math.toDegrees(cartographic.longitude);//经度值 var lat=Cesium.Math.toDegrees(cartographic.latitude);//纬度值 var mapPosition={x:lng,y:lat,z:cartographic.height};//cartographic.height的值始终为零。 }, Cesium.ScreenSpaceEventType.LEFT_CLICK);
2、三维坐标,获取地形表面的经纬度高程坐标:
方法一
var handler = new Cesium.ScreenSpaceEventHandler(scene.canvas); handler.setInputAction(function(evt) { var ray=viewer.camera.getPickRay(evt.position); var cartesian=viewer.scene.globe.pick(ray,viewer.scene); var cartographic=Cesium.Cartographic.fromCartesian(cartesian); var lng=Cesium.Math.toDegrees(cartographic.longitude);//经度值 var lat=Cesium.Math.toDegrees(cartographic.latitude);//纬度值 var mapPosition={x:lng,y:lat,z:cartographic.height};//cartographic.height的值为地形高度。 }, Cesium.ScreenSpaceEventType.LEFT_CLICK);
方法二
var handler = new Cesium.ScreenSpaceEventHandler(scene.canvas); handler.setInputAction(function(evt) { var ray=viewer.camera.getPickRay(evt.position); var cartesian=viewer.scene.globe.pick(ray,viewer.scene); var cartographic=Cesium.Cartographic.fromCartesian(cartesian); var lng=Cesium.Math.toDegrees(cartographic.longitude);//经度值 var lat=Cesium.Math.toDegrees(cartographic.latitude);//纬度值 //height结果与cartographic.height相差无几,注意:cartographic.height可以为0,也就是说,可以根据经 纬度计算出高程。 var height=viewer.scene.globe.getHeight(cartographic); var mapPosition={x:lng,y:lat,z:height.height};//height的值为地形高度。 }, Cesium.ScreenSpaceEventType.LEFT_CLICK);
3、三维坐标,获取模型表面的经纬度高程坐标(此方法借鉴于官方示例):
var handler = new Cesium.ScreenSpaceEventHandler(scene.canvas); handler.setInputAction(function(evt) { var scene = viewer.scene; if (scene.mode !== Cesium.SceneMode.MORPHING) { var pickedObject = scene.pick(evt.position); if (scene.pickPositionSupported && Cesium.defined(pickedObject) && pickedObject.node) { var cartesian = viewer.scene.pickPosition(evt.position); if (Cesium.defined(cartesian)) { var cartographic = Cesium.Cartographic.fromCartesian(cartesian); var lng = Cesium.Math.toDegrees(cartographic.longitude); var lat = Cesium.Math.toDegrees(cartographic.latitude); var height = cartographic.height;//模型高度 mapPosition={x:lng,y:lat,z:height} } } } }, Cesium.ScreenSpaceEventType.LEFT_CLICK);
pickEllipsoid和pickPosition的区别
pickEllipsoid在加载地形的情况下有一定误差,地形凹凸程度越大,误差越大。 pickPosition 在 depthTestAgainstTerrain=false 时 只 能 在 3DTile 上 获 取 准 确 位 置 , 当 depthTestAgainstTerrain=true 时,在3DTile和底图上均能获取准确位置,但如果非3DtTile且未开地形 深度检测则会报错,包括3DTile加载异常情况
viewer.scene.globe.depthTestAgainstTerrain = true; var earthPosition = viewer.scene.pickPosition(event.position);
七、Cesium中的Entity
BillboardGraphics
BillboardGraphics类是隶属于实体对象的一个类型,从字面意思能够理解,广告牌,其实就是一张图片,图片方向 始终朝向用户,不随着三维球的旋转而改变图片的朝向。我们经常在使用标注点图标的时候使用到这个类型,效果
如下图所示:
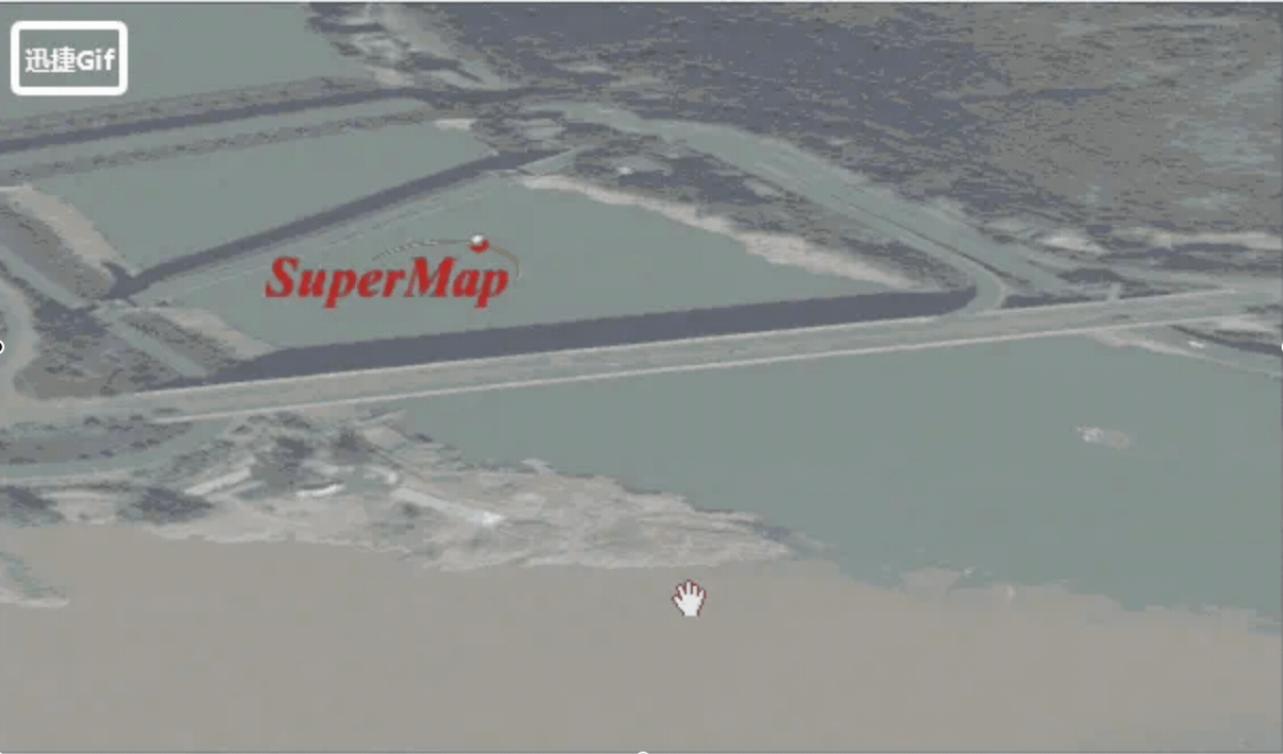
基础使用方法如下,我们添加了一个简单的Billboard
viewer.entities.add({ id: "test", position: Cesium.Cartesian3.fromDegrees(101.80089882736969, 26.60700234866561, 20), billboard: { image: 'data/logo.png', } });
一、主要参数介绍
1、image:必须设置,这个是Billboard需要显示的广告牌图片,可以是本地图片、在线图片链接或者是Canvas,需 要注意不支持gif动图。
2、scale:用于控制广告牌的显示缩放比例,默认是1.0
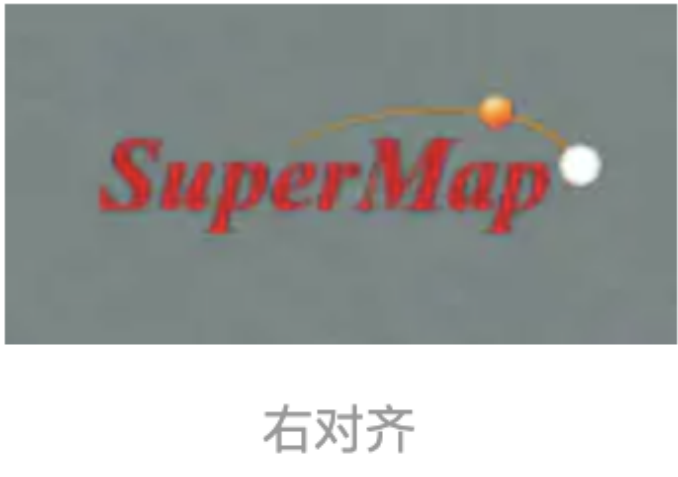
3、 horizontalOrigin :广告牌的水平对齐方式,默认是 Cesium.HorizontalOrigin.CENTER (水平居
中),也可以设置为 Cesium.HorizontalOrigin.LEFT/Cesium.HorizontalOrigin.RIGHT ,我们添加一个白色
参照点,右对齐效果如图所示
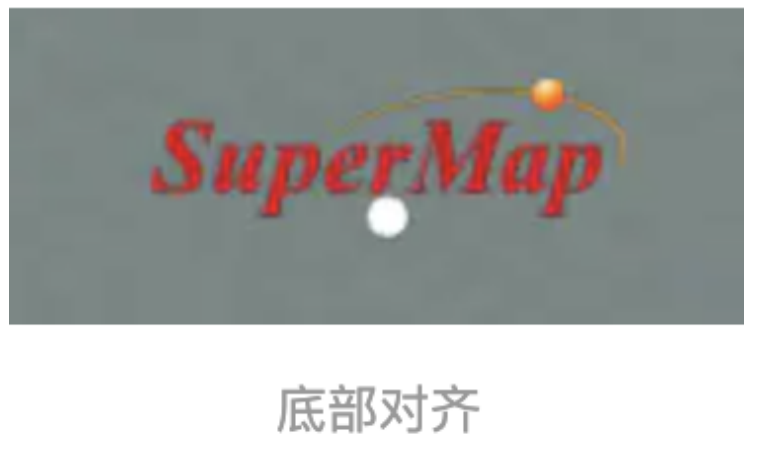
4、 verticalOrigin :广告牌的垂直对齐方式,默认 VerticalOrigin.CENTER (垂直居中),也可以设置为
Cesium.VerticalOrigin.BOTTOM / Cesium.VerticalOrigin.TOP /Cesium.VerticalOrigin.BASELINE ,
我们依然添加一个白色的参照点,底部对齐效果如下所示:
这里多介绍下 Cesium.VerticalOrigin.BASELINE ,这个文档解释说"如果对象包含文本,则原点位于文本的基
线处,否则原点位于对象的底部。"经过测试这个和 Cesium.VerticalOrigin.BOTTOM 效果一致,没有特别的变
化。
5、 eyeOffset :广告牌相对用户观察位置偏移,是一个Cartesian3类型,X和Y分量分别表示水平方向和垂直方向
的偏移,那么Z分量是什么,Z分量是指的相当用户观察位置的射线偏移位置,来对比下。我们将 eyeOffset 设置
为 new Cesium.Cartesian3(0,0,10)
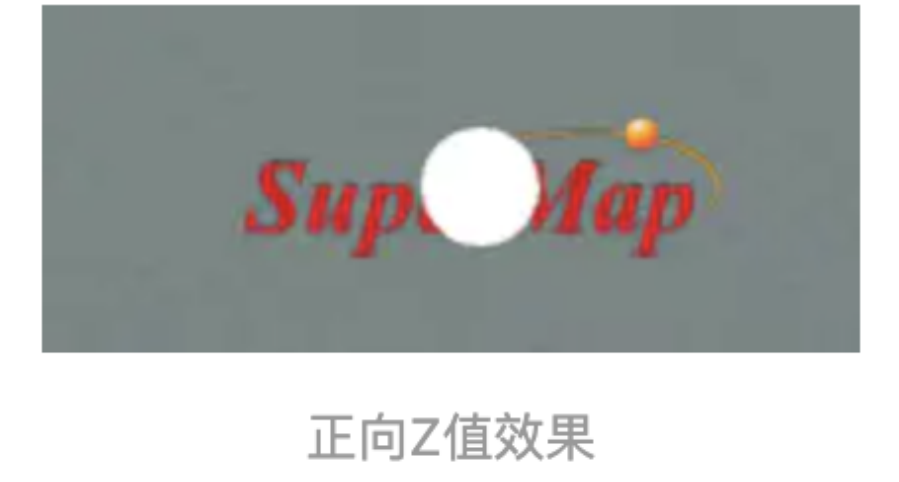
我们将 eyeOffset 设置为 new Cesium.Cartesian3(0,0,-10)
注意观察白色点对广告牌的遮蔽效果,由此说明Z分量是由屏幕和用户观察位置形成的射线方向。
6、 pixelOffset :广告牌在场景中的像素偏移,是一个 Cartesian2 类型,可以设置XY分量,也是水平方向
和垂直方向的偏移,但是区别于 eyeOffset 的XY分量
7、 rotation :广告牌的旋转参数值,一个数值类型,此处需要注意的是需要设置一个弧度值,如果是度的话需要进行转换,转换方式:弧度= π/180×角度
8、 alignedAxis :相当于是广告牌的基点位置。
9、 width/height :广告牌的宽高属性,以像素为单位,这个会改变默认图片的大小。
10、 color :设置广告牌的颜色属性,这个颜色和图片本身的颜色将进行混合显示,如果我们希望设置广告牌的 透明度,也可以通过这个参数进行设置,如: color:new Cesium.Color(1,1,1,0.5) ,这样透明度设置为了 0.5
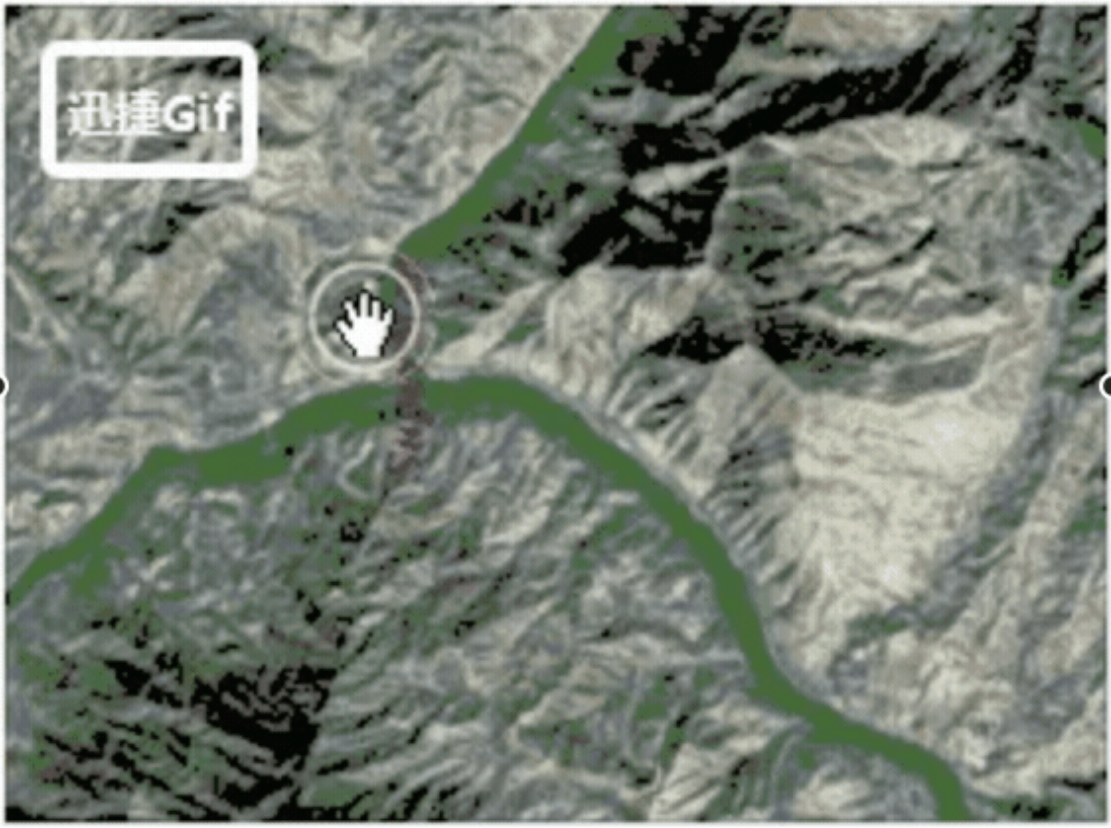
11、 scaleByDistance :设置基于相机距离的广告牌大小,也就是说可以根据不同的相机高度来设置广告牌的
不同大小,一个NearFarScalar类型,比如我设置 scaleByDistance为new Cesium.NearFarScalar(1500, 3,50000, 0.5)
效果如下:
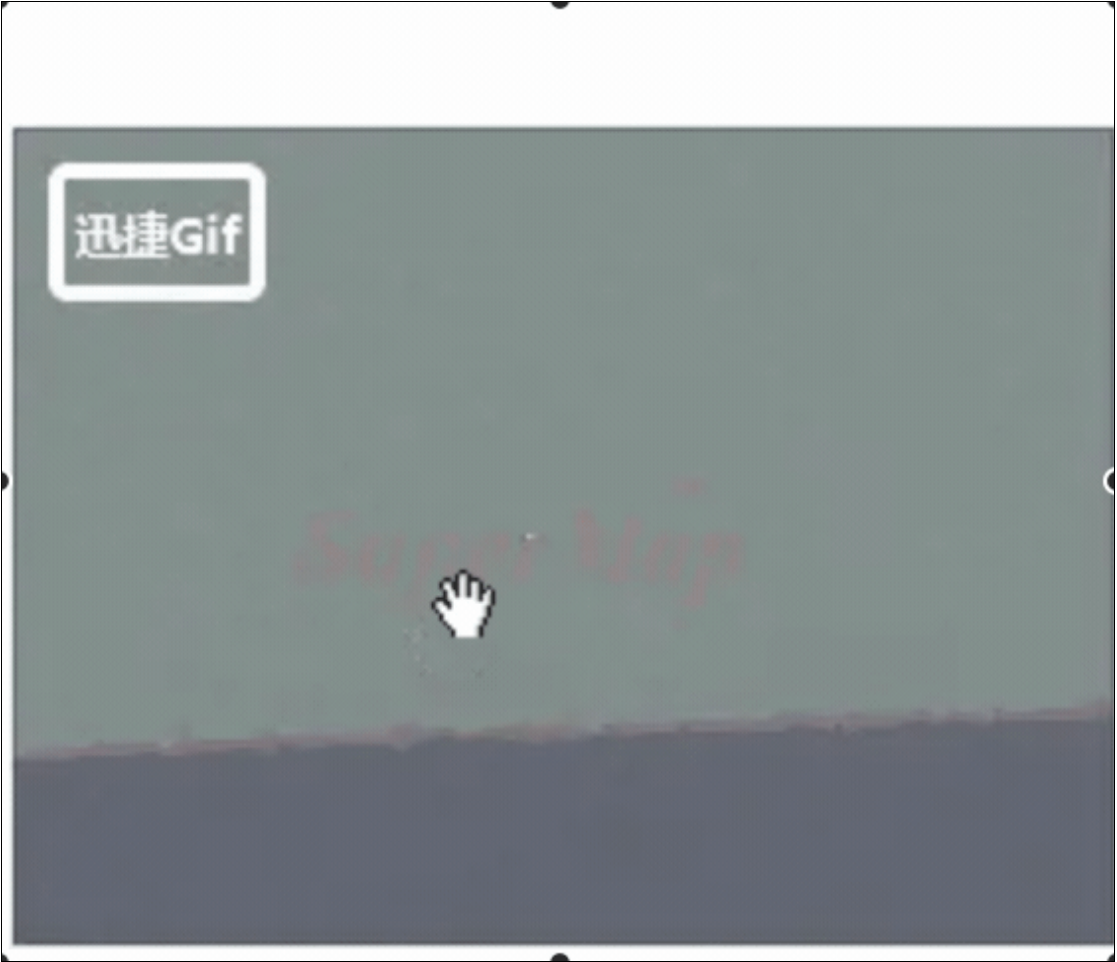
12、 translucencyByDistance :设置基于相机距离的广告牌透明度,也就是说可以根据不同的相机高度来设置
广 告 牌 的 透 明 度 , 一 个 NearFarScalar 类 型 , 比 如 我 设 置 scaleByDistance 为 new
Cesium.NearFarScalar(1500, 0.1, 8000, 1)
效果如下:
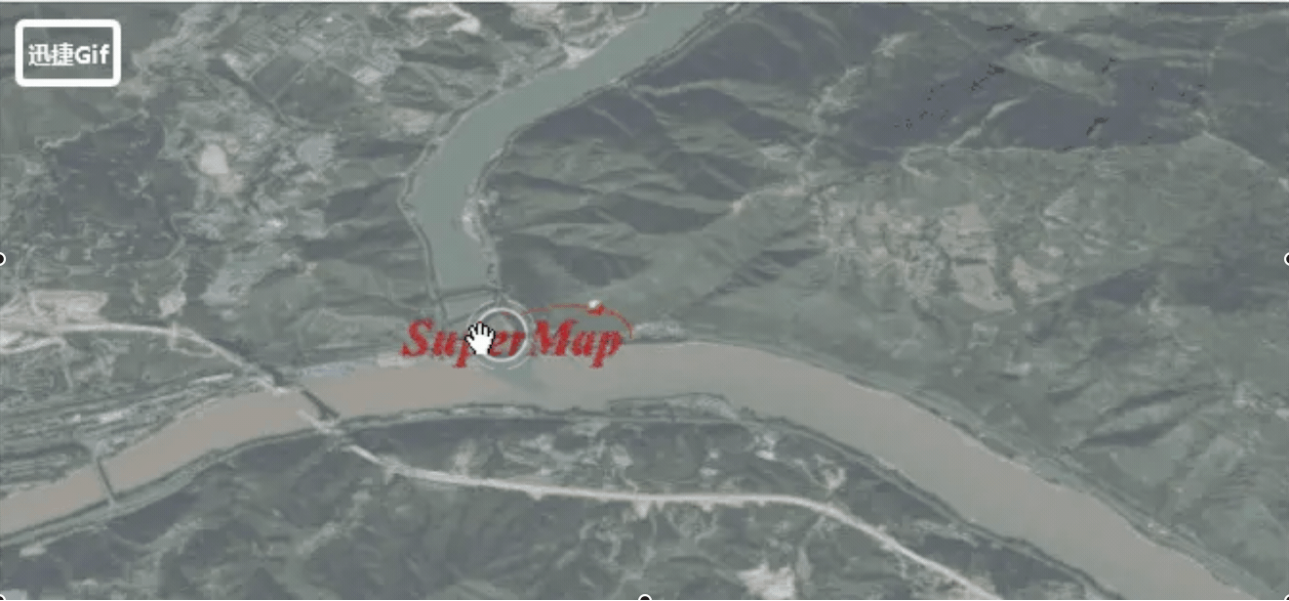
13、 pixelOffsetScaleByDistance :设置基于相机距离的像素偏移缩放倍数,需要配合pixelOffset属性一起进
行使用,如果 pixelOffset 没有设置则该属性设置无效,例如我们进行如下设置:
pixelOffset:new Cesium.Cartesian2(20,0), pixelOffsetScaleByDistance:new Cesium.NearFarScalar(1500, 20, 8000, 1)
效果如下,注意观察白色点和图片的位置变化关系:
14、 sizeInMeters :一个布尔属性,指定此广告牌的大小是否应以米为单位。设置此参数为true后,广告牌将随
场景的缩放而缩放,效果如下:
15 、 heightReference : 高 度 模 式 , 支 持 Cesium.HeightReference.NONE ( 绝 对 高 度 ) 、
Cesium.HeightReference.RELATIVE_TO_GROUND ( 相 对 地 面 ) 、
Cesium.HeightReference.CLAMP_TO_GROUND (贴地)三种高度模式,高度模式通过字面意思理解即可。
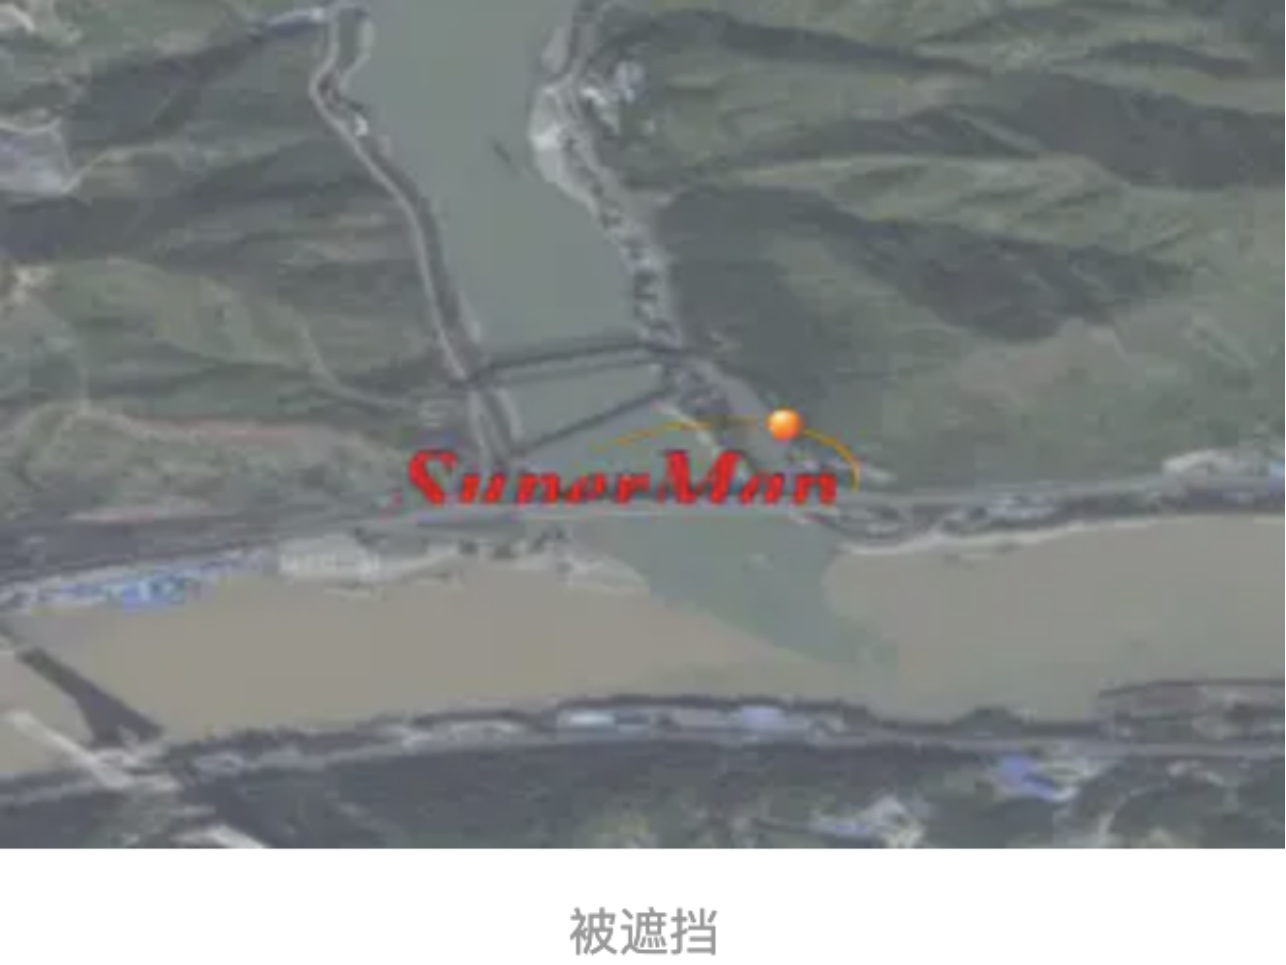
16、 disableDepthTestDistance :指定从相机到禁用深度测试的距离,关于深度测试我们将在后面的文章中介
绍到,由于深度测试的存在,我们的对象很多时候会被地形挡住,如下:
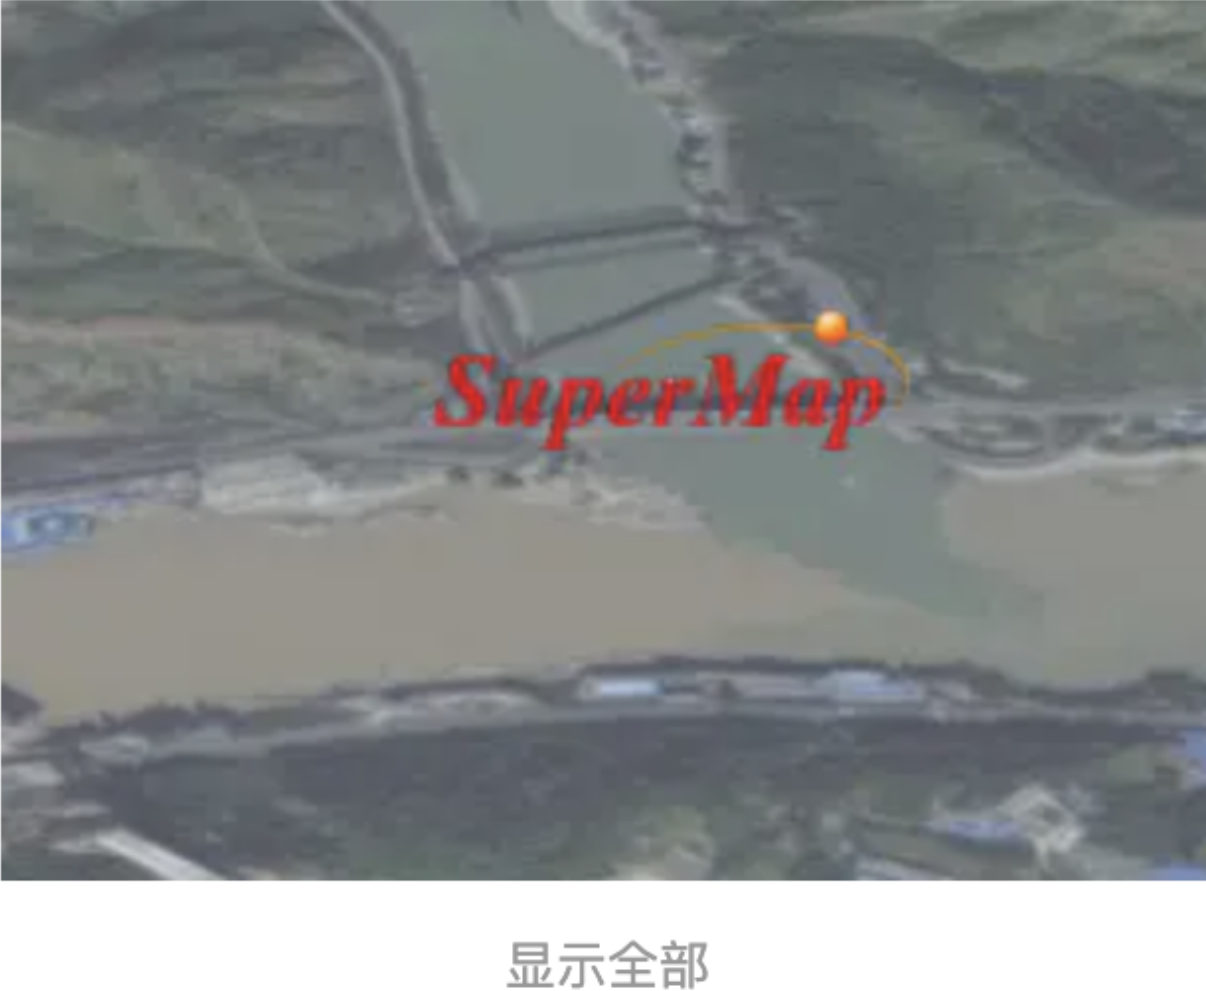
我们设置 disableDepthTestDistance 后,比如我们设置 disableDepthTestDistance:50000 ,对象即可在
高度50000下不再受深度的影响而显示
主要的参数就介绍到此。
二、使用方法
BillboardGraphics 隶属于Entity大类,操作当然全部在EntityCollection中进行操作,接下来我们来一步一步的
实现。
1、添加 BillboardGraphics
我们使用 viewer.entities.add 方法进行添加
添加对象有几个必填参数id(对象的唯一标识符。如果没有提供,则生成GUID,所以建议自己添加)、 position 、 billboard
viewer.entities.add({ id: "test", position: Cesium.Cartesian3.fromDegrees(101.80089882736969, 26.60700234866561, 20), billboard: { image: 'data/logo.png', } });
这样即可添加一个 BillboardGraphics ,其他参数可以按照上一步介绍到的参数进行按需添加
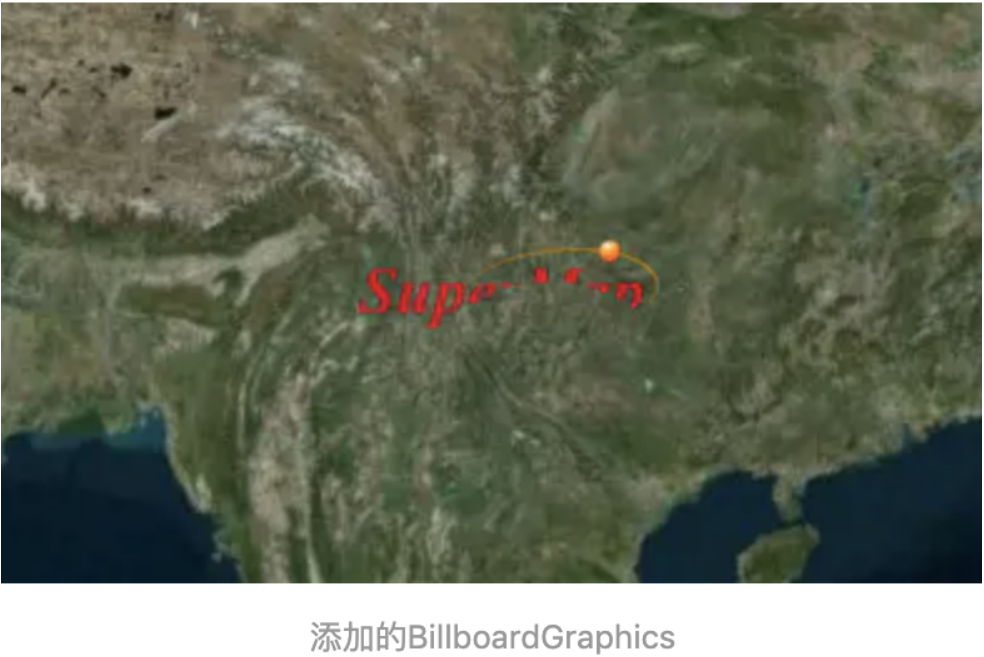
那么问题来了,有没有发现一个问题,广告牌被地球挡住了,如何解决这个问题,这个就涉及到我们说的深度测
试,我们可以设置disableDepthTestDistance值来解决,
如下
viewer.entities.add({ id: "test", position: Cesium.Cartesian3.fromDegrees(101.80089882736969, 26.60700234866561, 20), billboard: { image: 'data/logo.png', disableDepthTestDistance:Number.POSITIVE_INFINITY//返回正无穷大 } });
或者设置 viewer.scene.globe.depthTestAgainstTerrain=false 取消深度测试
viewer.scene.globe.depthTestAgainstTerrain=false; viewer.entities.add({ id: "test", position: Cesium.Cartesian3.fromDegrees(101.80089882736969, 26.60700234866561, 20), billboard: { image: 'data/logo.png' } });
都可以达到效果
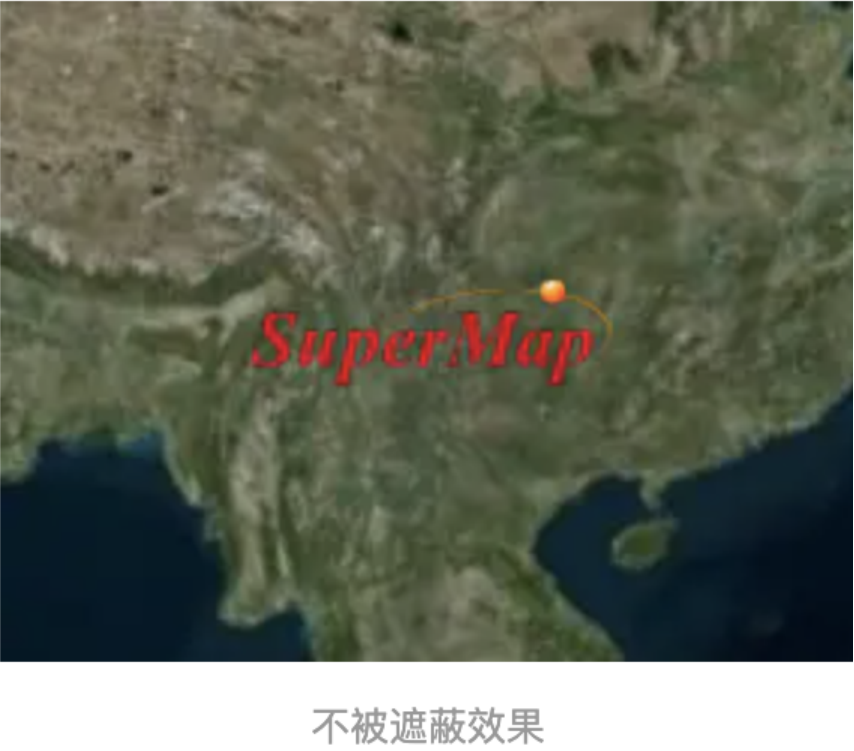
2、定位 BillboardGraphics
我们添加的对象,范围太大时不容易被找到,如何进行定位呢?
我们可以使用viewer.flyTo飞向广告牌,但是我们首先需要找到这个 BillboardGraphics ,才能使用flyTo方法,
我们使用 viewer.entities.getById 方法获取到对象,这个就是为什么添加的时候建议自己添加ID,以下代码就
能直接飞到添加的广告牌
viewer.flyTo(viewer.entities.getById("test"));
3、判断BillboardGraphics是否已存在,可以使用viewer.entities.contains方法进行判断。
4、移除对象我们可以使用viewer.entities.remove或viewer.entities.removeById方法进行移除。
三、综合使用
我们添加一个BillboardGraphics,并且让他随时间逐渐放大变化,并飞向这个对象。
代码如下:
function onload(Cesium) { var viewer = new Cesium.Viewer('cesiumContainer'); viewer.imageryLayers.addImageryProvider( new Cesium.BingMapsImageryProvider({ url: "https://dev.virtualearth.net", mapStyle: Cesium.BingMapsStyle.AERIAL, key: "BingMaps的KEY" }) ); var clock = viewer.cesiumWidget.clock; clock.currentTime = Cesium.JulianDate.fromIso8601('2019-01-01T00:00:00.00Z'); var property = new Cesium.SampledProperty(Number); property.addSample(Cesium.JulianDate.fromIso8601('2019-01-01T00:00:00.00Z'), 1); property.addSample(Cesium.JulianDate.fromIso8601('2019-01-01T00:00:10.00Z'), 5); viewer.entities.add({ id: "test", position: Cesium.Cartesian3.fromDegrees(101.80089882736969, 26.60700234866561, 20), billboard: { image: 'data/logo.png', scale: property, disableDepthTestDistance: Number.POSITIVE_INFINITY } }); viewer.flyTo(viewer.entities.getById("test")); }
效果如下:
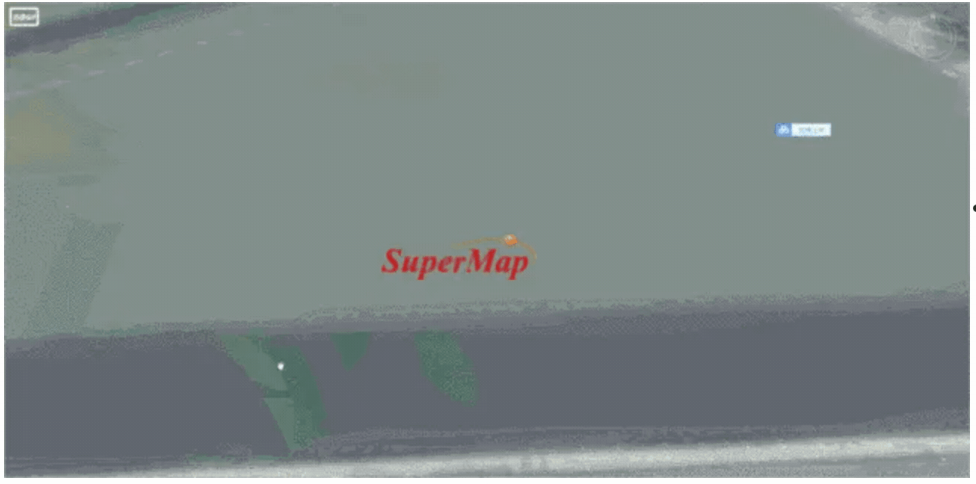
里面使用到了property的相关接口,后续文章中会介绍使用方法。
ModelGraphics
ModelGraphics类是隶属于实体对象的一个类型,主要用于创建模型图形,加载的gltf模型数据,和前面说到的广告 牌类似,只不过这里添加的模型数据。
关于gltf模型数据的制作,请参考前面的博客SuperMap iClient3D for WebGL教程(模型篇)-S3M/GLTF制作
添加的效果如下图
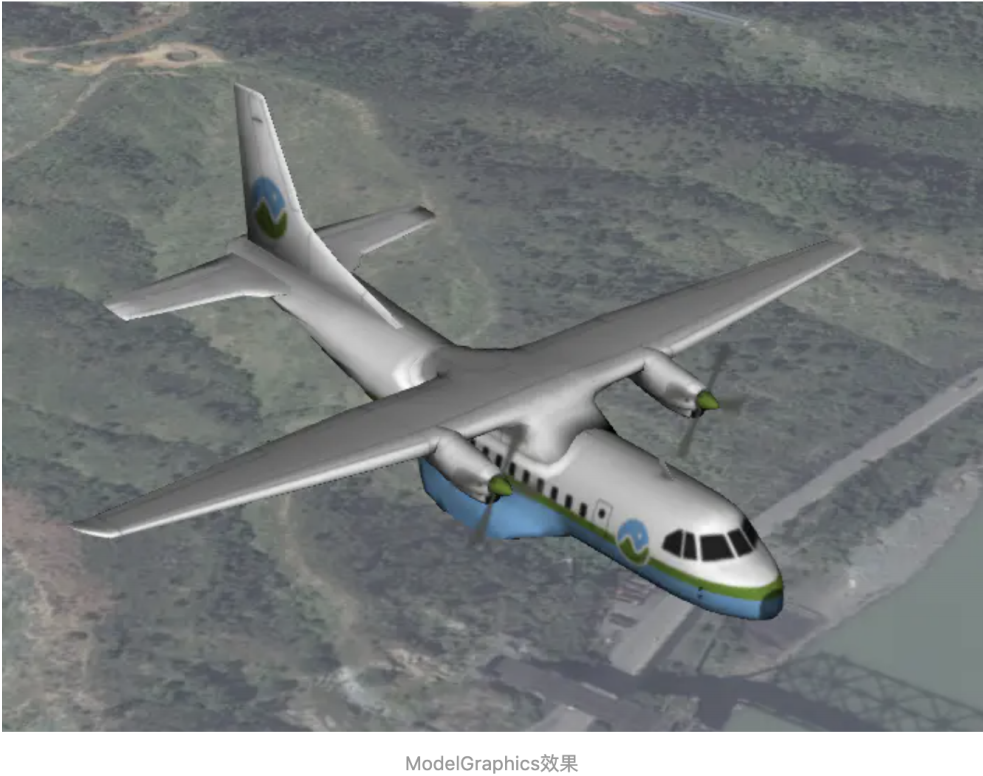
基础使用方法如下:
viewer.entities.add({ id: "test", position: Cesium.Cartesian3.fromDegrees(101.80089882736969, 26.60700234866561, 200), model: { uri: 'data/Cesium_Air.gltf' } });
接下来我们一起来学习下ModelGraphics的特点。
一、主要参数介绍
1、 uri :一个gltf的地址属性,可以是本地数据,也可以是在线数据。
2、 show :指定模型是否显示出来。
3、 scale :指定模型的缩放比例
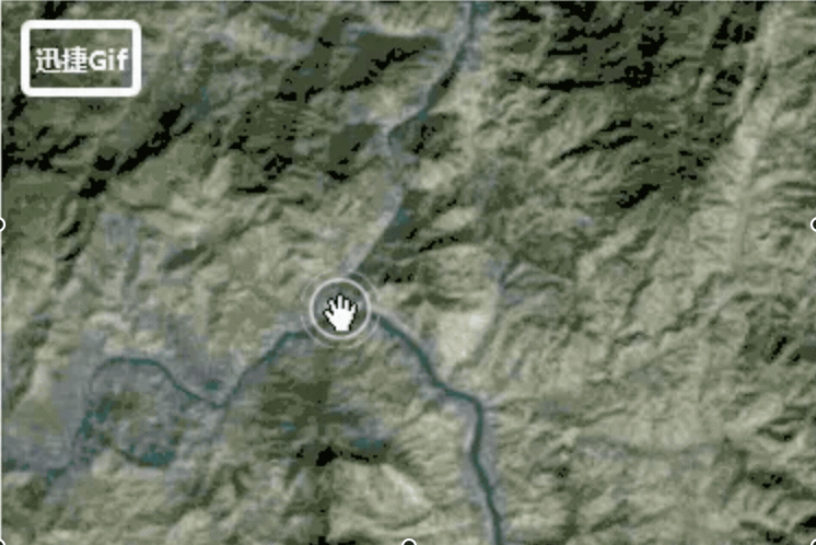
4、 minimumPixelSize :指定模型缩小到多少像素后,不再能被缩小,默认值是0,就是能被无限缩小。例如将
值设为200,不断缩小场景,我们依然可以看见一个大小不变化的飞机模型。
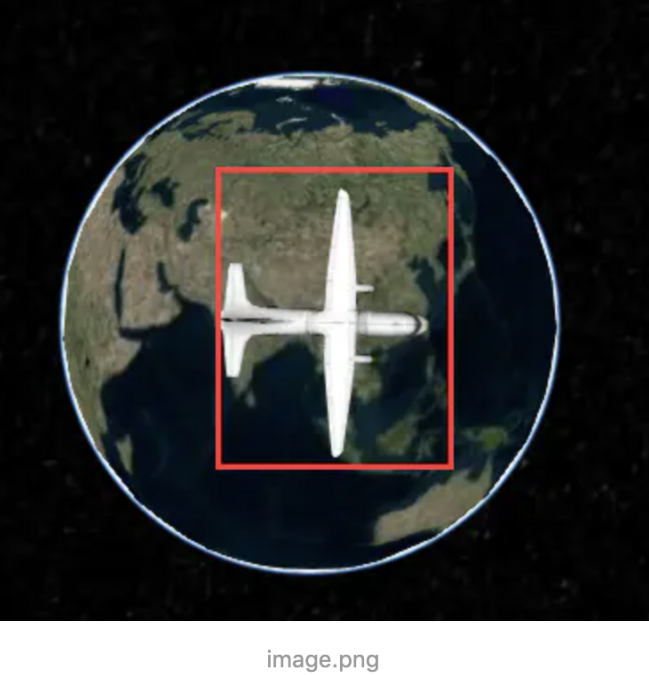
5、 maximumScale :模型的最大比例尺寸,指定此属性后minimumPixelSize将不能持续被放大,当超过
maximumScale 后,模型能够被缩小;并且 minimumPixelSize 是 maximumScale 能放大到的最大尺寸,是不
是比较晕乎,来看个动图,我们将 maximumScale 设置为50, minimumPixelSize 设置为200,注意观察中间过
程,中间是否有个过程不能再被缩小,当放大一定程度后就可以被持续缩小了
6、 incrementallyLoadTextures :官方介绍是设置在加载模型后纹理是否可以继续流入,默认是true,据说是
在动态修改贴图的时候使用的,目前没有用过,用到的时候再来更新。
7、 runAnimations :指定是否应该启动模型中指定的gltf动画,默认是true,当设置为false时,gltf动画模型默认
不启动动画。
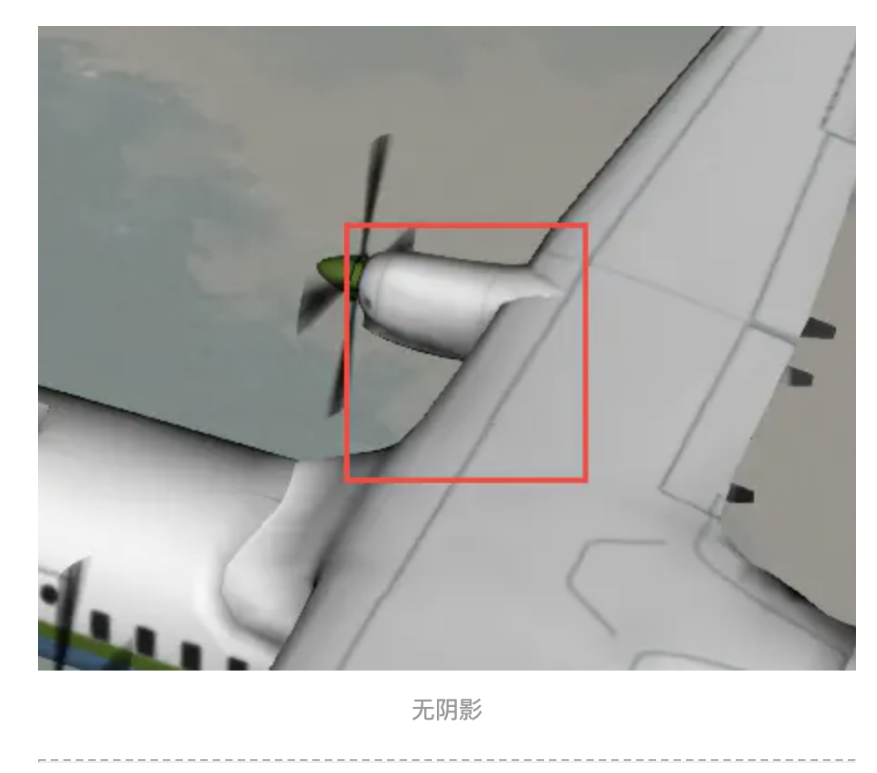
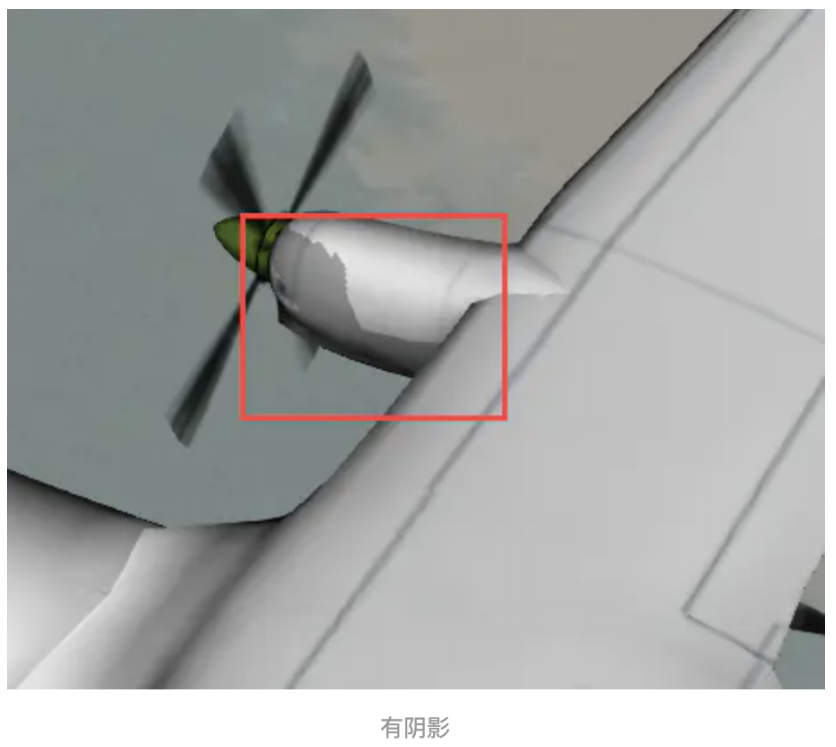
8、shadows:模型的阴影方式,当 viewer 的 shadows 为true时有效,有阴影的模型将更加具有立体感。
9 、 heightReference : 高 度 模 式 , 支 持 Cesium.HeightReference.NONE ( 绝 对 高 度 ) 、
Cesium.HeightReference.RELATIVE_TO_GROUND ( 相 对 地 面 ) 、
Cesium.HeightReference.CLAMP_TO_GROUND (贴地)三种高度模式,高度模式通过字面意思理解即可。
10 、 distanceDisplayCondition : 即 是 控 制 模 型 在 什 么 相 机 位 置 下 显 示 出 来 。 例 如 设 置
distanceDisplayCondition:new Cesium.DistanceDisplayCondition(1500,5000) , 即 是 在 相 机 距 离
1500-5000的位置范围内显示,其他范围模型都不显示。
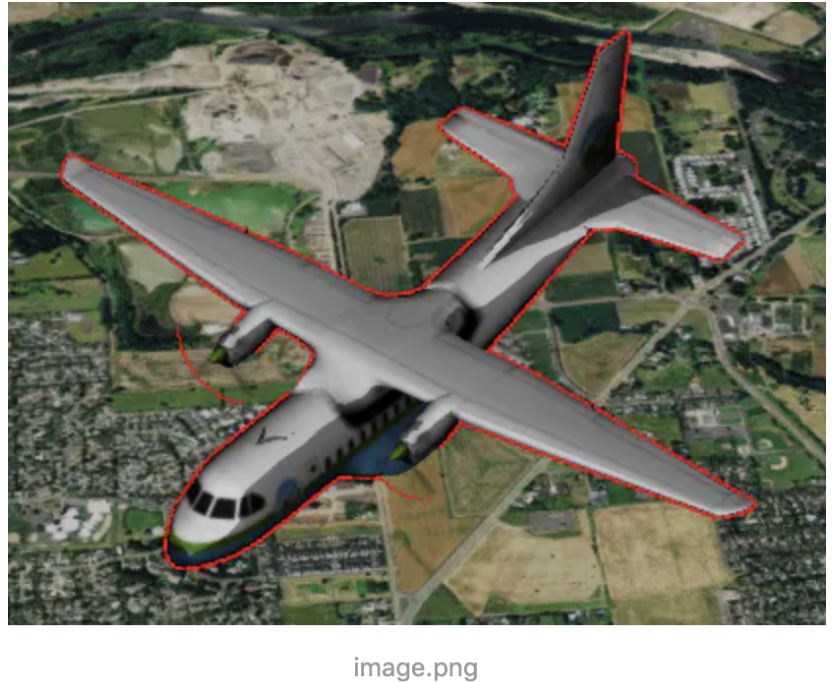
11、 silhouetteColor :模型的轮廓颜色,默认为红色,需要配合 silhouetteSize 使用才会有效果,
silhouetteSize 为轮廓的像素宽度,我们将 silhouetteSize 设置为2.0展现出如下效果:
12、 color :指定Color与模型的渲染颜色混合的属性,默认为白色,即没有任何颜色,显示模型本色。
13、 colorBlendMode :模型的颜色混合模式,支持3种, Cesium.ColorBlendMode.REPLACE (替换模
式)、 Cesium.ColorBlendMode.MIX (混合模式)、 Cesium.ColorBlendMode.HIGHLIGHT (相乘模式),
我们将模型的渲染颜色设置为 new Cesium.Color(1,0,0,1) 红色,来看下三种模式的区别
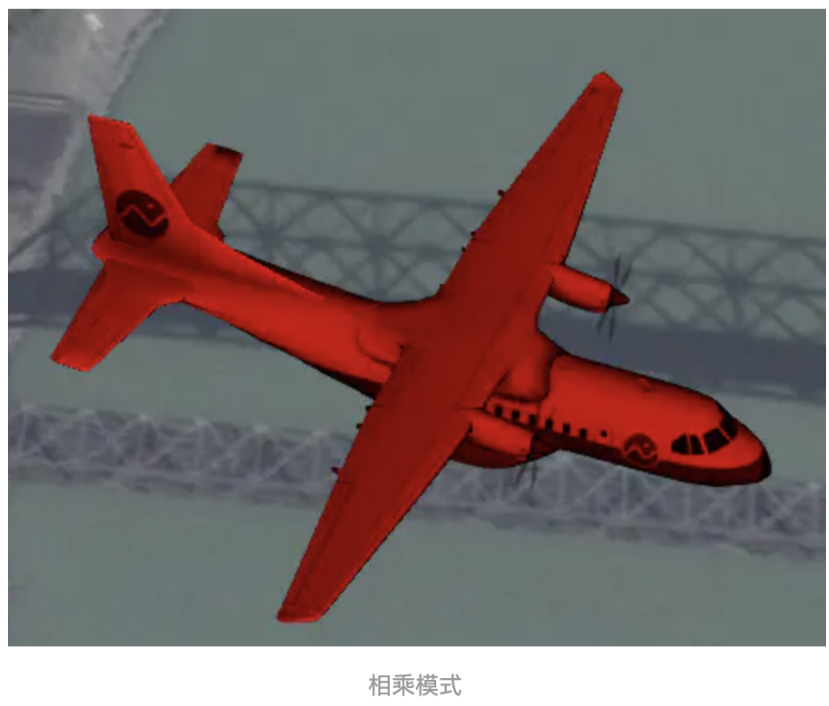
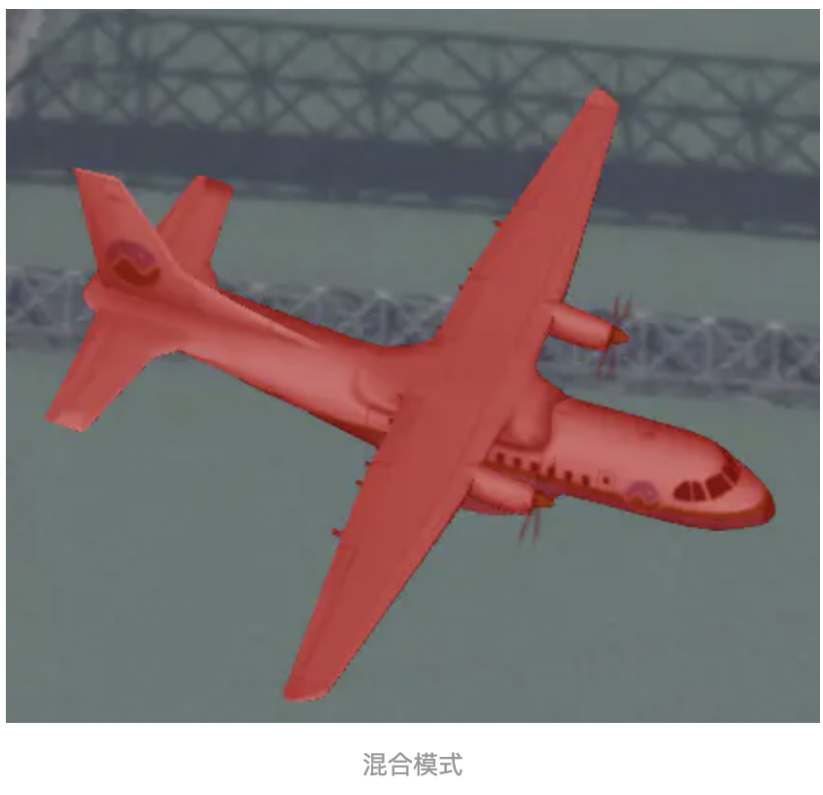
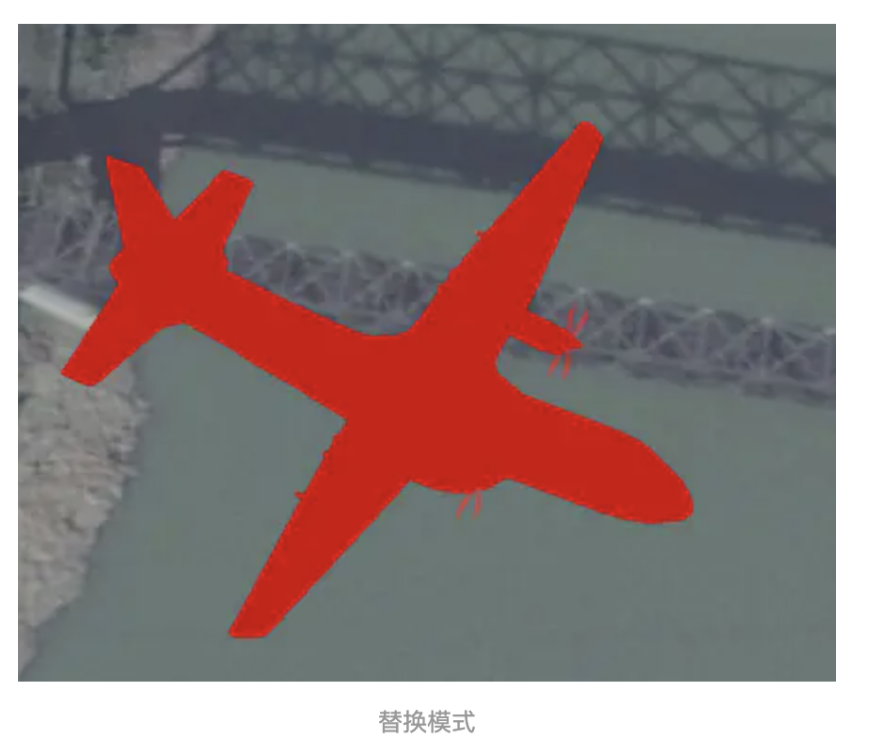
14、 colorBlendAmount :混合模式的强度值,当colorBlendMode为Cesium.ColorBlendMode.MIX时有效,范围0- 1,0表示不和颜色混合,1则表示替换。
主要的参数就介绍到此
二、使用方法
ModelGraphics隶属于Entity大类,操作当然全部在EntityCollection中进行操作,接下来我们来一步一步的实现。
1、添加ModelGraphics
我们使用viewer.entities.add方法进行添加
添加对象有几个必填参数id(对象的唯一标识符。如果没有提供,则生成GUID,所以建议自己添加)position、 model
viewer.entities.add({ id: "test", position: Cesium.Cartesian3.fromDegrees(101.80089882736969, 26.60700234866561, 200), model: { uri: 'data/Cesium_Air.gltf', } });
这样即可添加一个ModelGraphics,其他参数可以按照上一步介绍到的参数进行按需添加。
我们对模型数据,这里多介绍一个参数orientation,也就是实体的方向属性,我们添加完模型后,如果方向不对可以 使用这个方法进行调整模型方向,关于方向我们需要使用到 Cesium.HeadingPitchRoll 这个类型
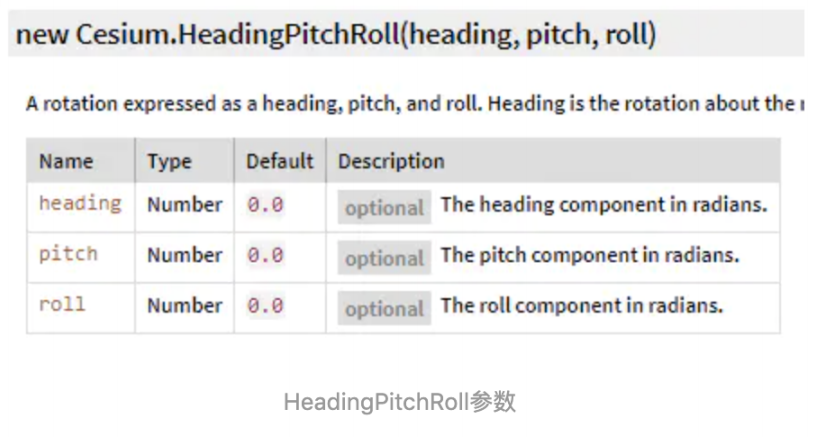
首先来了解下Heading、Pitch、Roll三个参数。
Heading:即是Z轴方向的旋转角,比如调整飞机机头的东南西北的方向。
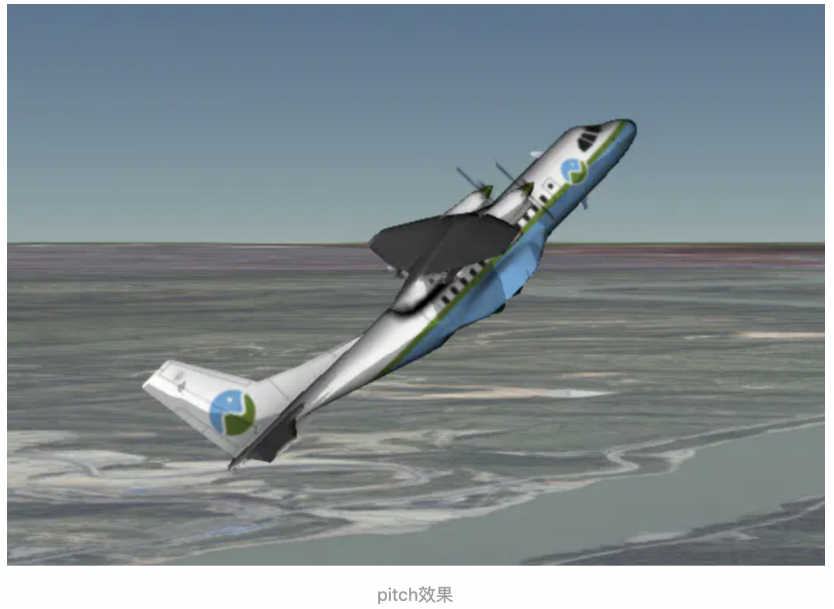
pitch:对象上下的旋转,比如调整飞机机头向上,还是向下的方向。
roll:对象中轴线上的旋转,比如调整飞机向左倾斜还是向右倾斜。
我们设置Heading为45°
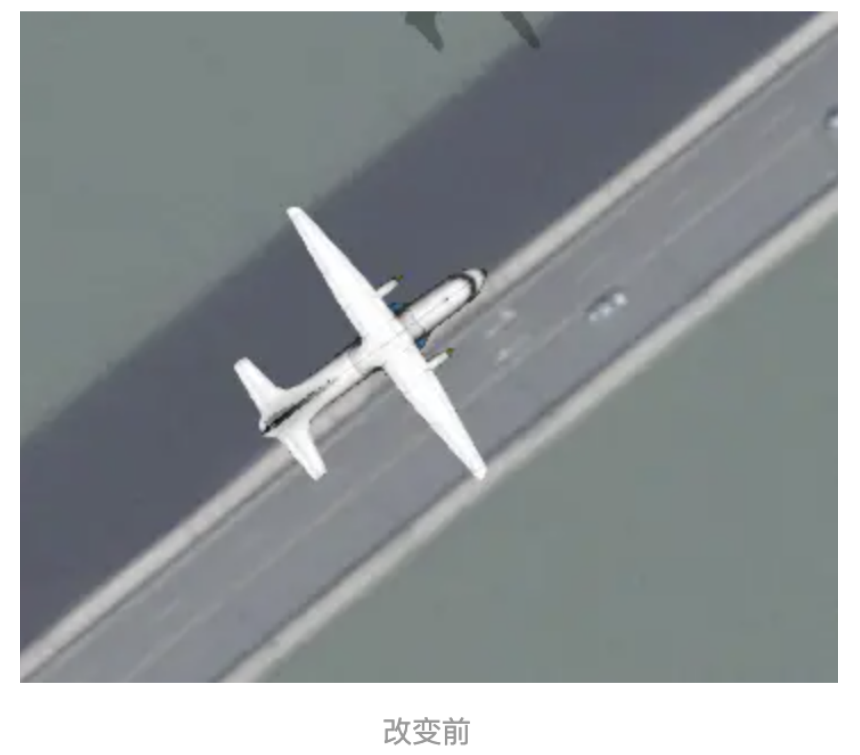
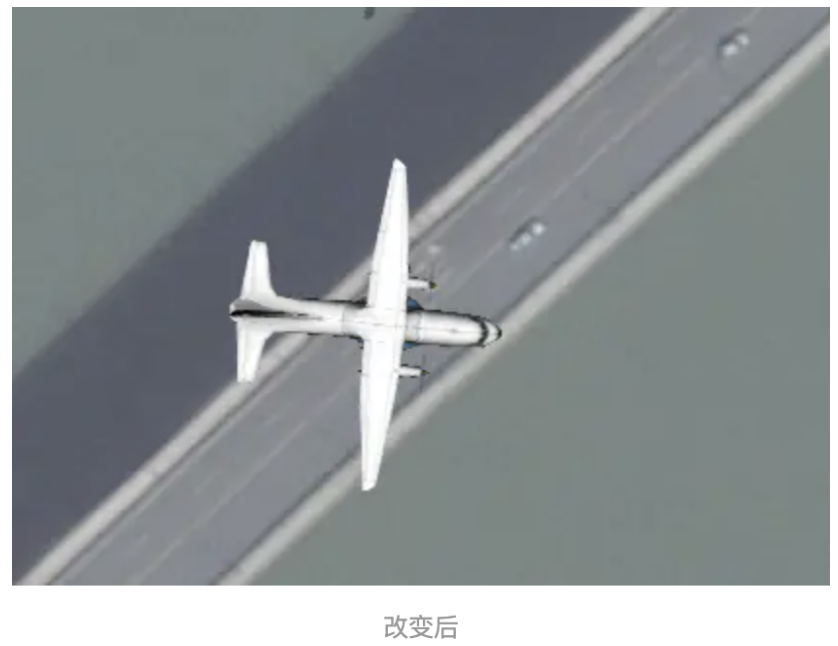
实现代码如下:
var position=Cesium.Cartesian3.fromDegrees(101.80089882736969, 26.60700234866561, 200) var airmodel=viewer.entities.getById("test"); var headingPitchRoll=new Cesium.HeadingPitchRoll(Cesium.Math.toRadians(45),0,0); var orientation=Cesium.Transforms.headingPitchRollQuaternion(position,headingPitchRoll); airmodel.orientation=orientation;
设置pitch为45°,像不像一只飞翔的小鸟?
三、综合使用
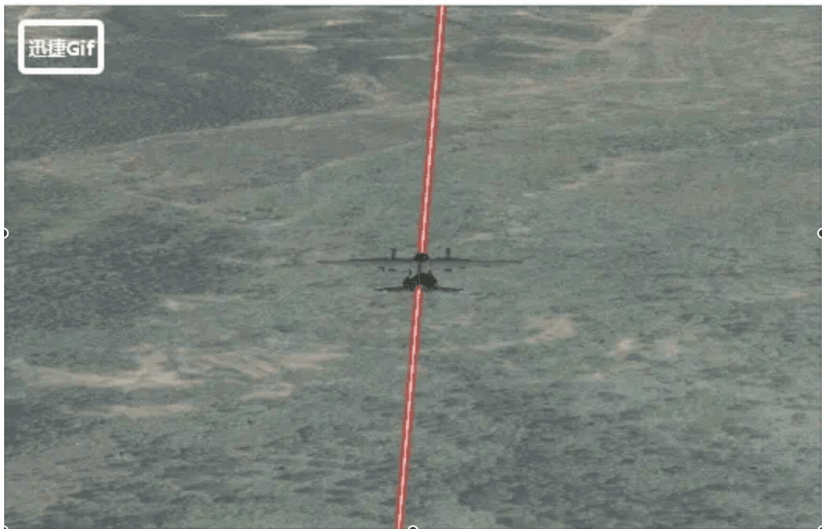
这里引入一个entity里面的新类型path,与实体关联的路径对象,和SampledPositionProperty属性,这里我们添加一个 沿线飞行的飞机。path类型和SampledPositionProperty类型后续文章会讲到
代码如下:
var startTime = viewer.clock.currentTime; var positions = new Cesium.SampledPositionProperty(); positions.addSample(startTime, Cesium.Cartesian3.fromDegrees(101.80089882736969, 26.60700234866561, 200)); var stopTime = Cesium.JulianDate.addSeconds(startTime, 60, new Cesium.JulianDate()); positions.addSample(stopTime, Cesium.Cartesian3.fromDegrees(101.88089882736969, 26.60700234866561, 200)); var position = Cesium.Cartesian3.fromDegrees(101.80089882736969, 26.60700234866561, 200) var airmodel = viewer.entities.getById("test"); var headingPitchRoll = new Cesium.HeadingPitchRoll(0, Cesium.Math.toRadians(5), 0); var orientation = Cesium.Transforms.headingPitchRollQuaternion(position, headingPitchRoll); viewer.entities.add({ id: "test", availability: new Cesium.TimeIntervalCollection([new Cesium.TimeInterval({ start: startTime, stop: stopTime })]), position: positions, orientation:orientation, model: { uri: 'data/Cesium_Air.gltf', }, path: { resolution: 1, material: new Cesium.PolylineGlowMaterialProperty({ glowPower: 0.1, color: Cesium.Color.RED }), width: 10 } }); viewer.trackedEntity = viewer.entities.getById("test");
实现效果如下:
PolygonGraphics
PolygonGraphics类是隶属于实体对象的一个类型,主要用于创建几何面对象和对面对象拉伸为盒子模型,数据的来 源为点串数据。添加拉伸后的面实体效果如下图:
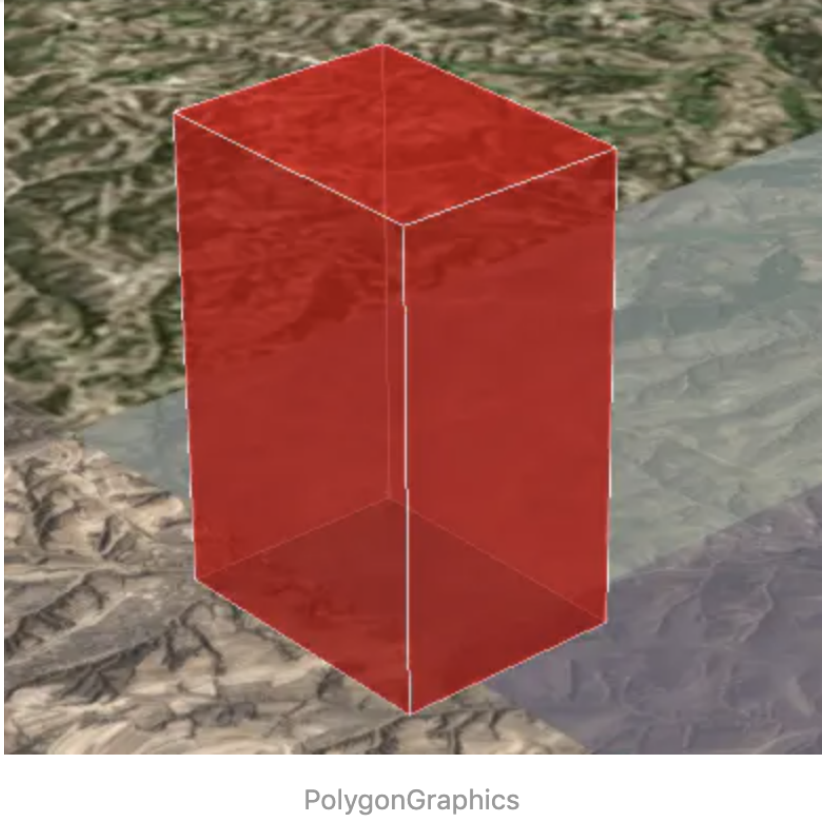
实现代码如下:
viewer.entities.add({ id: "test", polygon: { hierarchy: new Cesium.PolygonHierarchy(Cesium.Cartesian3.fromDegreesArray([112, 40, 112.01, 40, 112.01, 40.01, 112, 40.01])), height:300, extrudedHeight:2000, material:Cesium.Color.RED.withAlpha(0.5), outline:true, outlineColor:Cesium.Color.WHITE, outlineWidth:2.0 } }); viewer.flyTo(viewer.entities.getById("test"));
一、主要参数介绍
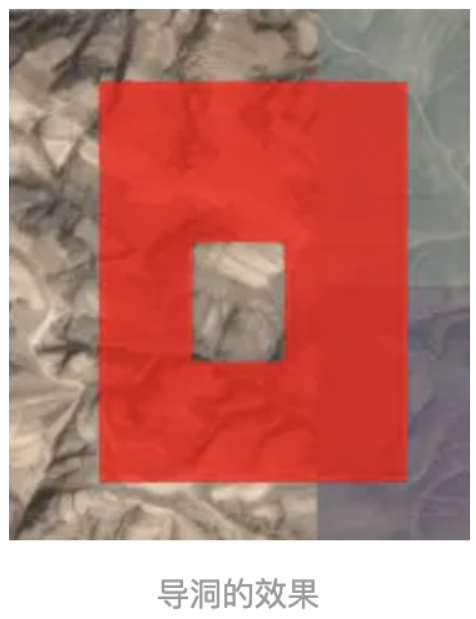
1、 hierarchy :多边形的点集合串,是一个PolygonHierarchy 类型的对象,里面可以创建普通面和导洞对象。
2、 height :多边形相当地面的高度。
3、 extrudedHeight :多边形的寄出高度,一般多边形的拉升高度 =extrudedHeight-height 。
4、 show :多边形是否可见
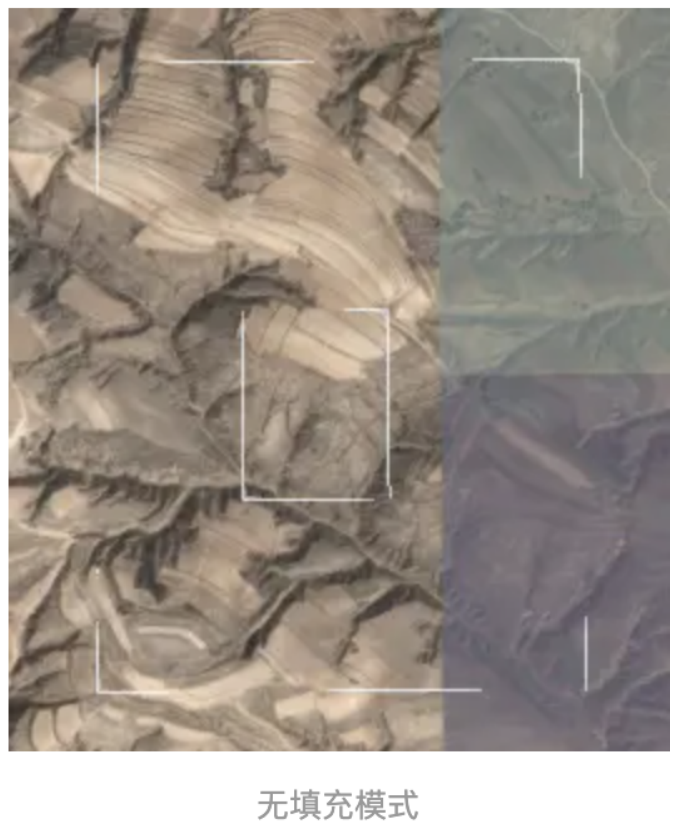
5、 fill :是否使用材质填充,不填充则是透明,如果有边线则只显示边线效果
6、 material :对象的填充材质,就是对象的外观,可以是颜色,也可以是贴图等等,后续的文章会讲解
7、 outline :对象是否显示边线
8、 outlineColor :边线的颜色
9、 outlineWidth :边线的宽度
10、 stRotation :材质的旋转角度
11、 perPositionHeight :是否单独使用对象的高度,也就是每个节点的高度可显示,这样可以做一个倾斜的
平面
12、 closeTop :拉伸的时候顶部是否封口
13、 closeBottom :拉伸的时候底部是否封口
14、 shadows :阴影投射方式
15 、 distanceDisplayCondition : 即 是 控 制 模 型 在 什 么 相 机 位 置 下 显 示 出 来 。 例 如 设 置
distanceDisplayCondition:newCesium.DistanceDisplayCondition(1500,5000) ,即是在相机距离1500-
5000的位置范围内显示,其他范围模型都不显示。
二、综合使用
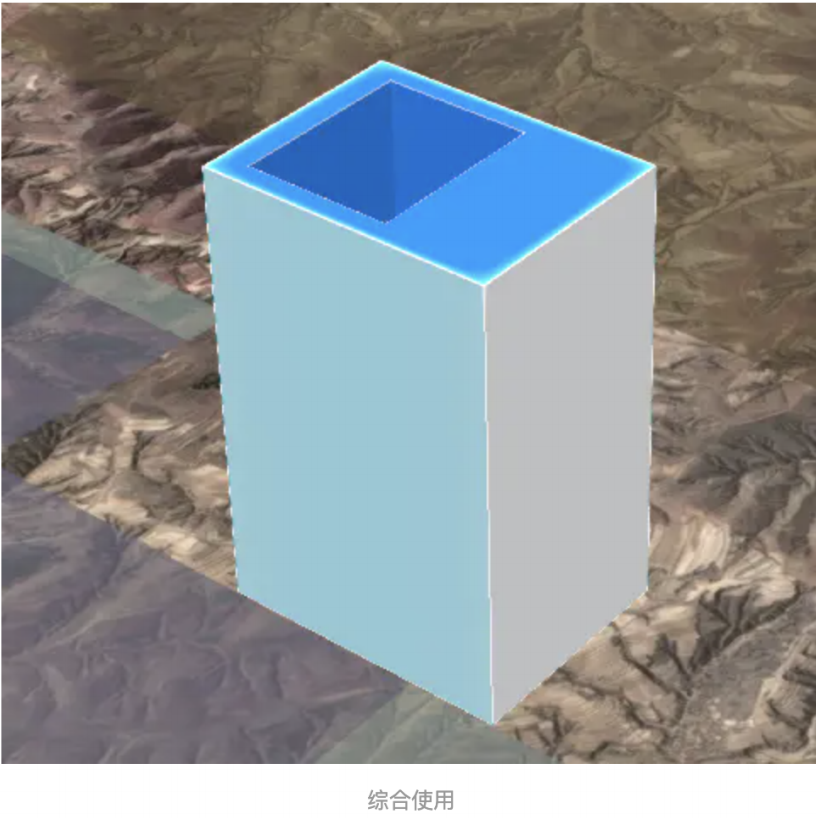
详细大家看到这里,怎么添加entity都已经会了,这里不再做多的讲解,我们添加一个带有洞的多边形,拉伸他并
给他贴一个图片材质
viewer.entities.add({ id: "test", polygon: { hierarchy: { positions: Cesium.Cartesian3.fromDegreesArray([112, 40, 112.01, 40, 112.01, 40.01, 112, 40.01]), holes:[new Cesium.PolygonHierarchy(Cesium.Cartesian3.fromDegreesArray([112.001, 40.001, 112.009, 40.001, 112.009, 40.006, 112.001, 40.006]))] }, height: 300, extrudedHeight: 2000, material: new Cesium.ImageMaterialProperty ({ image:"data/building2.png" }), outline: true, outlineColor: Cesium.Color.WHITE, outlineWidth: 2.0, } }); viewer.flyTo(viewer.entities.getById("test"));
效果如下图:
WallGraphics
本节我们来一起学习下WallGraphics这个对象,这个对象也是属于Entity是他对象的,Wall是一个墙对象,可以沿着 地面或海拔高度进行放置,是竖立着加载到场景中的,我们来看一个使用Wall做的效果
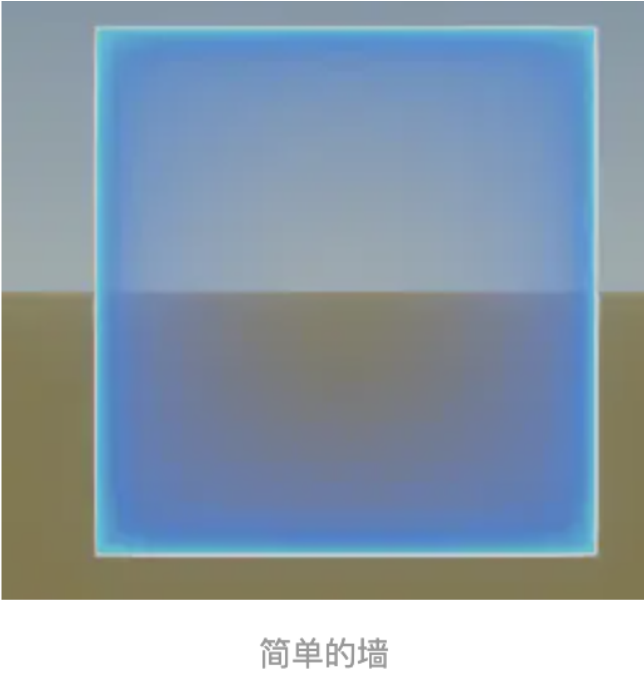
代码如下:
viewer.entities.add({ id: "test0", wall:{ positions:Cesium.Cartesian3.fromDegreesArray([112, 40, 112.001, 40]), maximumHeights:[90,90], material:new Cesium.ImageMaterialProperty({image:'./media/building.png',transparent:true}), } });
接下来我们来详细了解下WallGraphics的参数
一、主要参数介绍
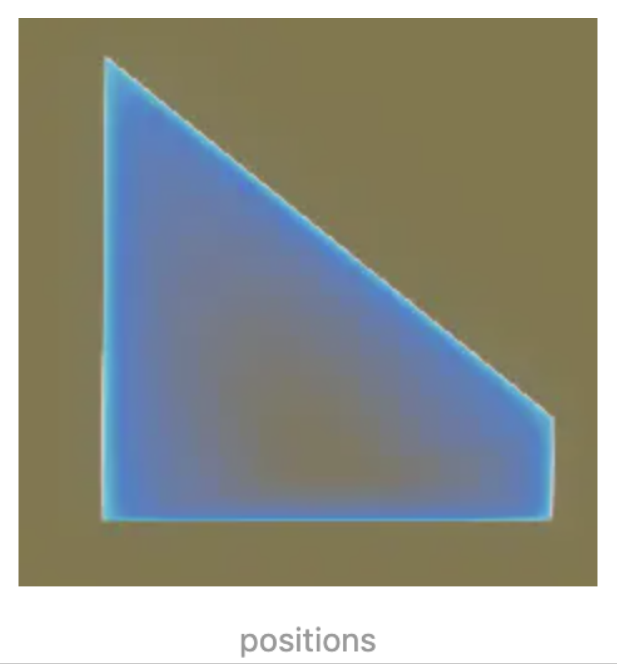
1、positions:墙的坐标信息,一个包含Cartesian3笛卡尔坐标系的数组对象,它决定了墙对象的位置和高度。我们 设置为Cesium.Cartesian3.fromDegreesArrayHeights([112, 40,90, 112.001, 40,20])
效果如下:
2、 maximumHeights :对象的最大高度数组,设置positions中每个点对于的高度,一个点对应一个值,当设置 maximumHeights后,positions中设置的高度值将无效。
3、 minimumHeights :对象的最小高度数组,同样是和positions中的点一一对应,他决定墙对象的底部高程,不 设置时,默认都是0。
4、 material :材质对象,可以对墙对象赋予材质例如上面用到的图片。
5、 outline :是否显示边框。
6、 outlineColor :边框的颜色。
7、 outlineWidth :边框的宽度。
8、 shadows :光照阴影的方式。
9 、 distanceDisplayCondition : 即 是 控 制 模 型 在 什 么 相 机 位 置 下 显 示 出 来 。 例 如 设 置
distanceDisplayCondition:new Cesium.DistanceDisplayCondition(1500,5000) , 即 是 在 相 机 距 离
1500-5000的位置范围内显示,其他范围模型都不显示。每个enitty对象都有类似的属性
二、综合使用
我们用四个 WallGraphics 对象围成了一个简单的框,并为它设置了图片材质
当然我们也可以结合上一节讲到的 PolygonGraphics ,给我们围成的框加个顶,让他变为一个盒子,通过这个
结合我们可以来拉伸一些白模的建筑。并且我们开启泛光,让盒子有点发光的感觉。
效果如下:
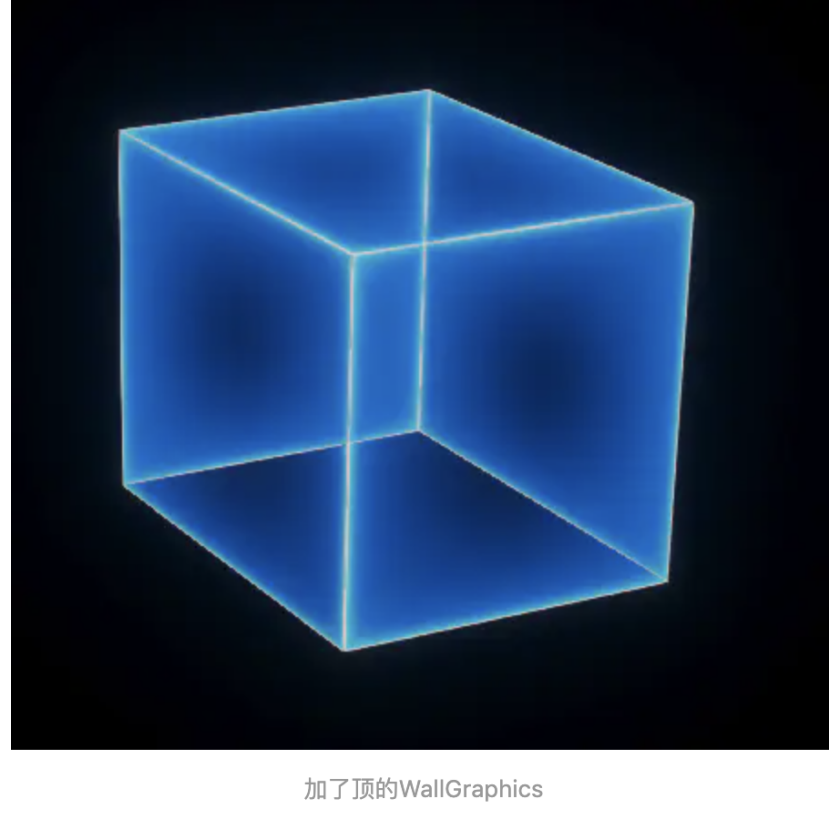
viewer.entities.add({ id: "test0", wall:{ positions:Cesium.Cartesian3.fromDegreesArrayHeights([112, 40,90, 112.001, 40,90]), material:new Cesium.ImageMaterialProperty({image:'./media/building.png',transparent:true}) } }); viewer.entities.add({ id: "test1", wall:{ positions:Cesium.Cartesian3.fromDegreesArrayHeights([112.001, 40,90, 112.001, 40.001,90]), material:new Cesium.ImageMaterialProperty({image:'./media/building.png',transparent:true}) } }); viewer.entities.add({ id: "test2", wall:{ positions:Cesium.Cartesian3.fromDegreesArrayHeights([112.001, 40.001,90, 112, 40.001,90]), material:new Cesium.ImageMaterialProperty({image:'./media/building.png',transparent:true}) } }); viewer.entities.add({ id: "test3", wall:{ positions:Cesium.Cartesian3.fromDegreesArrayHeights([112, 40.001,90, 112, 40,90]), material:new Cesium.ImageMaterialProperty({image:'./media/building.png',transparent:true}) } }); viewer.entities.add({ id: "top", polygon:{ hierarchy:Cesium.Cartesian3.fromDegreesArrayHeights([112, 40,90, 112.001, 40,90,112.001, 40.001,90,112, 40.001,90]), material:new Cesium.ImageMaterialProperty({image:'./media/building.png',transparent:true}), perPositionHeight:true } });
PolylineGraphics
本节继续学习PolylineGraphics对象,这个是一个折线类型,可以根据坐标直接添加到场景中,也可以对折线设置一 定的风格符号,接下来我们一起学习下吧。
首先来看一个折线的尾迹线效果
viewer.entities.add({ id: "test", polyline: { positions: Cesium.Cartesian3.fromDegreesArrayHeights([101, 40, 50000, 119, 40, 50000]), width:8.0, material: new Cesium.PolylineTrailMaterialProperty({ color: Cesium.Color.RED.withAlpha(0.9), trailLength: 0.4, period: 1.0 }) } });
接下来我们来详细了解下PolylineGraphics的参数
一、主要参数介绍
1、 positions :折线的点串信息,一组Cartesian3的数组。
2、 followSurface :表示线的显示方式是按照地球曲率显示为弧线,还是直接的线型连接。默认是true显示为
弧线。下面两图是效果对比。
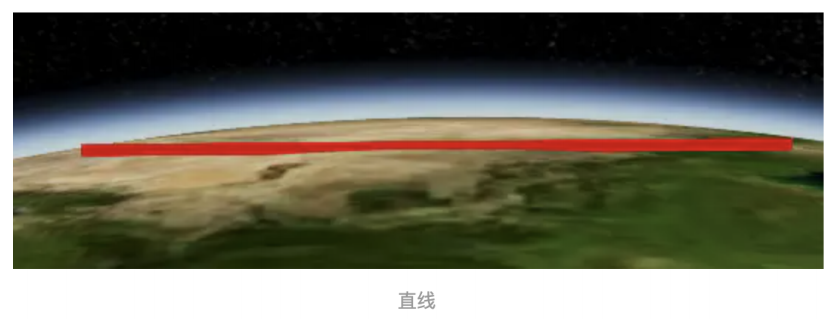
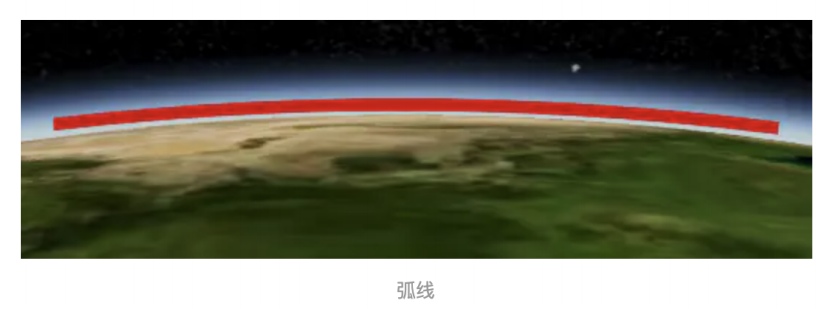
3、 width :表示线的宽度,以像素为单位。
4、 show :表示折线对象是否可见
5、 material :折线的材质,向文章开头的图就是我们使用了尾迹线的材质,才有了动态的效果。
6、 clampToGround :设置线对象是否贴地,设置此对象时,arcType必须为Cesium.ArcType.GEODESIC或
Cesium.ArcType.RHUMB,不能是不符合椭圆体的表面的直线。
7、 depthFailMaterial :当折线低于地形时用于绘制折线的材质,
8、 zIndex :指定用于排序地面几何的zIndex。只有当 clampToGround 为真时才有效。
二、Polyline的材质介绍
Polyline支持多种类型的材质,这里我们主要介绍折线对象支持的材质类型,关于其他的材质,我们在后续的文章
中会详细进行介绍。
1、PolylineTrailMaterialProperty尾迹线材质,效果见文章开始的gif图片,参数见下图
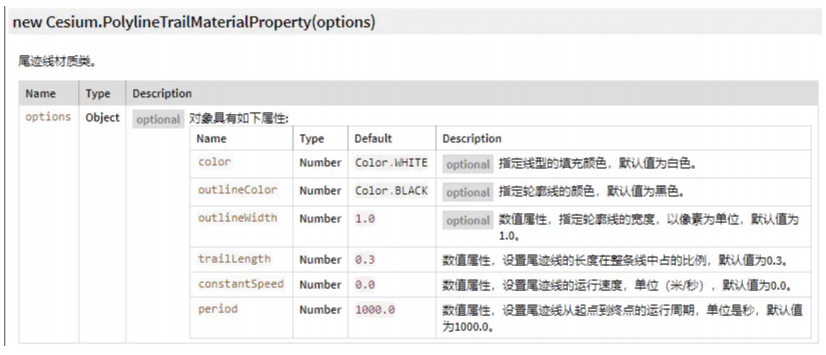
主要参数有
color :可以设置尾迹线的颜色
trailLength :尾迹线的长度在整条线中占的比例,默认值为0.3,一般不建议设置太大,太大就没有动态的效
果了;
constantSpeed :运动的速度;
period :运动的周期;
周期和速度只设置其中一个就可以了。
2、 PolylineGlowMaterialProperty 发光线,效果如下:
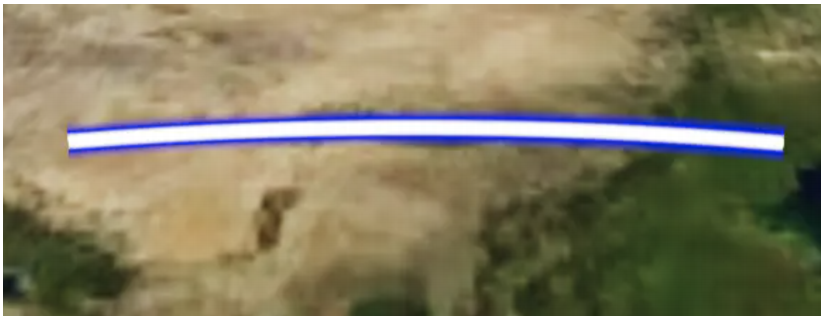
实现的材质代码为:
new Cesium.PolylineGlowMaterialProperty({ glowPower: 0.5, color: Cesium.Color.BLUE })
glowPower :为发光强度,color为发光的颜色
3、 PolylineOutlineMaterialProperty 带轮廓的线,从效果图可以看出轮廓线个发光线有本质的区别,效果
如下:
new Cesium.PolylineOutlineMaterialProperty({ color: Cesium.Color.BLUE, outlineWidth: 10, outlineColor: Cesium.Color.RED })
4、PolylineArrowMaterialProperty带箭头的线,效果如下图
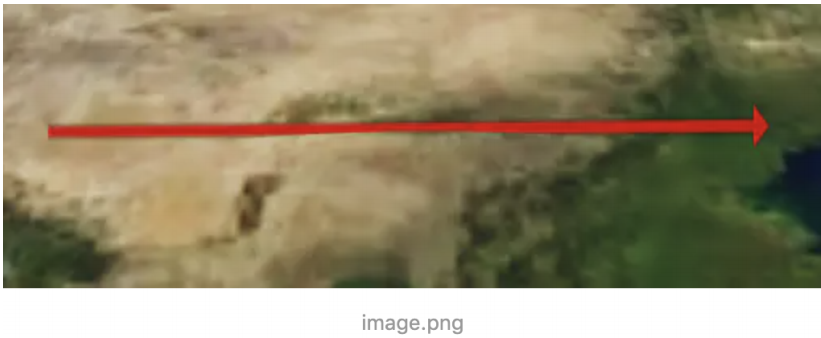
实现的材质代码为:
new Cesium.PolylineArrowMaterialProperty(Cesium.Color.RED)
5、PolylineDashMaterialProperty 虚线样式的折线,效果如下图
new Cesium.PolylineDashMaterialProperty({ color:Cesium.Color.RED, gapColor:Cesium.Color.TRANSPARENT, dashLength:20, dashPattern:255 })
其中gapColor为虚线的间隙颜色,dashLength为虚线间隙的长度
我们可以将虚线部分显示出来,那么可以做成间隔线的样式,如下图
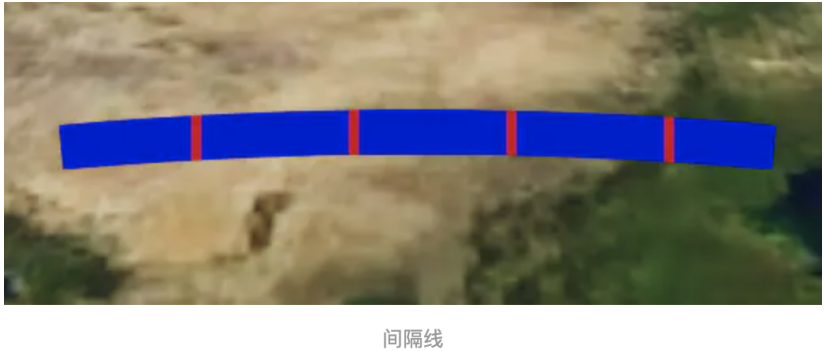
间隔线的材质代码为:
new Cesium.PolylineDashMaterialProperty({ color:Cesium.Color.RED, gapColor:Cesium.Color.BLUE, dashLength:100, dashPattern:2 })
三、综合使用
首先来看一张效果图,这个是通过PolylineGlowMaterialProperty发光线的材质做模拟的道路数据
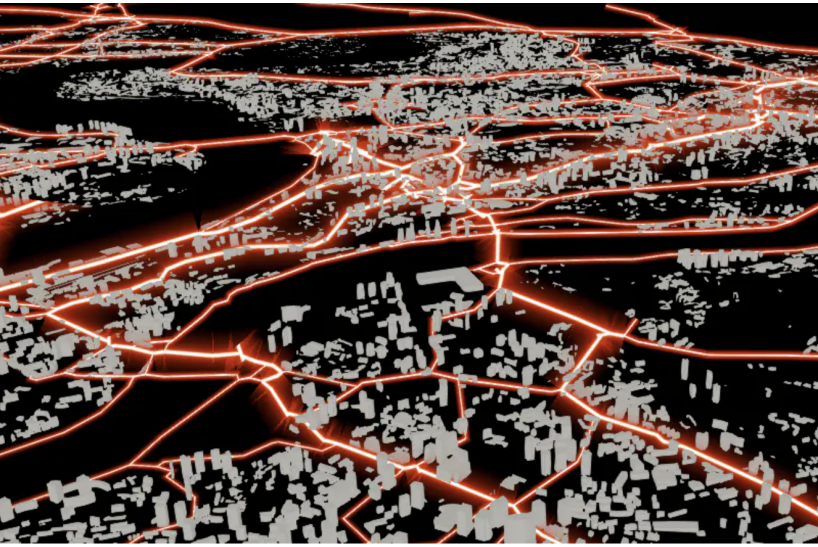
具体代码可以参见示例代码:http://support.supermap.com.cn:8090/webgl/examples/editor.html#polylineGlow
PointGraphics
本节继续学习PointGraphics对象,这个是一个点类型,对象属性相对较少,可以直接添加矢量点对象,接下来我们 一起学习下吧。
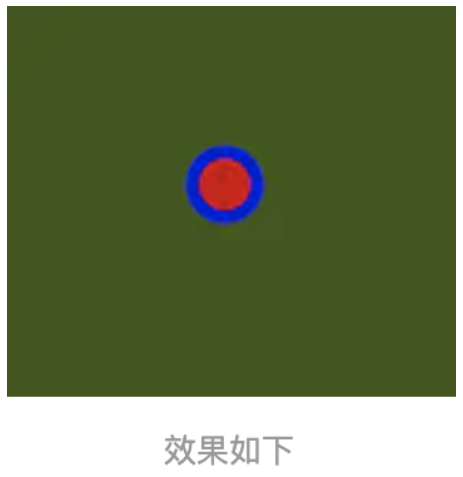
实现代码如下:
viewer.entities.add({ id: "test", position:Cesium.Cartesian3.fromDegrees(117,32,500), point: { color: Cesium.Color.RED, pixelSize:20, outlineColor:Cesium.Color.BLUE, outlineWidth:5, disableDepthTestDistance:Number.POSITIVE_INFINITY } });
一、主要参数介绍
1、 position :点的坐标位置,需要注意的是这个属性是设置给entity的,而不是point的内部。
2、 pixelSize :点的大小,以像素为单位。
3、 outlineColor :点的外边框颜色。
4、 outlineWidth :点外边框的宽度。
5、 show :点是否显示。
6、 scaleByDistance :设置基于相机距离的点大小,也就是说可以根据不同的相机高度来设置点的不同大小,
一个NearFarScalar类型,比如我设置 scaleByDistance为 new Cesium.NearFarScalar(1500, 10, 50000,
- ,如果设置了pixelSize则两者会相乘。
7、 translucencyByDistance :设置基于相机距离的点透明度,也就是说可以根据不同的相机高度来设置点的
透明度,一个NearFarScalar类型,比如我设置 scaleByDistance 为 new Cesium.NearFarScalar(1500, 0.1,
8000, 1)
8 、 heightReference : 高 度 模 式 , 支 持 Cesium.HeightReference.NONE ( 绝 对 高 度 ) 、
Cesium.HeightReference.RELATIVE_TO_GROUND ( 相 对 地 面 ) 、
Cesium.HeightReference.CLAMP_TO_GROUND (贴地)三种高度模式,高度模式通过字面意思理解即可。
9 、 distanceDisplayCondition : 即 是 控 制 点 在 什 么 相 机 位 置 下 显 示 出 来 。 例 如 设 置
distanceDisplayCondition:new Cesium.DistanceDisplayCondition(1500,5000) , 即 是 在 相 机 距 离
1500-5000的位置显示,其他具体广告牌都不显示。
10、 disableDepthTestDistance :指定从相机到禁用深度测试的距离,如果不希望被地形挡住,设置为
Number.POSITIVE_INFINITY 即可
二、综合使用
我们制作一个闪烁的有呼吸效果的点对象,效果如下:
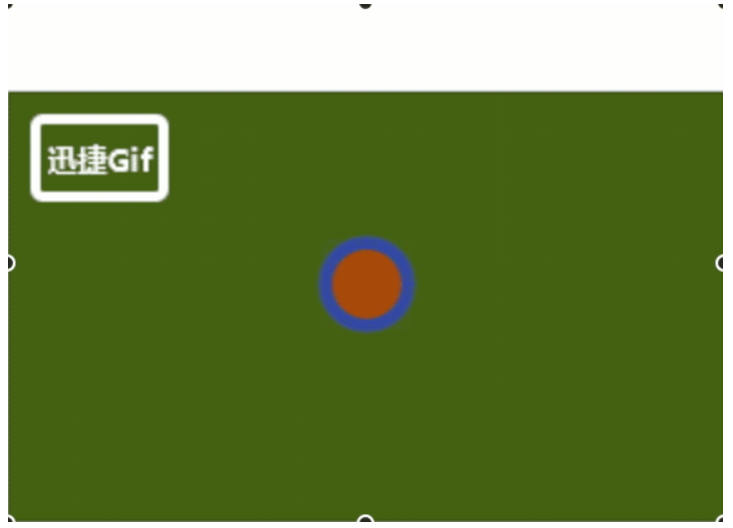
var x = 0; var size = 10; var isAdd = true; var isZoom = true; viewer.entities.add({ id: "test", position: Cesium.Cartesian3.fromDegrees(117, 32, 500), point: { color: new Cesium.CallbackProperty(function() { if(isAdd) { x = x + 0.05; if(x > 1) { isAdd = false; } } else { x = x - 0.05; if(x < 0) { isAdd = true; } } return Cesium.Color.RED.withAlpha(x); }, false), pixelSize: new Cesium.CallbackProperty(function() { if(isZoom) { size = size + 1; if(size > 50) { isZoom = false; } } else { size = size - 1; if(size < 10) { isZoom = true; } } return size; }, false), outlineColor: new Cesium.CallbackProperty(function() { if(isAdd) { x = x + 0.01; if(x > 1) { isAdd = false; } } else { x = x - 0.01; if(x < 0) { isAdd = true; } } return Cesium.Color.BLUE.withAlpha(x); }, false), outlineWidth: 5, disableDepthTestDistance: Number.POSITIVE_INFINITY, } });
PolylineVolumeGraphics
本节课程我们学习最后一个实体对象PolylineVolumeGraphics,线体积对象,它可以通过线数据挤出不同的形状,而 成为体数据,比如我们希望在线绘制一根圆形的管道、绘制一堵围墙,那这样对象就能派上大用场了。
首先我们来看一个简单的效果图吧
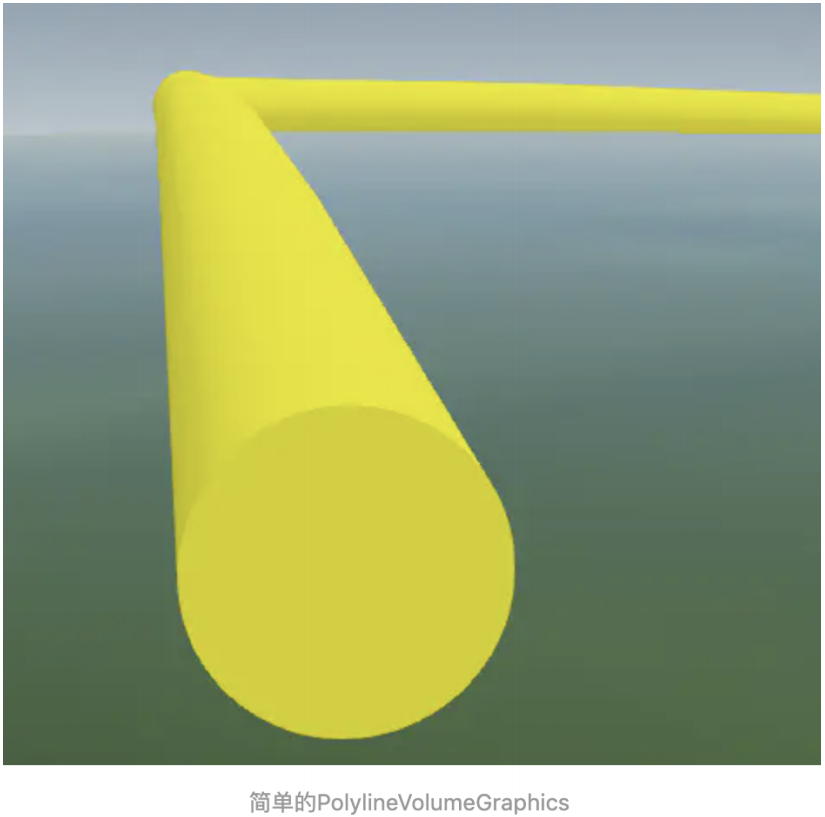
实现代码如下
function computeCircle(radius) { var positions = []; for(var i = 0; i < 360; i++) { var radians = Cesium.Math.toRadians(i); positions.push(new Cesium.Cartesian2(radius * Math.cos(radians), radius * Math.sin(radians))); } return positions; } viewer.entities.add({ id: "test", polylineVolume: { positions: Cesium.Cartesian3.fromDegreesArray([117.0, 32.0, 120.0, 36.0, 130.0, 36.0]), material: Cesium.Color.YELLOW, shape : computeCircle(6000.0), } }); viewer.flyTo(viewer.entities.getById("test"));
一、主要参数介绍
接下来我们来了解下 PolylineVolumeGraphics 的主要参数
1、 positions :指定线对象的位置,一个点串对象,里面存储的是 Cartesian3 对象。
2、 shape :要挤出的形状的数组,相当于是对象的切面形状
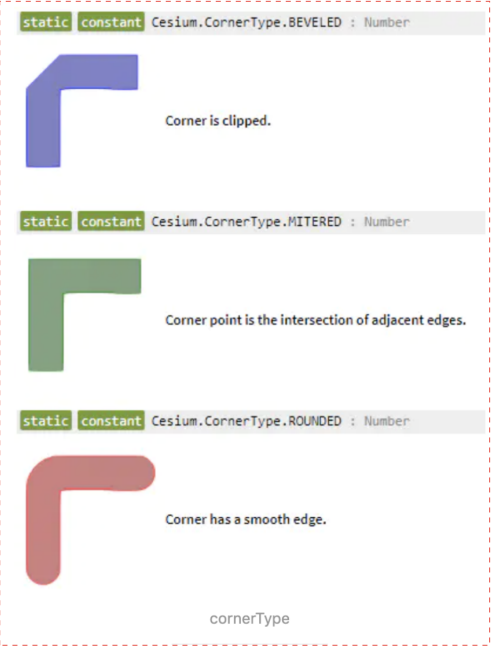
3、 cornerType :角落样式的属性,默认是CornerType.ROUNDED,目前支持以下这种几种风格
4、 show :定义对象是否显示。
5、 fill :是否用材质进行填充。
6、 material :定义材质外观对象
7、 material :对象的填充材质,就是对象的外观,可以是颜色,也可以是贴图等等
8、 outline :一个布尔属性,指定矩形是否显示轮廓。
9、 outlineColor :轮廓的颜色。
10、 outlineWidth :轮廓的宽度。
11、 shadows :指定矩形是否从每个光源投射或接收阴影。
12 、 distanceDisplayCondition : 即 是 控 制 模 型 在 什 么 相 机 位 置 下 显 示 出 来 。 例 如 设 置
distanceDisplayCondition:new Cesium.DistanceDisplayCondition(1500,5000) , 即 是 在 相 机 距 离
1500-5000的位置范围内显示,其他范围模型都不显示。
二、综合使用
我们这里绘制挤出了三类图形,圆形管道,三角形管道、方形立体盒子,并且为数据都设置了贴图,接下来看下效
果吧
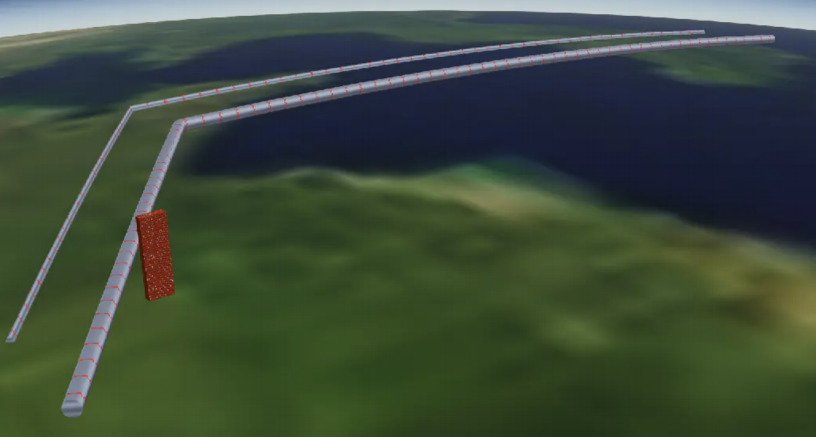
function computeCircle(radius) { var positions = []; for(var i = 0; i < 360; i++) { var radians = Cesium.Math.toRadians(i); positions.push(new Cesium.Cartesian2(radius * Math.cos(radians), radius * Math.sin(radians))); } return positions; } function computeTriangle(radius) { var jiaodu=60; var hudu= Cesium.Math.toRadians(jiaodu); var positions = []; positions.push(new Cesium.Cartesian2(-radius*Math.cos(hudu),-radius*Math.sin(hudu)/2)); positions.push(new Cesium.Cartesian2(radius*Math.cos(hudu),-radius*Math.sin(hudu)/2)); positions.push(new Cesium.Cartesian2(0,radius*Math.sin(hudu)/2)); return positions; } function computeqiang(radius) { var positions = []; positions.push(new Cesium.Cartesian2(-radius/2,0)); positions.push(new Cesium.Cartesian2(radius/2,0)); positions.push(new Cesium.Cartesian2(radius/2,radius*10)); positions.push(new Cesium.Cartesian2(-radius/2,radius*10)); return positions; } viewer.entities.add({ id: "test", polylineVolume: { positions: Cesium.Cartesian3.fromDegreesArray([117.0, 32.0, 120.0, 36.0, 130.0, 36.0]), material: new Cesium.ImageMaterialProperty({ image: "./img/arrow.png", repeat: new Cesium.Cartesian2(200.0, 1.0), }), shape : computeCircle(6000.0), } }); viewer.entities.add({ id: "test2", polylineVolume: { positions: Cesium.Cartesian3.fromDegreesArray([117.0, 33.0, 120.0, 37.0, 130.0, 37.0]), material: new Cesium.ImageMaterialProperty({ image: "./img/arrow.png", repeat: new Cesium.Cartesian2(200.0, 1.0), }), shape : computeTriangle(6000.0), } }); viewer.entities.add({ id: "test3", polylineVolume: { positions: Cesium.Cartesian3.fromDegreesArray([118.0, 33.0, 118.2, 33]), material: new Cesium.ImageMaterialProperty({ image: "./img/qiang.jpg", repeat: new Cesium.Cartesian2(100.0, 10.0), }), shape : computeqiang(6000.0), } }); viewer.flyTo(viewer.entities.getById("test"));
八、Cesium中Primitive
Primitive由两个部分组成
(1)几何形状(Geometry):定义了Primitive的结构,例如三角形、线条、点等
(2)外观(Appearance ):定义Primitive的着色(Sharding),包括GLSL(OpenGL着色语言,OpenGL
ShadingLanguage)顶点着色器和片段着色器( vertex and fragment shaders),以及渲染状态(render state)
Cesium支持以下几何图形:
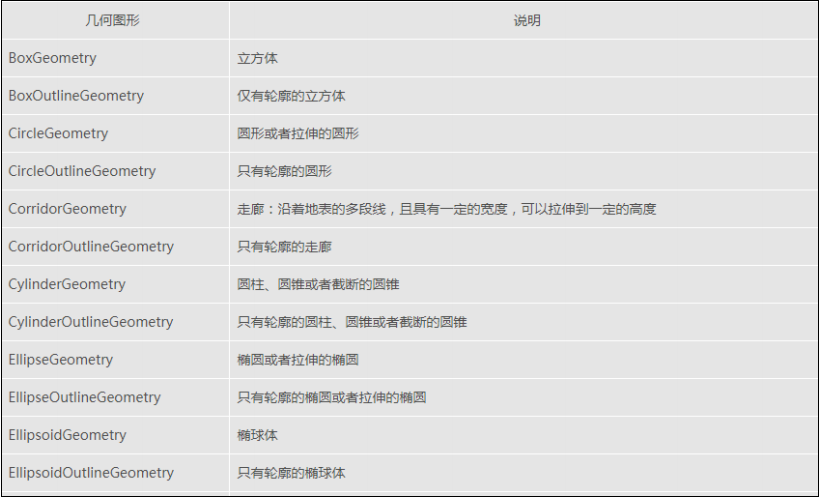
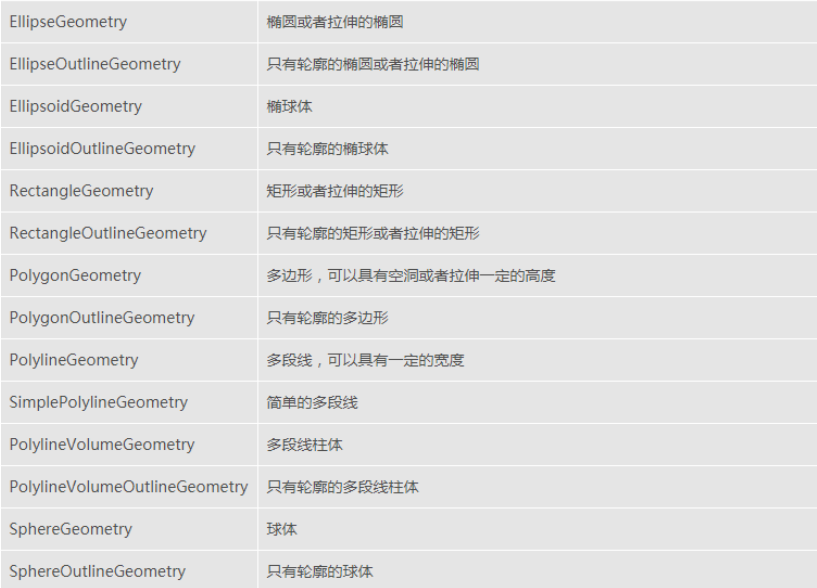

使用Geometry和Appearance 具有以下优势:
(1)性能:绘制大量Primitive时,可以将其合并为单个Geometry以减轻CPU负担、更好的使用GPU。合并Primitive
由web worker线程执行,UI保持响应性
(2)灵活性:Geometry与Appearance 解耦,两者可以分别进行修改
(3)低级别访问:易于编写GLSL 顶点、片段着色器、使用自定义的渲染状态
同时,具有以下劣势:
(1)需要编写更多地代码
(2)需要对图形编程有更多的理解,特别是OpenGL的知识
下面代码是entity与primitive方式对比:
//entity方式 viewer.entities.add({ rectangle: { coordinates: Cesium.Rectangle.fromDegrees(110.20, 34.55, 111.20, 35.55), material: new Cesium.StripeMaterialProperty({ evenColor: Cesium.Color.WHITE, oddColor: Cesium.Color.BLUE, repeat:5 }) } }); //primitive方式 var instance = new Cesium.GeometryInstance({ geometry: new Cesium.RectangleGeometry({ rectangle: Cesium.Rectangle.fromDegrees(105.20, 30.55, 106.20, 31.55), vertexFormat:Cesium.EllipsoidSurfaceAppearance.VERTEXT_FORMAT }) }); viewer.scene.primitives.add(new Cesium.Primitive({ geometryInstances: instance, appearance: new Cesium.EllipsoidSurfaceAppearance({ material:Cesium.Material.fromType('Stripe') }) }));
2、合并几何图形(Combing Geometries)
合并多个GeometryInstances 为一个Primitive可以极大的提高性能,下面的例子创建了2592个颜色各异的矩形,覆盖 整个地球 :
var viewer = new Cesium.Viewer( 'cesiumContainer' ); var scene = viewer.scene; var instances = []; for ( var lon = -180.0; lon < 180.0; lon += 5.0 ) { for ( var lat = -90.0; lat < 90.0; lat += 5.0 ) { instances.push( new Cesium.GeometryInstance( { geometry : new Cesium.RectangleGeometry( { rectangle : Cesium.Rectangle.fromDegrees( lon, lat, lon + 5.0, lat + 5.0 ) } ), attributes : { color : Cesium.ColorGeometryInstanceAttribute.fromColor( Cesium.Color.fromRandom( { alpha : 0.5 } ) ) } } ) ); } } scene.primitives.add( new Cesium.Primitive( { geometryInstances : instances, //合并 //某些外观允许每个几何图形实例分别指定某个属性,例如: appearance : new Cesium.PerInstanceColorAppearance() } ) );
3、选取几何图形(Picking)
即使多个 GeometryInstance被合并为单个Primitive,让然可以独立的被访问。我们可以为每一个GeometryInstance指
定一个id,并且可以通过Scene.pick来判断该实例是否被选取:
var viewer = new Cesium.Viewer( 'cesiumContainer' ); var scene = viewer.scene; var instance = new Cesium.GeometryInstance( { geometry : new Cesium.RectangleGeometry( { rectangle : Cesium.Rectangle.fromDegrees( -100.0, 30.0, -90.0, 40.0 ) } ), id : 'rectangle-1', attributes : { color : Cesium.ColorGeometryInstanceAttribute.fromColor( Cesium.Color.RED ) } } ); scene.primitives.add( new Cesium.Primitive( { geometryInstances : instance, appearance : new Cesium.PerInstanceColorAppearance() } ) ); var handler = new Cesium.ScreenSpaceEventHandler( scene.canvas ); //设置单击事件的处理句柄 handler.setInputAction( function( movement ) { var pick = scene.pick( movement.position ); if ( Cesium.defined( pick ) && ( pick.id === 'rectangle-1' ) ) { console.log( '矩形被选取' ); } }, Cesium.ScreenSpaceEventType.LEFT_CLICK );
4、几何图形实例(Geometry Instances)
上面的例子中,我们已经用到了GeometryInstances,注意GeometryInstance与Geometry的关系:前者是后者的容器, 多个Instance可以共用一个Geometry,并且可以通过GeometryInstances.modelMatrix属性提供不同position、scale、 rotate等位置、缩放、旋转信息。例如,下面的例子使用同一个Geometry绘制了两个Instance,一个位于另一个的上 方:
var viewer = new Cesium.Viewer( 'cesiumContainer' ); var scene = viewer.scene; var ellipsoidGeometry = new Cesium.EllipsoidGeometry( { vertexFormat : Cesium.PerInstanceColorAppearance.VERTEX_FORMAT, radii : new Cesium.Cartesian3( 300000.0, 200000.0, 150000.0 )//三轴半径 } ); //下方的实例 var cyanEllipsoidInstance = new Cesium.GeometryInstance( { geometry : ellipsoidGeometry, modelMatrix : Cesium.Matrix4.multiplyByTranslation( Cesium.Transforms.eastNorthUpToFixedFrame( Cesium.Cartesian3.fromDegrees( -100.0, 40.0 ) ), new Cesium.Cartesian3( 0.0, 0.0, 150000.0 ) ), attributes : { color : Cesium.ColorGeometryInstanceAttribute.fromColor( Cesium.Color.CYAN ) } } ); //上方的实例 var orangeEllipsoidInstance = new Cesium.GeometryInstance( { geometry : ellipsoidGeometry, modelMatrix : Cesium.Matrix4.multiplyByTranslation( Cesium.Transforms.eastNorthUpToFixedFrame( Cesium.Cartesian3.fromDegrees( -100.0, 40.0 ) ), new Cesium.Cartesian3( 0.0, 0.0, 450000.0 ) ), attributes : { color : Cesium.ColorGeometryInstanceAttribute.fromColor( Cesium.Color.ORANGE ) } } ); scene.primitives.add( new Cesium.Primitive( { geometryInstances : [ cyanEllipsoidInstance, orangeEllipsoidInstance ], appearance : new Cesium.PerInstanceColorAppearance( { translucent : false, closed : true } ) } ) );
5、更新单个GeometryInstance的属性
在添加到Primitive中以后,仍然可以修改几何图形的某些属性:
(1)颜色:如果Primitive设置了PerInstanceColorAppearance外观,则可以修改ColorGeometryInstanceAttribute类型 的颜色
(2)可见性:任何实例可以修改可见性
var viewer = new Cesium.Viewer( 'cesiumContainer' ); var scene = viewer.scene; var circleInstance = new Cesium.GeometryInstance( { geometry : new Cesium.CircleGeometry( { center : Cesium.Cartesian3.fromDegrees( -95.0, 43.0 ), radius : 250000.0, vertexFormat : Cesium.PerInstanceColorAppearance.VERTEX_FORMAT } ), attributes : { color : Cesium.ColorGeometryInstanceAttribute.fromColor( new Cesium.Color( 1.0, 0.0, 0.0, 0.5 ) ), show : new Cesium.ShowGeometryInstanceAttribute( true ) //显示或者隐藏 }, id : 'circle' } ); var primitive = new Cesium.Primitive( { geometryInstances : circleInstance, appearance : new Cesium.PerInstanceColorAppearance( { translucent : false, closed : true } ) } ); scene.primitives.add( primitive ); //定期修改颜色 setInterval( function() { var attributes = primitive.getGeometryInstanceAttributes( 'circle' );//获取某个实例的属性集 attributes.color = Cesium.ColorGeometryInstanceAttribute.toValue( Cesium.Color.fromRandom( { alpha : 1.0 } ) ); }, 2000 );
6、外观(Appearances)
Primitive由两个重要部分组成:几何图形实例、外观,一个Primitive只能有一个外观,而可以有多个实例。几何图 形定义了结构,外观定义了每个像素被如何着色,外观可能使用材质(Material)。这些对象的关系如下图所示:
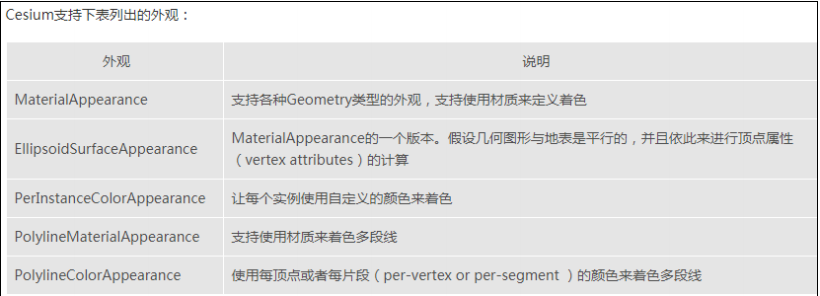
外观定义了需要在GPU上执行的完整的GLSL顶点、片段着色器,通常不需要修改这一部分,除非需要定义自己的
外观。
外观还定义了完整的render state,用于在绘制Primitive时控制GPU的状态,可以直接或者通过高层API来定义render state:
//下面的外观可用于定义一个Viewer不可进入的不透明盒子 var appearance = new Cesium.PerInstanceColorAppearance( { translucent : false, closed : true } ); //下面的代码效果同上 var translucent = new Cesium.PerInstanceColorAppearance( { renderState : { depthTest : { enabled : true }, cull : { enabled : true, face : Cesium.CullFace.BACK } } } );
一旦外观被创建,其render state就不可再变,但是其材质是可以替换的。另外Primitive的外观也是不可修改的。
大部分外观具有flat、faceForward属性,可以间接的控制GLSL 着色器:
(1)flat:扁平化着色,不考虑光线的作用
(2)faceForward:布尔值,控制光照效果
7、Geometry与Appearance的兼容性
需要注意,不是所有外观和所有几何图形可以搭配使用,例如EllipsoidSurfaceAppearance与WallGeometry就不能搭
配,原因是后者是垂直于地表的。
即使外观与几何图形兼容,它们还必须有匹配的顶点格式(vertex formats)—— 即几何图形必须具有外观可以作 为输入的数据格式,在创建Geometry时可以提供VertexFormat。
为了简便,可以让Geometry计算所有顶点属性(vertex attributes),以使之适用于任何外观,但这样做效率较差:
var geometry = new Cesium.RectangleGeometry( { vertexFormat : Cesium.VertexFormat.ALL } );
而如果我们使用外观EllipsoidSurfaceAppearance,其实只需要知道位置:
var geometry = new Ceisum.RectangleGeometry( { vertexFormat : Ceisum.VertexFormat.POSITION_ONLY } );
大部分外观具有vertexFormat属性或者VERTEX_FORMAT 静态常量,创建形状时只需要使用这些顶点格式即可:
var geometry = new Ceisum.RectangleGeometry( { vertexFormat : Ceisum.EllipsoidSurfaceAppearance.VERTEX_FORMAT } ); var geometry2 = new Ceisum.RectangleGeometry( { vertexFormat : Ceisum.PerInstanceColorAppearance.VERTEX_FORMAT } ); var appearance = new Ceisum.MaterialAppearance(); var geometry3 = new Ceisum.RectangleGeometry( { vertexFormat : appearance.vertexFormat } );
此外,两个形状必须具有匹配的vertexFormat,才能被合并到一个Primitive中。
九、Transforms对象
cesium获取某个位置垂直于当前地表的垂直坐标系,我们可以通过Cesium.Transforms对象来获取到相关的方法:
Cesium.Transforms.eastNorthUpToFixedFrame
常用的有Cesium.Transforms.eastNorthUpToFixedFrame这个方法,这个方法支持通过传入一个中心点,然后获取到中
心点的正东正北,和地表法线的方向:
x轴指向当前点的东方向。
y轴指向当前点的北方向。
z轴在椭圆体的方向轴指向表面法线穿过的位置。
例子:
//获取到经纬度为 0 0的地点的 局部坐标系 var center = Cesium.Cartesian3.fromDegrees(0.0, 0.0); var transform = Cesium.Transforms.eastNorthUpToFixedFrame(center);
和eastNorthUpToFixedFrame方法相匹配的还有相应的:
northEastDownToFixedFrame
northUpEastToFixedFrame
northWestUpToFixedFrame
Cesium.Transforms.northEastDownToFixedFrame
和eastNorthUpToFixedFrame用法相同,返回的矩阵的轴向略有不同:
x轴指向当地的北方
y轴指向当前地点的东方
z轴指向当前地点地表法线穿过的方向,也就是垂直于地表
Cesium.Transforms.northUpEastToFixedFrame
和eastNorthUpToFixedFrame用法相同,返回的矩阵的轴向略有不同:
x轴指向北方
y轴垂直于地表
z轴指向于东方
Cesium.Transforms.northWestUpToFixedFrame
和eastNorthUpToFixedFrame用法相同,返回的矩阵的轴向略有不同:
x轴指向北方
y轴指向西方
z轴垂直于地表
除了前面获取某个位置的局部坐标系矩阵,我们还可以获取某个地表位置的局部旋转修改成全局设置的方式。
Cesium.Transforms.fixedFrameToHeadingPitchRoll
fixedFrameToHeadingPitchRoll方法可以根据特定参考系中的变换计算航向俯仰角滚动角。
fixedFrameToHeadingPitchRoll支持四个值:transform,ellipsoid,fixedFrameTransform,result
transform-需要变换的四维矩阵
ellipsoid-当前使用的坐标系,可选,默认值:Ellipsoid.WGS84
fixedFrameTransform - 当 前 使 用 全 局 转 局 部 的 方 式 , 也 是 前 面 提 供 的 四 种 , 默 认
Transforms.eastNorthUpToFixedFrame
result - 可选,如果设置,将返回的HeadingPitchRoll值放置在此对象内。
Cesium.Transforms.headingPitchRollQuaternion
可以根据根据位置和设置的HeadingPitchRoll的值获取到在当前坐标系中的四元数,在已知实体的航向俯仰角滚动角
时设置实体的方向可使用方法
其中,
origin: 中心点
headingPitchRoll: 航向,俯仰和滚转
ellipsoid: (可选)三维场景的椭球体
fixedFrameTransform: (可选)从参考帧到提供的椭球的固定参考帧的4x4变换矩阵
result: (可选)要存储结果的对象
下面是官网的示例:
var center = Cesium.Cartesian3.fromDegrees(0.0, 0.0); var heading = -Cesium.Math.PI_OVER_TWO; var pitch = Cesium.Math.PI_OVER_FOUR; var roll = 0.0; var hpr = new HeadingPitchRoll(heading, pitch, roll); var quaternion = Cesium.Transforms.headingPitchRollQuaternion(center, hpr);
具体到实体设置,下面以添加模型实体为例设置实体的方向
var position = Cesium.Cartesian3.fromDegrees(116.39, 39.9, 0) viewer.entities.add({ show: true, position: position, orientation: Cesium.Transforms.headingPitchRollQuaternion( position, new Cesium.HeadingPitchRoll( Cesium.Math.toRadians(10), Cesium.Math.toRadians(0), Cesium.Math.toRadians(0) ) ), model: { uri : '/static/model/leida.gltf', scale: 1000 } })
Cesium.Transforms.headingPitchRollToFixedFrame
可以根据根据位置和设置的HeadingPitchRoll的值获取到在当前坐标系中的四维矩阵
例子:
var center = Cesium.Cartesian3.fromDegrees(0.0, 0.0); var heading = -Cesium.Math.PI_OVER_TWO; var pitch = Cesium.Math.PI_OVER_FOUR; var roll = 0.0; var hpr = new Cesium.HeadingPitchRoll(heading, pitch, roll); var transform = Cesium.Transforms.headingPitchRollToFixedFrame(center, hpr);
十、Cesium的Property机制
为什么要用Property?
还是举个例子来说吧。
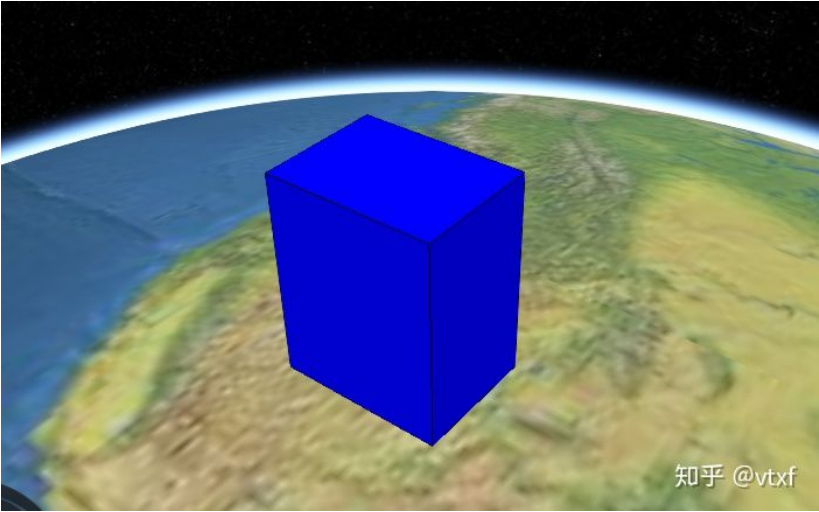
比如我想在地球上的某个位置加一个盒子,可以这样写代码:
// 创建盒子 var blueBox = viewer.entities.add({ name : 'Blue box', position: Cesium.Cartesian3.fromDegrees(-114.0, 40.0, 300000.0), box : { dimensions : new Cesium.Cartesian3(400000.0, 300000.0, 500000.0), material : Cesium.Color.BLUE, outline: true, } });
最终的效果如图所示:
但是呢,如果我想让这个盒子逐渐变长,该怎么操作呢?如下图所示:
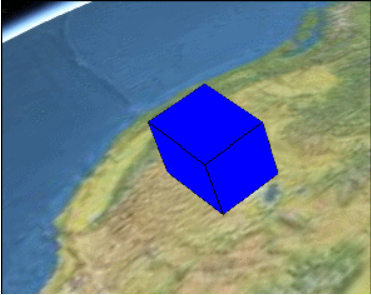
方 法 是 有 的 , 就 是 可 以 不 停 地 去 修 改 blueBox.position , 类 似 这 样 : setInterval(function(){
blueBox.box.dimensions = xxx; }, 3000);
如果场景中有很多物体,在不同的时间段要发生各种走走停停地运动时,这样操作可能会很累人。那么Cesium就提 供一种机制,让dimensions可以随时间自动发生变化,自动赋予不同的数值(位置)。这也就是property的作用了。
以下代码的加入,就可以让盒子如上图所示做线性运动了。
var property = new Cesium.SampledProperty(Cesium.Cartesian3); property.addSample(Cesium.JulianDate.fromIso8601('2019-01-01T00:00:00.00Z'), new Cesium.Cartesian3(400000.0, 300000.0, 200000.0)); property.addSample(Cesium.JulianDate.fromIso8601('2019-01-03T00:00:00.00Z'), new Cesium.Cartesian3(400000.0, 300000.0, 700000.0)); blueBox.box.dimensions = property;
由此可见,Property最大的特点是和时间相互关联,在不同的时间可以动态地返回不同的属性值。而Entity则
可以感知这些Property的变化,在不同的时间驱动物体进行动态展示。
Cesium宣称自己是数据驱动和time-dynamic visualization,这些可都是仰仗Property系统来实现的。
当然,Property可不只是这么简单,以下再详细论述。
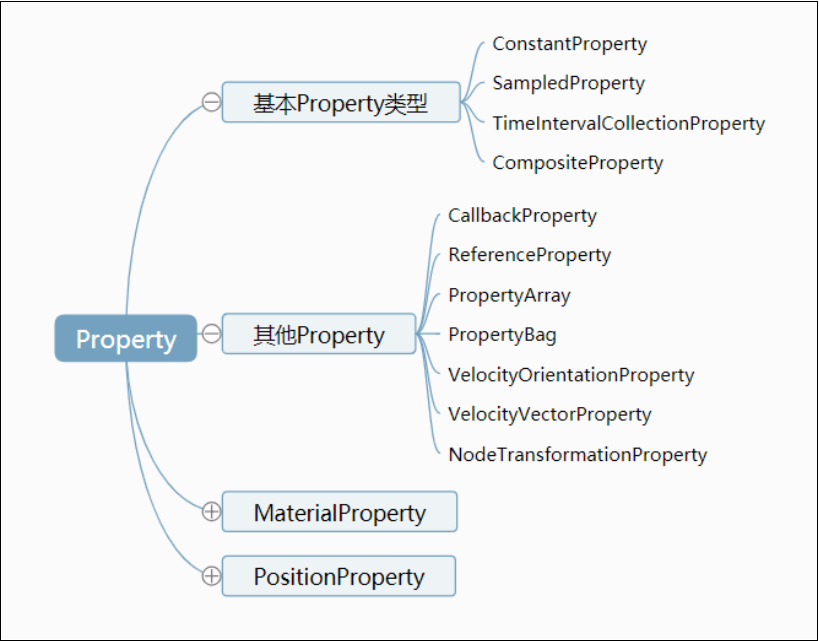
Property的分类
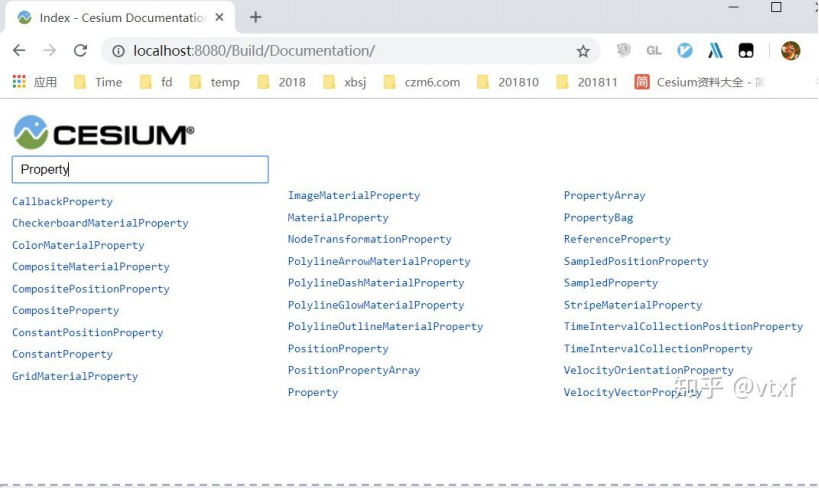
Cesium的Property不止有刚才示例代码中的SampleProperty,还有很多其他的类型。如果搜索一下Cesium的API文 档,会有很多。。如下图所示:
Property虚基类
Property是所有Property类型的虚基类。它定义了以下接口。
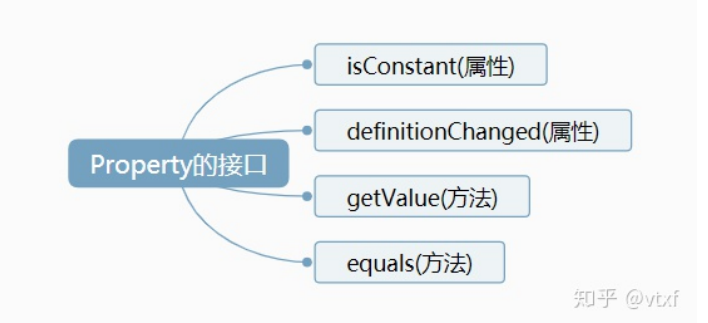
getValue 是一个方法,用来获取某个时间点的特定属性值。它有两个参数:第一个是time,用来传递一个时间点; 第二个是result,用来存储属性值,当然也可以是undefined。这个result是Cesium的scratch机制,主要是用来避免频 繁创建和销毁对象而导致内存碎片。Cesium就是通过调用getValue类似的一些函数来感知Property的变化的, 当然这个方法我们在外部也是可以使用的。
isConstant 用来判断该属性是否会随时间变化,是一个布尔值。Cesium会通过这个变量来决定是否需要在场景更新 的每一帧中都获取该属性的数值,从而来更新三维场景中的物体。如果isConstant为true,则只会获取一次数值,除 非definitionChanged事件被触发。
definitionChanged 是一个事件,可以通过该事件,来监听该Property自身所发生的变化,比如数值发生修改。
equals 是一个方法,用来检测属性值是否相等。
基本Property类型
SampleProperty
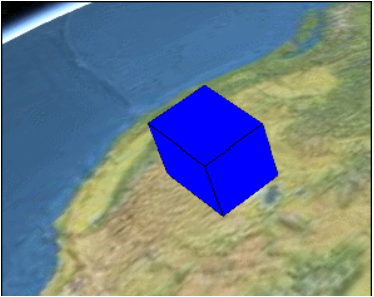
我们最早在上述示例中使用的就是它,用来通过给定多个不同时间点的Sample,然后在每两个时间点之间进行线性 插值的一种Property。代码写法如下:
var property = new Cesium.SampledProperty(Cesium.Cartesian3); property.addSample(Cesium.JulianDate.fromIso8601('2019-01-01T00:00:00.00Z'), new Cesium.Cartesian3(400000.0, 300000.0, 200000.0)); property.addSample(Cesium.JulianDate.fromIso8601('2019-01-03T00:00:00.00Z'), new Cesium.Cartesian3(400000.0, 300000.0, 700000.0)); blueBox.box.dimensions = property;
效果如下所示:
TimeIntervalCollectionProperty
该Property用来指定各个具体的时间段的属性值,每个时间段内的属性值是恒定的,并不会发生变化,除非已经进 入到下一个时间段。拿创建的盒子示例来说,表现出来的特点就是盒子尺寸的变化时跳跃式的。效果如下:
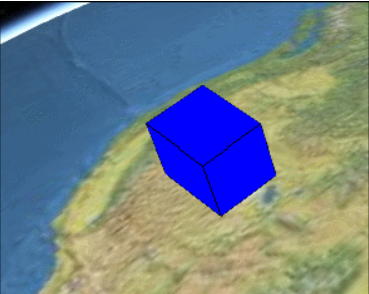
代码如下:
var property = new Cesium.TimeIntervalCollectionProperty(Cesium.Cartesian3); property.intervals.addInterval(Cesium.TimeInterval.fromIso8601({ iso8601 : '2019-01-01T00:00:00.00Z/2019-01-01T12:00:00.00Z', isStartIncluded : true, isStopIncluded : false, data : new Cesium.Cartesian3(400000.0, 300000.0, 200000.0) })); property.intervals.addInterval(Cesium.TimeInterval.fromIso8601({ iso8601 : '2019-01-01T12:00:01.00Z/2019-01-02T00:00:00.00Z', isStartIncluded : true, isStopIncluded : false, data : new Cesium.Cartesian3(400000.0, 300000.0, 400000.0) })); property.intervals.addInterval(Cesium.TimeInterval.fromIso8601({ iso8601 : '2019-01-02T00:00:01.00Z/2019-01-02T12:00:00.00Z', isStartIncluded : true, isStopIncluded : false, data : new Cesium.Cartesian3(400000.0, 300000.0, 500000.0) })); property.intervals.addInterval(Cesium.TimeInterval.fromIso8601({ iso8601 : '2019-01-02T12:00:01.00Z/2019-01-03T00:00:00.00Z', isStartIncluded : true, isStopIncluded : true, data : new Cesium.Cartesian3(400000.0, 300000.0, 700000.0) })); blueBox.box.dimensions = property;
ConstantProperty
通过对TimeIntervalCollectionProperty和SampleProperty的描述,读者应该基本了解Property的特点。我们回过头来说 下ConstantProperty,其实这才是最常用的Property。
示例代码如下:
blueBox.box.dimensions = new Cesium.Cartesian3(400000.0, 300000.0, 200000.0);
以上代码貌似没有使用ConstantProperty,实际上他是等同于:
blueBox.box.dimensions = new ConstantProperty(new Cesium.Cartesian3(400000.0, 300000.0, 200000.0));
也就是Entity的box.dimensions类型并不是Cartesian3,而是一个Property。虽然我们赋值了一个Cartesian3,但是 Cesium 内 部 会 隐 晦 地 转 化 成 了 一 个 ConstantProperty 。 注 意 只 会 隐 晦 地 转 化 成 ConstantProperty , 而 不 是 SampleProperty,更不是TimeIntervalCollectionProperty。
虽然叫ConstantProperty,但是,这里Constant的意思并不是说这个Property不可改变,而是说它不会随时间发生变 化。
举个例子,我们可以通过 property.getValue(viewer.clock.currentTime) 方法来获取某个时间点property的属性值。如果 property是SampleProperty或者TimeIntervalCollectionProperty的话,不同的时间点,可能getValue出不同的数值。但是 如果这个property是ConstantProperty,那么无论什么时间(getValue的第一个参数不起作用),最后返回的数值都是 一样的。
但是不会随时间变化,并不代表不可改变。ConstantProperty还有一个setValue的方法,开发者可以通过调用它,来 在适当的时候改变property的值。 比如,我可以通过点击按钮来修改ConstantProperty,代码如下:
blueBox.box.dimensions.setValue(new Cesium.Cartesian3(400000.0, 300000.0, 700000.0));
需要注意的是,虽然最终效果一样,但是以下两种写法的意义是不一样的。
blueBox.box.dimensions = new Cesium.Cartesian3(400000.0, 300000.0, 200000.0); blueBox.box.dimensions.setValue(new Cesium.Cartesian3(400000.0, 300000.0, 700000.0));
前者会创建一个新的ConstantProperty,后者则会修改原有的ConstantProperty的值。
CompositeProperty
CompositeProperty 的 意 思 是 组 合 的 Property , 可 以 把 多 种 不 同 类 型 的 ConstantProperty 、 SampleProperty 、 TimeIntervalCollectionProperty等Property组合在一起来操作。比如前一个时间段需要线性运动,后一段时间再跳跃 式运动。则可以使用类似下面这段代码来实现。
// 1 sampledProperty var sampledProperty = new Cesium.SampledProperty(Cesium.Cartesian3); sampledProperty.addSample(Cesium.JulianDate.fromIso8601('2019-01-01T00:00:00.00Z'), new Cesium.Cartesian3(400000.0, 300000.0, 200000.0)); sampledProperty.addSample(Cesium.JulianDate.fromIso8601('2019-01-02T00:00:00.00Z'), new Cesium.Cartesian3(400000.0, 300000.0, 400000.0)); // 2 ticProperty var ticProperty = new Cesium.TimeIntervalCollectionProperty(); ticProperty.intervals.addInterval(Cesium.TimeInterval.fromIso8601({ iso8601 : '2019-01-02T00:00:00.00Z/2019-01-02T06:00:00.00Z', isStartIncluded : true, isStopIncluded : false, data : new Cesium.Cartesian3(400000.0, 300000.0, 400000.0) })); ticProperty.intervals.addInterval(Cesium.TimeInterval.fromIso8601({ iso8601 : '2019-01-02T06:00:00.00Z/2019-01-02T12:00:00.00Z', isStartIncluded : true, isStopIncluded : false, data : new Cesium.Cartesian3(400000.0, 300000.0, 500000.0) })); ticProperty.intervals.addInterval(Cesium.TimeInterval.fromIso8601({ iso8601 : '2019-01-02T12:00:00.00Z/2019-01-02T18:00:00.00Z', isStartIncluded : true, isStopIncluded : false, data : new Cesium.Cartesian3(400000.0, 300000.0, 600000.0) })); ticProperty.intervals.addInterval(Cesium.TimeInterval.fromIso8601({ iso8601 : '2019-01-02T18:00:00.00Z/2019-01-03T23:00:00.00Z', isStartIncluded : true, isStopIncluded : true, data : new Cesium.Cartesian3(400000.0, 300000.0, 700000.0) })); // 3 compositeProperty var compositeProperty = new Cesium.CompositeProperty(); compositeProperty.intervals.addInterval(Cesium.TimeInterval.fromIso8601({ iso8601 : '2019-01-01T00:00:00.00Z/2019-01-02T00:00:00.00Z', data : sampledProperty })); compositeProperty.intervals.addInterval(Cesium.TimeInterval.fromIso8601({ iso8601 : '2019-01-02T00:00:00.00Z/2019-01-03T00:00:00.00Z', isStartIncluded : false, isStopIncluded : false, data : ticProperty })); // 4 设置position blueBox.box.dimensions = compositeProperty;
最终实现的效果如下:
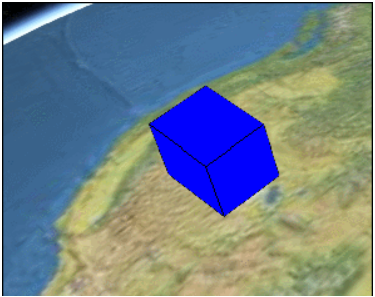
PositionProperty
以上示例可以看到,我们一直在用SampledProperty、ConstantProperty等来修改Entity的box.dimensions属性。基本上 可以得出结论:大部分Property都是可以赋值给Entity的box.dimensions的。
PositionProperty 和 Property 一 样 , 是 一 个 虚 类 , 并 不 能 直 接 实 例 化 , 他 扩 展 了 Property 的 接 口 , 增 加 了 referenceFrame,同时只能用来表示position。
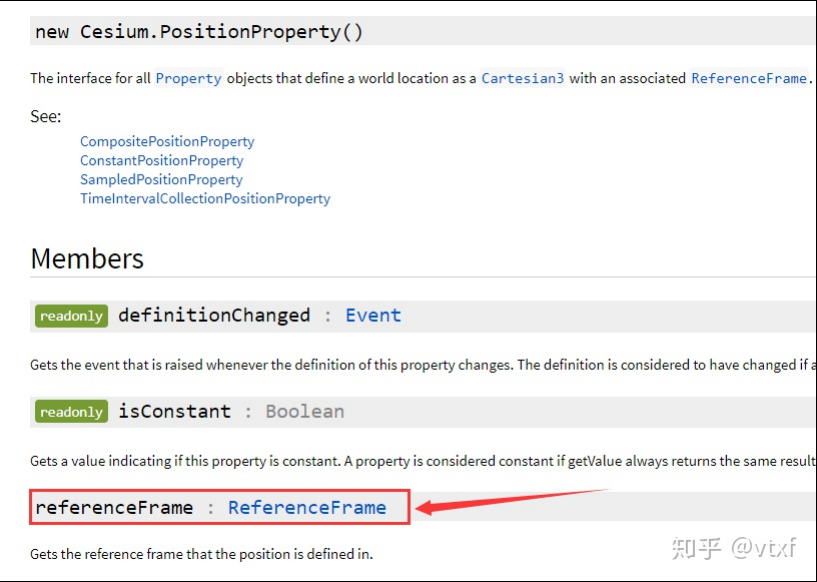

我们常用的是FIXED这种默认类型,它相当于以地球的中心作为坐标系的原点,x轴正向指向赤道和本初子午线的
交点。(可能描述不准确。。)这样我们给定一个笛卡尔坐标(x, y, z),它在地球上的位置是固定的。
而INERTIAL这种类型,则相当于以太阳系的质心为原点的坐标架偏移到地球的中心来,如果给定一个笛卡尔坐标
(x, y, z),那么它在不同的时间表示的是地球上的不同位置。。(我的理解,可能有误。。)
一 般 情 况 下 , 我 们 用 不 上 INERTIAL 。 但 是 如 果 真 的 给 定 了 INERTIAL 下 的 坐 标 点 , Cesium 内 部 会 通 过 PositionProperty,把它转成同一个FIXED下的坐标点来使用,这些不需要我们操作。
但是,因为普通的Property是没有办法进行这种参考架的自动转换的,所以Cesium派生了一批PositionProperty类型。
基于PositionProperty的类型有以下几种: CompositePositionProperty
ConstantPositionProperty
PositionProperty
PositionPropertyArray
SampledPositionProperty
TimeIntervalCollectionPositionProperty
稍加留意,就会发现,和普通的Property相比,只是多了一个Position,所以用法上也大同小异,只不过他们是用来 专门表示位置的。
SampledPositionProperty
SampledPositionProperty的用法,不多解释,直接看代码吧:
var property = new Cesium.SampledPositionProperty(); property.addSample(Cesium.JulianDate.fromIso8601('2019-01-01T00:00:00.00Z'), Cesium.Cartesian3.fromDegrees(-114.0, 40.0, 300000.0)); property.addSample(Cesium.JulianDate.fromIso8601('2019-01-03T00:00:00.00Z'), Cesium.Cartesian3.fromDegrees(-114.0, 45.0, 300000.0)); blueBox.position = property;
效果如下:
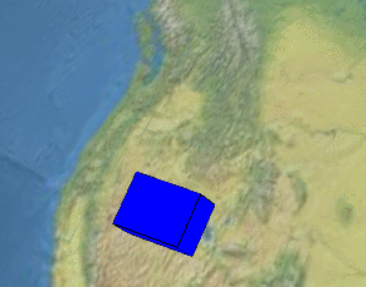
SampleProperty和SampledPositionProperty有一个特有的方法:setInterpolationOptions,用来修改不同的插值方式。以 下是以Cesium的Interpolation示例中的截图来说明他们的不同之处。
*****线性插值
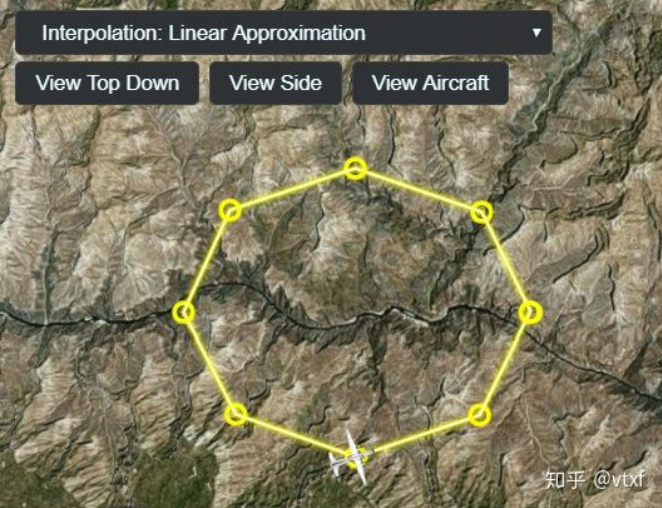
代码写法如下:
entity.position.setInterpolationOptions({ interpolationDegree : 1, interpolationAlgorithm : Cesium.LinearApproximation });
Lagrange插值
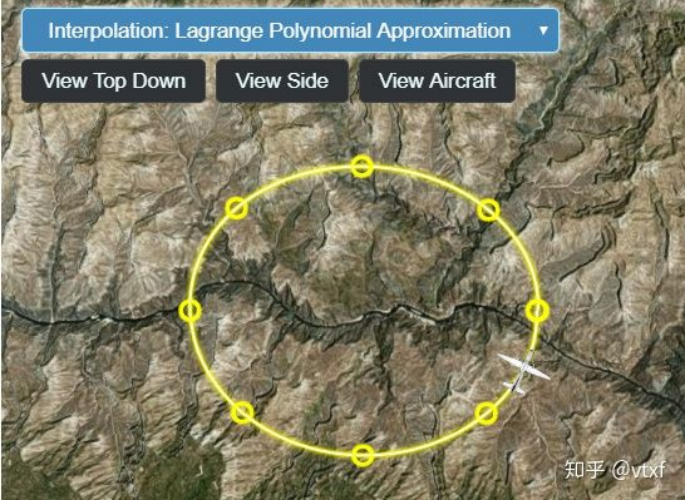
entity.position.setInterpolationOptions({ interpolationDegree : 5, interpolationAlgorithm : Cesium.LagrangePolynomialApproximation });
Hermite插值
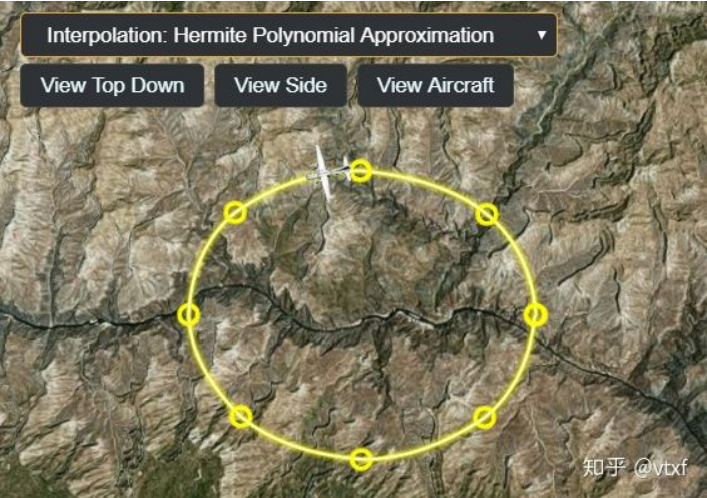
entity.position.setInterpolationOptions({ interpolationDegree : 2, interpolationAlgorithm : Cesium.HermitePolynomialApproximation });
MaterialProperty
MaterialProperty是用来专门表示材质的Property,它对Property进行了扩展,增加了getType方法,用来获取材质类 型。
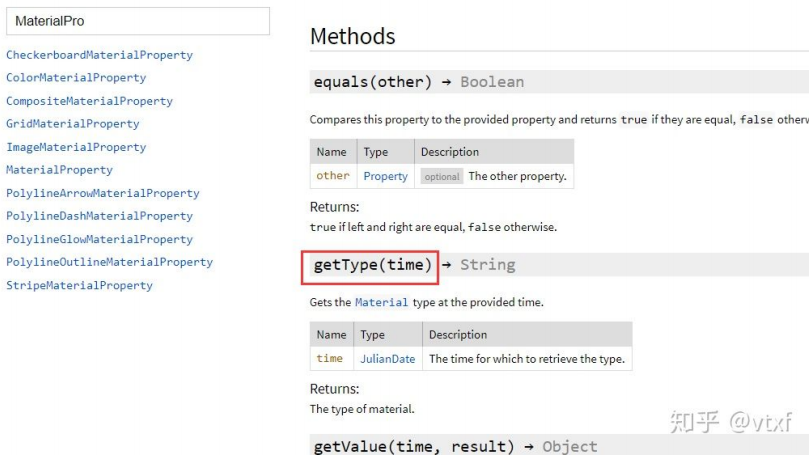
MaterialProperty也是一个虚基类,派生类有:
CheckerboardMaterialProperty
ColorMaterialProperty
CompositeMaterialProperty
GridMaterialProperty
ImageMaterialProperty
MaterialProperty
PolylineArrowMaterialProperty
PolylineDashMaterialProperty
PolylineGlowMaterialProperty
PolylineOutlineMaterialProperty
StripeMaterialProperty
使用上大同小异,我们以ColorMaterialProperty来说明一下。
ColorMaterialProperty
blueBox.box.material = new Cesium.ColorMaterialProperty(new Cesium.Color(0, 1, 0)); // 以上代码等同于 // blueBox.box.material = new Cesium.Color(0, 1, 0);
效果如下:
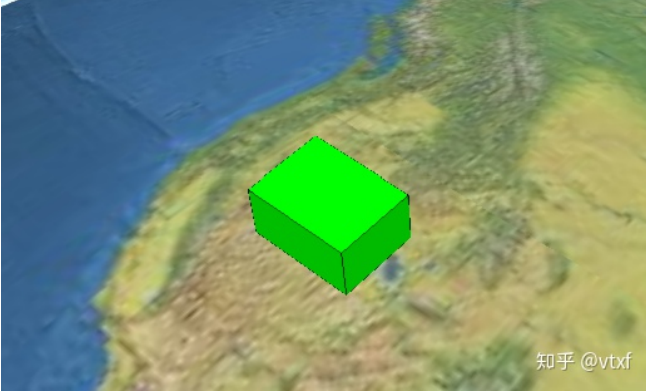
ColorMaterialProperty的动态变化
如 果 希 望 Color 动 起 来 的 话 , 也 是 可 以 的 。 ColorMaterialProperty 的 内 部 有 一 个 color 属 性 , 可 以 赋 予 一 个 SampledProperty来实现动态效果。
var colorProperty = new Cesium.SampledProperty(Cesium.Color); colorProperty.addSample(Cesium.JulianDate.fromIso8601('2019-01-01T00:00:00.00Z'), new Cesium.Color(0, 1, 0)); colorProperty.addSample(Cesium.JulianDate.fromIso8601('2019-01-03T00:00:00.00Z'), new Cesium.Color(0, 0, 1)); blueBox.box.material = new Cesium.ColorMaterialProperty(colorProperty);
效果如下:
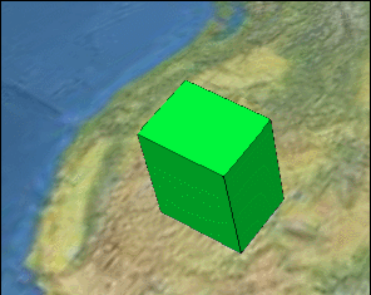
其他类型的Property
CallbackProperty
CallbackProperty是自由度最高的一种Property,让用户通过自定义,回调函数,来返回需要的值。回调函数中,用 户可以使用time来给定value,也可以以自己的方式给给定。
以下代码就是不通过time,自己手动调整dimension的示例。
var l = 200000.0; var property = new Cesium.CallbackProperty(function (time, result) { result = result || new Cesium.Cartesian3(0, 0, 0); l += 10000.0; if (l > 700000.0) { l = 200000.0; } result.x = 400000.0; result.y = 300000.0; result.z = l; return result; }, false); blueBox.box.dimensions = property;
效果如下:
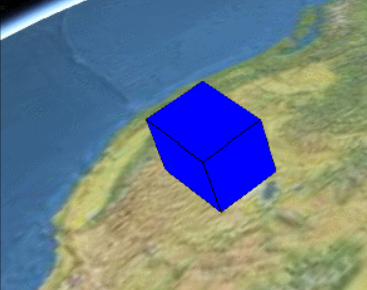
ReferenceProperty
该Property可以直接链接到别的对象的Property上,相当于引用,省得自己构建了。比如这里我创建了一个红色的盒 子redBox,希望它和之前的蓝色盒子一起变大。那么可以使用以下代码:
var collection = viewer.entities; redBox.box.dimensions = new Cesium.ReferenceProperty(collection, blueBox.id, ['box', 'dimensions']);
效果如下:
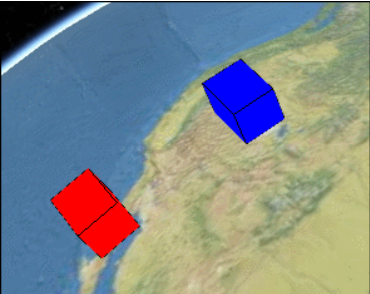

ReferenceProperty构造函数的参数有三个。第一个参数用来指定需要引用的对象所属的collection,如果没有自己专 门创建EntityCollection的话,可以直接使用viewer.entities。第二个参数传递所指对象的id。第三个参数指定属性的位 置的数组,如果是有层级的属性,可以依次写入。比如 ['billboard', 'scale'] 指定的是entity.billboard.scale 属性。当然还有其他设置方式,可以参见Cesium的api文档。
PropertyBag
PropertyBag虽然不是以Property结尾,但实际上也是一个Property。它的特点是可以包装一个对象(JS中的对象概 念),该对象的每一个属性(JS中的属性概念),都可以作为一个动态的Property。
比如之前修改dimensions的话,dimensions是作为一个Cartesian3类型变量整体封装到Property中去的,如果我们只想 修改dimensions的x。则可以使用PropertyBag来实现,代码如下:
var zp = new Cesium.SampledProperty(Number); zp.addSample(Cesium.JulianDate.fromIso8601('2019-01-01T00:00:00.00Z'), 200000.0); zp.addSample(Cesium.JulianDate.fromIso8601('2019-01-03T00:00:00.00Z'), 700000.0); blueBox.box.dimensions = new Cesium.PropertyBag({ x: 400000.0, y: 300000.0, z: zp });
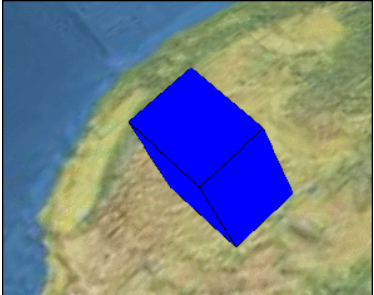
效果和sampleProperty类似,但是修改的只是dimensions的x。
*****PropertyArray
PropertyArray和上述的PropertyBag类似,只是其内部封装了一个数组而已。这里不再赘述。
VelocityOrientationProperty
该Property用来Entity的position的位置变化,来计算出移动的方向,最后把速度方向输出成Orientation。Cesium自带 的示例中有一个Interpolation中有其用法,不再赘述。
VelocityVectorProperty
与上面的Property类似,把速度方向转成Vector。使用示例如下:
blueBox.box.show = false; blueBox.billboard = { scale: 0.05, image : 'https://upload-images.jianshu.io/upload_images/80648-5dfe8a3ea2c250be.png? imageMogr2/auto-orient/strip%7CimageView2/2/w/540/format/webp', alignedAxis : new Cesium.VelocityVectorProperty(blueBox.position, true) // alignedAxis must be a unit vector };
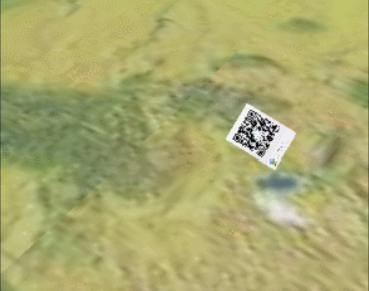
可见图像的摆放方向和位置移动的方向保持一致。效果如下:
var viewer = new Cesium.Viewer('cesiumContainer', { imageryProvider : Cesium.createTileMapServiceImageryProvider({ url : Cesium.buildModuleUrl('Assets/Textures/NaturalEarthII') }), baseLayerPicker : false, geocoder : false, shouldAnimate: true, }); //////////////////////////////////////////////////////// // 此段代码仅为消除锯齿,让录屏好看一点,可以忽略 begin viewer._cesiumWidget._supportsImageRenderingPixelated = Cesium.FeatureDetection.supportsImageRenderingPixelated(); viewer._cesiumWidget._forceResize = true; if (Cesium.FeatureDetection.supportsImageRenderingPixelated()) { var vtxf_dpr = window.devicePixelRatio; // 适度降低分辨率 while (vtxf_dpr >= 2.0) { vtxf_dpr /= 2.0; } //alert(dpr); viewer.resolutionScale = vtxf_dpr; } // 此段代码仅为消除锯齿,让录屏好看一点,可以忽略 end //////////////////////////////////////////////////////// // 设置时间 var start = Cesium.JulianDate.fromIso8601('2019-01-01T00:00:00.00Z'); var stop = Cesium.JulianDate.fromIso8601('2019-01-03T00:00:00.00Z'); //Make sure viewer is at the desired time. viewer.clock.startTime = start.clone(); viewer.clock.stopTime = stop.clone(); viewer.clock.currentTime = start.clone(); viewer.clock.clockRange = Cesium.ClockRange.LOOP_STOP; //Loop at the end viewer.clock.multiplier = 50000; viewer.timeline.zoomTo(start, stop); // 创建box var blueBox = viewer.entities.add({ name : 'Blue box', //id: 'blueBox', position: Cesium.Cartesian3.fromDegrees(-114.0, 40.0, 300000.0), box : { dimensions : new Cesium.Cartesian3(400000.0, 300000.0, 500000.0), material : Cesium.Color.BLUE, outline: true, }, path: { show: true } }); var redBox = viewer.entities.add({ name : 'Red box', position: Cesium.Cartesian3.fromDegrees(-114.0, 30.0, 300000.0), box : { dimensions : new Cesium.Cartesian3(200000.0, 200000.0, 200000.0), material : Cesium.Color.RED, outline: true, } }); viewer.zoomTo(viewer.entities); Sandcastle.addToolbarButton('Constant new', function () { blueBox.box.dimensions = new ConstantProperty(new Cesium.Cartesian3(400000.0, 300000.0, 200000.0)); // 以上代码等同于 // blueBox.box.dimensions = new Cesium.Cartesian3(400000.0, 300000.0, 200000.0); }); Sandcastle.addToolbarButton('Constant set', function () { blueBox.box.dimensions && blueBox.box.dimensions.setValue(new Cesium.Cartesian3(400000.0, 300000.0, 700000.0)); }); Sandcastle.addToolbarButton('Sampled', function () { var property = new Cesium.SampledProperty(Cesium.Cartesian3); property.addSample(Cesium.JulianDate.fromIso8601('2019-01-01T00:00:00.00Z'), new Cesium.Cartesian3(400000.0, 300000.0, 200000.0)); property.addSample(Cesium.JulianDate.fromIso8601('2019-01-03T00:00:00.00Z'), new Cesium.Cartesian3(400000.0, 300000.0, 700000.0)); blueBox.box.dimensions = property; }); Sandcastle.addToolbarButton('TimeIntervalCollection', function () { var property = new Cesium.TimeIntervalCollectionProperty(Cesium.Cartesian3); property.intervals.addInterval(Cesium.TimeInterval.fromIso8601({ iso8601 : '2019-01-01T00:00:00.00Z/2019-01-01T12:00:00.00Z', isStartIncluded : true, isStopIncluded : false, data : new Cesium.Cartesian3(400000.0, 300000.0, 200000.0) })); property.intervals.addInterval(Cesium.TimeInterval.fromIso8601({ iso8601 : '2019-01-01T12:00:01.00Z/2019-01-02T00:00:00.00Z', isStartIncluded : true, isStopIncluded : false, data : new Cesium.Cartesian3(400000.0, 300000.0, 400000.0) })); property.intervals.addInterval(Cesium.TimeInterval.fromIso8601({ iso8601 : '2019-01-02T00:00:01.00Z/2019-01-02T12:00:00.00Z', isStartIncluded : true, isStopIncluded : false, data : new Cesium.Cartesian3(400000.0, 300000.0, 500000.0) })); property.intervals.addInterval(Cesium.TimeInterval.fromIso8601({ iso8601 : '2019-01-02T12:00:01.00Z/2019-01-03T00:00:00.00Z', isStartIncluded : true, isStopIncluded : true, data : new Cesium.Cartesian3(400000.0, 300000.0, 700000.0) })); blueBox.box.dimensions = property; }); Sandcastle.addToolbarButton('Composit', function () { // 1 sampledProperty var sampledProperty = new Cesium.SampledProperty(Cesium.Cartesian3); sampledProperty.addSample(Cesium.JulianDate.fromIso8601('2019-01-01T00:00:00.00Z'), new Cesium.Cartesian3(400000.0, 300000.0, 200000.0)); sampledProperty.addSample(Cesium.JulianDate.fromIso8601('2019-01-02T00:00:00.00Z'), new Cesium.Cartesian3(400000.0, 300000.0, 400000.0)); // 2 ticProperty var ticProperty = new Cesium.TimeIntervalCollectionProperty(); ticProperty.intervals.addInterval(Cesium.TimeInterval.fromIso8601({ iso8601 : '2019-01-02T00:00:00.00Z/2019-01-02T06:00:00.00Z', isStartIncluded : true, isStopIncluded : false, data : new Cesium.Cartesian3(400000.0, 300000.0, 400000.0) })); ticProperty.intervals.addInterval(Cesium.TimeInterval.fromIso8601({ iso8601 : '2019-01-02T06:00:00.00Z/2019-01-02T12:00:00.00Z', isStartIncluded : true, isStopIncluded : false, data : new Cesium.Cartesian3(400000.0, 300000.0, 500000.0) })); ticProperty.intervals.addInterval(Cesium.TimeInterval.fromIso8601({ iso8601 : '2019-01-02T12:00:00.00Z/2019-01-02T18:00:00.00Z', isStartIncluded : true, isStopIncluded : false, data : new Cesium.Cartesian3(400000.0, 300000.0, 600000.0) })); ticProperty.intervals.addInterval(Cesium.TimeInterval.fromIso8601({ iso8601 : '2019-01-02T18:00:00.00Z/2019-01-03T23:00:00.00Z', isStartIncluded : true, isStopIncluded : true, data : new Cesium.Cartesian3(400000.0, 300000.0, 700000.0) })); // 3 compositeProperty var compositeProperty = new Cesium.CompositeProperty(); compositeProperty.intervals.addInterval(Cesium.TimeInterval.fromIso8601({ iso8601 : '2019-01-01T00:00:00.00Z/2019-01-02T00:00:00.00Z', data : sampledProperty })); compositeProperty.intervals.addInterval(Cesium.TimeInterval.fromIso8601({ iso8601 : '2019-01-02T00:00:00.00Z/2019-01-03T00:00:00.00Z', isStartIncluded : false, isStopIncluded : false, data : ticProperty })); // 4 设置position blueBox.box.dimensions = compositeProperty; }); Sandcastle.addToolbarButton('ConstantPosition', function () { blueBox.position = new Cesium.ConstantPositionProperty(Cesium.Cartesian3.fromDegrees(-114.0, 45.0, 300000.0)); // 以上代码等同于 // blueBox.position = Cesium.Cartesian3.fromDegrees(-114.0, 45.0, 300000.0) }); Sandcastle.addToolbarButton('SampledPosition', function () { var property = new Cesium.SampledPositionProperty(); property.addSample(Cesium.JulianDate.fromIso8601('2019-01-01T00:00:00.00Z'), Cesium.Cartesian3.fromDegrees(-114.0, 40.0, 300000.0)); property.addSample(Cesium.JulianDate.fromIso8601('2019-01-03T00:00:00.00Z'), Cesium.Cartesian3.fromDegrees(-114.0, 45.0, 300000.0)); blueBox.position = property; }); Sandcastle.addToolbarButton('ColorMaterial', function () { blueBox.box.material = new Cesium.ColorMaterialProperty(new Cesium.Color(0, 1, 0)); // 以上代码等同于 // blueBox.box.material = new Cesium.Color(0, 1, 0); }); Sandcastle.addToolbarButton('SampledColor', function () { var colorProperty = new Cesium.SampledProperty(Cesium.Color); colorProperty.addSample(Cesium.JulianDate.fromIso8601('2019-01-01T00:00:00.00Z'), new Cesium.Color(0, 1, 0)); colorProperty.addSample(Cesium.JulianDate.fromIso8601('2019-01-03T00:00:00.00Z'), new Cesium.Color(0, 0, 1)); blueBox.box.material = new Cesium.ColorMaterialProperty(colorProperty); }); Sandcastle.addToolbarButton('Reference', function () { var collection = viewer.entities; redBox.box.dimensions = new Cesium.ReferenceProperty(collection, blueBox.id, ['box', 'dimensions']); }); Sandcastle.addToolbarButton('PropertyBag', function () { var zp = new Cesium.SampledProperty(Number); zp.addSample(Cesium.JulianDate.fromIso8601('2019-01-01T00:00:00.00Z'), 200000.0); zp.addSample(Cesium.JulianDate.fromIso8601('2019-01-03T00:00:00.00Z'), 700000.0); blueBox.box.dimensions = new Cesium.PropertyBag({ x: 400000.0, y: 300000.0, z: zp }); }); Sandcastle.addToolbarButton('PropertyBag', function () { var l = 200000.0; var property = new Cesium.CallbackProperty(function (time, result) { result = result || new Cesium.Cartesian3(0, 0, 0); l += 10000.0; if (l > 700000.0) { l = 200000.0; } result.x = 400000.0; result.y = 300000.0; result.z = l; return result; }, false); blueBox.box.dimensions = property; }); Sandcastle.addToolbarButton('VelocityVector', function () { blueBox.billboard = { image : 'https://upload-images.jianshu.io/upload_images/80648-5dfe8a3ea2c250be.png? imageMogr2/auto-orient/strip%7CimageView2/2/w/540/format/webp', alignedAxis : new Cesium.VelocityVectorProperty(blueBox.position, true) // alignedAxis must be a unit vector }; });
十一、cesium轨迹回放,按路径飞行
在实例化cesium时,应该启用时间轴
否则会报zoomTo is undefined view.timeline.zoomTo(start,stop);
实现原理:
基于模型的availability 属性和postion属性.
其中availability可以设置时间轴,position中定义了模型的位置和时间信息.
时间轴类似于一个触发器,当在某个时间,模型就移动到某个地方,因为是一个序列,模型不会跳跃,而是会计算一个均
速移动过去。
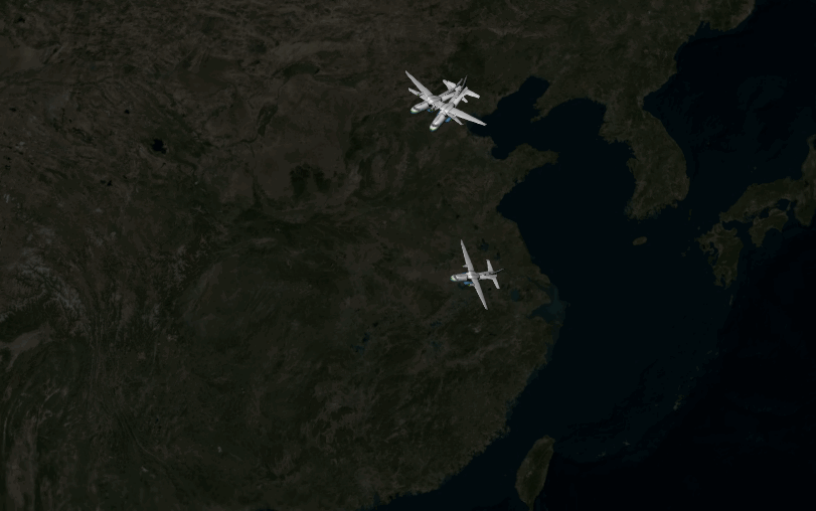
模型的实例化包括四部分
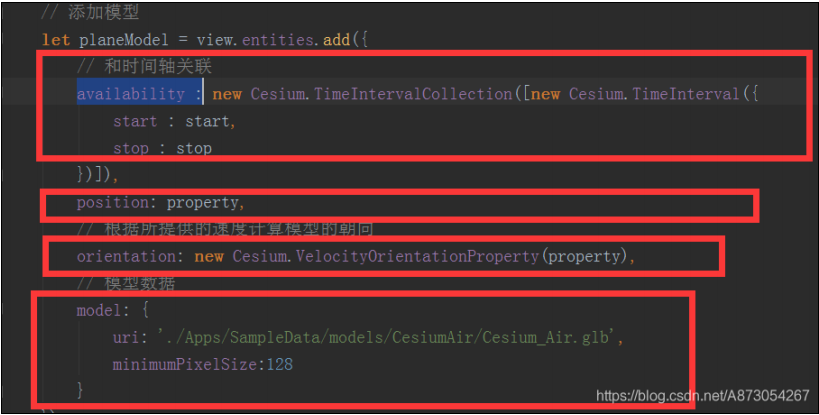
第一部分就是关联时间轴,cesium时间是一个儒略时,根据API进行声明即可。
第二部分是位置信息,根据API,进行设置即可。修改此处即可修改路线,修改此信息即可更改模型的速度,飞行
方向等。
第三部分就是速度和方向信息,(此部分是由property计算出来的)
第四部分为模型
那么我们的终点就在于这个property是个什么东西了。
查看API可以发现是一个PositionProperty()类
那么这个类是如何构造的呢?,查看demo中的函数,可以发现是声明一个time,和一个position组成。这样就可以理 解了,为何模型会在某个时间移动到某个地方。
function computeFlight(source) { // 取样位置 相当于一个集合 let property = new Cesium.SampledPositionProperty(); for(let i=0; i<source.length; i++){ let time = Cesium.JulianDate.addSeconds(start, source[i].time, new Cesium.JulianDate); let position = Cesium.Cartesian3.fromDegrees(source[i].longitude, source[i].dimension, source[i].height); // 添加位置,和时间对应 property.addSample(time, position); } return property; }
再来查看飞行路径数据的设置
data[0] = [{longitude:116.405419, dimension:39.918034, height:0, time:0},{longitude:116.2821, dimension:39.918145, height:0, time:40},{longitude:115.497402, dimension:39.344641, height:70000, time:100},{longitude:107.942392, dimension:29.559967, height:70000, time:280}, {longitude:106.549265, dimension:29.559967, height:0, time:360}]; data[1] = [{longitude:116.405419, dimension:39.918034, height:0, time:0},{longitude:117.034586, dimension:39.881202, height:0, time:40},{longitude:116.340088, dimension:38.842224, height:70000, time:100},{longitude:113.489176, dimension:23.464017, height:70000, time:280}, {longitude:113.262084, dimension:23.13901, height:0, time:360}]; data[2] = [{longitude:118.838979, dimension:32.073514, height:0, time:0},{longitude:118.438838, dimension:32.03777, height:0, time:40},{longitude:117.802406, dimension:31.91231, height:70000, time:100},{longitude:104.043645, dimension:35.993845, height:70000, time:280}, {longitude:101.807224, dimension:36.660972, height:0, time:360}]; // 起始时间 let start = Cesium.JulianDate.fromDate(new Date(2017,7,11)); // 结束时间 let stop = Cesium.JulianDate.addSeconds(start, 360, new Cesium.JulianDate());
其中start stop分别对应了数组中第一个位置的time属性和最后一个位置的time属性。
因此要改造仅需要修改传入的数据经纬度,time即可,time应当和start end时间对应
完整代码
Cesium.Ion.defaultAccessToken='你的token'; var view = new Cesium.Viewer('cesiumContainer',{ baseLayerPicker:false, timeline:true, homeButton:false, fullscreenButton:false, infoBox:false, sceneModePicker:false, navigationInstructionsInitiallyVisible:false, navigationHelpButton:false, shouldAnimate : true // 时间轴 }); view.scene.globe.enableLighting = true; let data = []; data[0] = [{longitude:116.405419, dimension:39.918034, height:0, time:0},{longitude:116.2821, dimension:39.918145, height:0, time:40},{longitude:115.497402, dimension:39.344641, height:70000, time:100},{longitude:107.942392, dimension:29.559967, height:70000, time:280}, {longitude:106.549265, dimension:29.559967, height:0, time:360}]; data[1] = [{longitude:116.405419, dimension:39.918034, height:0, time:0},{longitude:117.034586, dimension:39.881202, height:0, time:40},{longitude:116.340088, dimension:38.842224, height:70000, time:100},{longitude:113.489176, dimension:23.464017, height:70000, time:280}, {longitude:113.262084, dimension:23.13901, height:0, time:360}]; data[2] = [{longitude:118.838979, dimension:32.073514, height:0, time:0},{longitude:118.438838, dimension:32.03777, height:0, time:40},{longitude:117.802406, dimension:31.91231, height:70000, time:100},{longitude:104.043645, dimension:35.993845, height:70000, time:280}, {longitude:101.807224, dimension:36.660972, height:0, time:360}]; // 起始时间 let start = Cesium.JulianDate.fromDate(new Date(2017,7,11)); // 结束时间 let stop = Cesium.JulianDate.addSeconds(start, 360, new Cesium.JulianDate()); // 设置始时钟始时间 view.clock.startTime = start.clone(); // 设置时钟当前时间 view.clock.currentTime = start.clone(); // 设置始终停止时间 view.clock.stopTime = stop.clone(); // 时间速率,数字越大时间过的越快 view.clock.multiplier = 10; // 时间轴 view.timeline.zoomTo(start,stop); // 循环执行,即为2,到达终止时间,重新从起点时间开始 view.clock.clockRange = Cesium.ClockRange.LOOP_STOP; // view.camera.flyTo({ // destination:Cesium.Cartesian3.fromDegrees(116.405419,32.073514,20000) // }) for(let j=0; j<data.length; j++){ let property = computeFlight(data[j]); //console.log(property) // 添加模型 let planeModel = view.entities.add({ // 和时间轴关联 availability : new Cesium.TimeIntervalCollection([new Cesium.TimeInterval({ start : start, stop : stop })]), position: property, // 根据所提供的速度计算模型的朝向 orientation: new Cesium.VelocityOrientationProperty(property), // 模型数据 model: { uri: './Apps/SampleData/models/CesiumAir/Cesium_Air.glb', minimumPixelSize:128 } }); } /** * 计算飞行 * @param source 数据坐标 * @returns {SampledPositionProperty|*} */ function computeFlight(source) { // 取样位置 相当于一个集合 let property = new Cesium.SampledPositionProperty(); for(let i=0; i<source.length; i++){ let time = Cesium.JulianDate.addSeconds(start, source[i].time, new Cesium.JulianDate); let position = Cesium.Cartesian3.fromDegrees(source[i].longitude, source[i].dimension, source[i].height); // 添加位置,和时间对应 property.addSample(time, position); } return property; }
本文作者:赵刚、
本文链接:https://www.cnblogs.com/zgboy/p/17664232.html
版权声明:本作品采用知识共享署名-非商业性使用-禁止演绎 2.5 中国大陆许可协议进行许可。


【推荐】国内首个AI IDE,深度理解中文开发场景,立即下载体验Trae
【推荐】编程新体验,更懂你的AI,立即体验豆包MarsCode编程助手
【推荐】抖音旗下AI助手豆包,你的智能百科全书,全免费不限次数
【推荐】轻量又高性能的 SSH 工具 IShell:AI 加持,快人一步