微服务架构 | 负载均衡 - [Ribbon]
@
§1 简介
Ribbon 是 Springcloud 原配的负载均衡器
与 nginx 不同,它是本地进程负载均衡,由消费端进行(nginx 本质是个反向代理服务器,可以实现服务端的负载均衡
)
§2 简易使用
依赖
<dependency>
  <groupId>org.springframework.cloud</groupId>
  <artifactId>spring-cloud-starter-netflix-ribbon</artifactId>
  <version>2.2.1.RELEASE</version>
  <scope>compile</scope>
</dependency>
启用负载均衡
@Configuration
public class RestTemplateConfig {
    @Bean
    @LoadBalanced
    public RestTemplate restTemplate(){
        return new RestTemplateBuilder().messageConverters(new GsonHttpMessageConverter(new GsonBuilder().serializeNulls().create())).build();
    }
}
Ribbon 预设的负载均衡规则
Ribbon 的负载均衡策略由 IRule 接口定义,其预设实现类图如下:

- RoundRobinRule:轮询
- RandomRule:随机
- AvailabilityFilteringRule:轮询加强,轮询前先过滤掉由于多次访问故障而处于断路器状态的服务,还有并发的连接数量超过阈值的服务
- WeightedResponseTimeRule:轮询加强,根据平均响应时间计算所有服务的权重,响应时间越快的服务权重越大被选中的概率越大
- RetryRule:轮询加强,先按照RoundRobinRule(轮询)策略获取服务,如果获取服务失败则在指定时间内进行重试
- BestAvailableRule:会先过滤掉由于多次访问故障而处于断路器跳闸状态的服务,然后选择一个并发量最小的服务;
- ZoneAvoidanceRule:默认,复合判断Server所在区域的性能和Server的可用性选择服务器;
Ribbon 负载均衡规则的替换和自定义
负载均衡策略的替换可以通过自定义 RibbonClient 进行
需注意:此配置不应该至于 @SpringBootApplication 或 @ComponentScan 两种注解的扫描路径下,否则此配置将应用于全局,而不能分业务定制
自定义规则可以在项目或公司级别的common包及其子包中进行定义(需要引用ribbon的相关依赖)
自定义规则
package com.fc.common.ribbon;
import com.netflix.loadbalancer.RandomRule;
public class CustomizedRibbonRule extends RandomRule {
}
完成自定义规则配置
package com.fc.common.ribbon;

//@Configuration 不需要此注解,因为是通过 @RibbonClient 指定的
public class CustomizedRibbonRuleConfigration {
    @Bean
    public IRule customizedRibbonRule(){
        return new CustomizedRibbonRule();
    }
}
使用 @RibbonClient 使生效,示例为对指定的服务(payment-service)使用指定的规则配置
@SpringBootApplication
@EnableEurekaClient
@EnableDiscoveryClient
@RibbonClient(name="payment-service",configuration = CustomizedRibbonRuleConfigration.class)
public class OrderComsummerApplication {
    public static void main(String[] args) {
        SpringApplication.run(OrderComsummerApplication.class,args);
    }
}
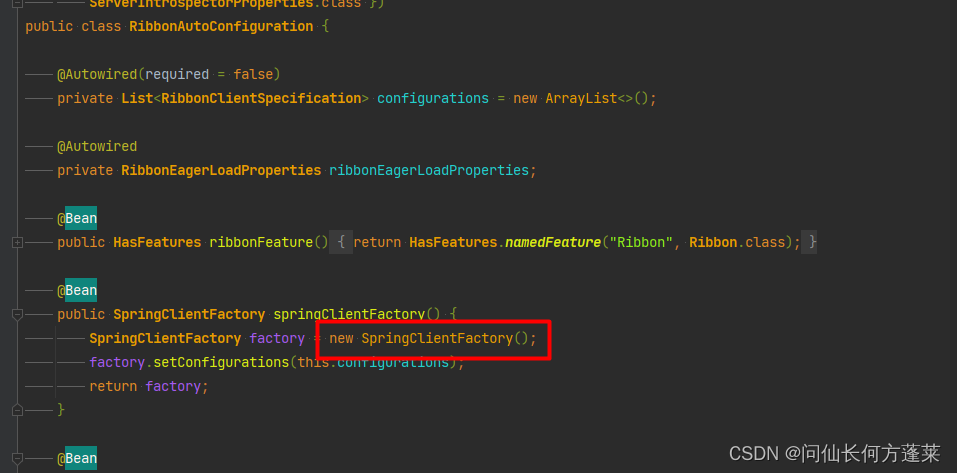
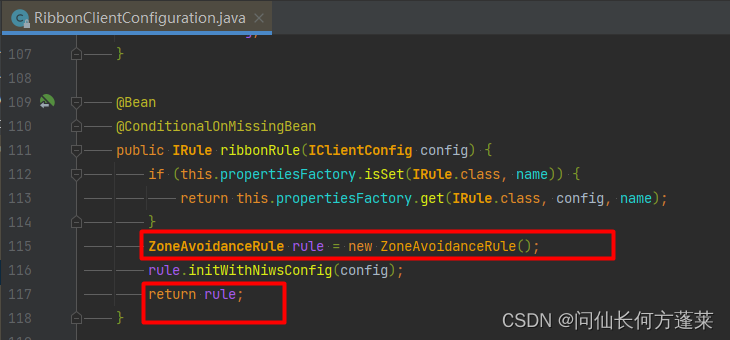
默认负载均衡规则
有些资料说默认规则是 RoundRobinRule,但从 2.2.1 的源码追溯,应该是 ZoneAvoidanceRule
可能是版本升级了,RoundRobinRule 在多服务器下按他默认的逻辑可能有坑


超时控制
因为 ribbon 的 resttemplate 会在通过 RibbonClientConfiguration 进行初始化,而下面的代码写死了 ribbon 超时的参数
因此,直接在 yml 文件中配置超时时间是不会生效的
@Bean
@ConditionalOnMissingBean
public IClientConfig ribbonClientConfig() {
	DefaultClientConfigImpl config = new DefaultClientConfigImpl();
	config.loadProperties(this.name);
	config.set(CommonClientConfigKey.ConnectTimeout, DEFAULT_CONNECT_TIMEOUT);//默认连接时间
	config.set(CommonClientConfigKey.ReadTimeout, DEFAULT_READ_TIMEOUT);//默认的业务响应读取时间
	config.set(CommonClientConfigKey.GZipPayload, DEFAULT_GZIP_PAYLOAD);
	return config;
}
有效的方式是通过自定义 resttemplate 实例进行配置
@Configuration
public class RestTemplateConfig {
    @Bean
    @LoadBalanced
    public RestTemplate restTemplate(){
        return new RestTemplateBuilder()
                .setConnectTimeout(Duration.ofSeconds(2)) //连接时间
                .setReadTimeout(Duration.ofSeconds(2)) //响应时间
                .messageConverters(new GsonHttpMessageConverter(new GsonBuilder().serializeNulls().create())).build();
    }
}
超时后会出现如下报错

§3 负载均衡策略源码
RoundRobinRule
private AtomicInteger nextServerCyclicCounter;//调用次数计数器

public Server choose(ILoadBalancer lb, Object key) {
    if (lb == null) {
        log.warn("no load balancer");
        return null;
    }

    Server server = null;//被选中的server,默认是没有找到
    int count = 0;//计数器

//只进行10轮choose
    while (server == null && count++ < 10) {
    	//获取所有可达服务器
        List<Server> reachableServers = lb.getReachableServers();
        //获取所有服务器
        List<Server> allServers = lb.getAllServers();
        int upCount = reachableServers.size();//可达服务器数量
        int serverCount = allServers.size();//总共服务器数量

		//短路,没有服务器或没有可用服务器直接找不到
        if ((upCount == 0) || (serverCount == 0)) {
            log.warn("No up servers available from load balancer: " + lb);
            return null;
        }

		//计算调用次数,借用次数确定服务器索引
        int nextServerIndex = incrementAndGetModulo(serverCount);
        //用获取到的索引取服务器
        server = allServers.get(nextServerIndex);

		//服务器不存在则线程让步并进入下一轮选中
        if (server == null) {
            /* Transient. */
            Thread.yield();
            continue;
        }
		//线程存活且空闲可用时返回
        if (server.isAlive() && (server.isReadyToServe())) {
            return (server);
        }

        // 选中的服务器不能用时置空重选
        server = null;
    }

	//超过10轮就罢工(感觉服务器如果很多的话,这里很可能是个坑)
    if (count >= 10) {
        log.warn("No available alive servers after 10 tries from load balancer: "
                + lb);
    }
    return server;
}

private int incrementAndGetModulo(int modulo) {
    for (;;) {//注意这里有个循环,会一直+1取余然后比较,值得这个线程不受干扰的拿到一个索引
        int current = nextServerCyclicCounter.get();
        int next = (current + 1) % modulo;//核心是这个,获取取值范围0到modulo-1的索引值
        //保证多线程同步,有其他线程插队会失败
        if (nextServerCyclicCounter.compareAndSet(current, next))
            return next;
    }
}
传送门:
微服务架构 | 组件目录


