使用rancher管理k3s创建MySQL数据库及持久化数据及主从搭建
【说明】
前面使用yml文件创建MySQL数据库及持久化数据,创建配置文件相对比较繁琐一些,这里使用rancher直接创建MySQL数据库并持久化数据;
【当前k3s信息】


【安装nfs】
安装涉及NFS的依赖包,主节点安装
yum -y install nfs-utils rpcbind
分配权限
mkdir -p /nfsdata
chmod 755 -R /nfsdata
配置挂载
cat >> /etc/exports <<EOF
/nfsdata 192.168.205.0/24(rw,no_root_squash)
EOF
#启动rpc跟nfs
systemctl start rpcbind.service
systemctl status rpcbind.service
systemctl start nfs.service
systemctl status nfs.service
systemctl enable rpcbind.service
systemctl enable nfs.service
master节点查看信息:
exportfs -arv
showmount -e

work节点查看信息
yum -y install nfs-utils rpcbind
#启动rpc跟nfs
systemctl start rpcbind.service
systemctl status rpcbind.service
systemctl start nfs.service
systemctl status nfs.service
systemctl enable rpcbind.service
systemctl enable nfs.service
创建挂载的目录
mkdir -p /nfsdata
编辑开机启动/etc/fstab
192.168.205.152:/nfsdata /nfsdata nfs defaults 0 0
mount -a
df -h

【使用rancher创建pv】

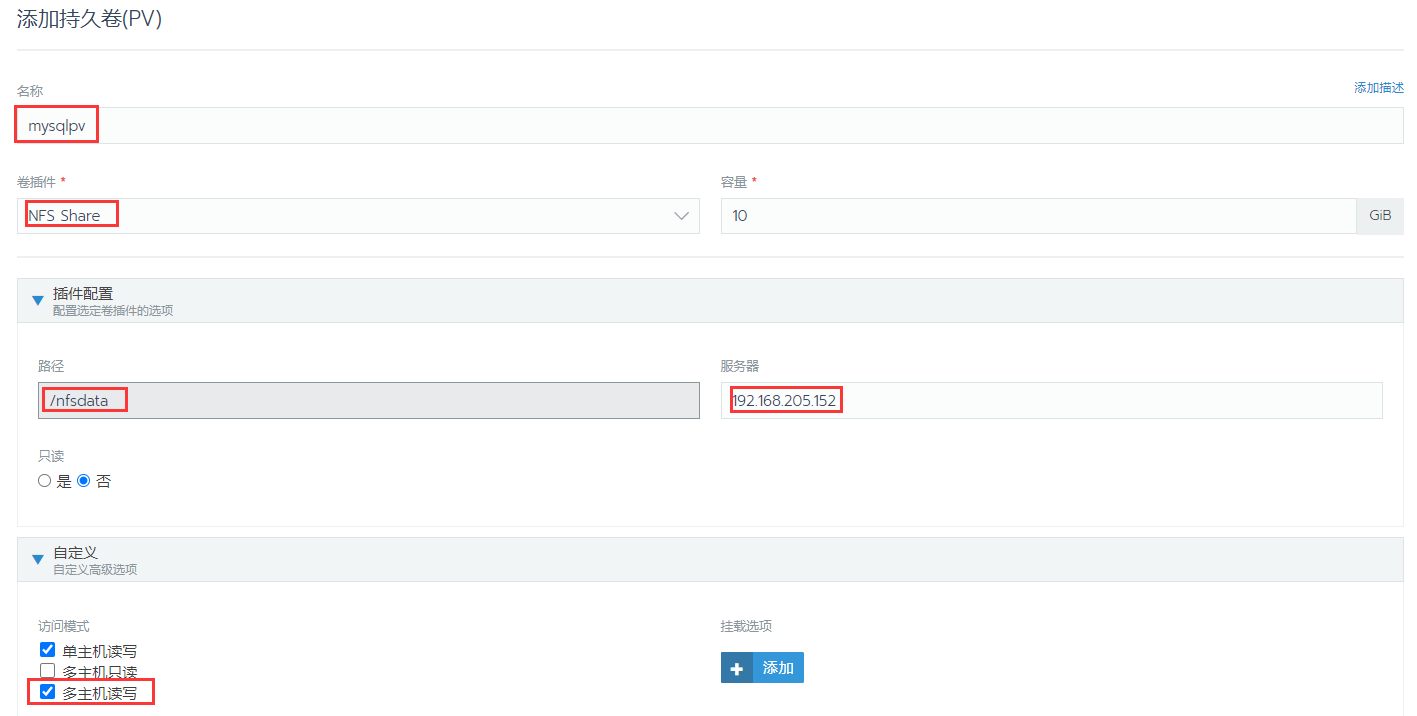
正常状态

【使用rancher创建PVC】


正常状态

【部署服务】
nfs目录下面创建目录
mkdir -p /nfsdata/mysqlmaster/data 数据目录
mkdir -p /nfsdata/mysqlmaster/conf 配置文件目录
添加配置文件
cd /nfsdata/mysqlmaster/conf
cat >my.cnf
# Copyright (c) 2017, Oracle and/or its affiliates. All rights reserved.
#
# This program is free software; you can redistribute it and/or modify
# it under the terms of the GNU General Public License as published by
# the Free Software Foundation; version 2 of the License.
#
# This program is distributed in the hope that it will be useful,
# but WITHOUT ANY WARRANTY; without even the implied warranty of
# MERCHANTABILITY or FITNESS FOR A PARTICULAR PURPOSE. See the
# GNU General Public License for more details.
#
# You should have received a copy of the GNU General Public License
# along with this program; if not, write to the Free Software
# Foundation, Inc., 51 Franklin St, Fifth Floor, Boston, MA 02110-1301 USA
#
# The MySQL Server configuration file.
#
# For explanations see
# http://dev.mysql.com/doc/mysql/en/server-system-variables.html
[mysqld]
pid-file = /var/run/mysqld/mysqld.pid
socket = /var/run/mysqld/mysqld.sock
datadir = /var/lib/mysql
secure-file-priv= NULL
server_id = 252
# Custom config should go here
!includedir /etc/mysql/conf.d/
rancher添加服务


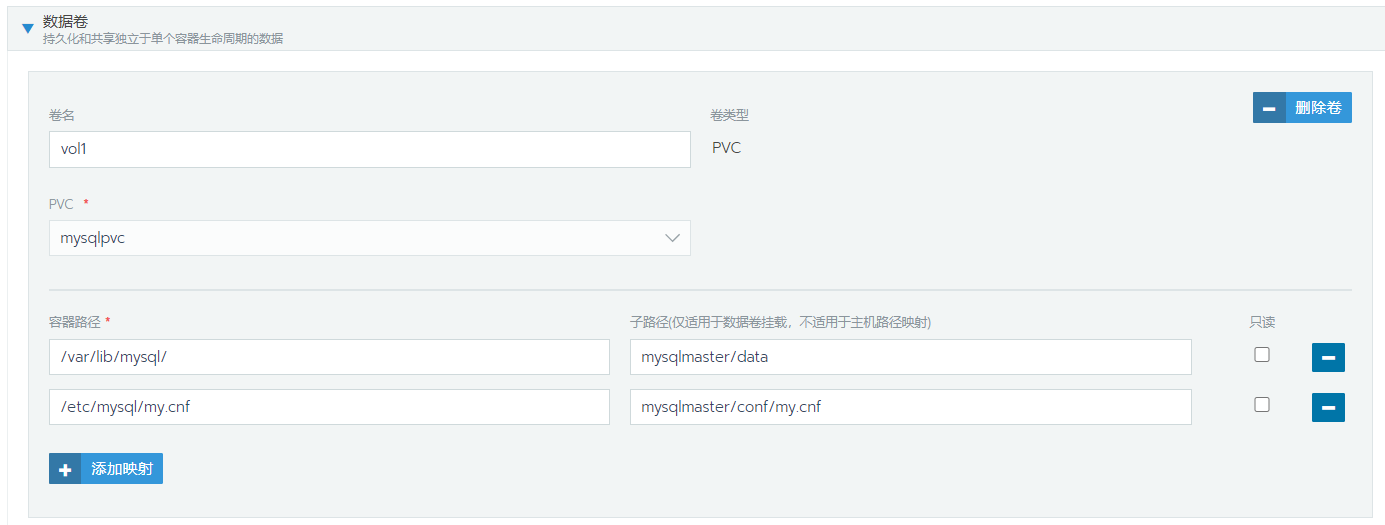

查看数据库信息
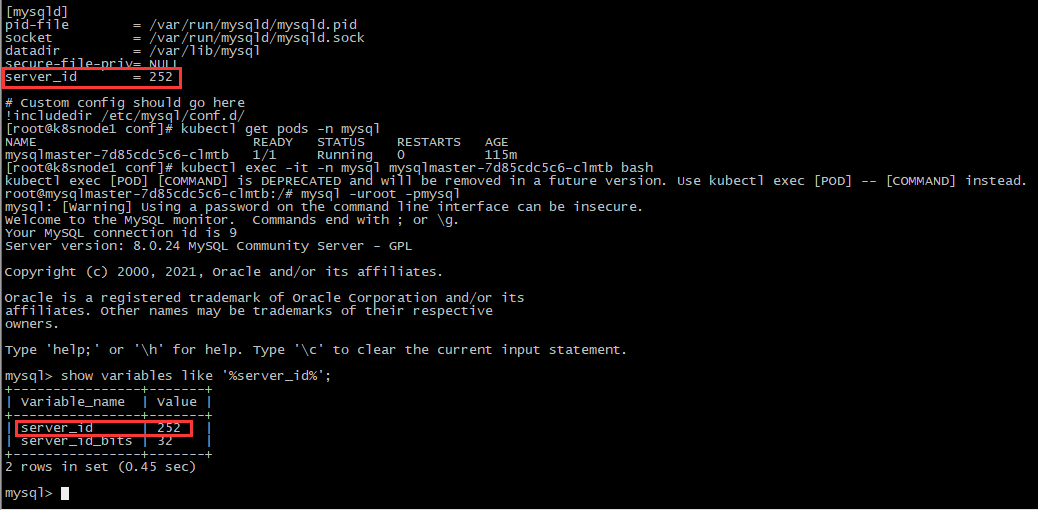
查看状态

【拷贝数据作为从库】
将nfs上面的master直接复制一份跟修改权限
cp -r mysqlmaster/ mysqlslave
chmod 755 mysqlslave/
chown -R systemd-bus-proxy:root mysqlslave
修改配置文件
vim /nfsdata/mysqlslave/conf/my.cnf
server_id = 250
rm /nfsdata/mysqlslave/data/auto.cnf
rancher启动这个从库


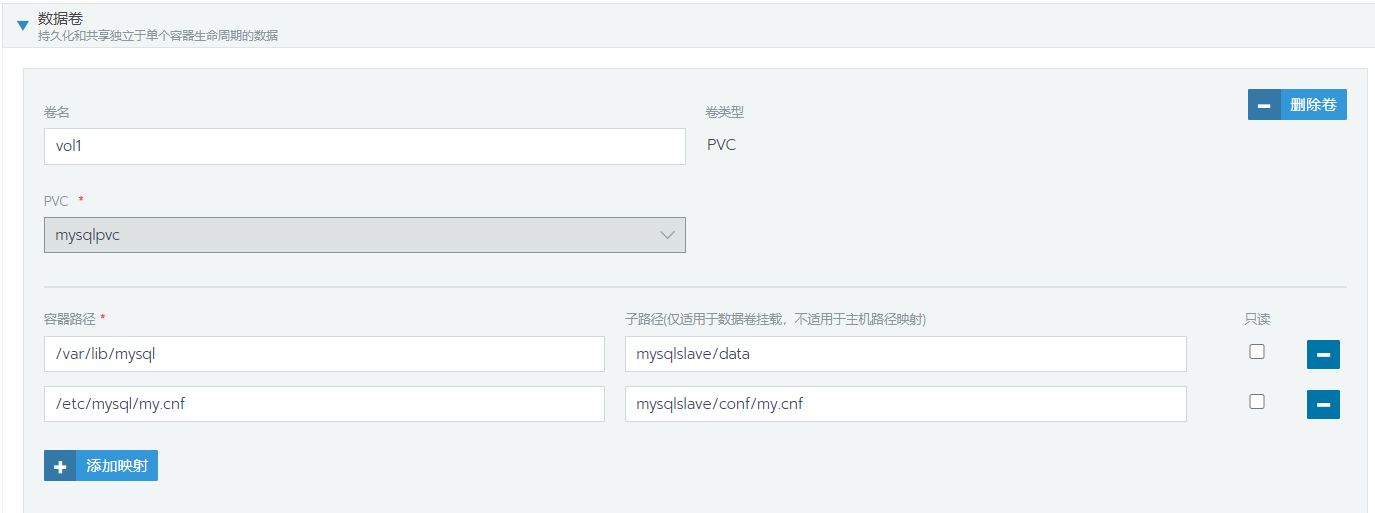
查看状态:

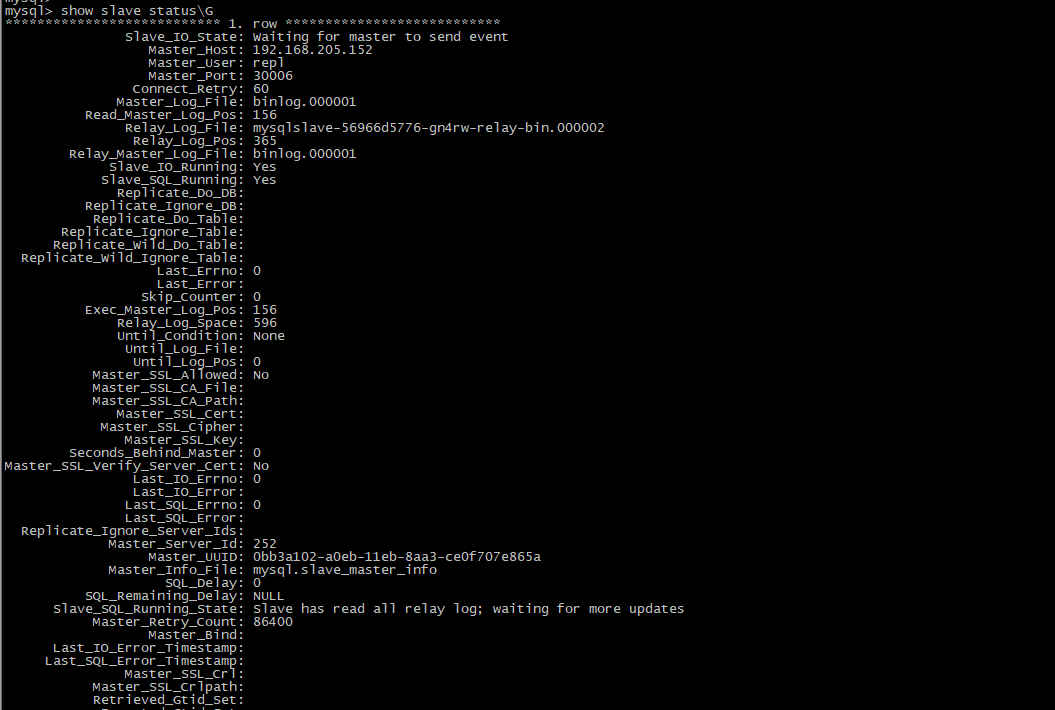
部署MySQL主从配置
按照物理主机方式配置主从即可,注意参数
查看主从状态
