salesforce零基础学习(九十五)lightning out
随着salesforce对lightning的推进,越来越多的项目基于lightning开发,导致很多小伙伴可能都并不了解classic或者认为不需要用到classic直接就开始了lightning的开发。其实有精力了解classic的使用还是很有必要的,因为lightning还在不断的优化中,可能有一部分还需要使用classic的功能来实现或者来协助实现,比如list view的list button目前只能使用visualforce page搭配lightning component。那么vf 如何去引用已经弄好的lightning component呢,我们接下来使用一个demo去简单了解一下。
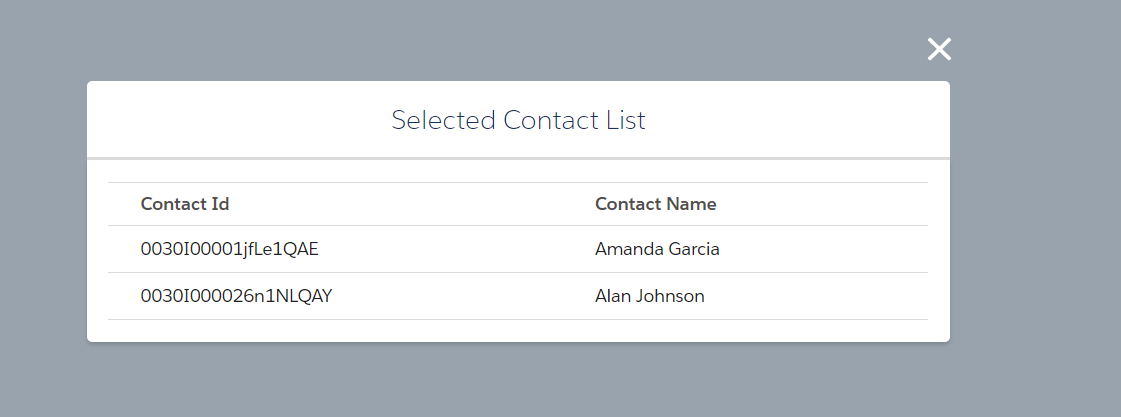
需求:在lightning环境下的contact list view定义一个自定义的list button,实现使用pop up方式弹出所勾选的数据列表( lwc + aura实现)。
实现步骤:
1.构建LwC component画UI;
2. 构建aura component包含lwc component;
3. 创建aura single APP继承ltng:outApp(包含SLDS样式库)/ltng:outAppUnstyled(不包含SLDS样式库),使用aura:dependency标签的resource属性引入2步骤中的aura component;
4. 创建vf page,使用$Lightning.use引入上面的aura single APP,然后动态创建component显示即可。
Talk is cheap,show me the code.下面根据上面的需求进行开发。
1. ContactListController.cls:根据选择的contact id list进行搜索数据,因为前端使用wire装载方式,所以方法声明必须使用cacheable=true
public with sharing class ContactListController {
    @AuraEnabled(cacheable=true)
    public static List<Contact> fetchContactListByIDs(List<String> idList){
        return [SELECT Id,Name
                FROM Contact
                WHERE Id IN :idList];
    }
}
2. contactListForLwc.html:用来展示一个popup modal,modal中展示一个table数据
<template>
    <section role="dialog" tabindex="-1" aria-labelledby="modal-heading-01" aria-modal="true" aria-describedby="modal-content-id-1" class="slds-modal slds-fade-in-open">
        <div class="slds-modal__container">
            <!-- modal header start -->
            <header class="slds-modal__header">
                <button class="slds-button slds-button_icon slds-modal__close slds-button_icon-inverse" title="Close">
                <lightning-icon icon-name="utility:close"
                    alternative-text="close"
                    variant="inverse"
                    size="small" ></lightning-icon>
                <span class="slds-assistive-text">Close</span>
                </button>
                <h2 id="modal-heading-01" class="slds-text-heading_medium slds-hyphenate">Selected Contact List</h2>

            </header>
            <!-- modal body start -->
            <div class="slds-modal__content slds-p-around_medium" id="modal-content-id-1">
                <table class="slds-table slds-table_cell-buffer slds-table_bordered">
                    <thead>
                        <tr class="slds-line-height_reset">
                            <th class="" scope="col">
                                <div class="slds-truncate">Contact Id</div>
                            </th>
                            <th class="" scope="col">
                                <div class="slds-truncate">Contact Name</div>
                            </th>
                        </tr>
                    </thead>
                    <tbody>
                        <template if:true={contactList.data}>
                            <template for:each={contactList.data} for:item="contact">
                                <tr key={contact.Id}>
                                    <td>{contact.Id}</td>
                                    <td> {contact.Name}</td>
                                </tr>
                            </template>
                        </template>
                        <template if:false={contactList.data}>
                            <tr>
                                <td colspan="2">List View is not contains any data</td>
                            </tr>
                        </template>
                    </tbody>
                </table>
            </div>

        </div>
    </section>
    <div class="slds-backdrop slds-backdrop_open"></div>
</template>
contactListForLwc.js:调用后台获取列表
import { LightningElement, api, wire } from 'lwc';
import fetchContactListByIDs from '@salesforce/apex/ContactListController.fetchContactListByIDs';
export default class ContactListForLwc extends LightningElement {
    @api contactIdList;

    @wire(fetchContactListByIDs,{idList:'$contactIdList'})
    contactList;

}
3. ContactListForAura.cmp:用于包一层lwc,用来在single app中使用,因为目前的动态创建component只能aura,所以lwc需要套一层。
<aura:component>
    <aura:attribute name="selectedIds" type="List" default="" />
    <c:contactListForLwc contactIdList="{!v.selectedIds}"/>
</aura:component>
4. ContactListApp.app:创建single app,设置access 为GLOBAL,因为需要使用SLDS的样式,这里extends为ltng:outApp,然后通过aura:dependency引入想要渲染的子component
<aura:application access="GLOBAL" extends="ltng:outApp">
    <aura:dependency resource="c:ContactListForAura"/>
</aura:application>
5. ContactListPage.page:用于声明contact list类型,然后使用$Lightning.user实现lightning out的功能。这里需要有几点小小的注意:
- 需要设置recordSetVar,这样才可以使用到list view的list button中;
- 需要引入apex:includeLightning,最好放在引入的第一行;
- javascript中使用GETRECORDIDS函数来获取列表中选择的数据选项,在vf page中需要使用{!selected}来获取,因为在js中如果使用''方式扩上他返回的是string类型,不扩上直接在list引用会报错,所以这里使用apex:repeat方式将其迭代在一个list中;
- 使用$lightning.use引入一个single app,然后在动态创建里面的auraDependency的component,$lightning.use可以多次使用,但是需要多次引入不同的single app,详细的使用自行查看文档。
<apex:page standardController="Contact" recordSetVar="Contacts" showHeader="false">
    <apex:includeLightning/>

    <div id="lightning" />
    <script>
        var selectedList = [];
    </script>
    <apex:repeat value="{!selected}" var="selectedItem">
        <script>
            selectedList.push('{!selectedItem}');
        </script>
    </apex:repeat>
    <script>
        if(selectedList.length == 0) {
            window.location.href = '/003';

        } else {
            $Lightning.use("c:ContactListApp", function() {
            $Lightning.createComponent("c:ContactListForAura",
                {selectedIds : selectedList},
                'lightning',
                function(cmp) {
                    console.log("component created");
                }
                );
            });
        }

    </script>
</apex:page>
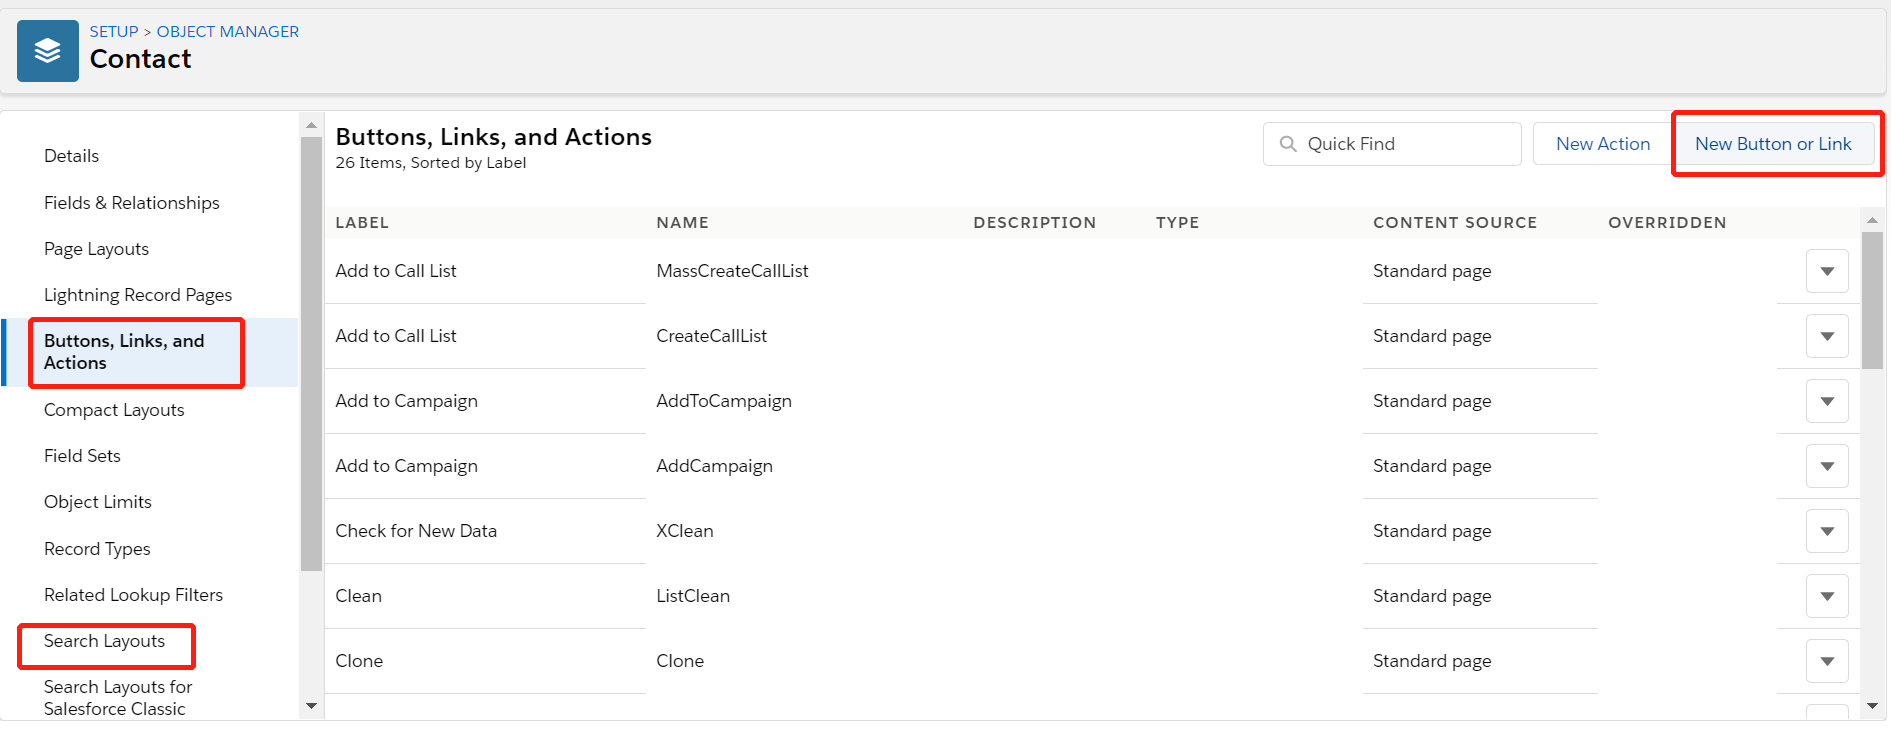
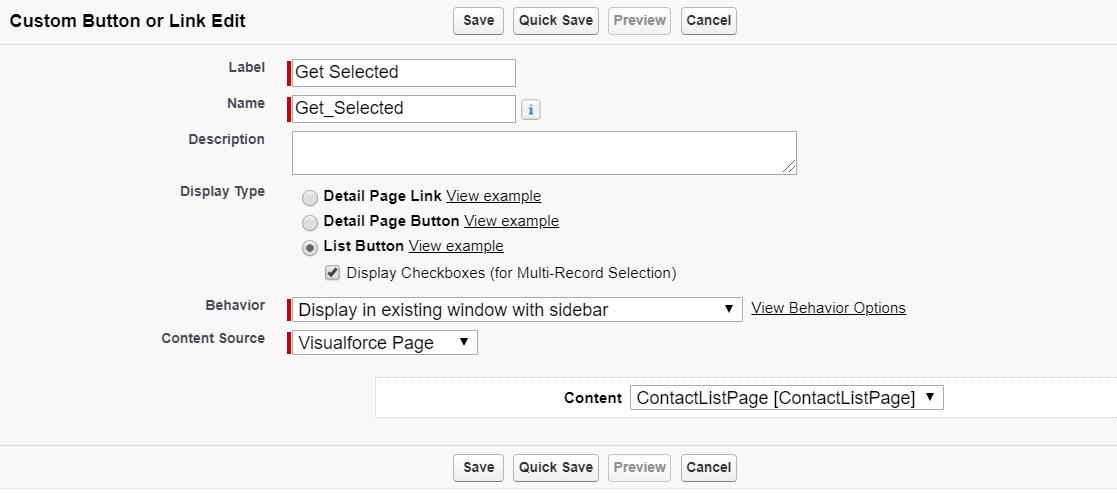
6. 创建contact的list button,然后类型选择 list button,选择指定的vf page,然后在search layout中的list view中将定义的拖拽即可。


效果展示:
1.Contact列表勾选了两条数据,然后点击按钮

2. 弹出页面展示选择的两条数据。
总结:篇中通过简单的例子展示了lightning out实现以及list view button关于vf page如何引入lightning component / lightning web component。缺点是使用vf page无法实现类似action的效果在本页pop up,查找了很多资料也没有实现,有好的实现方式欢迎留言。lightning out实际场景不仅仅demo中的使用场景,详细的lightning out知识以及限制自行查看。篇中有错误地方欢迎指出,有不懂地方欢迎留言。
作者:zero
博客地址:http://www.cnblogs.com/zero-zyq/
本文欢迎转载,但未经作者同意必须保留此段声明,且在文章页面明显位置给出原文连接
如果文章的内容对你有帮助,欢迎点赞~
为方便手机端查看博客,现正在将博客迁移至微信公众号:Salesforce零基础学习,欢迎各位关注。


 浙公网安备 33010602011771号