虚幻视频流播放器(vlc)UE4、UE5、支持rtsp、rtmp、http、m3u8等,支持gpu解码、支持声音播放、支持4k、8k不卡主线程,支持同时打开多个视频流且rtsp打开只需1 ~ 2秒

开票模板:
需购买的请先扫码付款,价格为
1288一年授权3台电脑.(老客户有大优惠,购买过商城任意插件都算老客户)
1888一年授权5台电脑。(老客户有大优惠,购买过商城任意插件都算老客户)
2888一年授权10台电脑。(老客户有大优惠,购买过商城任意插件都算老客户)
插件采用网络验证,编辑器每次打开都要连接认证服务器认证,内网环境无法使用.
一个票据码可以授权多台电脑开发,只限制编辑器开发,打包后没有时间和电脑台数等限制。
专业版不提供.cpp实现文件
能接受以上条件的请添加微信(351352579)详聊
打包后的测试exe
链接:https://pan.baidu.com/s/1w3YNJNC8ZSKYE_zyurC5bQ?pwd=1234
提取码:1234
--来自百度网盘超级会员V5的分享
和商城插件的区别
本插件和商城的Multi-channel play network video streams By OpenCV high performance WebCamera(基于opencv开发)相比,增强了很多功能,
1.添加了播放声音的支持。(Support for playing sound)
2.支持GPU解码(显卡加速),所以可以解析4k、8k的视频流(Support GPU Decode)
3.相比opencv播放器插件,具有更小的延迟,播放也更流畅(Smaller latency)
4.opencv插件同时只能打开一个视频流,如果有一个视频流卡住,则后面的视频流也不会加载出来,相反,基于vlc的插件不存在此问题。可同时打开多个视频流,没有先后顺序。哪个视频快就哪个先打开。
5.自动检测视频流帧率,无需像opencv插件需要填写视频流帧数。(Opencv插件需要填写帧数,如果帧数和服务器推流的帧数不一致,则对应的延迟越来越大)
6.支持将视频流画面渲染到材质上,可以将材质赋予静态或者动态模型。
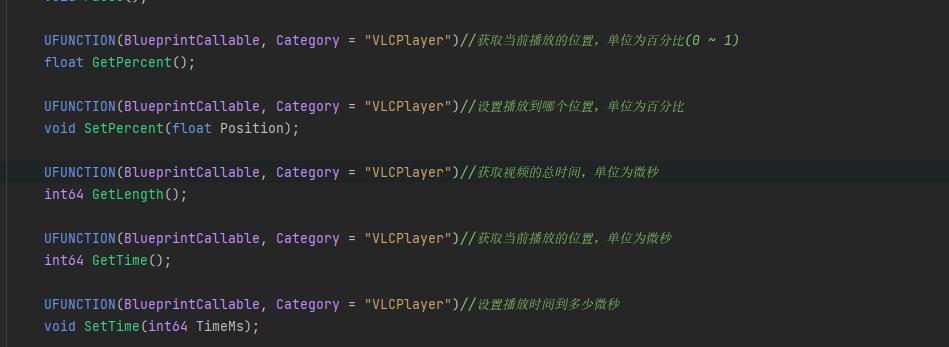
7.支持视频暂停、快进、后退、跳转播放、进度条拖动播放
8.插件不提供.cpp实现文件
一、安装部署 (installation and deployment)
1.下载插件
download the plugin
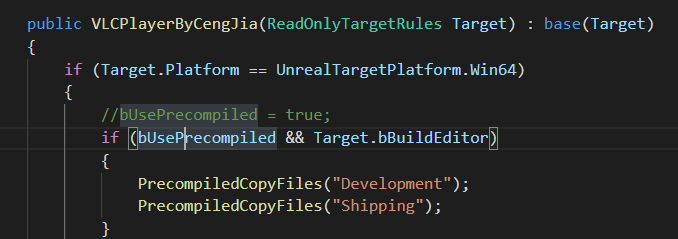
2. 解压插件至引擎目录的Plugins\Marketplace文件夹内,例如我的引擎安装在E:\UnrealEngine,则完全路径为E:\UnrealEngine\UE_5.0\Engine\Plugins\Marketplace,使用源码版本引擎需要将插件安装在项目目录的Plugins目录下。然后在VLCPlayerByCengJia.Build.cs文件中将bUsePrecompiled = true取消注释,取消注释后右键工程选择Generate Visual Studio project files,需要注意的是插件放在项目目录的Plugins下仅支持Development和Shipping启动,不支持DebugGame启动
Extract the plugin to the Plugins\Marketplace folder in the engine directory. For example, if my engine is installed at E:\UnrealEngine, the full path would be E:\UnrealEngine\UE_5.0\Engine\Plugins\Marketplace. If you are using the source version of the engine, you need to install the plugin in the Plugins directory of your project. Then, in the VLCPlayerByCengJia.Build.cs file, uncomment bUsePrecompiled = true. After uncommenting, right-click the project and select 'Generate Visual Studio project files'. Note that placing the plugin in the project's Plugins directory only supports Development and Shipping builds, and does not support DebugGame builds.
3. 启用插件。关闭项目而不是重启项目
Enable the plugin. Close the project instead of restarting it.
4.C++工程右键工程选择Generate Visual Studio project files(只有第一次安装插件后需要做)
For a C++ project, right-click the project and select 'Generate Visual Studio project files' (this only needs to be done after installing the plugin for the first time).
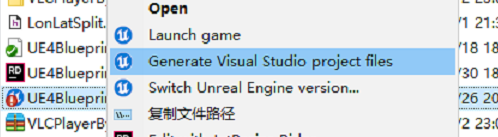
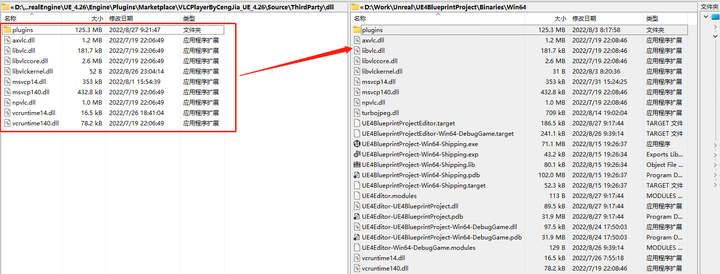
5.蓝图工程则将插件目录的Source/ThirdParty/dll下的所有文件拷贝到项目目录的Binaries/Win64下(只有第一次安装插件后需要做)
For a Blueprint project, copy all files from the Source/ThirdParty/dll directory of the plugin to the Binaries/Win64 directory of your project (this only needs to be done after installing the plugin for the first time).
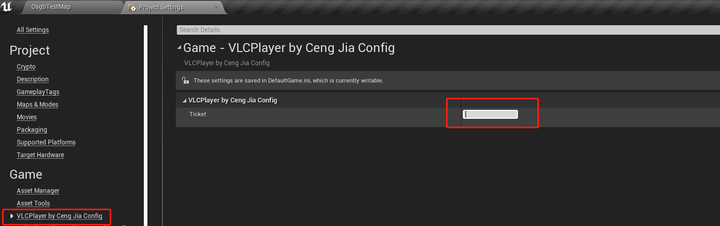
6.启动项目后在项目设置的游戏设置VLCPlayerByCengJiaConfig输入作者给的票据后,输入票据后重启UE编辑器
After starting the project, go to the project settings, find the game settings, and enter the token provided by the author in VLCPlayerByCengJiaConfig. After entering the token, restart the UE editor.
二、在UMG上播放视频流 (Play Video Stream on UMG)
1.新建一个新的关卡,打开关卡蓝图
Create a new level and open the level blueprint.
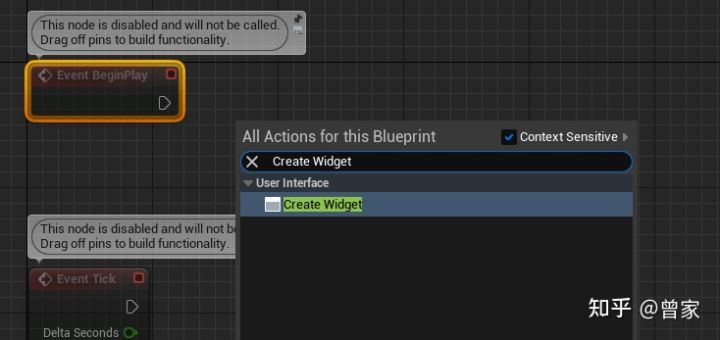
2.右键在输入框中输入Create Widget
Right-click and enter 'Create Widget' in the input box.
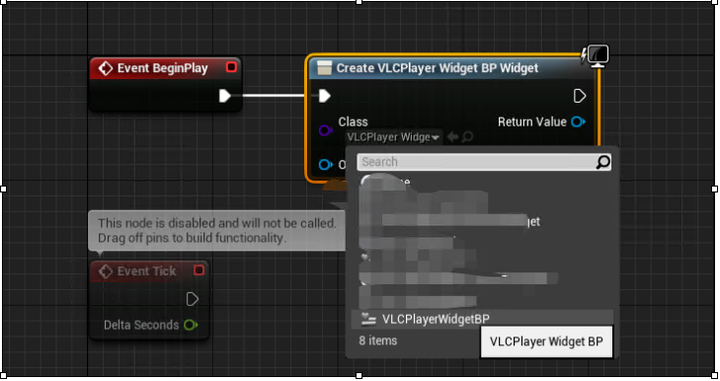
3.在Class选择VLCPlayerWidgetBP
Choose VLCPlayerWidgetBP in the Class selection.
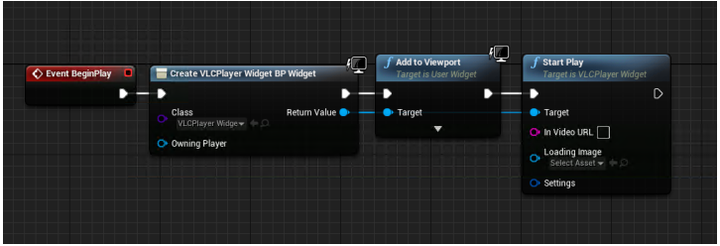
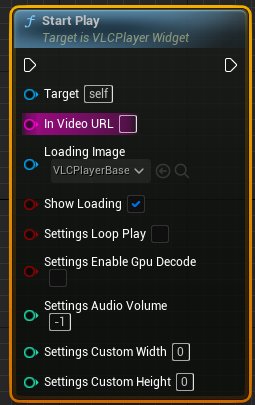
4.调用该widget的StartPlay方法,参数InVideoURL传入视频流地址或者本地文件的路径即可,LoadingImage可以选择自定义纹理来填充连接监控的缓冲时间。
Call the StartPlay method of the widget, pass the video stream URL or local file path as the parameter InVideoURL. You can choose a custom texture for LoadingImage to indicate buffering time while connecting.
5. StartPlay高级参数设置 (Advanced Settings for StartPlay)
(1) LoopPlay设置是否循环播放,适用于本地视频播放完成后循环播放,或者视频流因为网络原因断开连接后重新连接
The LoopPlay setting determines whether to loop the playback, suitable for looping local videos after completion or reconnecting video streams due to network interruptions.
(2) EnableGpuDecode是启用Gpu解码。4k、8k视频流建议启用该选项以提高视频帧率。
EnableGpuDecode enables GPU decoding. It is recommended to enable this option for 4K and 8K video streams to improve video frame rates.
(3) AudioVolume设置音频的音量大小,值为0-100,默认-1表示不播放声音。
AudioVolume sets the volume of the audio, with values ranging from 0 to 100. The default value of -1 indicates no sound playback.
(4) CustomWidth和CustomHeight为自定义解码视频流的分辨率大小。默认0使用视频流自身的分辨率解码
CustomWidth and CustomHeight are used to customize the resolution of the decoded video stream. A value of 0 by default uses the resolution of the video stream itself for decoding.
三、将视频流画面赋给静态模型或者动态模型,参考插件目录下的示例关卡。
Assign the video stream image to a static or dynamic model, referring to the example level in the plugin directory.
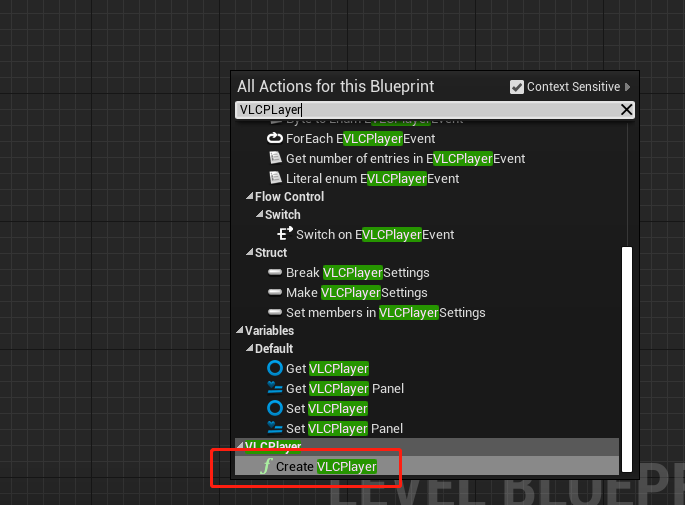
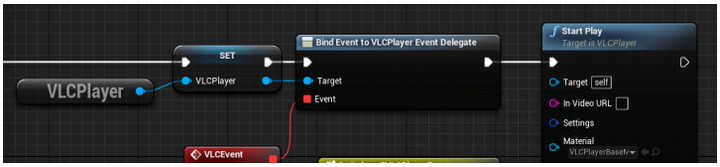
1.打开关卡蓝图,右键输入框输入VLCPlayer,选择最后的Create VLCPlayer
Open the level blueprint, right-click in the input box, type VLCPlayer, and select 'Create VLCPlayer' at the bottom.
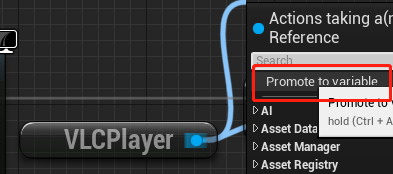
2.将节点提升为变量
Promote node to variable.
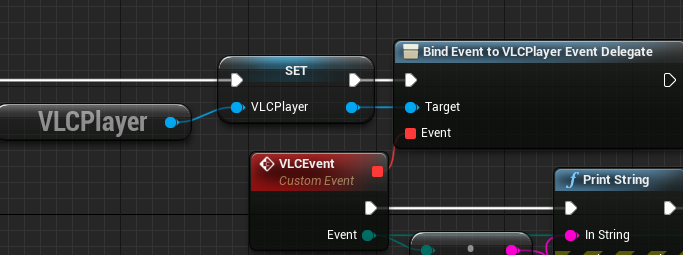
3.绑定打开视频流成功失败的回调
Bind callbacks for successful and failed opening of the video stream.
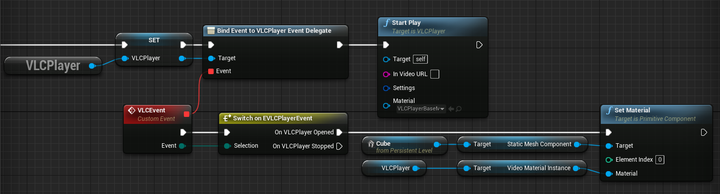
4.在视频播放成功后回调里面获取材质实例,把材质实例赋予静态或者动态模型
Retrieve the material instance in the callback after successful video playback and assign it to a static or dynamic model.

5.开始播放视频,调用VLCPlayer的节点StartPlay,Material选择VLCPlayerBaseMaterial,用户也可以自定义自己的材质。只需要材质里面的有个纹理参数并且名字为VideoTexture即可。
Start playing the video by calling the StartPlay node of VLCPlayer. Choose VLCPlayerBaseMaterial as the material. Users can also customize their own material. The material needs to have a texture parameter named 'VideoTexture'.
6.最终连线节点如下
"Final node connections are as follows.
更新日志
2022/8/31号支持本地和在线视频滑动进度条跳转。
2023/8/23更新自定义视频流分辨率解码

 浙公网安备 33010602011771号