http访问不安全,使用https相对好些。
参考网址:https://blog.csdn.net/bock1984/article/details/90116965
操作如下:
- 1. 使用JDK自带keytool工具,创建本地SSL证书
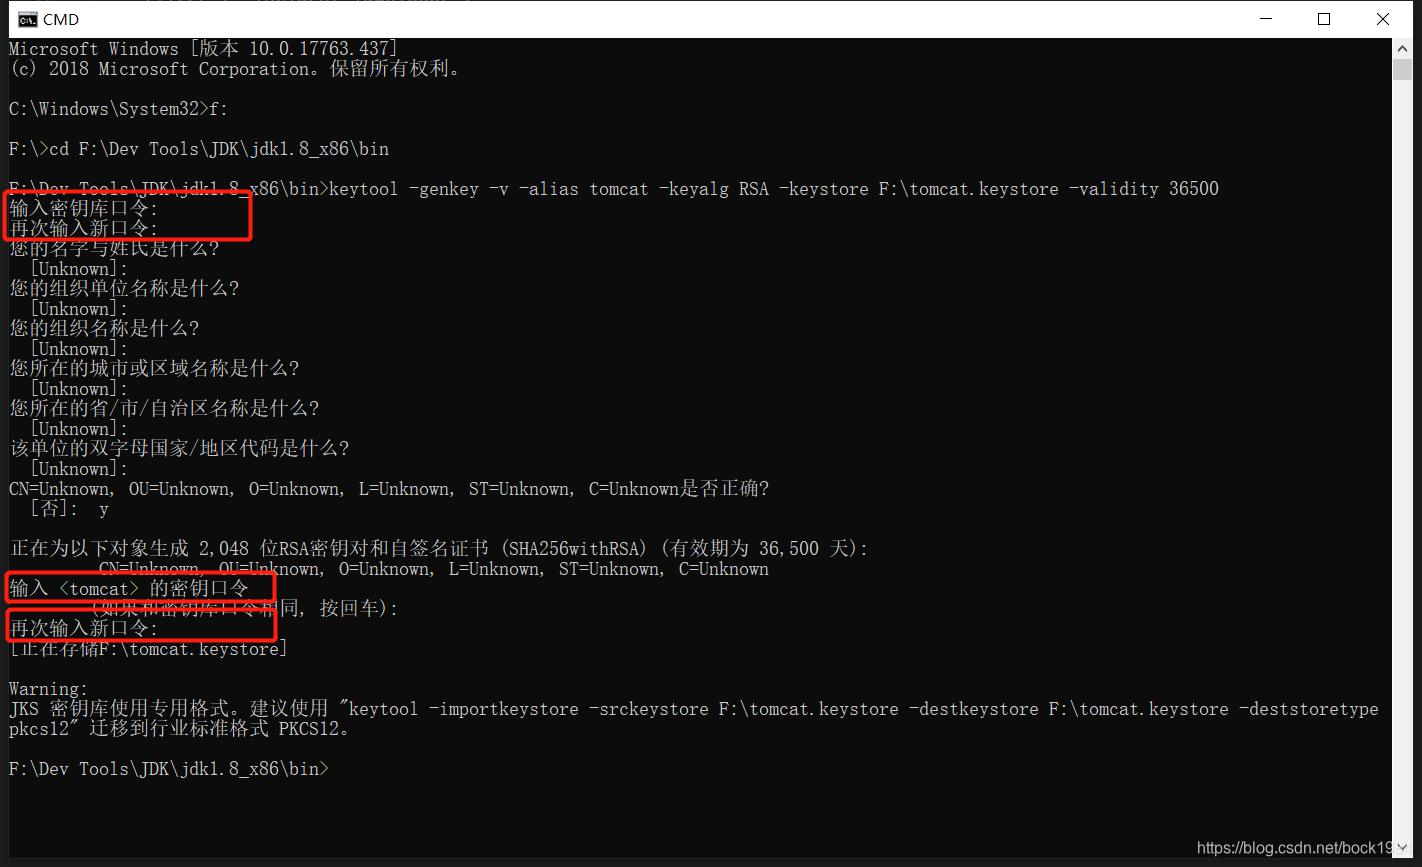
启动命令行工具,进入jdk的bin目录执行以下命令:
keytool -genkey -v -alias tomcat -keyalg RSA -keystore F:\tomcat.keystore -validity 36500

1.-keyalg 生证书的算法名称,RSA是一种非对称加密算法

2.-keystore 生成的证书文件的存储路径

3.-validity 证书的有效期

- 2.将生成的tomcat.keystore文件拷贝到springboot项目根目录下:

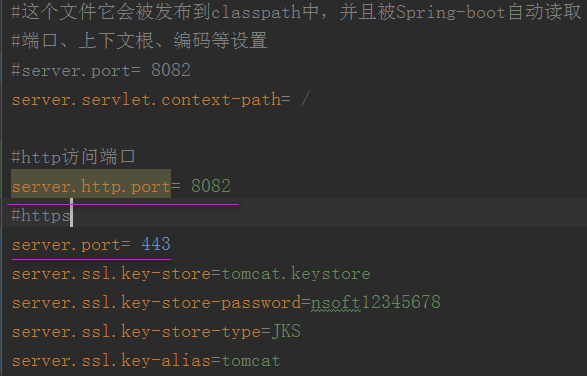
- 3.修改application.properties文件
·
- 4.启动服务即可访问 https://localhost:8443。
看application.properties配置文件可知,后面只能用https协议访问了。
1) http访问自动转https
(用户前期用http协议,突然改成只用https访问,这样有的客户还用http访问时就访问不到服务器了,针对这种情况可做http访问自动转到https)
package com.nsoft.gkzp.syscore.config;

import org.apache.catalina.Context;
import org.apache.catalina.connector.Connector;
import org.apache.tomcat.util.descriptor.web.SecurityCollection;
import org.apache.tomcat.util.descriptor.web.SecurityConstraint;
import org.springframework.beans.factory.annotation.Value;
import org.springframework.boot.web.embedded.tomcat.TomcatServletWebServerFactory;
import org.springframework.context.annotation.Bean;
import org.springframework.context.annotation.Configuration;
import org.springframework.context.annotation.PropertySource;

/**
 * 监听http端口,如访问网址为http协议的,自动转换为Https
 */
@Configuration
@PropertySource(value="classpath:application.properties")
public class HttpsComponent {

    //读取application.properties配置文件配置的https访问端口号
    @Value("${server.port}")
    public  int SYSTEM_HTTPS_PORT;
    //读取application.properties配置文件配置的http监控端口(自动转换为https)
    @Value("${server.http.port}")
    public  int SYSTEM_HTTP_PORT;

    @Bean
    public Connector connector(){

        Connector connector=new Connector("org.apache.coyote.http11.Http11NioProtocol");
        connector.setScheme("http");
        connector.setPort(SYSTEM_HTTP_PORT);//Connector监听的http的端口号
        connector.setSecure(false);
        connector.setRedirectPort(SYSTEM_HTTPS_PORT);//监听到http的端口号后转向到的https的端口号(一般会用443端口)
        return connector;
    }

    @Bean
    public TomcatServletWebServerFactory tomcatServletWebServerFactory(){

        TomcatServletWebServerFactory tomcat =new TomcatServletWebServerFactory(){
            @Override
            protected void postProcessContext(Context context) {
                SecurityConstraint securityConstraint=new SecurityConstraint();
                securityConstraint.setUserConstraint("CONFIDENTIAL");
                SecurityCollection collection=new SecurityCollection();
                collection.addPattern("/*");
                securityConstraint.addCollection(collection);
                context.addConstraint(securityConstraint);
            }
        };
        tomcat.addAdditionalTomcatConnectors(connector());
        return tomcat;
    }
}

package com.nsoft.gkzp.syscore.config;

import org.apache.catalina.Context;
import org.apache.catalina.connector.Connector;
import org.apache.tomcat.util.descriptor.web.SecurityCollection;
import org.apache.tomcat.util.descriptor.web.SecurityConstraint;
import org.springframework.boot.web.embedded.tomcat.TomcatServletWebServerFactory;
import org.springframework.context.annotation.Bean;
import org.springframework.context.annotation.Configuration;

/**
 * 监听http端口,如访问网址为http协议的,自动转换为Https
 */
@Configuration
public class HttpsComponent {

    @Bean
    public Connector connector(){

        Connector connector=new Connector("org.apache.coyote.http11.Http11NioProtocol");
        connector.setScheme("http");
        connector.setPort(8082);//Connector监听的http的端口号
        connector.setSecure(false);
        connector.setRedirectPort(8443);//监听到http的端口号后转向到的https的端口号(一般会用443端口)
        return connector;
    }

    @Bean
    public TomcatServletWebServerFactory tomcatServletWebServerFactory(){

        TomcatServletWebServerFactory tomcat =new TomcatServletWebServerFactory(){
            @Override
            protected void postProcessContext(Context context) {
                SecurityConstraint securityConstraint=new SecurityConstraint();
                securityConstraint.setUserConstraint("CONFIDENTIAL");
                SecurityCollection collection=new SecurityCollection();
                collection.addPattern("/*");
                securityConstraint.addCollection(collection);
                context.addConstraint(securityConstraint);
            }
        };
        tomcat.addAdditionalTomcatConnectors(connector());
        return tomcat;
    }
}
另:
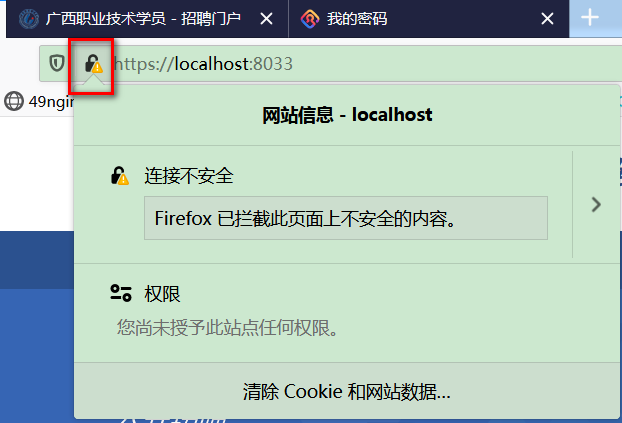
这边自己生成的证书,是不被公网认证的。如下图。要想公网认证,需要去网上相关机构的去买(将域名提供给他们,他们生成公网可认证的证书),便宜点的大约一年一千多块钱吧。

2) 同时支持http和https访问
(参考 : https://blog.csdn.net/qq_38288606/article/details/89478353)
注意:Spring Boot不支持通过application.properties同时配置HTTP连接器和HTTPS连接器
故我在application.properties配置了https相关配置,然后添加了一个自定义的server.http.port参数,然后新建httpComponent.java配置java类,来启动http端口访问
application.properties

新建类D:\workspace-gzy-gkzp\src\main\java\com\nsoft\gkzp\syscore\config\httpComponent.java
package com.nsoft.gkzp.syscore.config;

import org.apache.catalina.connector.Connector;
import org.springframework.beans.factory.annotation.Value;
import org.springframework.boot.web.embedded.tomcat.TomcatServletWebServerFactory;
import org.springframework.boot.web.servlet.server.ServletWebServerFactory;
import org.springframework.context.annotation.Bean;
import org.springframework.context.annotation.Configuration;
import org.springframework.context.annotation.PropertySource;


/**
 * 监听http端口,使http访问端口生效
 */
@Configuration
@PropertySource(value="classpath:application.properties")
public class httpComponent {

    //读取application.properties配置文件配置的http监控端口
    @Value("${server.http.port}")
    public  int SYSTEM_HTTP_PORT;

    @Bean
    public ServletWebServerFactory servletContainer() {
        TomcatServletWebServerFactory tomcat = new TomcatServletWebServerFactory();
        tomcat.addAdditionalTomcatConnectors(createStandardConnector()); // 添加http
        return tomcat;
    }

    private Connector createStandardConnector() {
        Connector connector = new Connector("org.apache.coyote.http11.Http11NioProtocol");
        connector.setPort(SYSTEM_HTTP_PORT);
        return connector;
    }

}
至此,就可以用 https://localhost 和 http://localhost:8082 访问了。这是spring2.x的配法。

注意: 上面在application.properties配置文件中配置访问端口号,是因为工程用了内置的tomcat容器(如下图pom.xml引入的tomcat依赖)。如果是用外部的tomcat,则直接在tomcat的\conf\server.xml配置文件里配置相关参数。

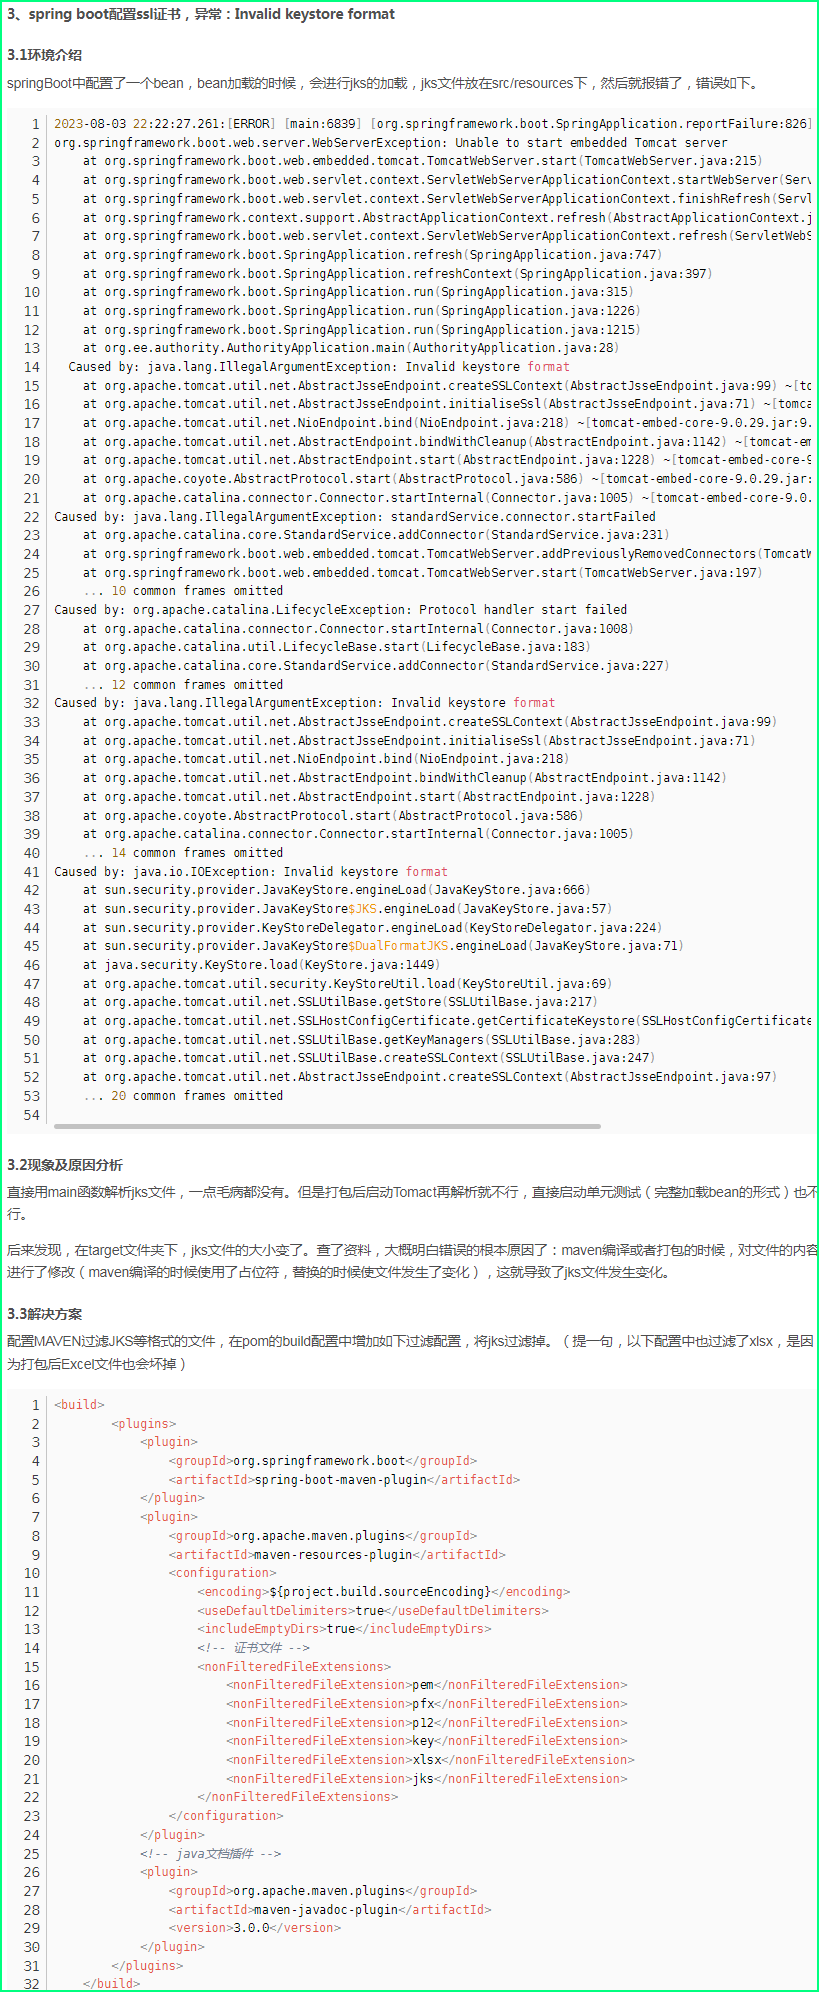
- 5. 部署后报错
参考文章:https://blog.csdn.net/weixin_45688141/article/details/132157819

参考文章:
本文来自博客园,作者:东方飘雪,转载请注明原文链接:https://www.cnblogs.com/zdyang/p/11775839.html


