IdentityServer4:授权码模式
1 前置阅读
在阅读本文章之前,你可以先阅读:
- IdentityServer4是什么
- IdentityServer4:客户端凭据模式
- IdentityServer4:资源所有者密码模式
2 授权认证服务(IdentityServer)
API资源配置,中间件配置与客户端凭据模式保持一致。
首先,添加对OpenID Connect Identity Scope的支持
与OAuth 2.0相似,OpenID Connect也使用范围概念。同样,范围代表您要保护的内容以及客户端要访问的内容。与OAuth相比,OIDC中的范围不代表API,而是诸如用户ID,名称或电子邮件地址之类的身份数据。通过修改以下属性来添加对标准openid(主题ID)和profile(名字,姓氏等)范围的支持:IdentityResourcesConfig.cs
public static IEnumerable<IdentityResource> IdentityResources =>
    new List<IdentityResource>
    {
        new IdentityResources.OpenId(),
        new IdentityResources.Profile(),
    };
然后,定义客户,即用于访问新API的客户端应用程序。
public static IEnumerable<Client> Clients =>
    new List<Client>
    {
        new Client
        {
            ClientId = "mvc",
            ClientSecrets = { new Secret("secret".Sha256()) },
            AllowedGrantTypes = GrantTypes.Code,
            RedirectUris = { "https://localhost:5002/signin-oidc" },
            PostLogoutRedirectUris = { "https://localhost:5002/signout-callback-oidc" },
            AllowOfflineAccess = true,
            AllowedScopes = new List<string>
            {
                IdentityServerConstants.StandardScopes.OpenId,
                IdentityServerConstants.StandardScopes.Profile,
                "api1"
            }
        }
    };
最后,配置IdentityServer,在Startup.ConfigureServices中,如下所示:
public void ConfigureServices(IServiceCollection services)
{
    var builder = services.AddIdentityServer()
        .AddInMemoryIdentityResources(Config.IdentityResources)
        .AddInMemoryApiScopes(Config.ApiScopes)
        .AddInMemoryClients(Config.Clients)
        .AddTestUsers(TestUsers.Users);

    builder.AddDeveloperSigningCredential();
}
3 业务资源服务(MVC)
首先,创建S042.MvcClient Web MVC 项目。
然后,将Microsoft.AspNetCore.Authentication.OpenIdConnect的NuGet软件包安装到您的应用程序中。
Microsoft.AspNetCore.Authentication.OpenIdConnect
接着,以下内容添加到ConfigureServices中Startup:
public void ConfigureServices(IServiceCollection services)
{
    services.AddControllersWithViews();

    JwtSecurityTokenHandler.DefaultMapInboundClaims = false;

    services.AddAuthentication(options =>
    {
        options.DefaultScheme = "Cookies";
        options.DefaultChallengeScheme = "oidc";
    })
    .AddCookie("Cookies")
    .AddOpenIdConnect("oidc", options =>
    {
        options.Authority = "https://localhost:5001";

        options.ClientId = "mvc";
        options.ClientSecret = "secret";
        options.ResponseType = "code";

        options.SaveTokens = true;

        options.Scope.Add("api1");
        options.Scope.Add("offline_access");
    });
}
AddAuthentication 将身份验证服务添加到DI。
我们使用一个Cookie在本地登录的用户(通过"Cookies"为DefaultScheme),和我们设定的DefaultChallengeScheme到oidc,因为当我们需要用户登录,我们将使用ID连接协议。
然后AddCookie,我们使用添加可以处理cookie的处理程序。
最后,AddOpenIdConnect用于配置执行OpenID Connect协议的处理程序。该Authority指示了信任令牌服务所在。然后,我们通过ClientId和标识此客户ClientSecret。 SaveTokens用于将来自IdentityServer的令牌保留在cookie中。
最后,添加UseAuthentication到Configure在Startup:
app.UseStaticFiles();

app.UseRouting();
app.UseAuthentication();
app.UseAuthorization();

app.UseEndpoints(endpoints =>
{
    endpoints.MapDefaultControllerRoute()
        .RequireAuthorization();
});
RequireAuthorization方法禁用整个应用程序的匿名访问。
4 测试客户端
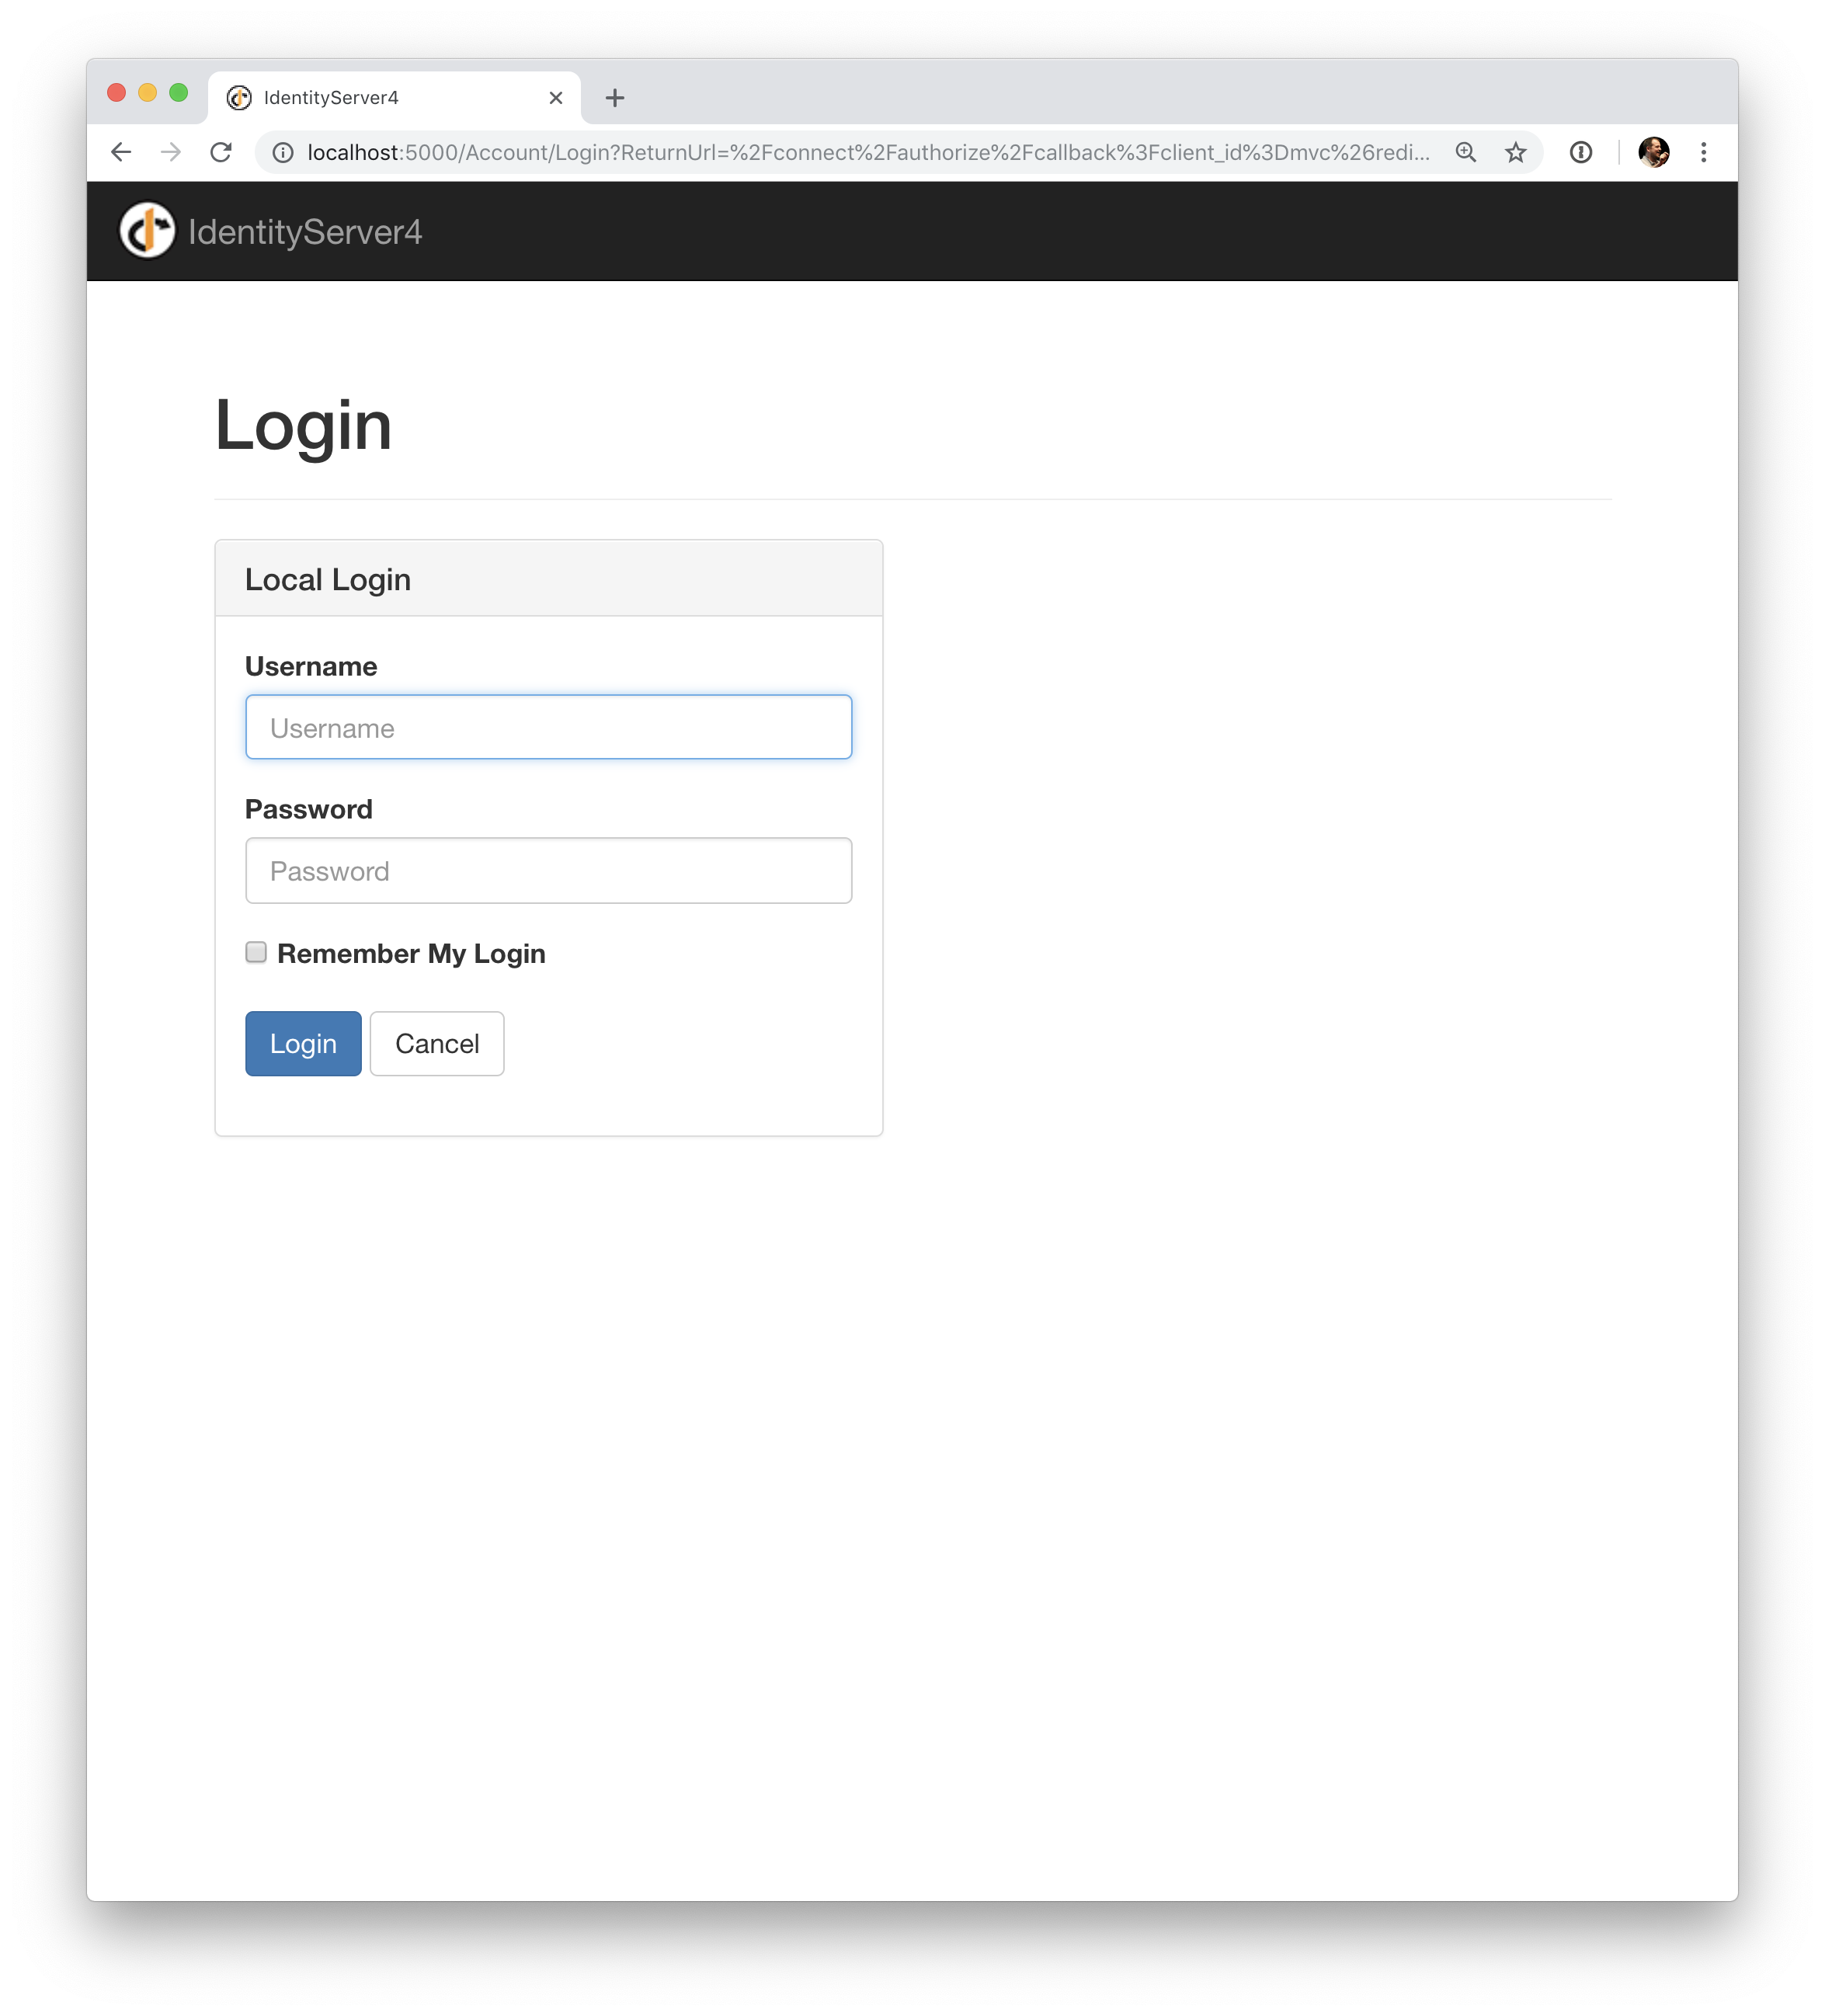
启动MVC应用程序,您应该看到重定向到IdentityServer的登录页面。

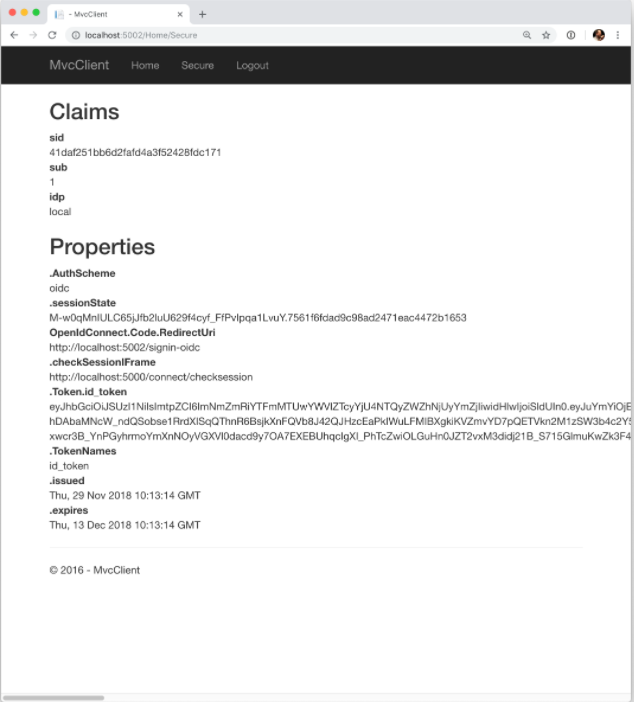
之后,IdentityServer将重定向回MVC客户端,在该客户端上,OpenID Connect身份验证处理程序将处理响应并通过设置cookie在本地登录用户。最后,MVC视图将显示cookie的内容。


 欢迎加入微信公众号:【南荣相如】

【推荐】国内首个AI IDE,深度理解中文开发场景,立即下载体验Trae
【推荐】编程新体验,更懂你的AI,立即体验豆包MarsCode编程助手
【推荐】抖音旗下AI助手豆包,你的智能百科全书,全免费不限次数
【推荐】轻量又高性能的 SSH 工具 IShell:AI 加持,快人一步
· AI与.NET技术实操系列(二):开始使用ML.NET
· 记一次.NET内存居高不下排查解决与启示
· 探究高空视频全景AR技术的实现原理
· 理解Rust引用及其生命周期标识(上)
· 浏览器原生「磁吸」效果!Anchor Positioning 锚点定位神器解析
· DeepSeek 开源周回顾「GitHub 热点速览」
· 记一次.NET内存居高不下排查解决与启示
· 物流快递公司核心技术能力-地址解析分单基础技术分享
· .NET 10首个预览版发布:重大改进与新特性概览!
· .NET10 - 预览版1新功能体验(一)