IdentityServer4:客户端凭据模式
1 前置阅读
在阅读本文章之前,你可以先阅读:
- IdentityServer4是什么
2 授权认证服务(IdentityServer)
首先,创建S041.IdentityServer Web API 项目,将IdentityServer4的NuGet软件包安装到您的应用程序中。
IdentityServer4
然后,定义API范围,API是您系统中要保护的资源,给您的API取一个逻辑名称就很重要。开发人员将使用它通过您的身份服务器连接到您的api。它应该以简单的方式向开发人员和用户描述您的api。
public static IEnumerable<ApiScope> ApiScopes =>
    new List<ApiScope>
    {
        new ApiScope("api1", "My API")
    };
接着,定义客户,即用于访问新API的客户端应用程序。
public static IEnumerable<Client> Clients =>
    new List<Client>
    {
        new Client
        {
            // 定义客户端ID
            ClientId = "client",
            // 授权方式为客户端凭据模式,类型可参考GrantTypes枚举
            AllowedGrantTypes = GrantTypes.ClientCredentials,
            // 定义客户端秘钥
            ClientSecrets =
            {
                new Secret("secret".Sha256())
            },
            // 允许客户端访问的范围
            AllowedScopes = { "api1" }
        }
    };
您可以将ClientId和ClientSecret视为应用程序本身的登录名和密码。
接着,配置IdentityServer,在Startup.ConfigureServices中,如下所示:
public void ConfigureServices(IServiceCollection services)
{
    var builder = services.AddIdentityServer()
        .AddInMemoryApiScopes(Config.ApiScopes)
        .AddInMemoryClients(Config.Clients);

    builder.AddDeveloperSigningCredential();
}
最后,配置中间件,在Startup.Configure中,如下所示:
public void Configure(IApplicationBuilder app, IWebHostEnvironment env)
{
    app.UseDeveloperExceptionPage();

    app.UseIdentityServer();
}
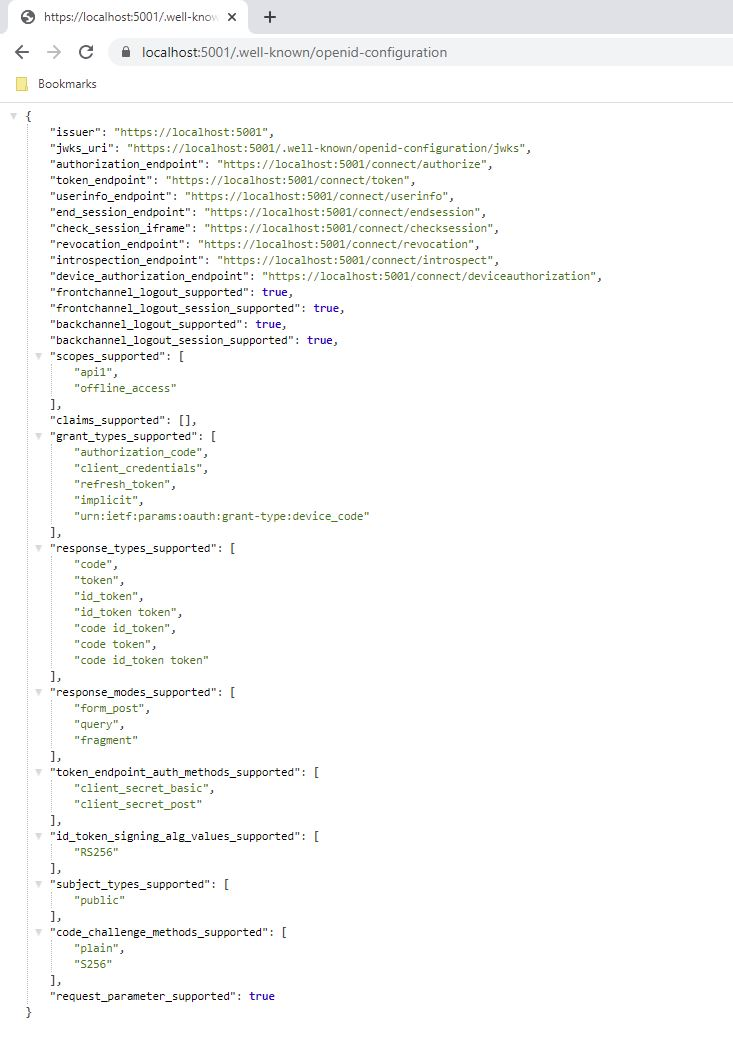
如果运行服务器并将浏览器导航到https://localhost:5001/.well-known/openid-configuration,则应该看到所谓的发现文档。

首次启动时,IdentityServer将为您创建一个开发人员签名密钥,该文件名为tempkey.jwk。您无需将该文件签入源代码管理中,如果不存在该文件将被重新创建。
3 业务资源服务(API)
首先,创建S041.Api Web API 项目,将Microsoft.AspNetCore.Authentication.JwtBearer的NuGet软件包安装到您的应用程序中。
Microsoft.AspNetCore.Authentication.JwtBearer
然后,配置API,在Startup.ConfigureServices中,如下所示:
public void ConfigureServices(IServiceCollection services)
{

    services.AddControllers();
    services.AddSwaggerGen(c =>
    {
        c.SwaggerDoc("v1", new OpenApiInfo { Title = "S041.Api", Version = "v1" });
    });

    services.AddAuthentication("Bearer")
        .AddJwtBearer("Bearer", options =>
        {
            options.Authority = "https://localhost:5001";

            options.TokenValidationParameters = new TokenValidationParameters
            {
                ValidateAudience = false
            };
        });
}
AddAuthentication将身份验证服务添加到DI并配置Bearer为默认方案。
接着,配置中间件,在Startup.Configure中,如下所示:
public void Configure(IApplicationBuilder app)
{
    app.UseRouting();

    app.UseAuthentication();
    app.UseAuthorization();

    app.UseEndpoints(endpoints =>
    {
        endpoints.MapControllers();
    });
}
- UseAuthentication 将身份验证中间件添加到管道中,以便对主机的每次调用都将自动执行身份验证。
最后,修改控制器,添加 [Authorize]
[ApiController]
[Route("[controller]")]
[Authorize]
public class WeatherForecastController : ControllerBase
{
}
4 API 测试
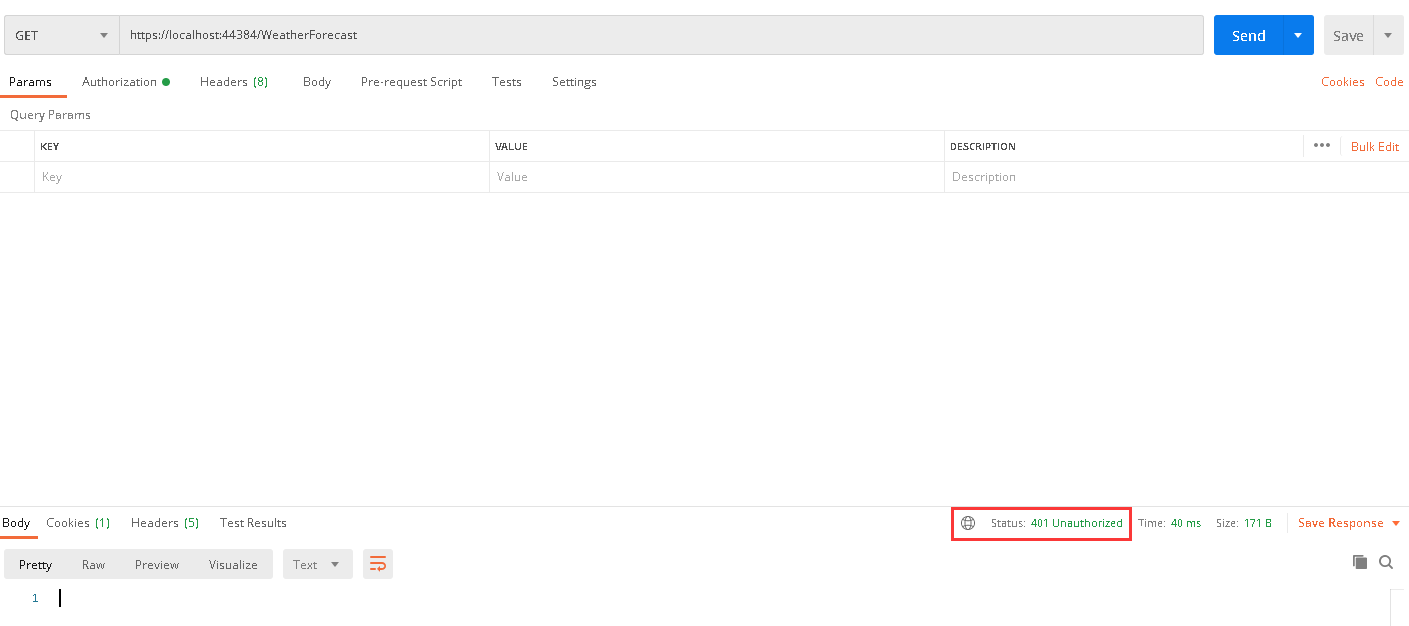
首先,用PostMan测试未加Token的API, 如图所示:

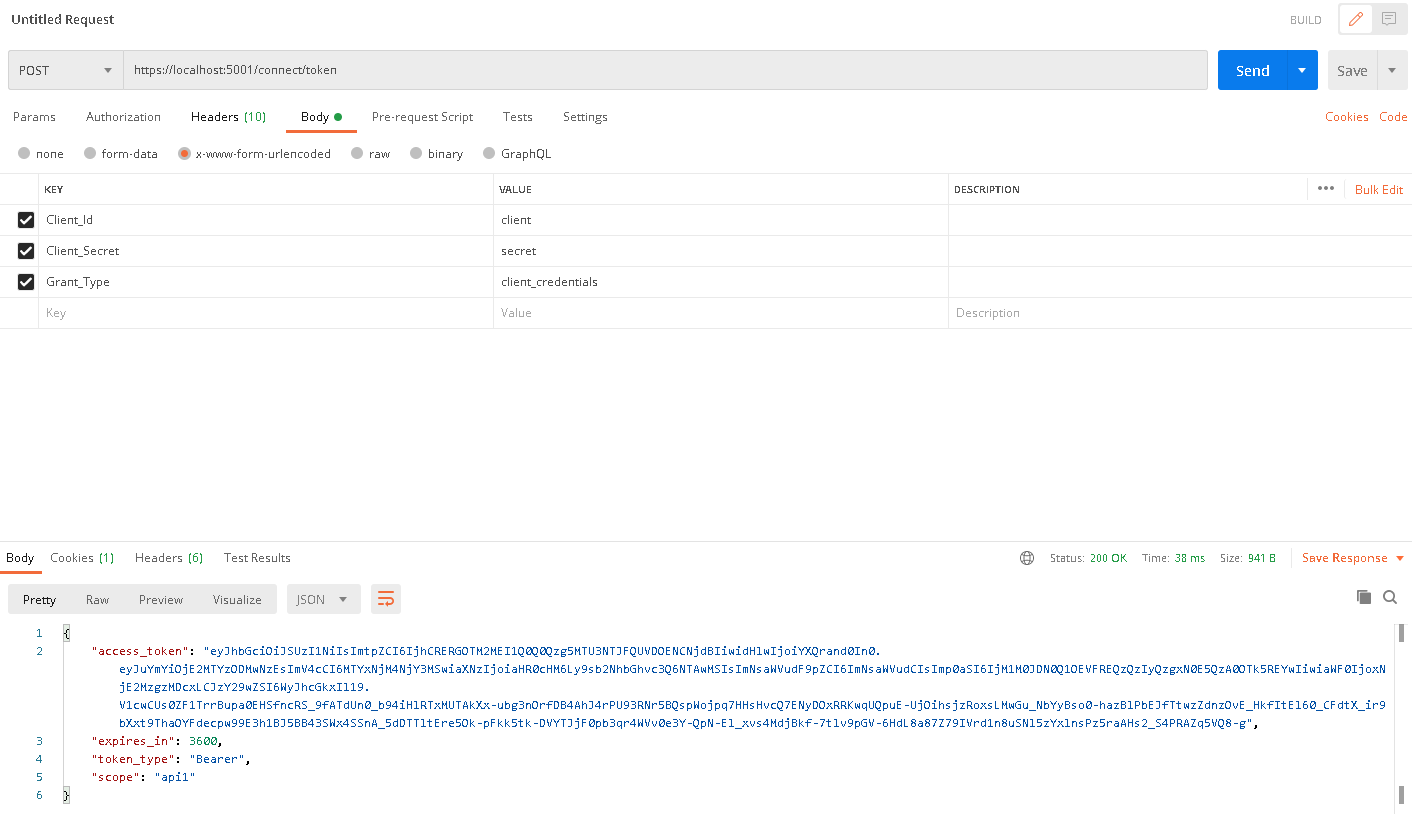
然后,用PostMan获取Token 如图所示:

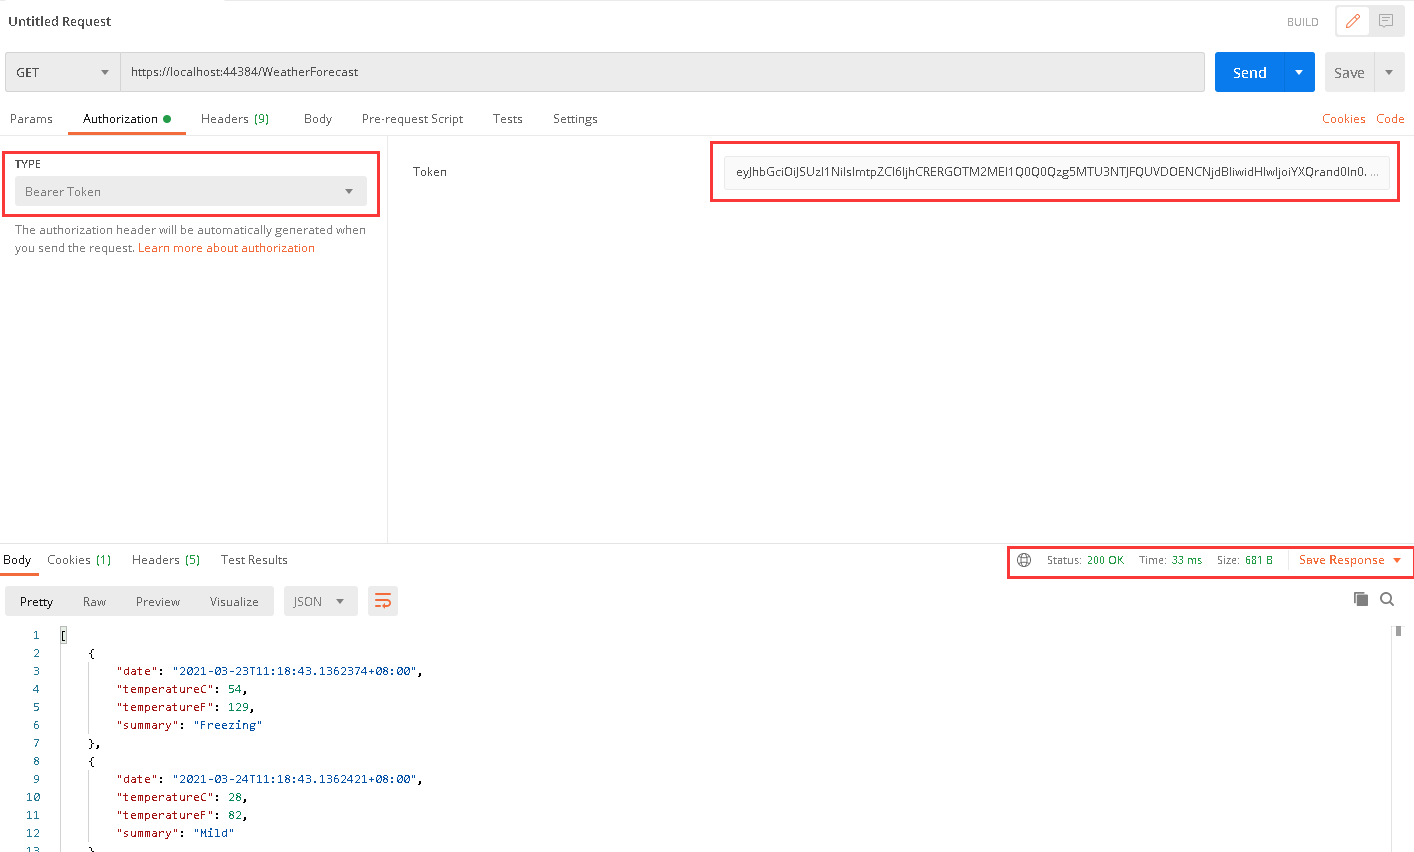
最后,用PostMan测试加Token的API 如图所示:

5 API 授权
目前,API接受您的身份服务器发出的所有访问令牌。
首先,我们将添加代码,该代码允许检查客户端请求(并被授予)的访问令牌中是否存在作用域。
services.AddAuthorization(options =>
{
    options.AddPolicy("ApiScope", policy =>
    {
        policy.RequireAuthenticatedUser();
        policy.RequireClaim("scope", "api1");
    });
});
最后,为路由系统中的所有API端点设置策略:
app.UseEndpoints(endpoints =>
{
    endpoints.MapControllers()
        .RequireAuthorization("ApiScope");
});


 欢迎加入微信公众号:【南荣相如】

【推荐】国内首个AI IDE,深度理解中文开发场景,立即下载体验Trae
【推荐】编程新体验,更懂你的AI,立即体验豆包MarsCode编程助手
【推荐】抖音旗下AI助手豆包,你的智能百科全书,全免费不限次数
【推荐】轻量又高性能的 SSH 工具 IShell:AI 加持,快人一步
· AI与.NET技术实操系列(二):开始使用ML.NET
· 记一次.NET内存居高不下排查解决与启示
· 探究高空视频全景AR技术的实现原理
· 理解Rust引用及其生命周期标识(上)
· 浏览器原生「磁吸」效果!Anchor Positioning 锚点定位神器解析
· DeepSeek 开源周回顾「GitHub 热点速览」
· 记一次.NET内存居高不下排查解决与启示
· 物流快递公司核心技术能力-地址解析分单基础技术分享
· .NET 10首个预览版发布:重大改进与新特性概览!
· .NET10 - 预览版1新功能体验(一)