17 jQuery阶段_操作样式_操作属性_动画_节点操作
一,jQuery操作样式:
我们平时操作样式的时候,可以直接修改单个样式,也可以先定义好一个class ,然后,直接修改 对象!
1,css操作:
a,设置样式:
功能:设置或者修改样式;操作的是style属性。
操作单个样式,
css (name,value) 两个参数,name 是样式名, value 是样式值。


 1 <!DOCTYPE html>
 2 <html lang="en">
 3 <head>
 4     <meta charset="UTF-8">
 5     <title>这是网页</title>
 6 </head>
 7 <body>
 8     <ul>
 9         <li>发电开始减肥</li>
10         <li>我去</li>
11         <li>嗯嗯</li>
12         <li>哦</li>
13         <li>各个</li>
14     </ul>
15     <script src="js/jquery-1.12.4.js"></script>
16     <script>
17         $(function () {
18             $("li").css("backgroundColor","yellow");  // 背景颜色
19             $("li").css("color","red");  // 字体颜色
20             $("li").css("fontSize","20px");  // 字体大小
21         })
22
23
24
25
26     </script>
27 </body>
28 </html>
但是,css操作一次只可以修改一个样式,不可以一次改多个参数。
如果想一次改多个样式的话,可以将所要修改的样式作为一个对象传入css() ; 如下:
 1 <!DOCTYPE html>
 2 <html lang="en">
 3 <head>
 4     <meta charset="UTF-8">
 5     <title>这是网页</title>
 6 </head>
 7 <body>
 8     <ul>
 9         <li>发电开始减肥</li>
10         <li>我去</li>
11         <li>嗯嗯</li>
12         <li>哦</li>
13         <li>各个</li>
14     </ul>
15     <script src="js/jquery-1.12.4.js"></script>
16     <script>
17         $(function () {
18             $("li").css({
19                 "backgroundColor":"yellow",
20                 "color":"red",
21                 "fontSize":"32px",
22             });
23
24
25
26         })
27
28
29
30
31     </script>
32 </body>
33 </html>
b,获取样式:
还是使用 css() 方法:
css(name) // 可以获取样式name 的属性值。
 1 <!DOCTYPE html>
 2 <html lang="en">
 3 <head>
 4     <meta charset="UTF-8">
 5     <title>这是网页</title>
 6 </head>
 7 <body>
 8     <ul>
 9         <li>发电开始减肥</li>
10         <li>我去</li>
11         <li>嗯嗯</li>
12         <li>哦</li>
13         <li>各个</li>
14     </ul>
15     <script src="js/jquery-1.12.4.js"></script>
16     <script>
17         $(function () {
18             // 获取 字体的大小
19             console.log($("li").css("fontSize"));
20
21             // 获取字体的颜色
22             console.log($("li").css("backgroundColor"));
23
24         })
25     </script>
26 </body>
27 </html>
不过在获取样式里,会有问题,如果有样式的值不同,此时就会有问题:
 1 <!DOCTYPE html>
 2 <html lang="en">
 3 <head>
 4     <meta charset="UTF-8">
 5     <title>这是网页</title>
 6 </head>
 7 <body>
 8     <ul>
 9         <li>发电开始减肥</li>
10         <li>我去</li>
11         <li>嗯嗯</li>
12         <li>哦</li>
13     </ul>
14     <script src="js/jquery-1.12.4.js"></script>
15     <script>
16         $(function () {
17             $("li").eq(0).css("fontSize","20px");
18             $("li").eq(1).css("fontSize","20px");
19             $("li").eq(2).css("fontSize","20px");
20             $("li").eq(3).css("fontSize","20px");
21
22             // 那么此时,用css()  获取 fontSize 的属性值是多少呢?
23             console.log($("li").css("fontSize")); //答案是:20px
24
25
26         })
27     </script>
28 </body>
29 </html>
之所以,输出是第一个的li 大小,是因为隐式迭代的缘故。
隐式迭代:
1,jQuery 设置属性的时候,它的隐式迭代是给所有的DOM对象都迭代的设置上相同的值。
2,但是,在获取属性值的时候,隐式迭代就不会迭代的获取所有的DOM对象了,它只会拿出第一个DOM对象的值!
2,class操作:
addClass() :
 1 <!DOCTYPE html>
 2 <html lang="en">
 3 <head>
 4     <meta charset="UTF-8">
 5     <title>这是网页</title>
 6     <style>
 7         .basic{
 8             font-size: 20px;
 9             background-color: purple;
10             color: red;
11         }
12         .bigger{
13             font-size: 30px;
14         }
15
16     </style>
17 </head>
18 <body>
19     <input type="button" value="添加basic类">
20     <input type="button" value="添加bigger类">
21     <ul>
22         <li class="aa">发电开始减肥</li>
23         <li class="aa">我去</li>
24         <li class="aa">嗯嗯</li>
25         <li class="aa">哦</li>
26     </ul>
27     <script src="js/jquery-1.12.4.js"></script>
28     <script>
29         $(function () {
30             $("input").eq(0).click(function () {
31                 $("li").addClass("basic"); // 而且 注意,addClass() 不是覆盖 原有的类样式,只是在原先所有的基础上,添加和 减少,这比用js 方便而且有好处~
32             });
33             $("input").eq(1).click(function () {
34                 $("li").addClass("bigger");
35             });
36         })
37     </script>
38 </body>
39 </html>
removeClass() :
 1 <!DOCTYPE html>
 2 <html lang="en">
 3 <head>
 4     <meta charset="UTF-8">
 5     <title>这是网页</title>
 6     <style>
 7         .basic{
 8             font-size: 20px;
 9             background-color: purple;
10             color: red;
11         }
12         .bigger{
13             font-size: 30px;
14         }
15
16     </style>
17 </head>
18 <body>
19     <input type="button" value="添加basic类">
20     <input type="button" value="添加bigger类">
21     <input type="button" value="移除bigger类">
22     <ul>
23         <li class="aa">发电开始减肥</li>
24         <li class="aa">我去</li>
25         <li class="aa">嗯嗯</li>
26         <li class="aa">哦</li>
27     </ul>
28     <script src="js/jquery-1.12.4.js"></script>
29     <script>
30         $(function () {
31             $("input").eq(0).click(function () {
32                 $("li").addClass("basic"); // 而且 注意,addClass() 不是覆盖 原有的类样式,只是在原先所有的基础上,添加和 减少,这比用js 方便而且有好处~
33             });
34             $("input").eq(1).click(function () {
35                 $("li").addClass("bigger");
36             });
37             $("input").eq(2).click(function () {
38                 $("li").removeClass("bigger"); // removeClass() 移除 类型样式,
39             })
40
41
42         })
43     </script>
44 </body>
45 </html>
hasClass(): 是否有某个类:它有返回值,true 和 false
<!DOCTYPE html>
<html lang="en">
<head>
    <meta charset="UTF-8">
    <title>这是网页</title>
    <style>
        .basic{
            font-size: 20px;
            background-color: purple;
            color: red;
        }
        .bigger{
            font-size: 30px;
        }

    </style>
</head>
<body>
    <input type="button" value="添加basic类">
    <input type="button" value="添加bigger类">
    <input type="button" value="移除bigger类">
    <input type="button" value="判断是否有某个类">
    <ul>
        <li class="aa">发电开始减肥</li>
        <li class="aa">我去</li>
        <li class="aa">嗯嗯</li>
        <li class="aa">哦</li>
    </ul>
    <script src="js/jquery-1.12.4.js"></script>
    <script>
        $(function () {
            $("input").eq(0).click(function () {
                $("li").addClass("basic"); // 而且 注意,addClass() 不是覆盖 原有的类样式,只是在原先所有的基础上,添加和 减少,这比用js 方便而且有好处~
            });
            $("input").eq(1).click(function () {
                $("li").addClass("bigger");
            });
            $("input").eq(2).click(function () {
                $("li").removeClass("bigger"); // removeClass() 移除 类型样式,
            });
            $("input").eq(3).click(function () {
                console.log($("li").hasClass("bigger"));
                console.log($("li").hasClass("daffasdf"));
            });


        })
    </script>
</body>
</html>
上述的代码还是比较长,
jQuery 中提供了更简单的方法:
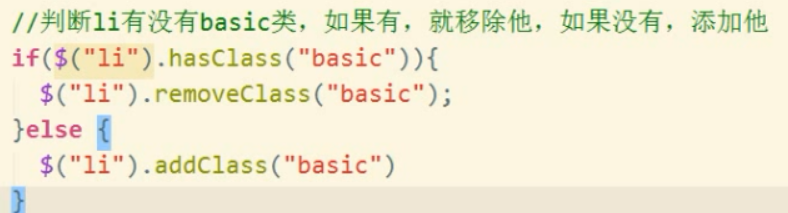
toggleClass(): 切换类,
它的意思也是,如果有这个类,就移除,如果没有就设置上:
 1 <!DOCTYPE html>
 2 <html lang="en">
 3 <head>
 4     <meta charset="UTF-8">
 5     <title>这是网页</title>
 6     <style>
 7         .basic{
 8             font-size: 20px;
 9             background-color: purple;
10             color: red;
11         }
12         .bigger{
13             font-size: 30px;
14         }
15
16     </style>
17 </head>
18 <body>
19     <input type="button" value="添加basic类">
20     <input type="button" value="添加bigger类">
21     <input type="button" value="移除bigger类">
22     <input type="button" value="判断是否有某个类">
23     <input type="button" value="切换类">  <!-- 如果有 类样式就移除,如果没有就设置上 -->
24     <ul>
25         <li class="aa">发电开始减肥</li>
26         <li class="aa">我去</li>
27         <li class="aa">嗯嗯</li>
28         <li class="aa">哦</li>
29     </ul>
30     <script src="js/jquery-1.12.4.js"></script>
31     <script>
32         $(function () {
33             $("input").eq(0).click(function () {
34                 $("li").addClass("basic"); // 而且 注意,addClass() 不是覆盖 原有的类样式,只是在原先所有的基础上,添加和 减少,这比用js 方便而且有好处~
35             });
36             $("input").eq(1).click(function () {
37                 $("li").addClass("bigger");
38             });
39             $("input").eq(2).click(function () {
40                 $("li").removeClass("bigger"); // removeClass() 移除 类型样式,
41             });
42             $("input").eq(3).click(function () {
43                 console.log($("li").hasClass("bigger"));
44                 console.log($("li").hasClass("daffasdf"));
45             });
46
47             $("input").eq(4).click(function () {
48                 $("li").toggleClass("bigger");
49             });
50
51
52         })
53     </script>
54 </body>
55 </html>
案例:tab栏切换:
  1 <!DOCTYPE html>
  2 <html>
  3 <head lang="en">
  4     <meta charset="UTF-8">
  5     <title></title>
  6     <style type="text/css">
  7     * {
  8       margin: 0;
  9       padding: 0;
 10     }
 11
 12     ul {
 13       list-style: none;
 14     }
 15
 16     .wrapper {
 17       width: 1000px;
 18       height: 475px;
 19       margin: 0 auto;
 20       margin-top: 100px;
 21     }
 22
 23     .tab {
 24       border: 1px solid #ddd;
 25       border-bottom: 0;
 26       height: 36px;
 27       width: 320px;
 28     }
 29
 30     .tab li {
 31       position: relative;
 32       float: left;
 33       width: 80px;
 34       height: 34px;
 35       line-height: 34px;
 36       text-align: center;
 37       cursor: pointer;
 38       border-top: 4px solid #fff;
 39     }
 40
 41     .tab span {
 42       position: absolute;
 43       right: 0;
 44       top: 10px;
 45       background: #ddd;
 46       width: 1px;
 47       height: 14px;
 48       overflow: hidden;
 49     }
 50
 51     .products {
 52       width: 1002px;
 53       border: 1px solid #ddd;
 54       height: 476px;
 55     }
 56
 57     .products .main {
 58       float: left;
 59       display: none;
 60     }
 61
 62     .products .main.selected {
 63       display: block;
 64     }
 65
 66     .tab li.active {
 67       border-color: red;
 68       border-bottom: 0;
 69     }
 70
 71     </style>
 72 </head>
 73 <body>
 74     <div class="wrapper">
 75       <ul class="tab">
 76         <li class="tab-item active">国际大牌<span>◆</span></li>
 77         <li class="tab-item">国妆名牌<span>◆</span></li>
 78         <li class="tab-item">清洁用品<span>◆</span></li>
 79         <li class="tab-item">男士精品</li>
 80       </ul>
 81       <div class="products">
 82         <div class="main selected">
 83           <a href="###"><img src="imgs/guojidapai.jpg" alt=""/></a>
 84         </div>
 85         <div class="main">
 86           <a href="###"><img src="imgs/guozhuangmingpin.jpg" alt=""/></a>
 87         </div>
 88         <div class="main">
 89           <a href="###"><img src="imgs/qingjieyongpin.jpg" alt=""/></a>
 90         </div>
 91         <div class="main">
 92           <a href="###"><img src="imgs/nanshijingpin.jpg" alt=""/></a>
 93         </div>
 94       </div>
 95     </div>
 96     <script src="js/jquery-1.12.4.js"></script>
 97     <script>
 98         $(function () {
 99             $(".tab-item").mouseenter(function () {
100                 $(this).addClass("active").siblings().removeClass("active");
101
102                 var idx = $(this).index();
103                 // console.log(idx);
104                 $(".main").eq(idx).addClass("selected").siblings().removeClass("selected");
105             });
106
107         })
108     </script>
109 </body>
110 </html>
二,jQuery操作属性:
attr 操作 :
attr(name,value); 设置单个属性。
样式: 在style 里面写的,用css() 来操作。
属性:在标签里面写的,用attr方法 操作。
 1 <!DOCTYPE html>
 2 <html lang="en">
 3 <head>
 4     <meta charset="UTF-8">
 5     <title>Title</title>
 6 </head>
 7 <body>
 8     <img src="image/06.jpg" alt="失败了.." title="哈哈哈">
 9     <script src="js/jquery-1.12.4.js"></script>
10     <script>
11         $(function () {
12             $("img").attr("title","我是个老爷爷") ; // 此时用 css() 方法是不行的,
13         })
14
15     </script>
16
17
18
19 </body>
20 </html>
这里面需要特别注意的就是 css() 和 attr() 的区别。
css() 是修改style 中的值。
attr()是修改标签中的值。
设置多个属性。
 1 <!DOCTYPE html>
 2 <html lang="en">
 3 <head>
 4     <meta charset="UTF-8">
 5     <title>Title</title>
 6 </head>
 7 <body>
 8     <img src="image/06.jpg" alt="失败了.." title="哈哈哈">
 9     <script src="js/jquery-1.12.4.js"></script>
10     <script>
11         $(function () {
12             $("img").attr({
13                 "alt":"我哭liao",
14                 "title":"我是个老爷爷"
15             })
16
17         })
18
19     </script>
20
21
22
23 </body>
24 </html>
 1 <!DOCTYPE html>
 2 <html lang="en">
 3 <head>
 4     <meta charset="UTF-8">
 5     <title>Title</title>
 6 </head>
 7 <body>
 8     <img src="image/06.jpg" alt="失败了.." title="哈哈哈" >
 9     <script src="js/jquery-1.12.4.js"></script>
10     <script>
11         $(function () {
12             $("img").attr({
13                 "alt":"我哭liao",
14                 "title":"我是个老爷爷",
15                 "bb":"cc"  // 也可以添加自定义属性
16             })
17
18         })
19
20     </script>
21
22
23
24 </body>
25 </html>
获取属性:
 1 <!DOCTYPE html>
 2 <html lang="en">
 3 <head>
 4     <meta charset="UTF-8">
 5     <title>Title</title>
 6 </head>
 7 <body>
 8     <img src="image/06.jpg" alt="失败了.." title="哈哈哈" >
 9     <script src="js/jquery-1.12.4.js"></script>
10     <script>
11         $(function () {
12             console.log($("img").attr("src")); //  image/06.jpg
13
14         })
15
16     </script>
17
18
19
20 </body>
21 </html>
总结:
attr() 方法 和 css() 基本上完全一致。
案例:美女相册:
 1 <!DOCTYPE html>
 2 <html lang="en">
 3 <head>
 4     <meta charset="UTF-8">
 5     <title>Title</title>
 6     <style type="text/css">
 7         body {
 8           font-family: "Helvetica", "Arial", serif;
 9           color: #333;
10           background-color: #ccc;
11           margin: 1em 10%;
12         }
13
14         h1 {
15           color: #333;
16           background-color: transparent;
17         }
18
19         a {
20           color: #c60;
21           background-color: transparent;
22           font-weight: bold;
23           text-decoration: none;
24         }
25
26         ul {
27           padding: 0;
28         }
29
30         li {
31           float: left;
32           padding: 1em;
33           list-style: none;
34         }
35
36         #imagegallery {
37
38           list-style: none;
39         }
40
41         #imagegallery li {
42           margin: 0px 20px 20px 0px;
43           padding: 0px;
44           display: inline;
45         }
46
47         #imagegallery li a img {
48           border: 0;
49     }
50   </style>
51 </head>
52 <body>
53     <h2>美女画廊</h2>
54     <ul id="imagegallery">
55         <li><a href="image/1.jpg" title="美女A"><img src="image/1-small.jpg" width="100" alt="美女1"/></a></li>
56         <li><a href="image/2.jpg" title="美女B"><img src="image/2-small.jpg" width="100" alt="美女2"/></a></li>
57         <li><a href="image/3.jpg" title="美女C"><img src="image/3-small.jpg" width="100" alt="美女3"/></a></li>
58         <li><a href="image/4.jpg" title="美女D"><img src="image/4-small.jpg" width="100" alt="美女4"/></a></li>
59     </ul>
60     <div style="clear:both"></div>
61     <img id="image" src="image/placeholder.png" alt="" width="450px"/>
62     <p id="des">选择一个图片</p>
63     <script src="js/jquery-1.12.4.js"></script>
64     <script>
65         $(function () {
66             // 1,给所有的a 标签注册点击事件
67             $("#imagegallery a").click(function () {
68                 $("#image").attr("src",$(this).attr("href"));
69
70                 //2 设置相应的文本
71                 $("#des").text($(this).attr("title"));
72
73                 //3 阻止a 标签的跳转
74                 return false;
75
76
77             });
78
79
80
81
82
83         })
84
85
86
87
88
89     </script>
90
91
92
93 </body>
94 </html>
prop 操作:
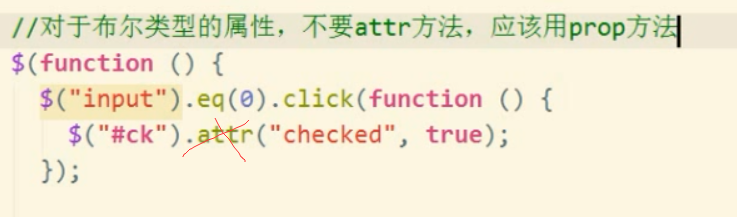
 1 <!DOCTYPE html>
 2 <html lang="en">
 3     <head>
 4         <meta charset="UTF-8">
 5         <title>Title</title>
 6     </head>
 7     <body>
 8         <input type="button" value="选中" >
 9         <input type="button" value="不选中" >
10         <input type="checkbox" id="ck">
11         <script src="js/jquery-1.12.4.js"> </script>
12         <script>
13             $(function () {
14
15                 $("input").eq(0).click(function () {
16                     $("#ck").attr("checked",true);
17                 });
18                 $("input").eq(1).click(function () {
19                     $("#ck").attr("checked",false);
20                 });
21
22             })
23
24
25         </script>
26
27
28     </body>
29 </html>
 1 <!DOCTYPE html>
 2 <html lang="en">
 3     <head>
 4         <meta charset="UTF-8">
 5         <title>Title</title>
 6     </head>
 7     <body>
 8         <input type="button" value="选中" >
 9         <input type="button" value="不选中" >
10         <input type="checkbox" id="ck">
11         <script src="js/jquery-1.12.4.js"> </script>
12         <script>
13             $(function () {
14
15                 $("input").eq(0).click(function () {
16                     $("#ck").prop("checked",true);
17                 });
18                 $("input").eq(1).click(function () {
19                     $("#ck").prop("checked",false);
20                 });
21
22             })
23
24
25         </script>
26
27
28     </body>
29 </html>
表格全选案例:
  1 <!DOCTYPE html>
  2 <html lang="en">
  3     <head>
  4         <meta charset="UTF-8">
  5         <title>Title</title>
  6         <style>
  7     * {
  8       padding: 0;
  9       margin: 0;
 10     }
 11
 12     .wrap {
 13       width: 300px;
 14       margin: 100px auto 0;
 15     }
 16
 17     table {
 18       border-collapse: collapse;
 19       border-spacing: 0;
 20       border: 1px solid #c0c0c0;
 21       width: 300px;
 22     }
 23
 24     th,
 25     td {
 26       border: 1px solid #d0d0d0;
 27       color: #404060;
 28       padding: 10px;
 29     }
 30
 31     th {
 32       background-color: #09c;
 33       font: bold 16px "微软雅黑";
 34       color: #fff;
 35     }
 36
 37     td {
 38       font: 14px "微软雅黑";
 39     }
 40
 41     tbody tr {
 42       background-color: #f0f0f0;
 43       text-align: center;
 44     }
 45
 46     tbody tr:hover {
 47       cursor: pointer;
 48       background-color: #fafafa;
 49     }
 50   </style>
 51     </head>
 52     <body>
 53         <div class="wrap">
 54           <table>
 55             <thead>
 56             <tr>
 57               <th>
 58                 <input type="checkbox" id="j_cbAll"/>
 59               </th>
 60               <th>菜名</th>
 61               <th>饭店</th>
 62             </tr>
 63             </thead>
 64             <tbody id="j_tb">
 65             <tr>
 66               <td>
 67                 <input type="checkbox"/>
 68               </td>
 69               <td>红烧肉</td>
 70               <td>田老师</td>
 71             </tr>
 72             <tr>
 73               <td>
 74                 <input type="checkbox"/>
 75               </td>
 76               <td>西红柿鸡蛋</td>
 77               <td>田老师</td>
 78             </tr>
 79             <tr>
 80               <td>
 81                 <input type="checkbox"/>
 82               </td>
 83               <td>红烧狮子头</td>
 84               <td>田老师</td>
 85             </tr>
 86             <tr>
 87               <td>
 88                 <input type="checkbox"/>
 89               </td>
 90               <td>日式肥牛</td>
 91               <td>田老师</td>
 92             </tr>
 93
 94             </tbody>
 95           </table>
 96         </div>
 97         <script src="js/jquery-1.12.4.js"> </script>
 98         <script>
 99             $(function () {
100                 //1, 点击上面的check ,让下面的全选 或全不选
101                 $("#j_cbAll").click(function () {
102                     $("#j_tb input").prop("checked",$("#j_cbAll").prop("checked"));
103
104                 });
105
106                 //2 , 当下面所有的选中的时候,上面的全选按钮也自动选中
107                 $("#j_tb input").click(function () {
108                     // 获取 被选中的下面的个数
109                     var checked_len = $("#j_tb input:checked").length;
110                     $("#j_cbAll").prop("checked",checked_len == 4);
111                 })
112
113
114
115             })
116
117         </script>
118
119
120     </body>
121 </html>
三,jQuery动画:
三组基本动画:
1,显示(show) 与 隐藏(hide)
 1 <!DOCTYPE html>
 2 <html lang="en">
 3     <head>
 4         <meta charset="UTF-8">
 5         <title>Title</title>
 6         <style>
 7             div{
 8                 width: 400px;
 9                 height: 300px;
10                 background-color: cyan;
11                 display: none;
12             }
13         </style>
14     </head>
15     <body>
16         <input type="button" value="显示">
17         <input type="button" value="隐藏">
18         <div></div>
19         <script src="js/jquery-1.12.4.js"> </script>
20         <script>
21             $(function () {
22                 $("input").eq(0).click(function () {
23                     // show 中 不传参数时,没有动画效果
24                     // $("div").show();
25
26                     //show 中传参数: speed
27                     // 这个参数可以是 毫秒值,也可以是 某些固定字符串
28                     //  字符串:  fast normal slow
29                     // $("div").show(1000);//1000ms
30                     // $("div").show("fast");//"fast"  200ms
31                     // $("div").show("normal");//"normal" 400ms
32                     // $("div").show("slow");//"slow" 600ms
33
34                     // show([speed], [call_back])  show 中还可以传 回调函数,
35                     //  回调函数在动画执行完之后执行
36
37                     $("div").show(100,function () {
38                         console.log("动画执行完毕");
39                     });
40
41                     // 不过最常用的方法 是: show() 啥都不传 。
42                 });
43                 $("input").eq(1).click(function () {
44                     $("div").hide();
45                 });
46
47             })
48
49         </script>
50
51
52     </body>
53 </html>
2, 滑入(slideUp) 与 滑出(slideDown) 与切换 (slide Toggle)
 1 <!DOCTYPE html>
 2 <html lang="en">
 3     <head>
 4         <meta charset="UTF-8">
 5         <title>Title</title>
 6         <style>
 7             div{
 8                 width: 400px;
 9                 height: 300px;
10                 background-color: cyan;
11                 display: none;
12             }
13         </style>
14     </head>
15     <body>
16         <input type="button" value="显示">
17         <input type="button" value="隐藏">
18         <input type="button" value="切换">
19         <div></div>
20         <script src="js/jquery-1.12.4.js"> </script>
21         <script>
22             $(function () {
23                 $("input").eq(0).click(function () {
24                     $("div").slideDown(); //显示  向下滑    不传参数也有动画效果,默认是normal
25
26
27
28
29                 });
30                 $("input").eq(1).click(function () {
31                     //隐藏 向上滑
32                     $("div").slideUp();
33
34                 });
35
36                 $("input").eq(2).click(function () {
37                     //切换 向上滑 和 向下滑 。如果是向上滑的状态,就变为向下滑
38                     $("div").slideToggle();
39
40                 });
41
42             })
43
44         </script>
45
46
47     </body>
48 </html>
3,淡入 (fadeIn )与 淡出(fadeOut) 与 切换(fade Toggle)
 1 <!DOCTYPE html>
 2 <html lang="en">
 3     <head>
 4         <meta charset="UTF-8">
 5         <title>Title</title>
 6         <style>
 7             div{
 8                 width: 400px;
 9                 height: 300px;
10                 background-color: cyan;
11                 display: none;
12             }
13         </style>
14     </head>
15     <body>
16         <input type="button" value="显示">
17         <input type="button" value="隐藏">
18         <input type="button" value="切换">
19         <div></div>
20         <script src="js/jquery-1.12.4.js"> </script>
21         <script>
22             $(function () {
23                 $("input").eq(0).click(function () {
24                     $("div").fadeIn(); //显示  淡入
25
26
27
28                 });
29                 $("input").eq(1).click(function () {
30                     //隐藏 淡出
31                     $("div").fadeOut();
32
33                 });
34
35                 $("input").eq(2).click(function () {
36                     //切换
37                     $("div").fadeToggle();
38
39                 });
40
41             })
42
43         </script>
44
45
46     </body>
47 </html>
1 <!DOCTYPE html> 2 <html lang="en"> 3 <head> 4 <meta charset="UTF-8"> 5 <title>Title</title> 6 <style > 7 * { 8 margin: 0; 9 padding: 0; 10 list-style: none; 11 } 12 13 .slider { 14 height: 340px; 15 width: 790px; 16 margin: 100px auto; 17 position: relative; 18 } 19 20 .slider li { 21 position: absolute; 22 display: none; 23 } 24 25 .slider li:first-child { 26 display: block; 27 } 28 29 30 .arrow { 31 display: none; 32 } 33 34 .slider:hover .arrow { 35 display: block; 36 } 37 38 .arrow-left, 39 .arrow-right { 40 font-family: "SimSun", "宋体"; 41 width: 30px; 42 height: 60px; 43 background-color: rgba(0, 0, 0, 0.1); 44 position: absolute; 45 top: 50%; 46 margin-top: -30px; 47 cursor: pointer; 48 text-align: center; 49 line-height: 60px; 50 color: #fff; 51 font-weight: 700; 52 font-size: 30px; 53 } 54 55 .arrow-left:hover, 56 .arrow-right:hover { 57 background-color: rgba(0, 0, 0, .5); 58 } 59 60 .arrow-left { 61 left: 0; 62 } 63 64 .arrow-right { 65 right: 0; 66 } 67 68 </style> 69 </head> 70 <body> 71 <div class="slider"> 72 <ul> 73 <li><a href="#"><img src="images/1.jpg" alt=""></a></li> 74 <li><a href="#"><img src="images/2.jpg" alt=""></a></li> 75 <li><a href="#"><img src="images/3.jpg" alt=""></a></li> 76 <li><a href="#"><img src="images/4.jpg" alt=""></a></li> 77 <li><a href="#"><img src="images/5.jpg" alt=""></a></li> 78 <li><a href="#"><img src="images/6.jpg" alt=""></a></li> 79 <li><a href="#"><img src="images/7.jpg" alt=""></a></li> 80 <li><a href="#"><img src="images/8.jpg" alt=""></a></li> 81 </ul> 82 <!--箭头--> 83 <div class="arrow"> 84 <span class="arrow-left"><</span> 85 <span class="arrow-right">></span> 86 </div> 87 </div> 88 <script src="js/jquery-1.12.4.js"> </script> 89 <script> 90 $(function () { 91 92 var count = 0 ; 93 $(".arrow-right").click(function () { 94 95 count ++; 96 // if (count == 8){ 97 if (count == $(".slider li").length){ 98 count = 0; 99 } 100 //让 count 渐渐的显示,其他的兄弟渐渐的隐藏 101 $(".slider li").eq(count).fadeIn().siblings().fadeOut(); 102 }); 103 104 $(".arrow-left").click(function () { 105 106 count --; 107 if (count == -1){ 108 count = $(".slider li").length - 1; 109 } 110 //让 count 渐渐的显示,其他的兄弟渐渐的隐藏 111 $(".slider li").eq(count).fadeIn().siblings().fadeOut(); 112 }); 113 114 115 116 }) 117 118 </script> 119 120 121 </body> 122 </html>
自定义动画:
 1 <!DOCTYPE html>
 2 <html lang="en">
 3 <head>
 4     <meta charset="UTF-8">
 5     <title>我是网页标题</title>
 6     <style>
 7         div{
 8             width: 100px;
 9             height: 100px;
10             background-color: green;
11             position: absolute;
12         }
13     </style>
14 </head>
15 <body>
16     <input type="button" value="开始">
17     <input type="button" value="结束">
18     <div></div>
19     <script src = "js/jquery-1.12.4.js"></script>
20     <script>
21         $(function () {
22             $("input").eq(0).click(function () {
23                  //第一个参数是对象
24                 // 第二个参数是 速度
25                 // 第三个参数是 以怎样的速度  默认是swing:变速 linear是匀速
26                 // $("div").animate({left:1000},1000);
27                 $("div").animate({left:1000},1000,"linear");
28
29                 // swing 秋千   linear 匀速
30                 //它还有第四个参数 是回调函数
31
32
33             });
34
35
36
37
38
39
40
41         })
42
43     </script>
44
45 </body>
46 </html>
案例:手风琴案例:
 1 <!DOCTYPE html>
 2 <html lang="en">
 3 <head>
 4     <meta charset="UTF-8">
 5     <title>我是网页标题</title>
 6     <style>
 7     * {
 8       margin: 0;
 9       padding: 0;
10     }
11
12     ul {
13       list-style: none;
14       width: 1300px;
15     }
16
17     #box {
18       width: 1200px;
19       height: 400px;
20       border: 2px solid red;
21       margin: 100px auto;
22     }
23
24     #box li {
25       width: 240px;
26       height: 400px;
27       /*border: 1px solid #000;*/
28       float: left;
29     }
30
31   </style>
32 </head>
33 <body>
34     <div id="box">
35       <ul>
36         <li></li>
37         <li></li>
38         <li></li>
39         <li></li>
40         <li></li>
41       </ul>
42     </div>
43     <script src = "js/jquery-1.12.4.js"></script>
44     <script>
45         $(function () {
46
47             // 给li 添加背景图片
48             // $("#box li").css("backgroundImage","url(images/1.jpg)"); #此时隐式遍历,会给所有的li 都加上1图片,
49             // 此时还是要写循环的 ,不过这种情况是比较少的。
50
51             var $lis = $("#box li"); // lis 为 jQuery 对象
52             // console.log($lis);
53
54             for(var i = 0;i<$lis.length;i++){
55                 // 第一种写法
56                 // $(lis[i]).css("backgroundImage","url(images/"+(i+1)+".jpg)");
57
58                 // 第二种写法
59                 $lis.eq(i).css("backgroundImage","url(images/"+(i+1)+".jpg)");
60             }
61             // 给所有Li注册 鼠标经过事件
62             $lis.mouseenter(function () {
63                 // 当前的设置为 800 ,其他设置为100
64                 $(this).animate({width:800}).siblings().animate({width:100});
65             }).mouseleave(function () {
66                 $lis.animate({width:240});
67             });
68
69
70
71
72         })
73
74     </script>
75
76 </body>
77 </html>
上面这个是有问题的,引起问题的原因是动画队列的问题。
动画队列:
jQuery 会将所有要执行的动画放到队列中,它的好处是:不会丢失,一个执行之后,执行其他的。但是坏处就是:执行 需要时间。
解决方案是加上 .stop()
它的作用是:如果有当前正在执行的动画,先停止正在执行的动画,然后再执行动画。
上面手风琴的改进如下:
 1 <!DOCTYPE html>
 2 <html lang="en">
 3 <head>
 4     <meta charset="UTF-8">
 5     <title>我是网页标题</title>
 6     <style>
 7     * {
 8       margin: 0;
 9       padding: 0;
10     }
11
12     ul {
13       list-style: none;
14       width: 1300px;
15     }
16
17     #box {
18       width: 1200px;
19       height: 400px;
20       border: 2px solid red;
21       margin: 100px auto;
22     }
23
24     #box li {
25       width: 240px;
26       height: 400px;
27       /*border: 1px solid #000;*/
28       float: left;
29     }
30
31   </style>
32 </head>
33 <body>
34     <div id="box">
35       <ul>
36         <li></li>
37         <li></li>
38         <li></li>
39         <li></li>
40         <li></li>
41       </ul>
42     </div>
43     <script src = "js/jquery-1.12.4.js"></script>
44     <script>
45         $(function () {
46
47             var $lis = $("#box li"); // lis 为 jQuery 对象
48
49             for(var i = 0;i<$lis.length;i++){
50                 $lis.eq(i).css("backgroundImage","url(images/"+(i+1)+".jpg)");
51             }
52             $lis.mouseenter(function () {
53                 $(this).stop().animate({width:800}).siblings().stop().animate({width:100});
54             }).mouseleave(function () {
55                 $lis.stop().animate({width:240});
56             });
57
58
59
60
61         })
62
63     </script>
64
65 </body>
66 </html>
停止动画:
 1 <!DOCTYPE html>
 2 <html lang="en">
 3 <head>
 4     <meta charset="UTF-8">
 5     <title>我是网页标题</title>
 6     <style>
 7         div{
 8             width: 400px;
 9             height: 400px;
10             background-color: cyan;
11             display: none;
12         }
13   </style>
14 </head>
15 <body>
16     <input type="button" value="开始">
17     <input type="button" value="结束">
18     <div></div>
19     <script src = "js/jquery-1.12.4.js"></script>
20     <script>
21         $(function () {
22             $("input").eq(0).click(function () {
23                 $("div").slideDown(4000).slideUp(4000);  //此时会 先执行 slideDown,其他动画先放到动画队列中。
24             });
25             $("input").eq(1).click(function () {
26                 $("div").stop();  //它会停止当前正在执行的动画,如果动画队列中非空,就执行队列中要执行的动画。
27             });
28
29         })
30
31     </script>
32
33 </body>
34 </html>
 1 <!DOCTYPE html>
 2 <html lang="en">
 3 <head>
 4     <meta charset="UTF-8">
 5     <title>我是网页标题</title>
 6     <style>
 7         div{
 8             width: 400px;
 9             height: 400px;
10             background-color: cyan;
11             display: none;
12         }
13   </style>
14 </head>
15 <body>
16     <input type="button" value="开始">
17     <input type="button" value="结束">
18     <div></div>
19     <script src = "js/jquery-1.12.4.js"></script>
20     <script>
21         $(function () {
22             $("input").eq(0).click(function () {
23                 $("div").slideDown(4000).slideUp(4000);
24             });
25             $("input").eq(1).click(function () {
26                 // stop() 中有两个参数
27                 // 1,clearQueue: 是否清楚动画队列  true/false
28                 // 2,jumpToEnd: 是否跳转到当前动画的 最终效果 true/false
29                 $("div").stop(true,false);
30
31             });
32
33         })
34
35     </script>
36
37 </body>
38 </html>
但是,使用stop()一般不传参。
一般的使用方式:
.stop().animate()
案例:音乐导航:
 1 <!DOCTYPE html>
 2 <html lang="en">
 3 <head>
 4     <meta charset="UTF-8">
 5     <title>我是网页标题</title>
 6     <style>
 7     * {
 8       margin: 0;
 9       padding: 0;
10       list-style: none;
11     }
12
13     .nav {
14       width: 900px;
15       height: 60px;
16       background-color: black;
17       margin: 0 auto;
18     }
19
20     .nav li {
21       width: 100px;
22       height: 60px;
23       /*border: 1px solid yellow;*/
24       float: left;
25       position: relative;
26       overflow: hidden;
27     }
28
29     .nav a {
30       position: absolute;
31       width: 100%;
32       height: 100%;
33       font-size: 24px;
34       color: blue;
35       text-align: center;
36       line-height:60px;
37       text-decoration: none;
38       z-index: 2;
39     }
40
41     .nav span {
42       position: absolute;
43       width: 100%;
44       height: 100%;
45       background-color: yellow;
46       top: 60px;
47     }
48   </style>
49 </head>
50 <body>
51     <div class="nav">
52       <ul>
53         <li>
54           <a href="javascript:void(0);">导航1</a>
55           <span></span>
56         </li>
57         <li><a href="javascript:void(0);">导航2</a><span></span></li>
58         <li><a href="javascript:void(0);">导航3</a><span></span></li>
59         <li><a href="javascript:void(0);">导航4</a><span></span></li>
60         <li><a href="javascript:void(0);">导航5</a><span></span></li>
61         <li><a href="javascript:void(0);">导航6</a><span></span></li>
62         <li><a href="javascript:void(0);">导航7</a><span></span></li>
63         <li><a href="javascript:void(0);">导航8</a><span></span></li>
64         <li><a href="javascript:void(0);">导航9</a><span></span></li>
65       </ul>
66       <!--音频标签-->
67       <div>
68         <audio src="mp3/1.ogg"></audio>
69         <audio src="mp3/2.ogg"></audio>
70         <audio src="mp3/3.ogg"></audio>
71         <audio src="mp3/4.ogg"></audio>
72         <audio src="mp3/5.ogg"></audio>
73         <audio src="mp3/6.ogg"></audio>
74         <audio src="mp3/7.ogg"></audio>
75         <audio src="mp3/8.ogg"></audio>
76         <audio src="mp3/9.ogg"></audio>
77       </div>
78 </div>
79     <script src = "js/jquery-1.12.4.js"></script>
80     <script>
81         $(function () {
82             $(".nav li").mouseenter(function () {
83                 $(this).children("span").stop().animate({top:0});
84                 // 让对应的音乐播放
85                 var idx = $(this).index();
86
87
88             }).mouseleave(function () {
89                 $(this).children("span").stop().animate({top: 60});
90             });
91
92         })
93
94     </script>
95
96 </body>
97 </html>
四,jQuery节点操作:
创建节点 和 添加节点:
 1 <!DOCTYPE html>
 2 <html lang="en">
 3 <head>
 4     <meta charset="UTF-8">
 5     <title>我是网页标题</title>
 6     <style>
 7         div{
 8             width: 200px;
 9             height: 200px;
10             background-color: cyan;
11         }
12     </style>
13
14 </head>
15 <body>
16     <div id="dv"></div>
17
18     <script src = "js/jquery-1.12.4.js"></script>
19     <script>
20         $(function () {
21             var box = document.getElementById("dv");
22
23             // 创建a 标签
24             var aObj = document.createElement("a");
25             box.appendChild(aObj);
26             aObj.setAttribute("href","http://www.baidu.com");
27             aObj.setAttribute("target","_black");
28             aObj.innerHTML = "百度一下";
29
30
31         })
32
33     </script>
34
35 </body>
36 </html>
下面是jQuery 的写法:
1,首先创建一个jQuery 对象,方法是:将标签 字符串放到$中,
2,使用append() 将jQuery 对象添加到我们要求的位置。
 1 <!DOCTYPE html>
 2 <html lang="en">
 3 <head>
 4     <meta charset="UTF-8">
 5     <title>我是网页标题</title>
 6     <style>
 7         div{
 8             width: 200px;
 9             height: 200px;
10             background-color: cyan;
11         }
12     </style>
13
14 </head>
15 <body>
16     <div id="dv"></div>
17     <script src = "js/jquery-1.12.4.js"></script>
18     <script>
19         $(function () {
20
21             var $a = $('<a href="http://www.baidu.com" target="_blank">百度一下</a>');
22             $("#dv").append($a);
23
24             //上面操作也可以一步完成。  如下:
25             // $("#dv").append('<a href="http://www.baidu.com" target="_blank">百度一下</a>')
26
27         })
28
29     </script>
30
31 </body>
32 </html>
注:append() 是将其添加到后面,
prepend()是将其添加到前面。
至于,appendTo() 和 preappendTo() 我选择不用。
总结:
创建节点直接用$()
添加节点,一般就使用 .append() 和 .prepend() .
1 <!DOCTYPE html> 2 <html lang="en"> 3 <head> 4 <meta charset="UTF-8"> 5 <title>我是网页标题</title> 6 <style> 7 select { 8 width: 200px; 9 background-color: teal; 10 height: 200px; 11 font-size: 20px; 12 } 13 14 .btn-box { 15 width: 30px; 16 display: inline-block; 17 vertical-align: top; 18 } 19 </style> 20 21 </head> 22 <body> 23 <h1>城市选择:</h1> 24 <select id="src-city" name="src-city" multiple> 25 <option value="1">北京</option> 26 <option value="2">上海</option> 27 <option value="3">深圳</option> 28 <option value="4">广州</option> 29 <option value="5">西红柿</option> 30 </select> 31 <div class="btn-box"> 32 <!--实体字符--> 33 <button id="btn1"> >> </button> 34 <button id="btn2"> << </button> 35 <button id="btn3"> ></button> 36 <button id="btn4"> < </button> 37 </div> 38 <select id="tar-city" name="tar-city" multiple> 39 </select> 40 <script src = "js/jquery-1.12.4.js"></script> 41 <script> 42 $(function () { 43 $("#btn1").click(function () { 44 $("#tar-city").append($("#src-city>option")); 45 }); 46 $("#btn2").click(function () { 47 $("#src-city").append($("#tar-city>option")); 48 }); 49 $("#btn3").click(function () { 50 $("#tar-city").append($("#src-city>option:selected")); 51 }); 52 $("#btn4").click(function () { 53 $("#src-city").append($("#tar-city>option:selected")); 54 }); 55 56 57 58 59 }) 60 61 </script> 62 63 </body> 64 </html>
清空节点 与 删除节点:
 1 <!DOCTYPE html>
 2 <html lang="en">
 3 <head>
 4     <meta charset="UTF-8">
 5     <title>我是网页标题</title>
 6     <style>
 7         div{
 8             width: 200px;
 9             height: 200px;
10             background-color: pink;
11         }
12
13     </style>
14 </head>
15 <body>
16     <div>
17         <p>1111</p>
18         <p>2222</p>
19     </div>
20     <p id="pp">我是外面的p</p>
21     <script src = "js/jquery-1.12.4.js"></script>
22     <script>
23         $(function () {
24
25             // $("div").html("");  //这可以 清除 div中的内容,但是如果div中有事件,不会清除,造成内存泄漏。
26
27             // 清除时可以使用 .empty() ;//这个对于事件 也可以清除
28             $("div").empty();  //清空div 中的
29
30             // 删除节点
31             $("div").remove(); // 删除 div
32
33
34         })
35
36     </script>
37
38 </body>
39 </html>
克隆节点:

 1 <!DOCTYPE html>
 2 <html>
 3 <head lang="en">
 4   <meta charset="UTF-8">
 5   <title></title>
 6   <style>
 7     * {
 8       margin: 0;
 9       padding: 0;
10     }
11
12     ul {
13       list-style: none;
14     }
15
16     .box {
17       width: 600px;
18       margin: 100px auto;
19       border: 1px solid #000;
20       padding: 20px;
21     }
22
23     textarea {
24       width: 450px;
25       height: 160px;
26       outline: none;
27       resize: none;
28     }
29
30     ul {
31       width: 450px;
32       padding-left: 80px;
33     }
34
35     ul li {
36       line-height: 25px;
37       border-bottom: 1px dashed #cccccc;
38     }
39
40     input {
41       float: right;
42     }
43
44
45   </style>
46 </head>
47 <body>
48 <div class="box" id="weibo">
49   <span>微博发布</span>
50   <textarea name="" id="txt" cols="30" rows="10"></textarea>
51   <button id="btn">发布</button>
52   <ul id="ul">
53
54   </ul>
55 </div>
56
57 <script src="jquery-1.12.4.js"></script>
58 <script>
59   $(function () {
60
61     $("#btn").click(function () {
62
63       if($("#txt").val().trim().length == 0) {
64         return;
65       }
66       //就是文本框的值
67       $("<li></li>").text($("#txt").val()).prependTo("#ul");
68
69       $("#txt").val("");
70     })
71
72   });
73 </script>
74 </body>
75 </html>
  1 <!DOCTYPE html>
  2 <html lang="en">
  3 <head>
  4     <meta charset="UTF-8">
  5     <title>我是网页标题</title>
  6     <style type="text/css">
  7     html, body {
  8       margin: 0px;
  9       padding: 0px;
 10       width: 100%;
 11       height: 100%;
 12       font-family: "微软雅黑";
 13       font-size: 62.5%;
 14     }
 15
 16     .boxDom {
 17       width: 100%;
 18       height: 100%;
 19       position: relative;
 20       overflow: hidden;
 21     }
 22
 23     .idDom {
 24       width: 100%;
 25       height: 100px;
 26       background: #666;
 27       position: fixed;
 28       bottom: 0px;
 29     }
 30
 31     .content {
 32       display: inline-block;
 33       width: 430px;
 34       height: 40px;
 35       position: absolute;
 36       left: 0px;
 37       right: 0px;
 38       top: 0px;
 39       bottom: 0px;
 40       margin: auto;
 41     }
 42
 43     .title {
 44       display: inline;
 45       font-size: 4em;
 46       vertical-align: bottom;
 47       color: #fff;
 48     }
 49
 50     .text {
 51       border: none;
 52       width: 300px;
 53       height: 30px;
 54       border-radius: 5px;
 55       font-size: 2.4em;
 56     }
 57
 58     .btn {
 59       width: 60px;
 60       height: 30px;
 61       background: #f90000;
 62       border: none;
 63       color: #fff;
 64       font-size: 2.4em;
 65     }
 66
 67     span {
 68       width: 300px;
 69       height: 40px;
 70       position: absolute;
 71       overflow: hidden;
 72       color: #000;
 73       font-size: 4em;
 74       line-height: 1.5em;
 75       cursor: pointer;
 76       white-space: nowrap;
 77     }
 78
 79     </style>
 80 </head>
 81 <body>
 82     <div class="boxDom" id="boxDom">
 83       <div class="idDom" id="idDom">
 84         <div class="content">
 85           <p class="title">吐槽:</p>
 86           <input type="text" class="text" id="text"/>
 87           <button type="button" class="btn" id="btn">发射</button>
 88         </div>
 89       </div>
 90     </div>
 91
 92     <script src = "js/jquery-1.12.4.js"></script>
 93     <script>
 94         $(function () {
 95
 96
 97             var colors = ["red",'green','hotpink','cyan','pink','yellowgreen','purple','deepskyblue'];
 98             //注册事件。
 99             $("#btn").click(function () {
100                 // 随机生成一个颜色
101                 var idx = parseInt(Math.random()*colors.length);
102                 color = colors[idx];
103
104                 var randomY = parseInt(Math.random()*400);
105
106
107                 // 获取input 中的值
108                 var value = $("#text").val();
109
110                 //创建一个span 并给它设置内容  并设置字体颜色
111                 $("<span></span>")
112                     .text(value)  //  设置 内容
113                     .css("color",color) // 设置 字体颜色
114                     .css("left","1350px") // 设置 left 值
115                     .css("top",randomY) // 设置 top值
116                     .animate({left:-500},10000,"linear",function () { //添加动画
117                         //回调函数,到了终点需要删除span
118                         $(this).remove();
119
120                     })
121                     .appendTo("#boxDom");
122
123                 $("#text").val("");
124
125
126             });
127
128             $("#text").keyup(function (e) {
129                 if(e.keyCode == 13){
130                     $("#btn").click();
131                 }
132             });
133
134
135
136
137
138
139         })
140
141     </script>
142
143 </body>
144 </html>
