

ListView主要包括view和数据源。其数据适配器列表分为三种,ArrayAdapter,SimpleAdapter和SimpleCursorAdapter。
ListView的没有oom原因。经典图:
1.democoderjoy中使用,这里我们新建一个ListViewActi的activity。布局文件listview比较简单
<LinearLayout xmlns:android="http://schemas.android.com/apk/res/android"
    android:orientation="vertical" android:layout_width="match_parent"
    android:layout_height="match_parent">
    <ListView android:layout_width="wrap_content"
        android:layout_height="wrap_content"
        android:id="@+id/ListView01"
        android:layout_weight="1"
        />
    <ListView android:layout_width="wrap_content"
        android:layout_height="wrap_content"
        android:id="@+id/list_view"
        android:layout_weight="1"
        android:stackFromBottom="true"
        android:background="@drawable/icon"
        android:scrollbars="none"

        />
</LinearLayout>
2.此外还需要一个item项
<?xml version="1.0" encoding="utf-8"?>
<RelativeLayout xmlns:android="http://schemas.android.com/apk/res/android"

    android:layout_width="match_parent"
    android:layout_height="match_parent">
d
        <ImageView
            android:layout_width="wrap_content"
            android:layout_height="wrap_content"
            android:id="@+id/imageView"
            android:layout_alignParentRight="true"
            />

        <TextView
            android:layout_width="match_parent"
            android:layout_height="40dp"
            android:textSize="20dp"
            android:text="New Text"
            android:id="@+id/textView01"

             />
        <TextView
            android:layout_width="match_parent"
            android:layout_height="wrap_content"
            android:text="New Text"
            android:id="@+id/textView02"
            android:layout_below="@+id/textView01"
            />

</RelativeLayout>
3.arrayAdapter的使用采用布局的第二个listview id
核心代码:
ArrayAdapter<String> adapter=new ArrayAdapter<String>(
                this,R.layout.simple_list_item_1,
                mData);
        ListView listView=(ListView) findViewById(R.id.list_view);
        listView.setAdapter(adapter);
4.simpleAdater使用
ListView list = (ListView) findViewById(R.id.ListView01);
        ArrayList<HashMap<String, Object>> listItem = new ArrayList<HashMap<String, Object>>();
        for(int i=0;i<10;i++)
        {
            HashMap<String, Object> map = new HashMap<String, Object>();
            map.put("ItemImage", R.drawable.icon);//图像资源的ID
            map.put("ItemTitle", "Level "+i);
            map.put("ItemText", "Finished in 1 Min 54 Secs, 70 Moves! ");
            listItem.add(map);
        }
        SimpleAdapter listItemAdapter = new SimpleAdapter(this,listItem,//数据源
                R.layout.listview_item,//ListItem的XML实现
                //动态数组与ImageItem对应的子项
                new String[] {"ItemImage","ItemTitle", "ItemText"},
                //ImageItem的XML文件里面的一个ImageView,两个TextView ID
                new int[] {R.id.imageView,R.id.textView01,R.id.textView02}
        );

        View view = LayoutInflater.from(this).inflate(R.layout.head_view_layout, null);
        list.addHeaderView(view, null, true);
        list.setOverscrollHeader(getResources().getDrawable(R.drawable.icon));
        list.addFooterView(view);
        list.setHeaderDividersEnabled(true);
        list.setFooterDividersEnabled(true);
        list.setDescendantFocusability(ViewGroup.FOCUS_BLOCK_DESCENDANTS);
        list.setAdapter(listItemAdapter);

        //list.setOverScrollMode(View.OVER_SCROLL_NEVER);
        //view.setVisibility(View.GONE);
        //添加点击
        list.setOnItemClickListener(new AdapterView.OnItemClickListener() {

            @Override
            public void onItemClick(AdapterView<?> arg0, View arg1, int arg2,
                                    long arg3) {
                setTitle("点击第"+arg2+"个项目");
                Toast.makeText(getApplicationContext(),"点击第"+arg2+"个项目",Toast.LENGTH_SHORT).show();
            }
        });
        SimpleCursorAdapter d;
        //添加长按点击 响应餐单
        list.setOnCreateContextMenuListener(new View.OnCreateContextMenuListener() {

            @Override
            public void onCreateContextMenu(ContextMenu menu, View v, ContextMenu.ContextMenuInfo menuInfo) {
                menu.setHeaderTitle("长按菜单-ContextMenu");
                menu.add(0, 0, 0, "弹出长按菜单0");
                menu.add(0, 1, 0, "弹出长按菜单1");
            }
        });
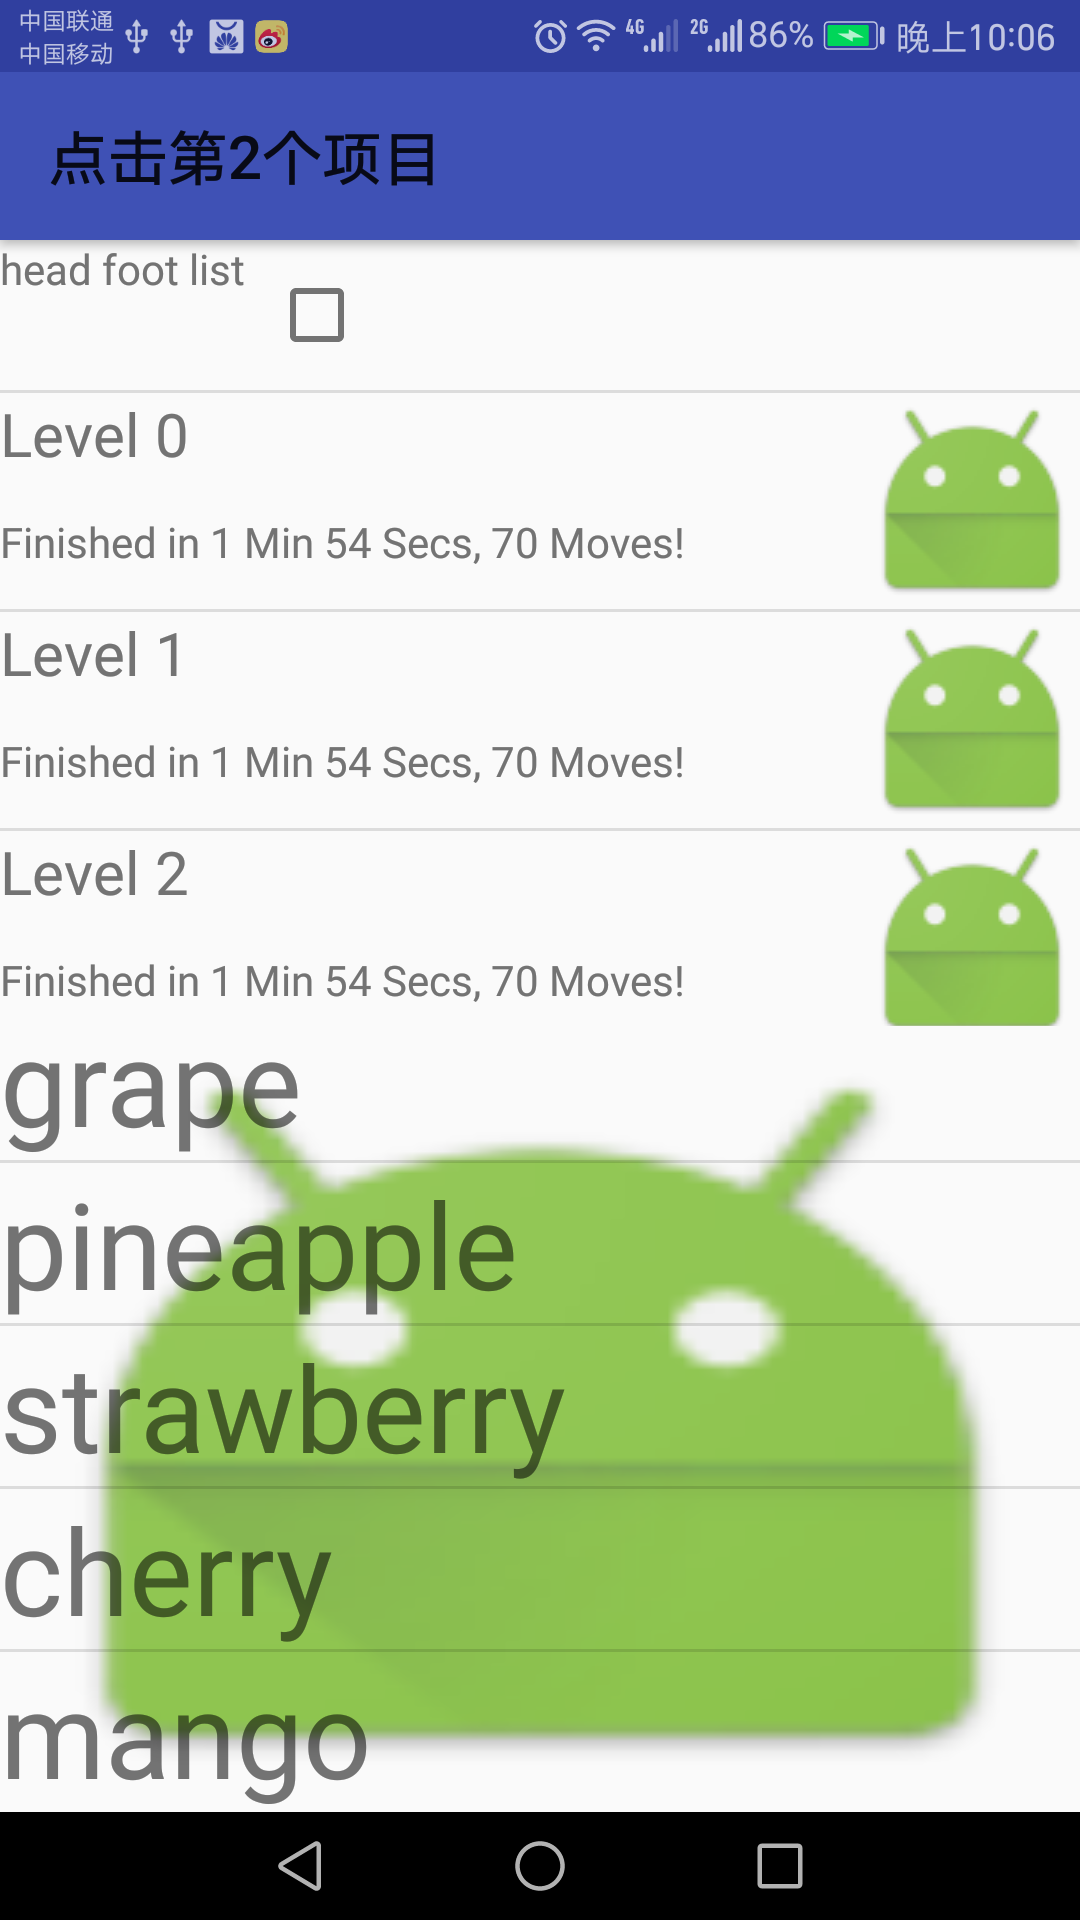
5.效果如下:
Tips:
a. footerDividersEnabled:是否在footerView(表尾)前绘制一个分隔条,默认为true
headerDividersEnabled:是否在headerView(表头)前绘制一个分隔条,默认为true
b. listview可以在布局中设置背景
c. listview具有headview 和footview 如程序中所使用的,
list.addHeaderView(view, null, true);
        list.setOverscrollHeader(getResources().getDrawable(R.drawable.icon));
list.addFooterView(view);
使用的子view的布局如下:
<?xml version="1.0" encoding="utf-8"?>
<LinearLayout xmlns:android="http://schemas.android.com/apk/res/android"
    android:layout_width="match_parent"
    android:layout_height="match_parent"
    android:orientation="horizontal" >

    <TextView
        android:layout_width="match_parent"
        android:layout_height="50dp"
        android:text="head foot list"/>
<CheckBox
    android:id="@+id/group_selection_all"
    android:layout_width="40dip"
    android:layout_height="40dip"
    android:layout_gravity="center_vertical"
    android:layout_marginLeft="8dip"
    android:layout_marginRight="0dip"
    android:focusable="false"
    android:clickable="true"
    android:gravity="center"
    android:scaleType="centerInside"/>
</LinearLayout>
d.设置从底向上排列参数 布局中定义stackFromBottom

 浙公网安备 33010602011771号