

记录一下微信授权登录的开发套路,免得过几天又忘了
1. 先搞一下测试账号
https://mp.weixin.qq.com/debug/cgi-bin/sandbox?t=sandbox/login

2. 找到接口权限页面
https://mp.weixin.qq.com/advanced/advanced?action=table&token=1523894466&lang=zh_CN
在页面中找到这儿

点击后面那个修改按钮,配置好我们的回调的域名

然后进去看它的文档
https://developers.weixin.qq.com/doc/offiaccount/OA_Web_Apps/Wechat_webpage_authorization.html
大概就以下几步:
这一步需要get请求微信服务器的url地址:
https://open.weixin.qq.com/connect/oauth2/authorize?appid=APPID&redirect_uri=REDIRECT_URI&response_type=code&scope=SCOPE&state=STATE#wechat_redirect
2 第二步:通过code换取网页授权access_token
这一步需要get请求微信服务器地址:
https://api.weixin.qq.com/sns/oauth2/access_token?appid=APPID&secret=SECRET&code=CODE&grant_type=authorization_code
这一步需要get请求微信服务器地址:
https://api.weixin.qq.com/sns/oauth2/refresh_token?appid=APPID&grant_type=refresh_token&refresh_token=REFRESH_TOKEN
4 第四步:拉取用户信息(需scope为 snsapi_userinfo)
这一步需要get请求微信服务器地址:
https://api.weixin.qq.com/sns/userinfo?access_token=ACCESS_TOKEN&openid=OPENID&lang=zh_CN
这一步需要get请求微信服务器地址:
https://api.weixin.qq.com/sns/auth?access_token=ACCESS_TOKEN&openid=OPENID
下面上代码:
application.properties
weixin.appID=wxbc35232a6eb75be1
weixin.appsecret=8294dc5fd2b123179a6e20a15a50c4cd
# 微信登录需要的四个请求url
weixin.login_url=https://open.weixin.qq.com/connect/oauth2/authorize?appid=%s&redirect_uri=%s&response_type=code&scope=snsapi_userinfo&state=STATE#wechat_redirect
weixin.back_url=http://arm5rq.natappfree.cc
weixin.login.access_token_url=https://api.weixin.qq.com/sns/oauth2/access_token?appid=%s&secret=%s&code=%s&grant_type=authorization_code
weixin.snsapi_userinfo.url=https://api.weixin.qq.com/sns/userinfo?access_token=%s&openid=%s&lang=zh_CN
读取配置文件的配置类
@Data
@Component
public class WeiXinConfig {
    @Value("${weixin.appID}")
    private String appId;

    @Value("${weixin.appsecret}")
    private String appsecret;

    /**
     * 微信授权登录
     * 1: 用户同意授权,获取code 的请求url
     */
    @Value("${weixin.login_url}")
    private String loginUrl;

    /**
     * 微信授权登录回调用地址
     */
    @Value("${weixin.back_url}")
    private String loginCallBackUrl;

    @Value("${weixin.login.access_token_url}")
    private String loginAccessTokenUrl;

    @Value("${weixin.snsapi_userinfo.url}")
    private String userInfoUrl;
}
WxLoginController.java
import com.alibaba.fastjson.JSON;
import com.alibaba.fastjson.JSONObject;
import com.bangke.life.user.common.utils.NetUtil;
import com.bangke.life.user.weixin.config.WeiXinConfig;
import lombok.extern.slf4j.Slf4j;
import org.springframework.beans.factory.annotation.Autowired;
import org.springframework.stereotype.Controller;
import org.springframework.web.bind.annotation.GetMapping;
import org.springframework.web.bind.annotation.ModelAttribute;
import org.springframework.web.bind.annotation.RequestMapping;
import org.springframework.web.servlet.ModelAndView;

import javax.servlet.ServletException;
import javax.servlet.http.HttpServletRequest;
import javax.servlet.http.HttpServletResponse;
import java.io.IOException;
import java.net.URLEncoder;

@Slf4j
@RequestMapping("/wx")
@Controller
public class WxLoginController {

    @Autowired
    private WeiXinConfig weiXinConfig;

    @GetMapping("/login")
    public void wxLogin(HttpServletRequest request, HttpServletResponse response) throws Exception {
        String callBack = URLEncoder.encode(weiXinConfig.getLoginCallBackUrl()+"/wx/callBack/","UTF-8");
        String loginUrl = weiXinConfig.getLoginUrl();
        loginUrl = String.format(loginUrl, weiXinConfig.getAppId(), callBack);
        log.info("loginUrl: {}", loginUrl);
        // 1. 重定向用户授权页面
        response.sendRedirect(loginUrl);
    }

    /**
     * 2. 微信服务器重定向我们自定义的回调地址
     *
     * @param request
     * @throws IOException
     */
    @ModelAttribute("userInfo")
    @GetMapping("/callBack")
    public ModelAndView callBack(HttpServletRequest request, HttpServletResponse response) throws IOException, ServletException {
        String code = request.getParameter("code");
        log.info("code: {} ", code);
        String loginAccessTokenUrl = weiXinConfig.getLoginAccessTokenUrl();

        loginAccessTokenUrl = String.format(loginAccessTokenUrl, weiXinConfig.getAppId(), weiXinConfig.getAppsecret(), code);

        // 3. 请求获取登录access_token
        String result = NetUtil.get(loginAccessTokenUrl);
        JSONObject jsonObject = JSON.parseObject(result);

        // 从请求结果中获取access_token 和 opendid
        String accessToken = jsonObject.getString("access_token");
        String openid = jsonObject.getString("openid");

        String userInfoUrl = weiXinConfig.getUserInfoUrl();
        userInfoUrl = String.format(userInfoUrl, accessToken, openid);

        // 4. 拉取用户信息
        result = NetUtil.get(userInfoUrl);
        JSONObject userInfo = JSON.parseObject(result);
        log.info("userInfo : {} ", userInfo);
        ModelAndView mv = new ModelAndView();
        mv.setViewName("login");
        mv.addObject("userInfo", userInfo);
        return mv;

    }

}
@Controller
public class IndexController {

    @GetMapping("/")
    public String index() {
        return "index";
    }
}
再写两个html页面
index.html
<!DOCTYPE html>
<html lang="en">
<head>
    <meta charset="UTF-8">
    <meta name="viewport" content="width=device-width,initial-scala=1.0">
    <title>登录</title>
</head>
<body style="font-size: 40px; text-align: center">
<a href="/wx/login">微信授权登录</a>

</body>
</html>
login.html
<!DOCTYPE html>
<html xmlns:th="http://www.thymeleaf.org">
<html lang="en">
<head>
    <meta charset="UTF-8">
    <meta name="viewport" content="width=device-width,initial-scala=1.0">
    <title>个人信息</title>
</head>
<body style="font-size: 40px; text-align: center">
    用户名:<span th:text="${userInfo.nickname}"></span>
</body>
</html>
好了, 就这么些代码。
下面测试一下:
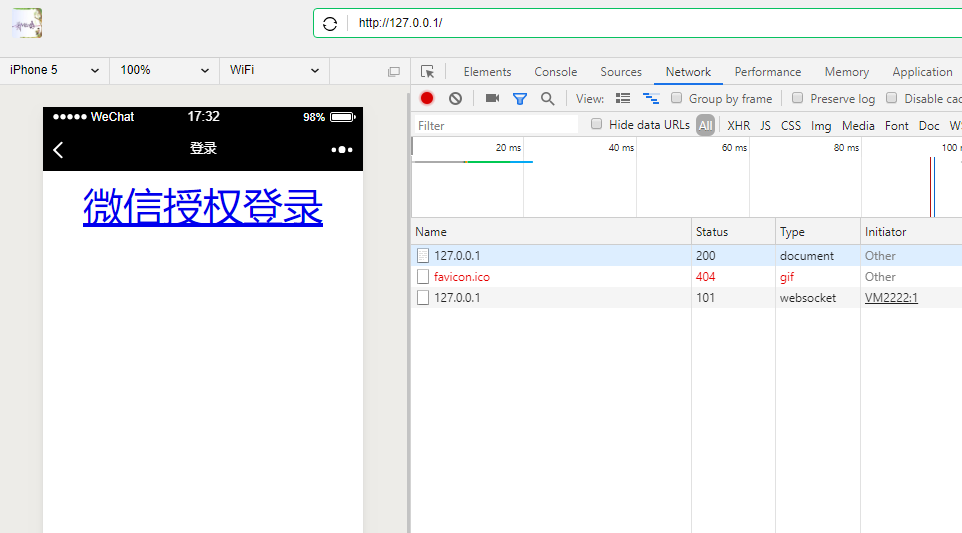
1. 请求: http://127.0.0.1
请求进入IndexController的index方法后,跳转到index.html
2. 用户同意

后台的逻辑是:
用户同意登录之后,用入WxLoginController#wxLogin方法-----> 微信服务器----> 重定向到WxLoginController#callBack方法 -----> 本地项目跳转到login.html
