(web查看三维CAD图纸)在三维网页CAD中绘制一个窗户模型
前言
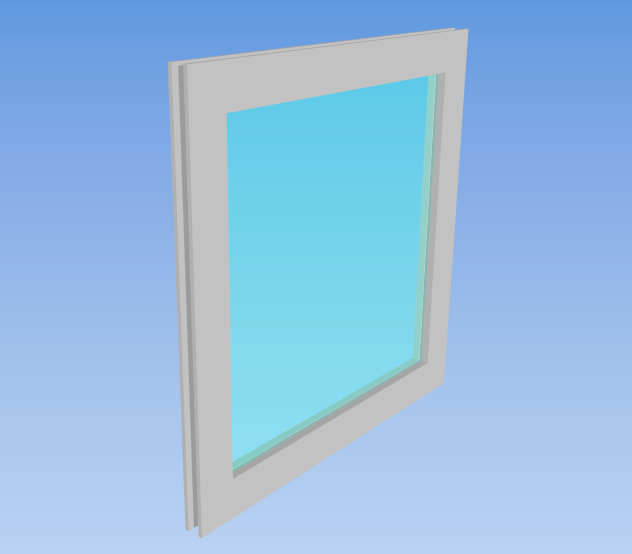
本文使用mxcad3d在网页中创建一个简单的三维窗户模型,mxcad3d提供了丰富的三维建模功能和便捷的API,使得创建各种三维模型变得简单方便,最终效果如下图:

环境搭建和入门
首先学习mxcad的基本使用方法,可通过官方的入门教程来搭建一个最基本的项目模板,依次查看教程:安装`Node.js`以及`VS Code`开发工具、创建mxcad开发项目、API文档接口使用说明。
完整测试项目压缩包,下载解压后需要在项目目录下打开`cmd命令行`,然后在命令行中执行`npm install`来安装依赖,然后再按照本教程中的方式来运行项目查看效果。
编写创建窗户模型的代码
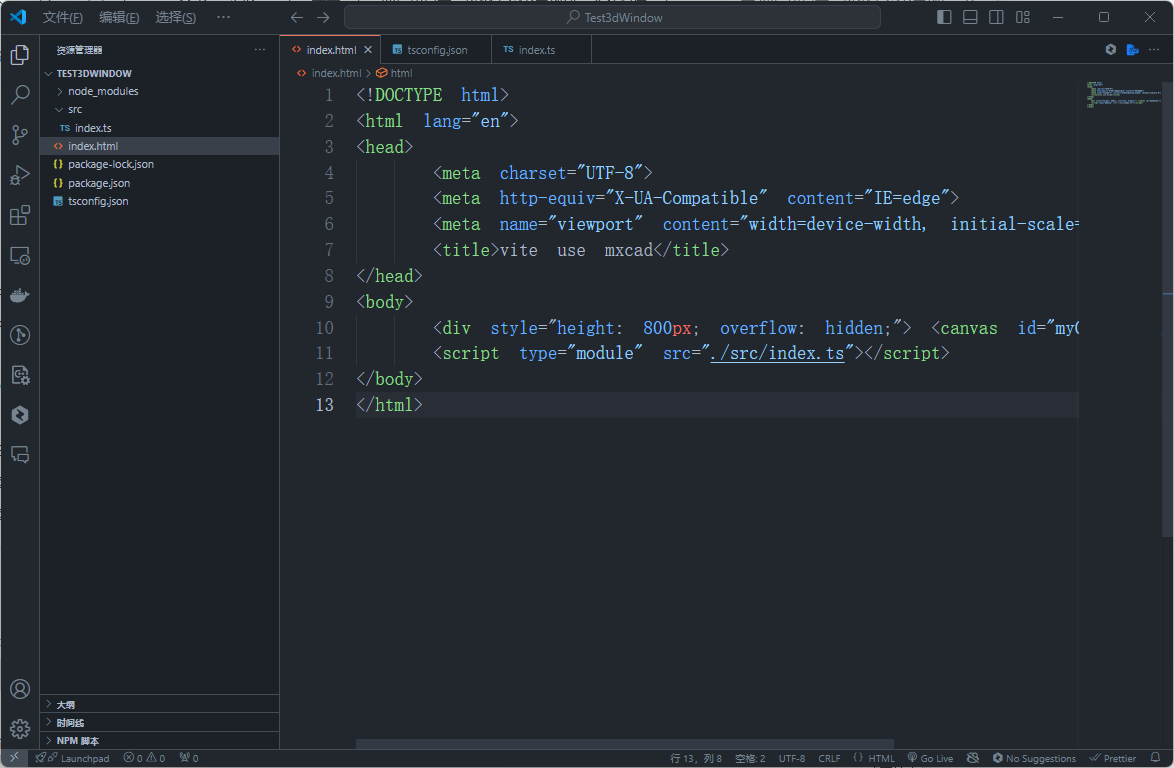
1. 根据官方快速入门教程来创建一个名为`Test3dWindow`的项目,如下图:

2. 编写绘制窗户模型的代码
在index.html中插入一个按钮"绘制窗户模型", index.html的完整代码如下:
   <!DOCTYPE html>
   <html lang="en">
   <head>
       <meta charset="UTF-8">
       <meta http-equiv="X-UA-Compatible" content="IE=edge">
       <meta name="viewport" content="width=device-width, initial-scale=1.0">
       <title>vite use mxcad</title>
   </head>
   <body>
       <div style="height: 800px; overflow: hidden;"> <canvas id="myCanvas"></canvas></div>
       <button>绘制窗户模型</button>
       <script type="module" src="./src/index.ts"></script>
   </body>
   </html>
在src/index.ts中编写绘制窗户模型的函数,src/index.ts的完整代码如下:
   import { MdGe, Mx3dGeAxis, Mx3dGeColor, Mx3dGeDir, Mx3dGeMaterial, Mx3dGeomPlane, Mx3dGePoint, Mx3dGeVec, Mx3dMkBox, Mx3dMkFace, Mx3dMkPolygon, Mx3dMkPrism, MxCAD3DObject } from "mxcad"
   // 创建mxcad3d对象
   const mxcad3d = new MxCAD3DObject()
   // 初始化mxcad3d对象
   mxcad3d.create({
       // canvas元素的css选择器字符串(示例中是id选择器),或canvas元素对象
       canvas: "#myCanvas",
       // 获取加载wasm相关文件(wasm/js/worker.js)路径位置
       locateFile: (fileName)=> new URL(`/node_modules/mxcad/dist/wasm/3d/${fileName}`, import.meta.url).href,
   })
   // 初始化完成
   mxcad3d.on("init", ()=>{
       console.log("初始化完成");
       // 修改背景颜色
       const color1 = new Mx3dGeColor(61/255, 139/255, 221/255, MdGe.MxTypeOfColor.Color_TOC_sRGB);
       const color2 = new Mx3dGeColor(203/255, 223/255, 247/255, MdGe.MxTypeOfColor.Color_TOC_sRGB);
       mxcad3d.setGradientBgColor(color1, color2, MdGe.MxGradientFillMethod.GFM_VER);
       // 设置透视投影
       mxcad3d.setProjectionType(MdGe.MxCameraProjection.CProjection_Perspective);
       // 打开光照阴影
       mxcad3d.enableDirLightSrc(true);
   });
   function drawWindow(){
     // 窗户边框横截面轮廓点
     const pts: Mx3dGePoint[] = [];
     pts.push(new Mx3dGePoint(0, 0, 0));
     pts.push(new Mx3dGePoint(1, 0, 0));
     pts.push(new Mx3dGePoint(1, 0, 2));
     pts.push(new Mx3dGePoint(4, 0, 2));
     pts.push(new Mx3dGePoint(4, 0, 0));
     pts.push(new Mx3dGePoint(5, 0, 0));
     pts.push(new Mx3dGePoint(5, 0, 10));
     pts.push(new Mx3dGePoint(3, 0, 10));
     pts.push(new Mx3dGePoint(3, 0, 8));
     pts.push(new Mx3dGePoint(2, 0, 8));
     pts.push(new Mx3dGePoint(2, 0, 10));
     pts.push(new Mx3dGePoint(0, 0, 10));
     // 窗户边框横截面轮廓多段线
     const polygon = new Mx3dMkPolygon();
     pts.forEach((pt) => polygon.Add(pt));
     polygon.Close();
     // 窗户边框横截面轮廓线
     const wire = polygon.Wire();
     // 窗户边框横截面轮廓线生成窗框横截面
     const makeface = new Mx3dMkFace(wire);
     const face = makeface.Face();
     const vec = new Mx3dGeVec(0, 100, 0);
     // 横截面拉伸出窗框体形状
     const frame = new Mx3dMkPrism(face, vec);
     let frameShape = frame.Shape();
     // 构造两个平面用于分割窗户边框(边框两端的斜45度角)
     const pt = new Mx3dGePoint(0, 0, 0);
     const dir = new Mx3dGeDir(0, -1, 1);
     const plane = new Mx3dGeomPlane(pt, dir);
     // 平面1
     const planeFace = plane.Face(1e-5);
     pt.setXYZ(0, 50, 0);
     dir.SetXYZ(0, 0, 1);
     const axis = new Mx3dGeAxis(pt, dir);;
     // 平面2
     const planeFace2 = planeFace.MirroredByAxis(axis);
     // 分割窗户边框(分割成了两个斜45度的小三角形部分和中间的一个梯形部分)
     const parts = frameShape.spliter([planeFace, planeFace2]);
     // 筛选出中间那个梯形的部分(这里是通过质心的位置来判断的)
     parts.forEach((shape)=>{
       // 这里Centroid的参数添填的MdGe.MxQuantAspect.Quant_Volume这个枚举,是因为shape是实体,它的质心是体质心,所以这里填MdGe.MxQuantAspect.Quant_Volume
       // 如果shape是面,它的质心是面质心,所以要填MdGe.MxQuantAspect.Quant_Area
       // 如果shape是线,它的质心是线质心,所以要填MdGe.MxQuantAspect.Quant_Length
       const centroid = shape.Centroid(MdGe.MxQuantAspect.Quant_Volume);
       if (centroid.Y() > 45 && centroid.Y() < 55) {
         frameShape = shape;
       }
     });
     // 通过旋转得到另外三个边的边框
     const frameShape2 = frameShape.Rotated(new Mx3dGeAxis([0, 50, 50], [1, 0, 0]), Math.PI / 2);
     const frameShape3 = frameShape.Rotated(new Mx3dGeAxis([0, 50, 50], [1, 0, 0]), Math.PI);
     const frameShape4 = frameShape2.Rotated(new Mx3dGeAxis([0, 50, 50], [1, 0, 0]), Math.PI);
     // 合并四个边框,获得边框整体形状
     frameShape = frameShape.fuse(frameShape2).fuse(frameShape3).fuse(frameShape4);
     // 窗框颜色
     const frameColor = new Mx3dGeColor(0.5, 0.5, 0.5, MdGe.MxTypeOfColor.Color_TOC_RGB);
     // 窗框材质
     const frameMaterial = new Mx3dGeMaterial(MdGe.MxNameOfMaterial.Material_NOM_ShinyPlastified);
     // 玻璃
     const glass = new Mx3dMkBox([2, 8, 8], [3, 92, 92]);
     // 玻璃形状
     const glassShape = glass.Shape();
     // 玻璃颜色
     const glassColor = new Mx3dGeColor(0, 0.9, 0.549, MdGe.MxTypeOfColor.Color_TOC_RGB);
     // 玻璃材质,看起来是透明的
     const glassMaterial = new Mx3dGeMaterial(MdGe.MxNameOfMaterial.Material_NOM_Glass);
     // 获取模型文档
     const doc = mxcad3d.getDocument();
     // 新增一个形状标签用于保存边框形状
     const frameLabel = doc.addShapeLabel();
     frameLabel.setShape(frameShape);
     frameLabel.setColor(frameColor)
     frameLabel.setMaterial(frameMaterial);
     // 新增一个形状标签用于保存玻璃形状
     const glassLabel = doc.addShapeLabel();
     glassLabel.setShape(glassShape);
     glassLabel.setColor(glassColor)
     glassLabel.setMaterial(glassMaterial);
     // 更新视图显示
     mxcad3d.update();
   }
   // 给button添加点击事件,点击后调用drawWindow函数,进行窗户模型的绘制
   // 立即执行函数
   (function addEventToButton(){
     const btn = document.querySelector("button");
     if (btn) {
       btn.addEventListener("click", () => {
         drawWindow();
       });
     }
   })()
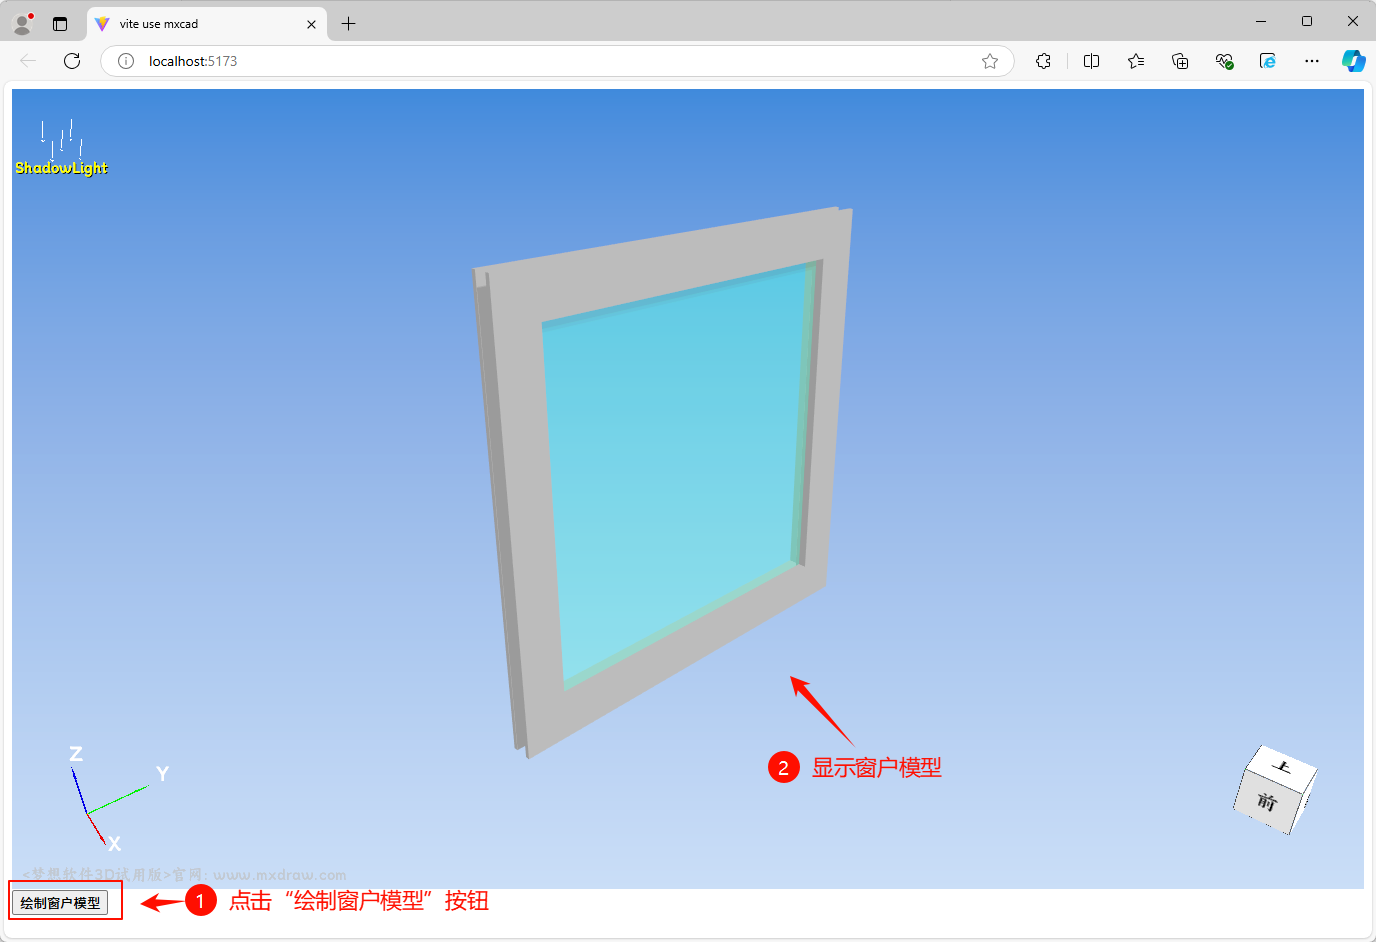
3. 新建终端,运行`npx vite`命令来运行项目,效果如下图:


【推荐】国内首个AI IDE,深度理解中文开发场景,立即下载体验Trae
【推荐】编程新体验,更懂你的AI,立即体验豆包MarsCode编程助手
【推荐】抖音旗下AI助手豆包,你的智能百科全书,全免费不限次数
【推荐】轻量又高性能的 SSH 工具 IShell:AI 加持,快人一步
· winform 绘制太阳,地球,月球 运作规律
· 超详细:普通电脑也行Windows部署deepseek R1训练数据并当服务器共享给他人
· TypeScript + Deepseek 打造卜卦网站:技术与玄学的结合
· AI 智能体引爆开源社区「GitHub 热点速览」
· 写一个简单的SQL生成工具