升级ssh和ssl
一、查看ssh版本和ssl版本
[root@iZe3e0601c6zlmi2ilbh7iZ ~]# ssh -V
[root@iZe3e0601c6zlmi2ilbh7iZ ~]# openssl version

二、下载安装包上传并解压
下载安装包
下载openssh地址:https://openbsd.hk/pub/OpenBSD/OpenSSH/portable/
下载openssl地址:https://ftp.openssl.org/source/
以下面版本为例:

上传安装包到服务器
安装lrzsz,方便上传文件到服务器(可不用此方式上传文件)。
[root@iZe3e0601c6zlmi2ilbh7iZ ~]# yum install lrzsz
rz 上传文件
sz 下载文件
-y 参数表示覆盖原文件
例如:[root@iZe3e0601c6zlmi2ilbh7iZ ~]# rz -y
上传文件会保存到当前路径下。
解压
[root@iZe3e0601c6zlmi2ilbh7iZ ~]# tar -zxvf openssh-8.0p1.tar.gz
[root@iZe3e0601c6zlmi2ilbh7iZ ~]# tar -zxvf openssl-1.1.1h.tar.gz
三、安装ssh
检查openssh
[root@iZe3e0601c6zlmi2ilbh7iZ ~]# rpm -qa|grep openssh
openssh-clients-7.4p1-16.el7.x86_64
openssh-server-7.4p1-16.el7.x86_64
openssh-7.4p1-16.el7.x86_64
避免openssh失败无法登陆安装telnet
[root@iZe3e0601c6zlmi2ilbh7iZ ~]# yum install -y telnet-server xinetd
[root@iZe3e0601c6zlmi2ilbh7iZ ~]# echo -e 'pts/0\pts/1\npts/2\pts/3' >>/etc/securetty
[root@iZe3e0601c6zlmi2ilbh7iZ ~]# systemctl enable xinetd.service
[root@iZe3e0601c6zlmi2ilbh7iZ ~]# systemctl enable telnet.socket
[root@iZe3e0601c6zlmi2ilbh7iZ ~]# systemctl start telnet.socket
[root@iZe3e0601c6zlmi2ilbh7iZ ~]# systemctl start xinetd
卸载旧的openssh
rpm -e `rpm -qa | grep openssh` --nodeps
安装必要软件
yum -y install gcc pam pam-devel zlib zlib-devel openssl-devel
安装ssh
[root@iZe3e0601c6zlmi2ilbh7iZ ~]# ll
total 11164
drwxr-xr-x 5 1000 1000 12288 Apr 18 2019 openssh-8.0p1
-rw-r--r-- 1 root root 1597697 Sep 29 14:38 openssh-8.0p1.tar.gz
drwxrwxr-x 18 root root 4096 Sep 22 20:55 openssl-1.1.1h
-rw-r--r-- 1 root root 9810045 Sep 30 10:14 openssl-1.1.1h.tar.gz
[root@iZe3e0601c6zlmi2ilbh7iZ ~]# cd openssh-8.0p1
[root@iZe3e0601c6zlmi2ilbh7iZ ~]# ./configure --prefix=/usr --sysconfdir=/etc/ssh --with-md5-passwords --with-zlib --with-ssl-dir=/usr/local/ssl --with-privsep-path=/var/lib/sshd
[root@iZe3e0601c6zlmi2ilbh7iZ ~]# make
[root@iZe3e0601c6zlmi2ilbh7iZ ~]# make install
若出现以下报错。

执行命令
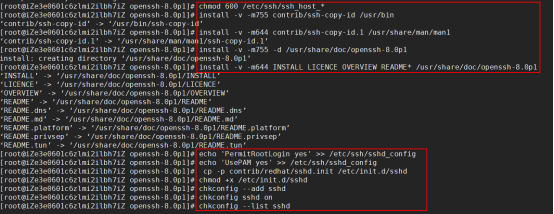
[root@iZe3e0601c6zlmi2ilbh7iZ ~]# chmod 600 /etc/ssh/ssh_host_*
[root@iZe3e0601c6zlmi2ilbh7iZ ~]# install -v -m755 contrib/ssh-copy-id /usr/bin
[root@iZe3e0601c6zlmi2ilbh7iZ ~]# install -v -m644 contrib/ssh-copy-id.1 /usr/share/man/man1
[root@iZe3e0601c6zlmi2ilbh7iZ ~]# install -v -m755 -d /usr/share/doc/openssh-8.0p1
[root@iZe3e0601c6zlmi2ilbh7iZ ~]# install -v -m644 INSTALL LICENCE OVERVIEW README* /usr/share/doc/openssh-8.0p1
[root@iZe3e0601c6zlmi2ilbh7iZ ~]# echo 'PermitRootLogin yes' >> /etc/ssh/sshd_config
[root@iZe3e0601c6zlmi2ilbh7iZ ~]# echo 'UsePAM yes' >> /etc/ssh/sshd_config
[root@iZe3e0601c6zlmi2ilbh7iZ ~]# cp -p contrib/redhat/sshd.init /etc/init.d/sshd
[root@iZe3e0601c6zlmi2ilbh7iZ ~]# chmod +x /etc/init.d/sshd
[root@iZe3e0601c6zlmi2ilbh7iZ ~]# chkconfig --add sshd
[root@iZe3e0601c6zlmi2ilbh7iZ ~]# chkconfig sshd on
[root@iZe3e0601c6zlmi2ilbh7iZ ~]# chkconfig --list sshd

重启验证
[root@iZe3e0601c6zlmi2ilbh7iZ ~]# systemctl restart sshd
[root@iZe3e0601c6zlmi2ilbh7iZ ~]# ssh -V
![]()
验证完毕后,关闭telnet服务
vi /etc/securetty
删除增加的4行:
pts/0
pts/1
pts/2
pts/3
停止telnet服务
[root@iZe3e0601c6zlmi2ilbh7iZ ~]# systemctl stop telnet.socket
[root@iZe3e0601c6zlmi2ilbh7iZ ~]# systemctl disable telnet.socket
[root@iZe3e0601c6zlmi2ilbh7iZ ~]# systemctl stop xinetd.service
[root@iZe3e0601c6zlmi2ilbh7iZ ~]# systemctl disable xinetd.service
四、安装ssl
查看ssl版本
[root@iZe3e0601c6zlmi2ilbh7iZ ~]# openssl version
![]()
cd到openssl-1.1.1h

[root@iZe3e0601c6zlmi2ilbh7iZ ~]# cd openssl-1.1.1h
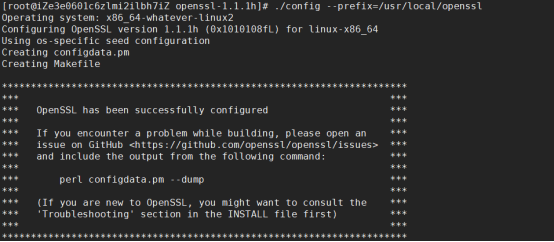
[root@iZe3e0601c6zlmi2ilbh7iZ ~]# ./config --prefix=/usr/local/openssl

[root@iZe3e0601c6zlmi2ilbh7iZ ~]# make && make install
[root@iZe3e0601c6zlmi2ilbh7iZ ~]# mv /usr/bin/openssl /usr/bin/openssl.bak
[root@iZe3e0601c6zlmi2ilbh7iZ ~]# ln -sf /usr/local/openssl/bin/openssl /usr/bin/openssl
[root@iZe3e0601c6zlmi2ilbh7iZ ~]# echo "/usr/local/openssl/lib" >> /etc/ld.so.conf
设置使生效
[root@iZe3e0601c6zlmi2ilbh7iZ ~]# ldconfig -v
验证
[root@iZe3e0601c6zlmi2ilbh7iZ ~]# openssl version
![]()

