.net core Identity web 项目创建(四) 基架创建 .net core mvc identity
创建 项目
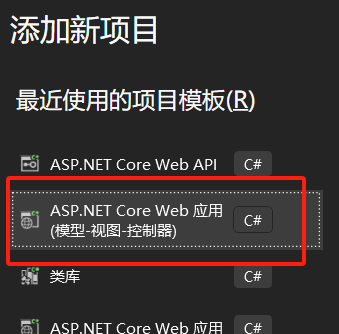
身份验证类型 :选择个人账户
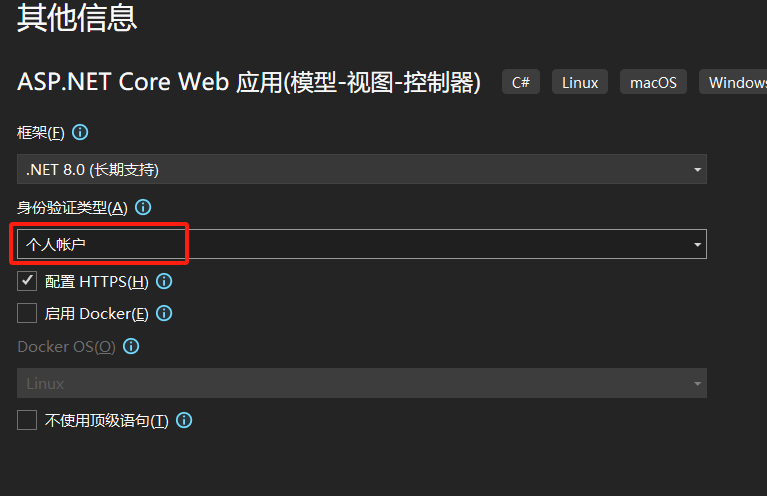
默认创建的 是 sql server 的数据库链接
注意 这里 使用默认 AddDefaultIdentity 除了 AddDefaultIdentity 还有 AddIdentity
他俩的区别
AddIdentity:
AddIdentity 方法用于手动配置身份认证服务,允许您自定义身份认证的各个方面,如用户实体、角色、密码策略、登录配置等。
使用 AddIdentity 方法时,您需要显式地指定身份认证所需的各个部分,例如用户实体的类型、密码选项、用户锁定策略等。
这种方法提供了更多的灵活性和自定义选项,但也需要更多的配置工作。

AddDefaultIdentity:
AddDefaultIdentity 方法是一个简化配置身份认证服务的方法,它提供了一种快速启用身份认证功能的方式。
使用 AddDefaultIdentity 方法时,会自动配置一些常见的身份认证选项,包括用户实体、密码选项、登录配置等。
默认情况下,AddDefaultIdentity 方法将配置使用 Entity Framework Core 存储用户信息,并启用 Cookie 身份验证。
这种方法适合于快速启用身份认证功能并使用默认配置的情况,但对于需要更多自定义的场景可能不够灵活。
总的来说,AddIdentity 提供了更多的自定义选项和灵活性,而 AddDefaultIdentity 则是一个简化配置的方法,适用于快速启用身份认证功能并使用默认配置的场景。
您可以根据项目的需求选择合适的方法进行配置。
using Microsoft.AspNetCore.Identity;
using Microsoft.EntityFrameworkCore;
using WebApplication1.Data;

var builder = WebApplication.CreateBuilder(args);

// Add services to the container.
var connectionString = builder.Configuration.GetConnectionString("DefaultConnection") ?? throw new InvalidOperationException("Connection string 'DefaultConnection' not found.");
builder.Services.AddDbContext<ApplicationDbContext>(options =>
    options.UseSqlServer(connectionString));
builder.Services.AddDatabaseDeveloperPageExceptionFilter();

builder.Services.AddDefaultIdentity<IdentityUser>(options => options.SignIn.RequireConfirmedAccount = true)
    .AddEntityFrameworkStores<ApplicationDbContext>();
builder.Services.AddControllersWithViews();

var app = builder.Build();

// Configure the HTTP request pipeline.
if (app.Environment.IsDevelopment())
{
    app.UseMigrationsEndPoint();
}
else
{
    app.UseExceptionHandler("/Home/Error");
    // The default HSTS value is 30 days. You may want to change this for production scenarios, see https://aka.ms/aspnetcore-hsts.
    app.UseHsts();
}

app.UseHttpsRedirection();
app.UseStaticFiles();

app.UseRouting();

app.UseAuthorization();

app.MapControllerRoute(
    name: "default",
    pattern: "{controller=Home}/{action=Index}/{id?}");
app.MapRazorPages();

app.Run();
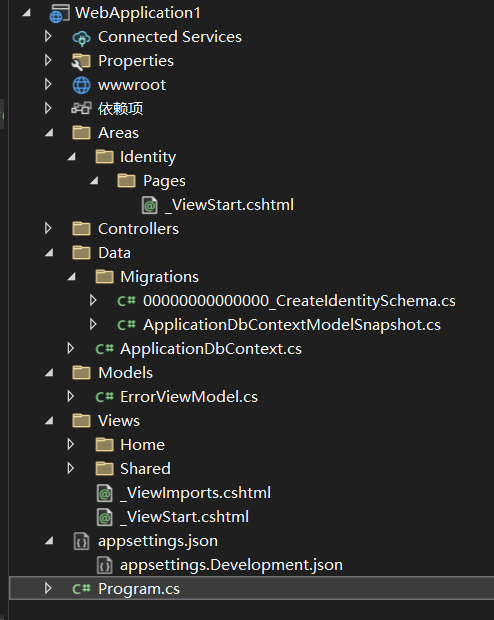
默认创建的 项目 结构
默认添加的 包
<Project Sdk="Microsoft.NET.Sdk.Web">

  <PropertyGroup>
    <TargetFramework>net8.0</TargetFramework>
    <Nullable>enable</Nullable>
    <ImplicitUsings>enable</ImplicitUsings>
    <UserSecretsId>aspnet-WebApplication1-ddbe5ec3-4113-4b47-902e-9066ee1d5fbe</UserSecretsId>
  </PropertyGroup>

  <ItemGroup>
    <PackageReference Include="Microsoft.AspNetCore.Diagnostics.EntityFrameworkCore" Version="8.0.2" />
    <PackageReference Include="Microsoft.AspNetCore.Identity.EntityFrameworkCore" Version="8.0.2" />
    <PackageReference Include="Microsoft.AspNetCore.Identity.UI" Version="8.0.2" />
    <PackageReference Include="Microsoft.EntityFrameworkCore.SqlServer" Version="8.0.2" />
    <PackageReference Include="Microsoft.EntityFrameworkCore.Tools" Version="8.0.2" />
  </ItemGroup>

</Project>
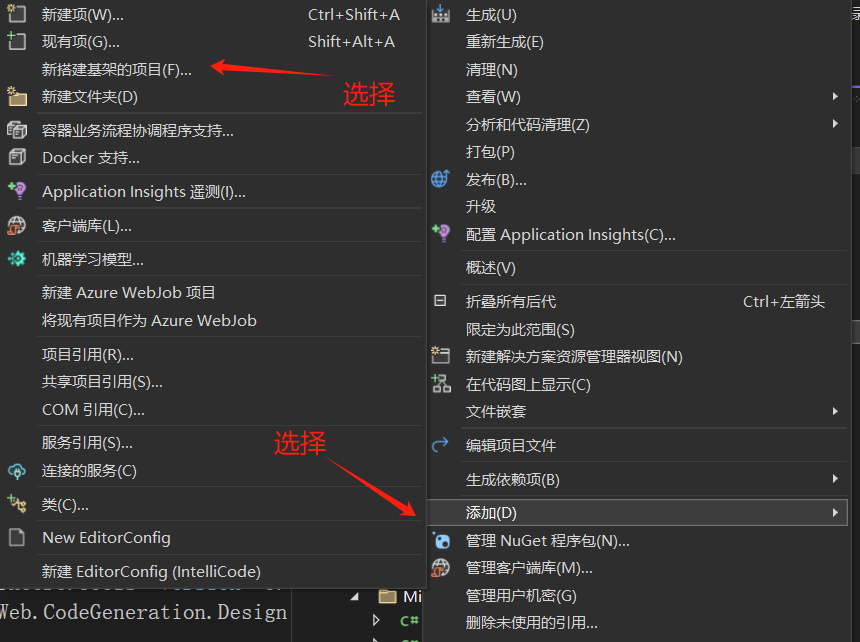
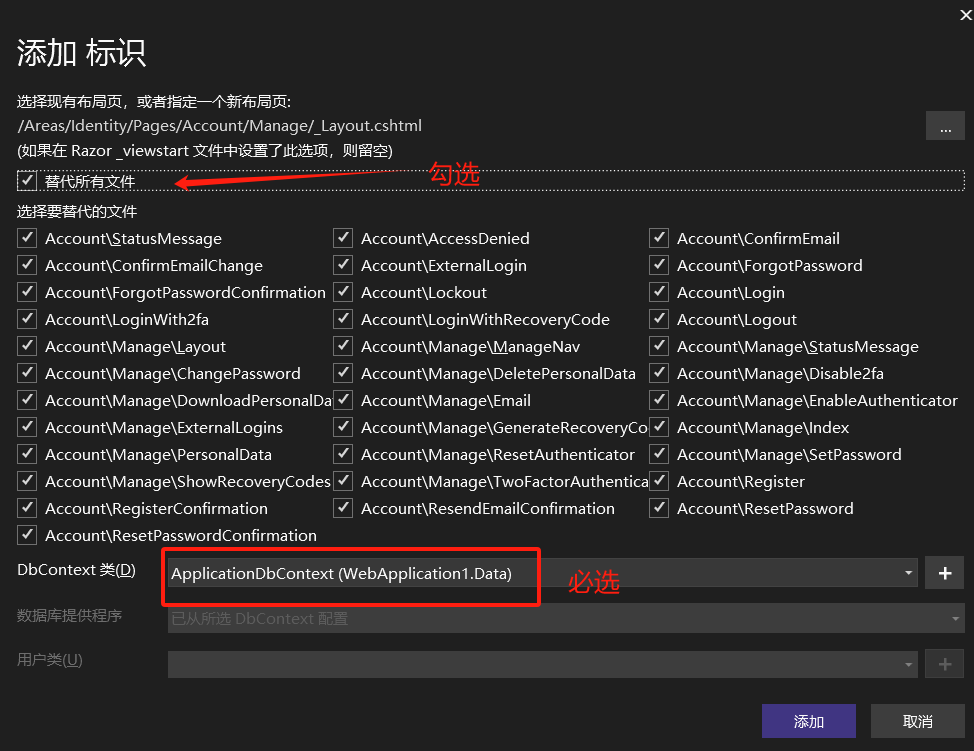
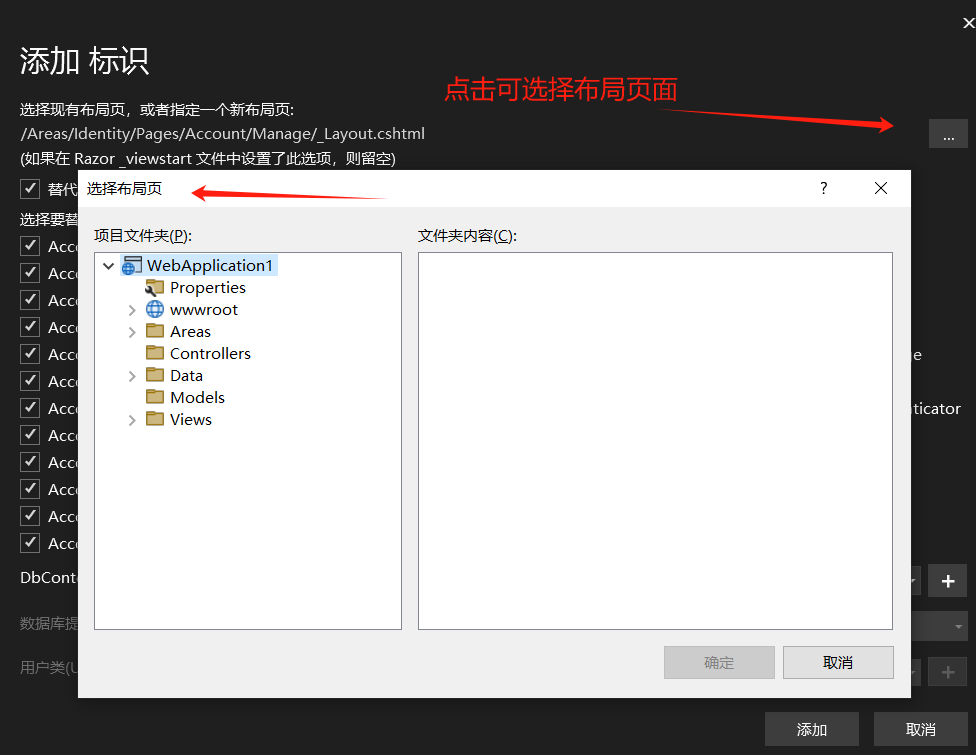
接下来 使用 基架 标识创建 identity 实际处理页面
选择添加 在弹出的 框选择 新搭建基架的项目
默认创建的 rezapage项目
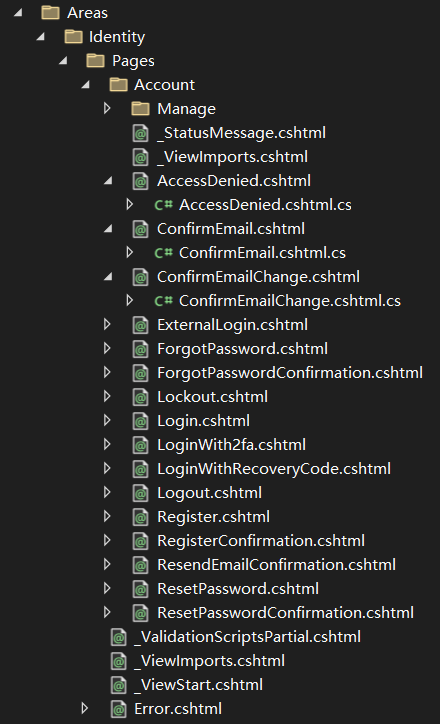
这里 说明 rezapage 路由 是 area 下的 identity
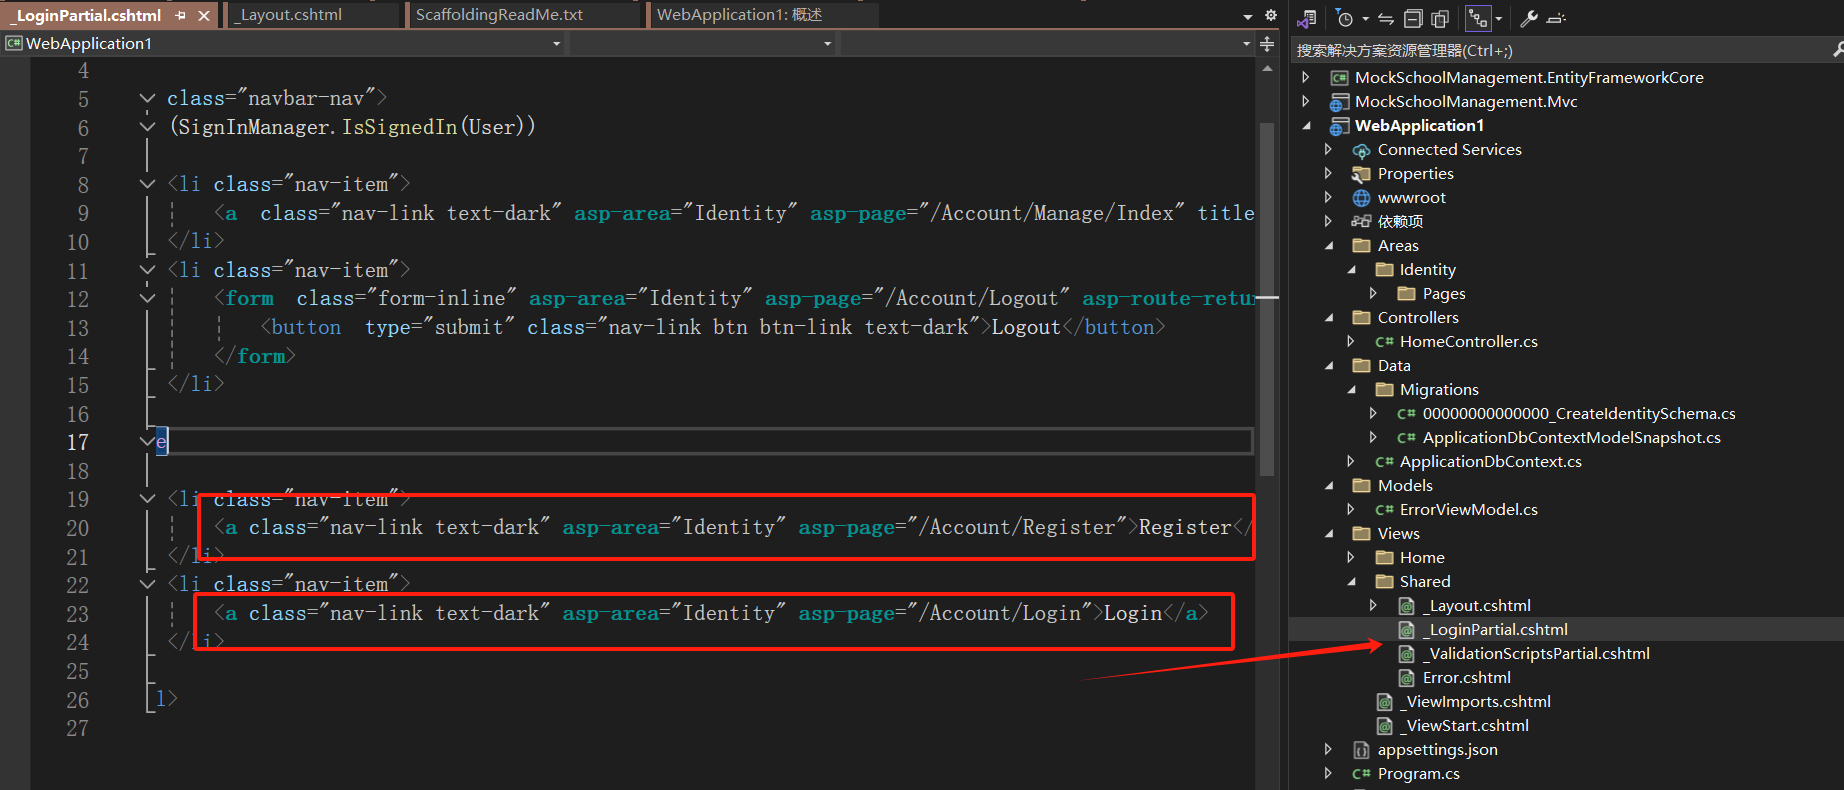
@using Microsoft.AspNetCore.Identity
@inject SignInManager<IdentityUser> SignInManager
@inject UserManager<IdentityUser> UserManager

<ul class="navbar-nav">
@if (SignInManager.IsSignedIn(User))
{
    <li class="nav-item">
        <a  class="nav-link text-dark" asp-area="Identity" asp-page="/Account/Manage/Index" title="Manage">Hello @User.Identity?.Name!</a>
    </li>
    <li class="nav-item">
        <form  class="form-inline" asp-area="Identity" asp-page="/Account/Logout" asp-route-returnUrl="@Url.Action("Index", "Home", new { area = "" })">
            <button  type="submit" class="nav-link btn btn-link text-dark">Logout</button>
        </form>
    </li>
}
else
{
    <li class="nav-item">
        <a class="nav-link text-dark" asp-area="Identity" asp-page="/Account/Register">Register</a>
    </li>
    <li class="nav-item">
        <a class="nav-link text-dark" asp-area="Identity" asp-page="/Account/Login">Login</a>
    </li>
}
</ul>
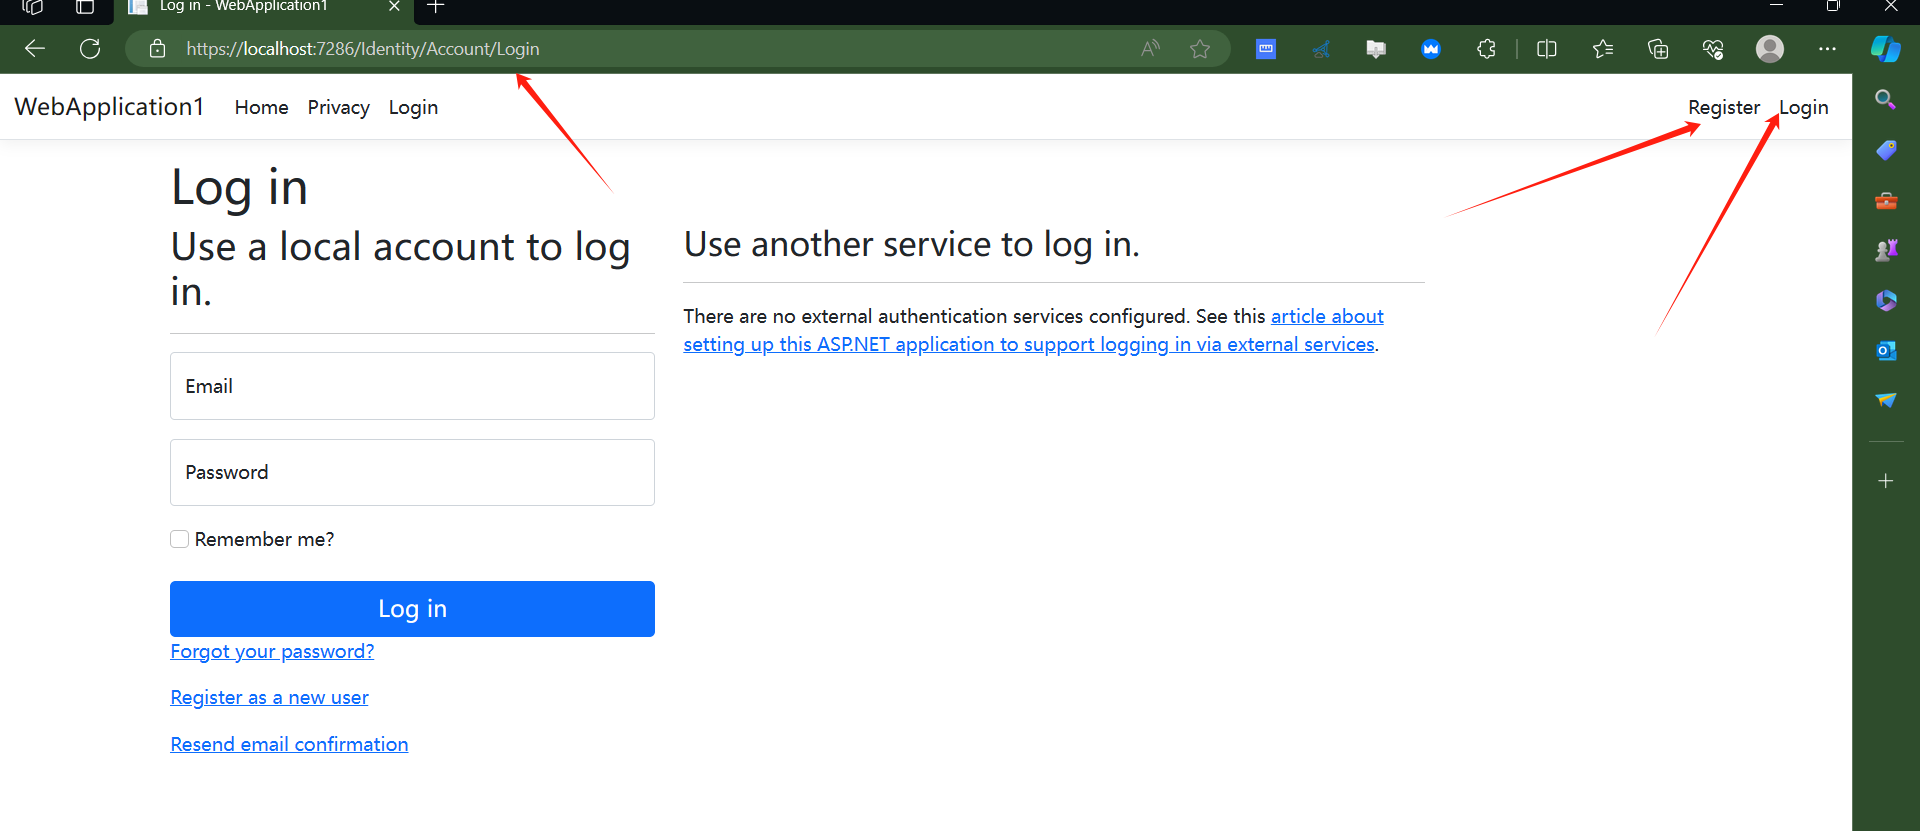
现在 运行


 浙公网安备 33010602011771号