


代码学习(总)
一、常用
(1)保存阶段图片
from torchvision import utils as vutils


vutils.save_image(img_LQ, 'experiments/model/img_LQ.jpg', normalize=True)
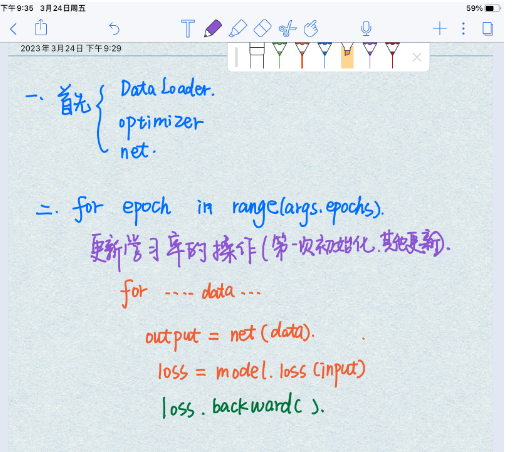
(2)基本流程
(3)events.out.tfevents读取与可视化
大佬链接:https://www.cnblogs.com/leeeeee/p/16117812.html
(4)激活函数:
大佬链接:(5条消息) 机器学习中的数学——激活函数(十):Softplus函数_von Neumann的博客-CSDN博客
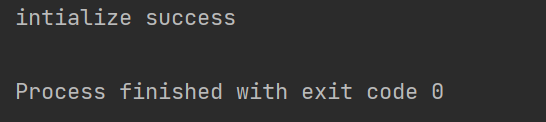
创建一个对象,只会执行__init__ 操作,只有在对象操作的时候,才会调用到__getitem__。

class Fun:
    def __init__(self, x_list):
        """ initialize the class instance
        Args:
            x_list: data with list type
        Returns:
            None
        """
        if not isinstance(x_list, list):
            raise ValueError("input x_list is not a list type")
        self.data = x_list
        print("intialize success")

    def __getitem__(self, idx):
        print("__getitem__ is called")
        return self.data[idx]

    def __len__(self):
        print("__len__ is called")
        return len(self.data)


fun = Fun(x_list=[1, 2, 3, 4, 5])
# print(fun[2])
# print(len(fun))
结果:
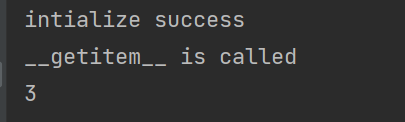
代码:
fun = Fun(x_list=[1, 2, 3, 4, 5])
print(fun[2])
# print(len(fun))
结果:
(4)Python中Tqdm模块--进度条配置
大佬链接:https://blog.csdn.net/qq_42958831/article/details/127926194
(5)在tensorboard可视化(好多人说再谷歌上可以,在别的浏览器上输入网址不行)
注意:生成如下文件
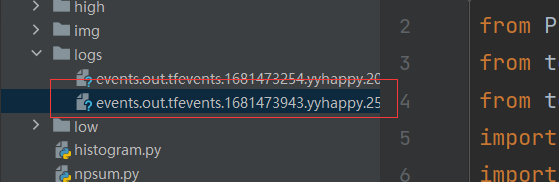
在pycharm的终端中输入tensorboard --logdir="logs"(我的电脑是这个)注意logs是写的是文件夹的位置,不是文件下的events位置
注:可能因为tensorboard 版本的原因,命令也有一些差别tensorboard --logdir=logstensorboard --logdir="logs"tensorboard --logdir "logs"
这三个命令都试一下
import torch.nn as nn
from PIL import Image
from torch.utils.tensorboard import SummaryWriter
from torch.nn import Conv2d
import numpy as np
import torchvision
import torch

image = Image.open('img/a.jpg').convert('RGB')
image = torchvision.transforms.ToTensor()(np.asarray(image) / 255.0).unsqueeze(0)
image = image.to(torch.float32)

print(image.shape)
class Tudui(nn.Module):
    def __init__(self):
        super(Tudui, self).__init__()
        self.conv1 = Conv2d(in_channels=3,out_channels=6,kernel_size=3,stride=1,padding=0)

    def forward(self,x):
        x = self.conv1(x)
        return x

writer = SummaryWriter('logs')  # 保存地址

tudui = Tudui()
output = tudui(image)
print(output.shape)
output = torch.reshape(output,(-1, 3, 1066, 1068))
# writer.add_image('input', image)
writer.add_image('output', output[0])
writer.close()


一、FFA
1、训练保存的pt文件是参数权重问题(可以通过反向传播等更新的权重),测试走的网络一般是训练用的网络
2、注意epoch和stage的区别
epoch走的是轮数比如1000轮
stage根据batch size而定。比如1600张图片, batch size=16,那么stage=100
二、SCI(cvpr'22)
3、torch.clamp
# 输入的r 张量每个元素的范围限制到(0,1)之间,返回一个新的张量
  r = torch.clamp(r, 0, 1)
4、padding填充
padding = int((kernel_size - 1) / 2) * dilation
nn.Conv2d(in_channels=channels, out_channels=channels, kernel_size=kernel_size, stride=1, padding=padding),
# 在卷积神经网络的卷积层之后总会添加BatchNorm2d进行数据的归一化处理,这使得数据在进行Relu之前不会因为数据过大而导致网络性能的不稳定
nn.BatchNorm2d(channels),
nn.ReLU()
5、在写自己的网络时:在Pytorch的网络构造代码中,都会看到继承nn.Module类的子类
6、nn.Sequential是nn.Module的一个子类,它作为一个有序的容器,网络模块将按照在传入构造器的顺序依次被添加到计算图中执行
self.in_conv = nn.Sequential(
            nn.Conv2d(in_channels=3, out_channels=channels, kernel_size=kernel_size, stride=1, padding=padding),
            nn.ReLU()
        )

self.conv = nn.Sequential(
            nn.Conv2d(in_channels=channels, out_channels=channels, kernel_size=kernel_size, stride=1, padding=padding),
            # 在卷积神经网络的卷积层之后总会添加BatchNorm2d进行数据的归一化处理,这使得数据在进行Relu之前不会因为数据过大而导致网络性能的不稳定
            nn.BatchNorm2d(channels),
            nn.ReLU()
        )
使用*号时
layer = [nn.Conv2d(1,20,5),nn.ReLU()]
model = nn.Sequential(*layer)
print(model)
首先定义了一个包含四个层的列表 layers,然后使用 * 运算符将其解压并传递给 nn.Sequential() 构造函数。这样,layers 列表中的每个层都会按照它们在列表中的顺序添加到 nn.Sequential() 中,从而形成一个新的神经网络模型 model。
需要注意的是,使用 * 运算符传递参数时,必须保证列表或元组中的每个元素都是 nn.Module 的子类对象。
7、nn.ModuleList
 # 初始化一个空的ModuleList 命名为blocks
 self.blocks = nn.ModuleList()
 for i in range(layers):
     self.blocks.append(self.conv)
8、nn.Sigmoid() 和 nn.ReLu 两个激活函数:区别
(1)如果两者都可用的情况下,优先使用ReLU()
(2)如果是两分类的情况,则使用Sigmoid()
大佬链接:https://zhuanlan.zhihu.com/p/172254089
9、PyTorch 权重初始化
# PyTorch 权重初始化
    def weights_init(self, m):
        # 对比参数m,nn.Conv2d是否属于同一类型
        if isinstance(m, nn.Conv2d):
            m.weight.data.normal_(0, 0.02)
            m.bias.data.zero_()

        if isinstance(m, nn.BatchNorm2d):
            m.weight.data.normal_(1., 0.02)
10、SmoothLoss损失函数
class SmoothLoss(nn.Module):
    def __init__(self):
        super(SmoothLoss, self).__init__()
        self.sigma = 10

    def rgb2yCbCr(self, input_im):
        # 返回一个内存连续的有相同数据的tensor,如果原tensor内存连续,则返回原tensor。 一般与transpose,permute,view等方法搭配使用。 使用transpose或permute进行维度变换后,需要调用contiguous,才可使用view对维度进行变形
        im_flat = input_im.contiguous().view(-1, 3).float()
        mat = torch.Tensor([[0.257, -0.148, 0.439], [0.564, -0.291, -0.368], [0.098, 0.439, -0.071]]).to('cuda:0')
        bias = torch.Tensor([16.0 / 255.0, 128.0 / 255.0, 128.0 / 255.0]).to('cuda:0')
        temp = im_flat.mm(mat) + bias
        out = temp.view(input_im.shape[0], 3, input_im.shape[2], input_im.shape[3])
        return out

    # output: output      input:input
    def forward(self, input, output):
        self.output = output
        # 图像由rgb转化为YCbCr,其中YCbCr:亮度 (Y) 和色度(Cb和Cr)值
        self.input = self.rgb2yCbCr(input)
        sigma_color = -1.0 / (2 * self.sigma * self.sigma)
        w1 = torch.exp(torch.sum(torch.pow(self.input[:, :, 1:, :] - self.input[:, :, :-1, :], 2), dim=1,
                                 keepdim=True) * sigma_color)
        w2 = torch.exp(torch.sum(torch.pow(self.input[:, :, :-1, :] - self.input[:, :, 1:, :], 2), dim=1,
                                 keepdim=True) * sigma_color)
        w3 = torch.exp(torch.sum(torch.pow(self.input[:, :, :, 1:] - self.input[:, :, :, :-1], 2), dim=1,
                                 keepdim=True) * sigma_color)
        w4 = torch.exp(torch.sum(torch.pow(self.input[:, :, :, :-1] - self.input[:, :, :, 1:], 2), dim=1,
                                 keepdim=True) * sigma_color)
        w5 = torch.exp(torch.sum(torch.pow(self.input[:, :, :-1, :-1] - self.input[:, :, 1:, 1:], 2), dim=1,
                                 keepdim=True) * sigma_color)
        w6 = torch.exp(torch.sum(torch.pow(self.input[:, :, 1:, 1:] - self.input[:, :, :-1, :-1], 2), dim=1,
                                 keepdim=True) * sigma_color)
        w7 = torch.exp(torch.sum(torch.pow(self.input[:, :, 1:, :-1] - self.input[:, :, :-1, 1:], 2), dim=1,
                                 keepdim=True) * sigma_color)
        w8 = torch.exp(torch.sum(torch.pow(self.input[:, :, :-1, 1:] - self.input[:, :, 1:, :-1], 2), dim=1,
                                 keepdim=True) * sigma_color)
        w9 = torch.exp(torch.sum(torch.pow(self.input[:, :, 2:, :] - self.input[:, :, :-2, :], 2), dim=1,
                                 keepdim=True) * sigma_color)
        w10 = torch.exp(torch.sum(torch.pow(self.input[:, :, :-2, :] - self.input[:, :, 2:, :], 2), dim=1,
                                  keepdim=True) * sigma_color)
        w11 = torch.exp(torch.sum(torch.pow(self.input[:, :, :, 2:] - self.input[:, :, :, :-2], 2), dim=1,
                                  keepdim=True) * sigma_color)
        w12 = torch.exp(torch.sum(torch.pow(self.input[:, :, :, :-2] - self.input[:, :, :, 2:], 2), dim=1,
                                  keepdim=True) * sigma_color)
        w13 = torch.exp(torch.sum(torch.pow(self.input[:, :, :-2, :-1] - self.input[:, :, 2:, 1:], 2), dim=1,
                                  keepdim=True) * sigma_color)
        w14 = torch.exp(torch.sum(torch.pow(self.input[:, :, 2:, 1:] - self.input[:, :, :-2, :-1], 2), dim=1,
                                  keepdim=True) * sigma_color)
        w15 = torch.exp(torch.sum(torch.pow(self.input[:, :, 2:, :-1] - self.input[:, :, :-2, 1:], 2), dim=1,
                                  keepdim=True) * sigma_color)
        w16 = torch.exp(torch.sum(torch.pow(self.input[:, :, :-2, 1:] - self.input[:, :, 2:, :-1], 2), dim=1,
                                  keepdim=True) * sigma_color)
        w17 = torch.exp(torch.sum(torch.pow(self.input[:, :, :-1, :-2] - self.input[:, :, 1:, 2:], 2), dim=1,
                                  keepdim=True) * sigma_color)
        w18 = torch.exp(torch.sum(torch.pow(self.input[:, :, 1:, 2:] - self.input[:, :, :-1, :-2], 2), dim=1,
                                  keepdim=True) * sigma_color)
        w19 = torch.exp(torch.sum(torch.pow(self.input[:, :, 1:, :-2] - self.input[:, :, :-1, 2:], 2), dim=1,
                                  keepdim=True) * sigma_color)
        w20 = torch.exp(torch.sum(torch.pow(self.input[:, :, :-1, 2:] - self.input[:, :, 1:, :-2], 2), dim=1,
                                  keepdim=True) * sigma_color)
        w21 = torch.exp(torch.sum(torch.pow(self.input[:, :, :-2, :-2] - self.input[:, :, 2:, 2:], 2), dim=1,
                                  keepdim=True) * sigma_color)
        w22 = torch.exp(torch.sum(torch.pow(self.input[:, :, 2:, 2:] - self.input[:, :, :-2, :-2], 2), dim=1,
                                  keepdim=True) * sigma_color)
        w23 = torch.exp(torch.sum(torch.pow(self.input[:, :, 2:, :-2] - self.input[:, :, :-2, 2:], 2), dim=1,
                                  keepdim=True) * sigma_color)
        w24 = torch.exp(torch.sum(torch.pow(self.input[:, :, :-2, 2:] - self.input[:, :, 2:, :-2], 2), dim=1,
                                  keepdim=True) * sigma_color)
        p = 1.0

        pixel_grad1 = w1 * torch.norm((self.output[:, :, 1:, :] - self.output[:, :, :-1, :]), p, dim=1, keepdim=True)
        pixel_grad2 = w2 * torch.norm((self.output[:, :, :-1, :] - self.output[:, :, 1:, :]), p, dim=1, keepdim=True)
        pixel_grad3 = w3 * torch.norm((self.output[:, :, :, 1:] - self.output[:, :, :, :-1]), p, dim=1, keepdim=True)
        pixel_grad4 = w4 * torch.norm((self.output[:, :, :, :-1] - self.output[:, :, :, 1:]), p, dim=1, keepdim=True)
        pixel_grad5 = w5 * torch.norm((self.output[:, :, :-1, :-1] - self.output[:, :, 1:, 1:]), p, dim=1, keepdim=True)
        pixel_grad6 = w6 * torch.norm((self.output[:, :, 1:, 1:] - self.output[:, :, :-1, :-1]), p, dim=1, keepdim=True)
        pixel_grad7 = w7 * torch.norm((self.output[:, :, 1:, :-1] - self.output[:, :, :-1, 1:]), p, dim=1, keepdim=True)
        pixel_grad8 = w8 * torch.norm((self.output[:, :, :-1, 1:] - self.output[:, :, 1:, :-1]), p, dim=1, keepdim=True)
        pixel_grad9 = w9 * torch.norm((self.output[:, :, 2:, :] - self.output[:, :, :-2, :]), p, dim=1, keepdim=True)
        pixel_grad10 = w10 * torch.norm((self.output[:, :, :-2, :] - self.output[:, :, 2:, :]), p, dim=1, keepdim=True)
        pixel_grad11 = w11 * torch.norm((self.output[:, :, :, 2:] - self.output[:, :, :, :-2]), p, dim=1, keepdim=True)
        pixel_grad12 = w12 * torch.norm((self.output[:, :, :, :-2] - self.output[:, :, :, 2:]), p, dim=1, keepdim=True)
        pixel_grad13 = w13 * torch.norm((self.output[:, :, :-2, :-1] - self.output[:, :, 2:, 1:]), p, dim=1, keepdim=True)
        pixel_grad14 = w14 * torch.norm((self.output[:, :, 2:, 1:] - self.output[:, :, :-2, :-1]), p, dim=1, keepdim=True)
        pixel_grad15 = w15 * torch.norm((self.output[:, :, 2:, :-1] - self.output[:, :, :-2, 1:]), p, dim=1, keepdim=True)
        pixel_grad16 = w16 * torch.norm((self.output[:, :, :-2, 1:] - self.output[:, :, 2:, :-1]), p, dim=1, keepdim=True)
        pixel_grad17 = w17 * torch.norm((self.output[:, :, :-1, :-2] - self.output[:, :, 1:, 2:]), p, dim=1, keepdim=True)
        pixel_grad18 = w18 * torch.norm((self.output[:, :, 1:, 2:] - self.output[:, :, :-1, :-2]), p, dim=1, keepdim=True)
        pixel_grad19 = w19 * torch.norm((self.output[:, :, 1:, :-2] - self.output[:, :, :-1, 2:]), p, dim=1, keepdim=True)
        pixel_grad20 = w20 * torch.norm((self.output[:, :, :-1, 2:] - self.output[:, :, 1:, :-2]), p, dim=1, keepdim=True)
        pixel_grad21 = w21 * torch.norm((self.output[:, :, :-2, :-2] - self.output[:, :, 2:, 2:]), p, dim=1, keepdim=True)
        pixel_grad22 = w22 * torch.norm((self.output[:, :, 2:, 2:] - self.output[:, :, :-2, :-2]), p, dim=1, keepdim=True)
        pixel_grad23 = w23 * torch.norm((self.output[:, :, 2:, :-2] - self.output[:, :, :-2, 2:]), p, dim=1, keepdim=True)
        pixel_grad24 = w24 * torch.norm((self.output[:, :, :-2, 2:] - self.output[:, :, 2:, :-2]), p, dim=1, keepdim=True)

        ReguTerm1 = torch.mean(pixel_grad1) \
                    + torch.mean(pixel_grad2) \
                    + torch.mean(pixel_grad3) \
                    + torch.mean(pixel_grad4) \
                    + torch.mean(pixel_grad5) \
                    + torch.mean(pixel_grad6) \
                    + torch.mean(pixel_grad7) \
                    + torch.mean(pixel_grad8) \
                    + torch.mean(pixel_grad9) \
                    + torch.mean(pixel_grad10) \
                    + torch.mean(pixel_grad11) \
                    + torch.mean(pixel_grad12) \
                    + torch.mean(pixel_grad13) \
                    + torch.mean(pixel_grad14) \
                    + torch.mean(pixel_grad15) \
                    + torch.mean(pixel_grad16) \
                    + torch.mean(pixel_grad17) \
                    + torch.mean(pixel_grad18) \
                    + torch.mean(pixel_grad19) \
                    + torch.mean(pixel_grad20) \
                    + torch.mean(pixel_grad21) \
                    + torch.mean(pixel_grad22) \
                    + torch.mean(pixel_grad23) \
                    + torch.mean(pixel_grad24)
        total_term = ReguTerm1
        return total_term
train中
1、
    # 先定义一个随机数种子
    np.random.seed(args.seed)
    # 自动寻找最适合当前配置的高效算法,优化运行效率
    # cudnn.benchmark = True
    # 为CPU设置种子用于生成随机数,以使得结果是确定的
    torch.manual_seed(args.seed)
    # cuDNN使用非确定性算法实现训练加速
    # cudnn.enabled = True
    # 如果使用多个GPU,应该使用torch.cuda.manual_seed_all()为所有的GPU设置种子。
    # torch.cuda.manual_seed(args.seed)
三、SNR(cvpr'2022)
运行问题
0、transformer结构问题
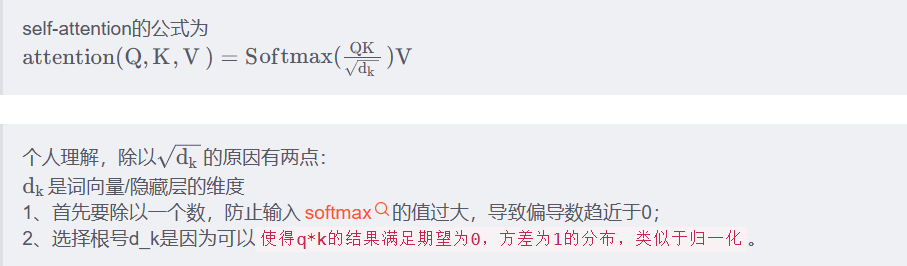
大佬链接:(3条消息) self-attention为什么要除以根号d_k_想念@思恋的博客-CSDN博客
softmax():
Softmax的含义就在于不再唯一的确定某一个最大值,而是为每个输出分类的结果都赋予一个概率值,表示属于每个类别的可能性。Softmax函数就可以将多分类的输出值转换为范围在[0, 1]和为1的概率分布。
大佬链接:(3条消息) pytorch中tf.nn.functional.softmax(x,dim = -1)对参数dim的理解_nn.softmax(dim=-1)_Will_Ye的博客-CSDN博客
1、yaml文件中 dataset: n_workers=0 batch_size=1
关于transformer的大佬讲解:Self-Attention和Transformer - machine-learning-notes (gitbook.io)‘
代码问题
1、permute
# fea_unfold三维张量(0,1,2)   输出:交换维度之后的张量 0位置不变,2,1交换位置
 fea_unfold = fea_unfold.permute(0, 2, 1)
2、shape()函数
# shape 功能是读取矩阵的长度,比如shape[0]就是读取矩阵第一维度的长度
 h_feature = fea.shape[2]
3、
# torch.nn.functional.interpolate 插值和上采样:就是改变数组的尺寸大小,尽量保持数据完整。
# interpolate(input,size) input 采样处理的数组,size输出的大小,要求input是float格式
mask = F.interpolate(mask, size=[h_feature, w_feature], mode='nearest')
大佬链接:(1条消息) F.interpolate——数组采样操作_视觉萌新、的博客-CSDN博客
4、torch.div()
# torch.div()——数组的’点除’运算, input/noise + 0.0001
 mask = torch.div(light, noise + 0.0001)
大佬链接:(1条消息) torch.div()——数组的‘点除‘运算_torch 除法_视觉萌新、的博客-CSDN博客
5、计算图片的灰度图
img3=0.2989*img[:,:,2]+0.5870*img[:,:,1]+0.1140*img[:,:,0]
img2=cv2.cvtColor(img.astype(np.uint8), cv2.COLOR_BGR2GRAY)

print((img3-img2).sum()/(img.shape[0]*img.shape[1]))  ###结果=-0.0072855376781315
大佬链接:计算机视觉】- 如何计算灰度图像 【python 灰度图像】_对一张灰度图求和怎么求_Hi_AI的博客-CSDN博客
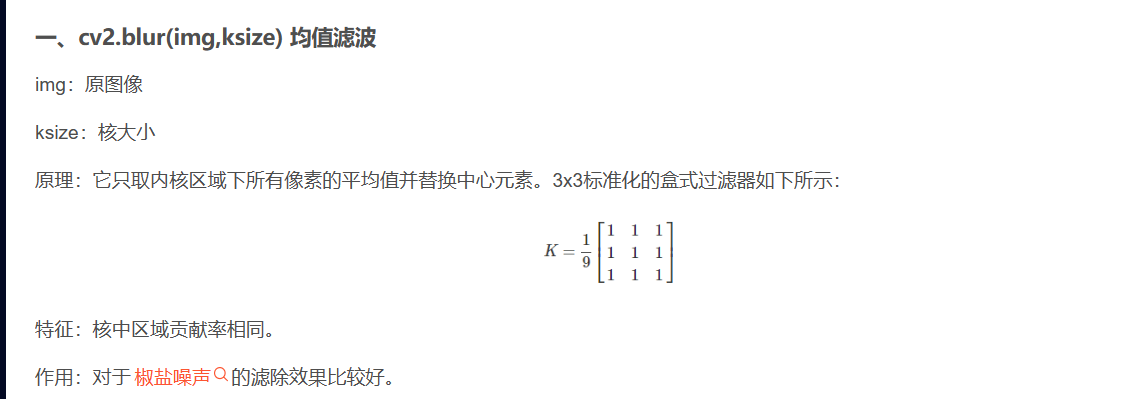
7、cv2.blur
# cv2.blur(img,ksize) 均值滤波
img_nf = cv2.blur(img_nf, (5, 5))
大佬链接:https://blog.csdn.net/weixin_40922285/article/details/102801633
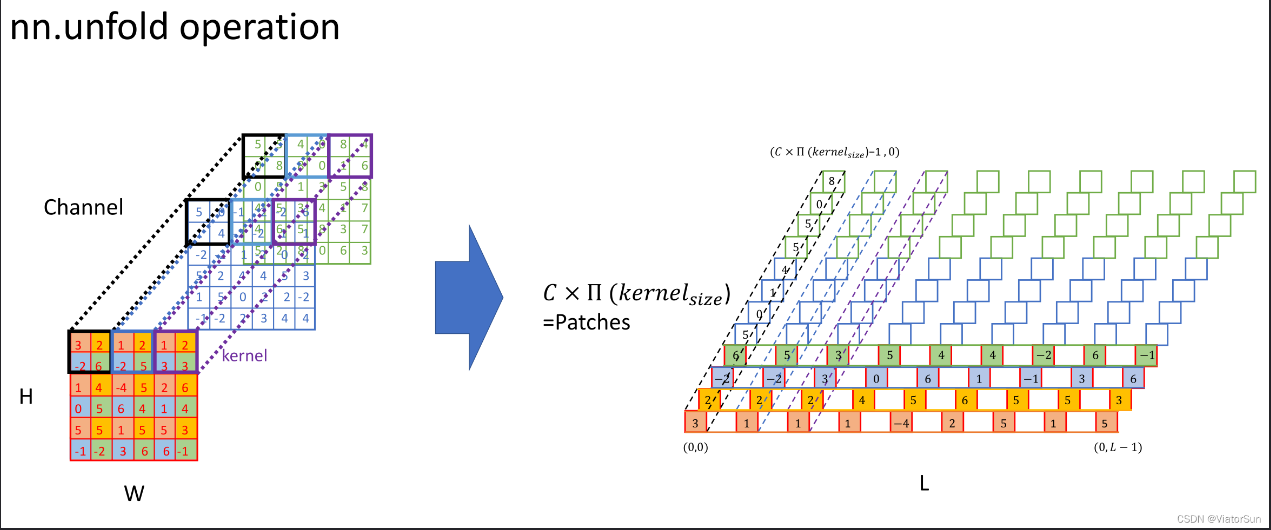
8、torch.nn.functional.unFold & torch.nn.functional.Fold
(1)unfold函数的输入数据是四维,但输出是三维的。假设输入数据是[B, C, H, W], 那么输出数据是 [B, C* kH * kW, L], 其中kH是核的高,kW是核宽。 L则是这个高kH宽kW的核能在H*W区域按照指定stride滑动的次数
该函数的输入是(bs,c,h,w),其中bs为batch-size,C是channel的个数。
F.unfold 函数的作用是将一个多通道的输入张量 x 展开成一个二维的矩阵,以便进行卷积计算。展开操作的实现方式是将输入张量 x 划分成若干个大小为 kernel_size 、步长为 stride 的块,然后按照通道顺序将各个块拉成一个一维向量,并将这些向量拼接成一个二维矩阵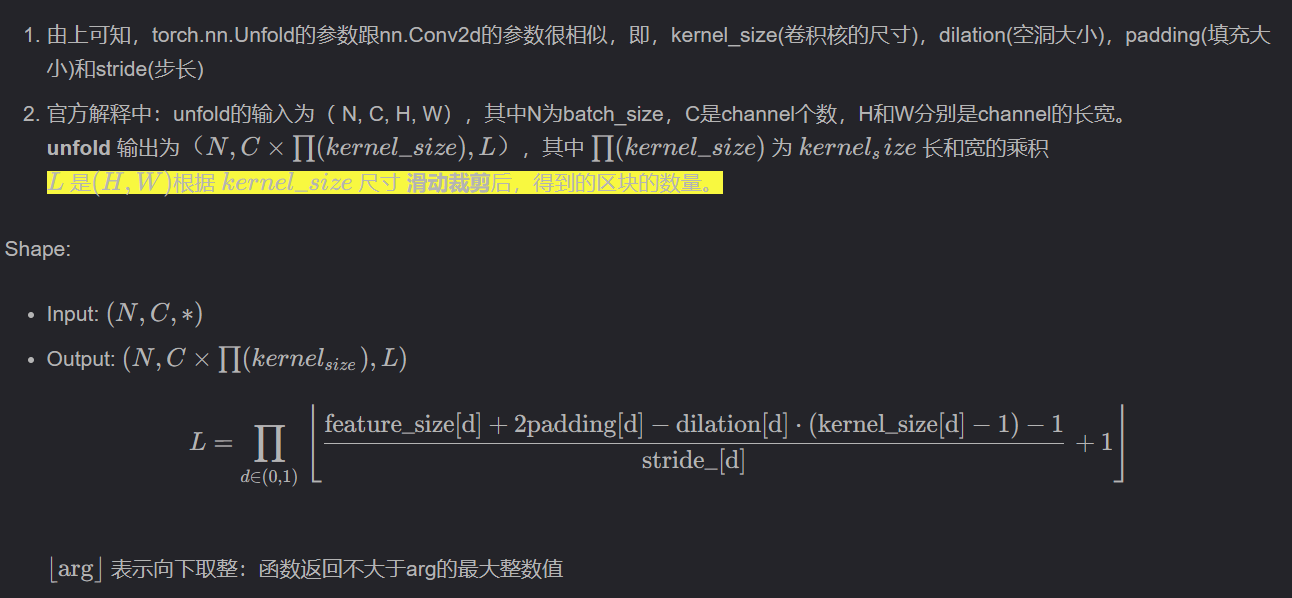
大佬链接:(3条消息) 「详解」torch.nn.Fold和torch.nn.Unfold操作_ViatorSun的博客-CSDN博客
9、nn.Dropout。
大佬链接:【Pytorch】nn.Dropout的用法_马里亚纳Mariana的博客-CSDN博客
class Dropout(nn.Module):
    def __init__(self):
        super(Dropout, self).__init__()
        self.linear = nn.Linear(20, 40)
        self.dropout = nn.Dropout(p = 0.3) # p=0.3表示下图(a)中的神经元有p = 0.3的概率不被激活

    def forward(self, inputs):
        out = self.linear(inputs)
        out = self.dropout(out)
        return out

net = Dropout()
# Dropout只能用在train而不能用在test
10、masked_fill
import torch

t = torch.randn(3, 2)
# torch.randint(low=0, high, size) → Tensor
# low ( int , optional ) – 要从分布中提取的最小整数。默认值:0。
# high ( int ) – 高于要从分布中提取的最高整数。
# size ( tuple ) – 定义输出张量形状的元组。
m = torch.randint(0, 2, (3, 2))
print(t)
print(m)
# masked_fill方法有两个参数,maske和value,mask是一个pytorch张量(Tensor),元素是布尔值,value是要填充的值,填充规则是mask中取值为True位置对应于self的相应位置用value填充
t = t.masked_fill(m == 1, -1e9)
print(t)
结果:
tensor([[-0.3729,  0.3023],
        [-1.0291, -1.5842],
        [ 1.9957,  1.4655]])
tensor([[1, 1],
        [1, 0],
        [1, 0]])
tensor([[-1.0000e+09, -1.0000e+09],
        [-1.0000e+09, -1.5842e+00],
        [-1.0000e+09,  1.4655e+00]])
代码问题
1、 Python中torch.multiprocessing.get_start_method方法
需要导入
# 多进程编程
import torch.multiprocessing as mp
def init_dist(backend='nccl', **kwargs):
    """initialization for distributed training"""
    # spawn 启动进程
    if mp.get_start_method(allow_none=True) != 'spawn':
        mp.set_start_method('spawn')
    rank = int(os.environ['RANK'])
    num_gpus = torch.cuda.device_count()
    torch.cuda.set_device(rank % num_gpus)
    dist.init_process_group(backend=backend, **kwargs)
2、torch.load(f, map_location=None, pickle_module=<module 'pickle' from '...'>) 用来加载模型

大佬链接:Pytorch:模型的保存与加载 torch.save()、torch.load()、torch.nn.Module.load_state_dict()_宁静致远*的博客-CSDN博客
torch.load('tensors.pt')

# Load all tensors onto the CPU
torch.load('tensors.pt', map_location=torch.device('cpu'))

# Load all tensors onto the CPU, using a function
torch.load('tensors.pt', map_location=lambda storage, loc: storage)

# Load all tensors onto GPU 1
torch.load('tensors.pt', map_location=lambda storage, loc: storage.cuda(1))

# Map tensors from GPU 1 to GPU 0
torch.load('tensors.pt', map_location={'cuda:1':'cuda:0'})

# Load tensor from io.BytesIO object
with open('tensor.pt') as f:
    buffer = io.BytesIO(f.read())
torch.load(buffer)
2、为什么会执行到forward
大佬链接: https://zhuanlan.zhihu.com/p/366461413
3、# 使用lambda表达式,一步实现。 # 冒号左边是原函数参数; # 冒号右边是原函数返回值;
def main():
    a = lambda x:x+1
    print(a(1))

if __name__ == '__main__':
    main()
输出:
x.numel()获取tensor中一共包含多少个元素
lambda x: x.numel()
# 使用lambda表达式,一步实现。 # 冒号左边是原函数参数; # 冒号右边是原函数返回值; >>> a = lambda x:x+1 >>> a(1) 2
4、PixelShuffle层做的事情就是将输入feature map像素重组输出高分辨率的feature map,是一种上采样方法
大佬链接:https://blog.csdn.net/MR_kdcon/article/details/123967262
# PixelShuffle(2) 输入的是上采样的倍率
 self.pixel_shuffle = nn.PixelShuffle(2)
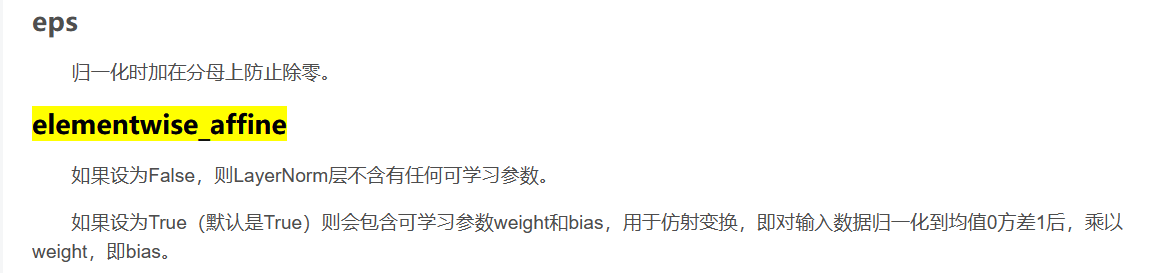
5、大佬链接: https://blog.csdn.net/MR_kdcon/article/details/123967262
LayerNorm((1024,), eps=1e-06, elementwise_affine=True)
4、cv2.blur()
大佬链接:(3条消息) cv2.blur图像滤波(Filter)处理学习笔记_cv2.blur()_AI算法联盟的博客-CSDN博客
# cv2.blur(img,ksize) 均值滤波
 img_nf = cv2.blur(img_nf, (5, 5))
5、 将图片转化为灰度图

# 名称 :openimg.py
# 时间 : 2023/3/26 19:18
# 功能 :
from PIL import Image
from torchvision import transforms

img_path =r"E:\cute.jpg"
img = Image.open(img_path)
# 将PIL图像转化为tensor类型
img = transforms.ToTensor()(img)

print(img.size())

# 利用公式 将图像转化为灰度图
dark = img[0:1, :, :] * 0.299 + img[1:2, :, :] * 0.587 + img[2:3, :, :] * 0.114

#将tensor读片转化为PIL格式并展示
dark = dark.squeeze(0)
dark = transforms.ToPILImage()(dark) # 自动转换为0-255
dark.show()
6、torch.max() 返回张量的最大值
7、
# shape 功能是读取矩阵的长度,比如shape[0]就是读取矩阵第一维度的长度
 h_feature = fea.shape[2]
8、state_dict详解:torch.nn.Module模块中的state_dict只包含卷积层和全连接层的参数
大佬链接:https://blog.csdn.net/bigFatCat_Tom/article/details/90722261
8、 卷积层: Conv2d要求输入输出是四维张量
全连接层: nn.Linear()要求输入输出是二维张量:形状通常为[batch_size, size]
大佬链接:https://blog.csdn.net/qq_42079689/article/details/102873766
5、repeat()
 # repeat() 扩展维度
mask = mask.repeat(1, channel, 1, 1)
大佬链接:(1条消息) torch中repeat()函数的准确理解_torch repeat_视觉弘毅的博客-CSDN博客
6、transformer 数据预处理
import torch
from PIL import Image
import torchvision.transforms as tfs
import matplotlib.pyplot as plt


class ImgFactory(object):
    def __init__(self, patch=16):
        super(ImgFactory, self).__init__()
        self.patch = patch
        self.im_tfs = tfs.Compose([
            tfs.ToTensor(),
            tfs.Normalize([0.485, 0.456, 0.406], [0.229, 0.224, 0.225])
        ])

    def getImagePatch(self, filename):
        img = Image.open(filename)
        width, height = img.size
        num_patch_w = width // self.patch
        num_patch_h = height // self.patch

        patch_list = []

        num = 1
        for i in range(num_patch_h):
            for j in range(num_patch_w):
                s_y = i * self.patch
                s_x = j * self.patch
                box = (s_x, s_y, self.patch + s_x, self.patch + s_y)
                region = img.crop(box)
                patch_list.append(region)
                plt.subplot(num_patch_h, num_patch_w, num), plt.imshow(region), plt.axis("off")
                num = num + 1

        plt.savefig("patch.png")

        for i in range(len(patch_list)):
            patch_list[i] = self.im_tfs(patch_list[i])
            patch_list[i] = patch_list[i].view(1, -1)

        seq = torch.cat(patch_list, dim=0)
        return seq


if __name__ == "__main__":
    factory = ImgFactory()
    seq = factory.getImagePatch("a.jpg")
    print(seq.shape)

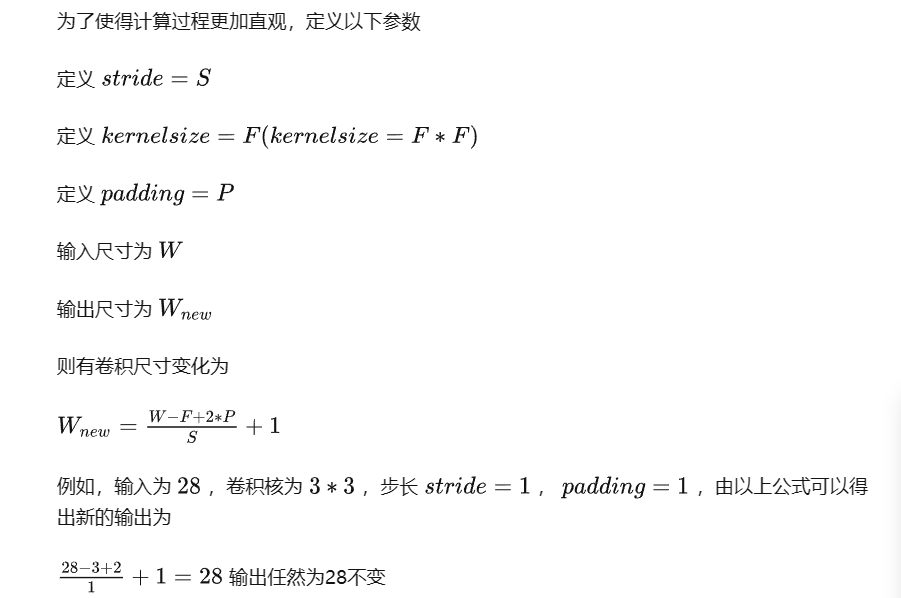
7、conv2D输出尺寸大小: 除向下取整
四、LLFlow
1、torch.zeros_like(x)
 # torch.zeros_like(x) torch.zeros_like:生成和括号x内变量维度维度一致的全是零的内容
 left_shift_x, right_shift_x, grad = torch.zeros_like(x), torch.zeros_like(x), torch.zeros_like(x)
1、map(function,iter)
# map() 会根据提供的函数对指定序列做映射。
# 第一个参数 function 以参数序列中的每一个元素调用 function 函数,返回包含每次 function 函数返回值的新列表。
def square(x):  # 计算平方数
    return x ** 2


print(list(map(square, [1, 2, 3, 4, 5])))

五、LLFormer
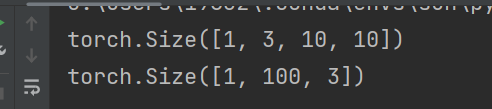
1、rearrange:重塑形状
大佬链接:https://zhuanlan.zhihu.com/p/594012790
import torch
import torch.nn.functional as F
from einops import rearrange

input = torch.randn(1,3,10,10)
print(input.shape)

x = rearrange(input, 'b c h w -> b (h w) c')
print(x.shape)
2、.var 返回给定维度 dim 中 input 张量的每一行的方差
torch.var(input, dim, unbiased=True, keepdim=False, *, out=None) → Tensor
大佬链接:PyTorch - torch.var 返回输入张量中所有元素的方差。 (runebook.dev)
3、pytorch 中 torch.optim.Adam 方法的使用和参数的解释
大佬链接:https://blog.csdn.net/Ibelievesunshine/article/details/99624645
4. array = numpy.linspace(start, end, num=num_points)将在start和end之间生成一个统一的序列,共有num_points个元素


【推荐】国内首个AI IDE,深度理解中文开发场景,立即下载体验Trae
【推荐】编程新体验,更懂你的AI,立即体验豆包MarsCode编程助手
【推荐】抖音旗下AI助手豆包,你的智能百科全书,全免费不限次数
【推荐】轻量又高性能的 SSH 工具 IShell:AI 加持,快人一步
· 【自荐】一款简洁、开源的在线白板工具 Drawnix
· 没有Manus邀请码?试试免邀请码的MGX或者开源的OpenManus吧
· 无需6万激活码!GitHub神秘组织3小时极速复刻Manus,手把手教你使用OpenManus搭建本
· C#/.NET/.NET Core优秀项目和框架2025年2月简报
· DeepSeek在M芯片Mac上本地化部署
2018-03-08 修改Tomcat编码方式