python 之 mysql
mysql操作
请自行安装mysql服务及mysql客户端,官网地址 http://dev.mysql.com/downloads/mysql/
mysql详细安装,操作请参考 http://www.cnblogs.com/wupeiqi/articles/5699254.html
mysql的一些简单语句
SHOW DATABASES;  #查看当前数据库的的库名
USE test;  #使用test库
SHOW TABLES;     #查看当前库名中的表
CREATE DATABASE students;  #创建一个数据库名字为students
FLUSH PRIVILEGES;   #刷新系统权限表

# 创建用户
    create user '用户名'@'IP地址' identified by '密码';
# 删除用户
    drop user '用户名'@'IP地址';
# 修改用户
    rename user '用户名'@'IP地址'; to '新用户名'@'IP地址';;
# 修改密码
    set password for '用户名'@'IP地址' = Password('新密码')

# 授权管理:
    show grants for '用户'@'IP地址'                  -- 查看权限
    grant  权限 on 数据库.表 to   '用户'@'IP地址'      -- 授权
    revoke 权限 on 数据库.表 from '用户'@'IP地址'      -- 取消权限

# 创建表
    create table 表名(
        列名  类型  是否可以为空,
        列名  类型  是否可以为空
    )
# 删除表
    drop table 表名
# 清空表
    delete from 表名
    truncate table 表名

# 修改表
    添加列:alter table 表名 add 列名 类型
    删除列:alter table 表名 drop column 列名
    修改列:
            alter table 表名 modify column 列名 类型;  -- 类型
            alter table 表名 change 原列名 新列名 类型; -- 列名,类型

    添加主键:
            alter table 表名 add primary key(列名);
    删除主键:
            alter table 表名 drop primary key;
            alter table 表名  modify  列名 int, drop primary key;

    添加外键:alter table 从表 add constraint 外键名称(形如:FK_从表_主表) foreign key 从表(外键字段) references 主表(主键字段);
    删除外键:alter table 表名 drop foreign key 外键名称

    修改默认值:ALTER TABLE testalter_tbl ALTER i SET DEFAULT 1000;
    删除默认值:ALTER TABLE testalter_tbl ALTER i DROP DEFAULT;
mysql API pymsql
pymsql是Python中操作MySQL的模块,其使用方法和MySQLdb几乎相同。
一、下载安装:
|
1
|
pip3 install pymysql |
二、基本使用
1、创建连接,并执行SQL,简单实例
#!/bin/bin/env python
# -*-coding:utf-8 -*-
# Author : rain

import pymysql

# 创建连接
conn = pymysql.connect(host='127.0.0.1', port='3306', user='root', passwd='123456', db='test')
# 创建游标
cursor = conn.cursor()
# 执行sql语句插入一行数据,并返回受影响的行数
res = cursor.execute("insert into students (name, adress) values ('rain', 'china') ")
# 提交数据,否则sql语句不生效
conn.commit()
# 关闭游标
cursor.close()
# 头闭连接
conn.close()

#!/bin/bin/env python
# -*-coding:utf-8 -*-
# Author : rain

import pymysql

# '''

# 创建连接
conn = pymysql.connect(host='127.0.0.1', port='3306', user='root', passwd='123456', db='test')
# 创建游标
cursor = conn.cursor()
# 删除表
reste = cursor.execute('delete from hello')
# 创建表
rest = cursor.execute("create table hello(id int AUTO_INCREMENT primary key not null,name CHAR(24) not null)")
# 执行sql语句插入一行数据,并返回受影响的行数
res = cursor.execute("insert into students (name, adress) values ('rain', 'china') ")
# 一次性插入多条数据,并返回受影响的行数
res1 = cursor.executemany("insert into students(name, adress))values(%s, %s)", [('yxy', 'china'), ('window', 'UK')])
# 更新一条数据
res2 = cursor.execute("update students set name='windows' where address ='UK'")
# 删除一条数据
res3 = cursor.execute("delete from students where id=1 and name='UK'")
# 删除整张表
res4 = cursor.execute("delete from students")


# 提交数据,否则sql语句不生效
conn.commit()
# 关闭游标
cursor.close()
# 头闭连接
conn.close()

# 获取最新自增ID
new_id = cursor.lastrowid
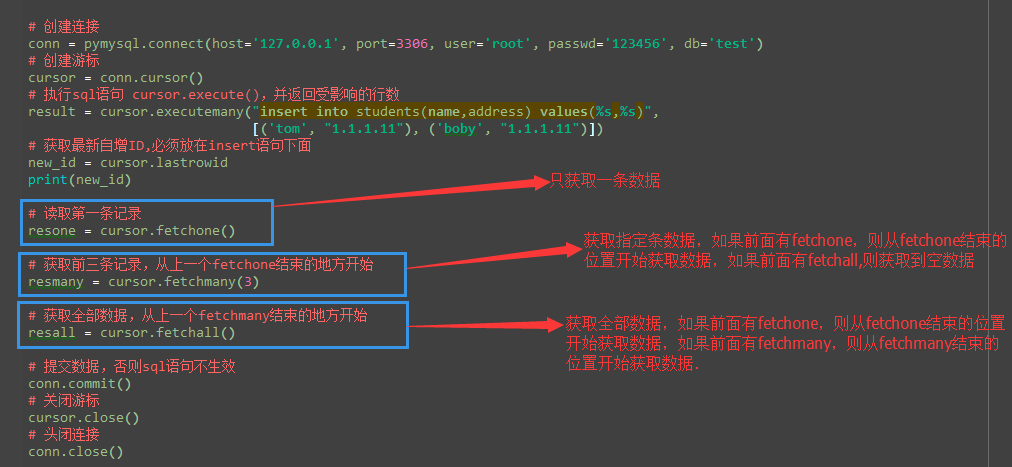
2、获取查询数据
# 创建连接
conn = pymysql.connect(host='127.0.0.1', port=3306, user='root', passwd='123456', db='test')
# 创建游标
cursor = conn.cursor()
# 执行sql语句 cursor.execute(),并返回受影响的行数
restin = cursor.execute("insert into students ( name, address) values('hi', 'china')")
# 执行查询语句
rest = cursor.execute('select * from test.students')
print(rest)
# 获取最新自增ID,必须放在insert语句下面
new_id = cursor.lastrowid
print(new_id)

# 读取第一条记录
queryone = cursor.fetchone()
# (1, 'yxy', 'china')

# 获取前三条记录,从上一个fetchone结束的地方开始
querymany = cursor.fetchmany(4)
# ((2, 'rain', 'UK'), (3, 'windows', 'china'), (4, 'pay', 'Uk'), (5, 'pay', 'Uk'))

# 获取全部数据,从上一个fetchmany结束的地方开始
queryall = cursor.fetchall()
# ((6, 'hello', 'china'), (7, 'hello', 'china'), (8, 'hello', 'china'))
print(queryone)
print(querymany)
print(queryall)

# 提交数据,否则sql语句不生效
conn.commit()
# 关闭游标
cursor.close()
# 头闭连接
conn.close()
注:在fetch数据时按照顺序进行,可以使用cursor.scroll(num,mode)来移动游标位置,如:
- cursor.scroll(1,mode='relative') # 相对当前位置移动
- cursor.scroll(2,mode='absolute') # 相对绝对位置移动

3、fetch数据类型
关于默认获取的数据是元祖类型,如果想要或者字典类型的数据,即:
#!/usr/bin/env python
# -*- coding:utf-8 -*-

import pymysql
conn = pymysql.connect(host='127.0.0.1',user='root',passwd='123456',db='test')
# 将游标设置成字典类型
cur = conn.cursor(cursor=pymysql.cursors.DictCursor)
a = cur.execute('select * from students')
print(a)
result = cur.fetchmany(3)
# ({'name': 'yxy', 'id': 1, 'address': 'china'},
# {'name': 'rain', 'id': 2, 'address': 'UK'},
# {'name': 'windows', 'id': 3, 'address': 'china'})
print(result)

conn.commit()
cur.close()
conn.close()
如有另外见解,稍后补充。。。


 浙公网安备 33010602011771号