elastic集群运维实例
内存分配优化


每个节点都有125G的内存
内存设置规则
32GB是ES一个内存设置限制,那如果你的机器有很大的内存怎么办呢?现在的机器内存普遍增长,你现在都可以看到有300-500GB内存的机器。
首先,我们建议编码使用这样的大型机
其次,如果你已经有了这样的机器,你有两个可选项:
你主要做全文检索吗?考虑给Elasticsearch 32G内存,剩下的交给Lucene用作操作系统的文件系统缓存,所有的segment都缓存起来,会加快全文检索
你需要更多的排序和聚合?你希望更大的堆内存.你可以考虑一台机器上创建两个或者更多ES节点,而不要部署一个使用32+GB内存的节点.仍然要 坚持50%原则,假设 你有个机器有128G内存,你可以创建两个node,使用32G内存.也就是说64G内存给ES的堆内存,剩下的64G给Lucene
如果你选择第二种,你需要配置cluster.routing.allocation.same_shard.host:true.这会防止同一个shard的主副本存在同一个物理机上(因为如果存在一个机器上,副本的高可用性就没有了)
当然,内存对于Elasticsearch来说绝对是重要的,用于更多的内存数据提供更快的操作,而且还有一个内存消耗大户-Lucene
Lucene的设计目的是把底层OS里的数据缓存到内存中。Lucene的段是分别存储到单个文件中的,这些文件都是不会变化的,所以很利于缓存,同时操作系统也会把这些段文件缓存起来,以便更快的访问
Lucene的性能取决于和OS的交互,如果你把所有的内存都分配给Elasticsearch,不留一点给Lucene,那你的全文检索性能会很差的
最后标准的建议是把50%的内存给elasticsearch,剩下的50%也不会没有用处的,Lucene会很快吞噬剩下的这部分内存用于文件缓存
不要超过32G
swapping是性能的坟墓
这是显而易见的,但是还是有必要说的更清楚一点,内存交换到磁盘对服务器性能来说是致命的.想想看一个内存的操作必须是快速的
如果内存交换到磁盘上,一个100微秒的操作可能变成10毫秒,再想想那么多10微秒的操作时延累加起来。不难看出swapping对于性能是多么可怕。
最好的办法就是在你的操作系统中完全禁用swapping.这样可以暂时禁用:
swapoff -a
为了永久禁用它,你可能需要修改/etc/fstab文件,这要参考你的操作系统相关文档。
如果完全禁用swap,对你来说是不可行的。你可以降低swappiness 的值,这个值决定操作系统交换内存的频率。这可以预防正常情况下发生交换。但仍允许os在紧急情况下发生交换。
对于大部分Linux操作系统,可以在sysctl 中这样配置:
vm.swappiness = 1
备注:swappiness设置为1比设置为0要好,因为在一些内核版本 swappness=0会引发OOM(内存溢出)
简单地说这个参数定义了系统对swap的使用倾向,默认值为60,值越大表示越倾向于使用swap。可以设为0,这样做并不会禁止对swap的使用,只是最大限度地降低了使用swap的可能性。
通过sysctl -q vm.swappiness可以查看参数的当前设置
修改参数的方法是修改/etc/sysctl.conf文件,加入vm.swappiness=xxx,并重起系统。这个操作相当于是修改虚拟系统中的/proc/sys/vm/swappiness文件,将值改为XXX数值。
如果不想重起,可以通过sysctl -p动态加载/etc/sysctl.conf文件,但建议这样做之前先清空swap。
最后,如果上面的方法都不能做到,你需要打开配置文件中的mlockall开关,它的作用就是运行JVM锁住内存,禁止OS交换出去.在elasticsearch.yml配置如下:
bootstrap.mlockall: true
配置文件

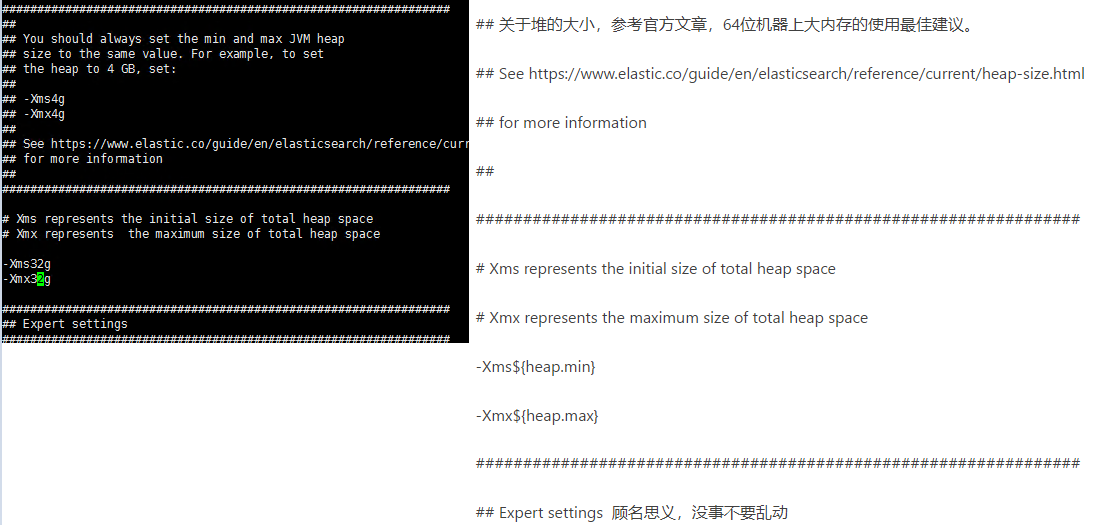
ES集群数据的迁移
快照方式
必须先停止es服务.迁移速度快,适用数据量大的场景
1.先配置源es集群的快照目录。重新启动es服务
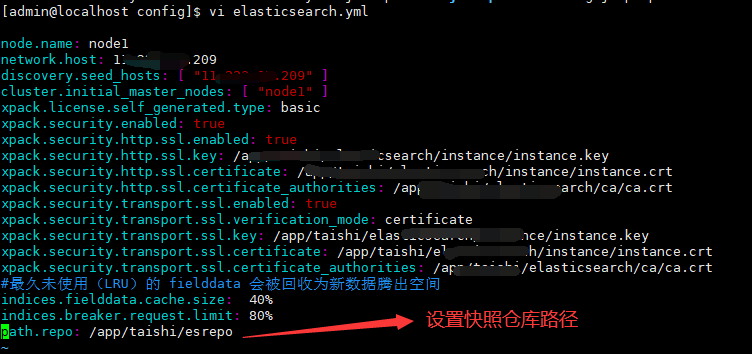
2.注册repo

 curl -k -XPUT -u elastic:bbbb'https://11.223.35.209:9200/_snapshot/my_backup' -H 'Content-Type: application/json' -d '{
     "type": "fs",
     "settings": {
         "location": "/app/taishi/esrepo",
         "compress": true
     }
 }'
3.创建快照文件
curl -k -XPUT -u elastic:bbb 'https://11.223.35.209:9200/_snapshot/my_repo/snapshot_1?wait_for_completion=true'
my_repo是第二步骤注册到es中的repo名称
snapshot_1是自定义取的快照文件名称
还原快照的时候需要根据这两个名称来恢复索引数据

4.查看快照的进度
curl -k -XGET -u elastic:bbb 'https://11.223.35.209:9200/_snapshot/my_repo/snapshot_1'


snapshot

适用于数据量大的场景
snapshot api是Elasticsearch用于对数据进行备份和恢复的一组api接口,能够经过snapshot api进行跨集群的数据迁移,原理就是从源ES集群建立数据快照,而后在目标ES集群中进行恢复。须要注意ES的版本问题:
目标ES集群的主版本号(如5.6.4中的5为主版本号)要大于等于源ES集群的主版本号;
1.x版本的集群建立的快照不能在5.x版本中恢复;
具体步骤以下:

一、源ES集群中建立repository
建立快照前必须先建立repository仓库,一个repository仓库能够包含多份快照文件,二、二、二、repository主要有一下几种类型
fs: 共享文件系统,将快照文件存放于文件系统中
 url: 指定文件系统的URL路径,支持协议:http,https,ftp,file,jar
 s3: AWS S3对象存储,快照存放于S3中,以插件形式支持
 hdfs: 快照存放于hdfs中,以插件形式支持
 cos: 快照存放于腾讯云COS对象存储中,以插件形式支持
 若是须要从自建ES集群迁移至腾讯云的ES集群,能够直接使用fs类型仓库,注意须要在Elasticsearch配置文件elasticsearch.yml设置仓库路径:
 path.repo: ["/data/es/backup"]

 一、配置文件
vim elasticsearch.yml
path.repo: ["/data/es/backup"]
二、注册快照仓库repository到ES中
PUT /_snapshot/es_backup
{
  "type": "fs",
  "settings": {
    "location": "/data/es/backup/"
  }
}
三、建立索引并添加文档
DELETE test
PUT test/_doc/1
{
  "key": "value1",
  "name": "lqbyz",
  "age":30
}
四、建立快照
#建立全部索引的快照
PUT _snapshot/es_backup/snapshot4?wait_for_completion=true
#建立指定索引建立快照
PUT /_snapshot/es_backup/snapshot_3?wait_for_completion=true
{
  "indices": "test",
  "ignore_unavailable": true,
  "include_global_state": false,
  "metadata": {
    "taken_by": "lqbyz",
    "taken_because": "backup before delete"
  }
}
五、查看相关的快照
GET _snapshot/es_backup/_all
GET _snapshot/es_backup/
GET _cat/indices
六、删除相关的快照
DELETE _snapshot/my_backup
GET test/_search
七、恢复快照
POST _snapshot/es_backup/snapshot_3/_restore
{}
#指定索引进行restore
POST /_snapshot/es_backup/snapshot1/_restore
{
  "indices": "elk-info-test-2020-06-26",
  "index_settings": {
    "index.number_of_replicas": 1
  },
  "ignore_index_settings": [
     "index.refresh_interval"
    ]
}
八、删除索引和快照
DELETE test
DELETE _snapshot/my_fs_backup

#####相关操做的查询
#####删除es_backup仓库
DELETE _snapshot/es_backup
###查看仓库信息
GET _snapshot/_all
####查看快照的
GET _snapshot/snapshot4/_status
###建立一个snapshot快照(包含全部的索引)
PUT _snapshot/es_backup/snapshot4?wait_for_completion=true
###建立一个快照只包含test2的索引
PUT _snapshot/es_backup/snapshot2
{
  "indices": "test2"
}
###查看刚才建立的快照信息
GET /_snapshot/es_backup/snapshot2
###查看全部的快照信息
GET _snapshot/es_backup/_all
###删除一个快照
DELETE /_snapshot/es_backup/snapshot2
###删除一个仓库
DELETE /_snapshot/es_backup
若是要中止一个正在运行的snapshot任务(备份和恢复),将其删除便可。
logstash迁移
无需停止es服务.适合迁移少量的数据
elasticsearch配置文件

discovery.seed_hosts: ["11.223.35.210", "11.223.35.211", "11.223.35.212"]

#
# Bootstrap the cluster using an initial set of master-eligible nodes:
#
cluster.initial_master_nodes: ["node-210"]
#
# For more information, consult the discovery and cluster formation module documentation.
#
# ---------------------------------- Gateway -----------------------------------
#
# Block initial recovery after a full cluster restart until N nodes are started:
#
#gateway.recover_after_nodes: 3
#
# For more information, consult the gateway module documentation.
#
# ---------------------------------- Various -----------------------------------
#
# Require explicit names when deleting indices:
#
#action.destructive_requires_name: true
xpack.security.enabled: false
xpack.security.http.ssl.enabled: false
xpack.security.transport.ssl.enabled: false

xpack.license.self_generated.type: basic
xpack.security.http.ssl.key: /u01/app/taishi/elastic/elasticsearch-7.8.1/config/certs/instance/instance.key
xpack.security.http.ssl.certificate: /u01/app/taishi/elastic/elasticsearch-7.8.1/config/certs/instance/instance.crt
xpack.security.http.ssl.certificate_authorities: /u01/app/taishi/elastic/elasticsearch-7.8.1/config/certs/ca/ca.crt
xpack.security.transport.ssl.verification_mode: certificate
xpack.security.transport.ssl.key: /u01/app/taishi/elastic/elasticsearch-7.8.1/config/certs/instance/instance.key
xpack.security.transport.ssl.certificate: /u01/app/taishi/elastic/elasticsearch-7.8.1/config/certs/instance/instance.crt
xpack.security.transport.ssl.certificate_authorities: /u01/app/taishi/elastic/elasticsearch-7.8.1/config/certs/ca/ca.crt

node.name: node1
network.host: 11.223.35.209
discovery.seed_hosts: [ "11.223.35.209" ]
cluster.initial_master_nodes: [ "node1" ]
xpack.license.self_generated.type: basic
xpack.security.enabled: false
xpack.security.http.ssl.enabled: false
xpack.security.http.ssl.key: /app/taishi/elasticsearch/instance/instance.key
xpack.security.http.ssl.certificate: /app/taishi/elasticsearch/instance/instance.crt
xpack.security.http.ssl.certificate_authorities: /app/taishi/elasticsearch/ca/ca.crt
xpack.security.transport.ssl.enabled: false
xpack.security.transport.ssl.verification_mode: certificate
xpack.security.transport.ssl.key: /app/taishi/elasticsearch/instance/instance.key
xpack.security.transport.ssl.certificate: /app/taishi/elasticsearch/instance/instance.crt
xpack.security.transport.ssl.certificate_authorities: /app/taishi/elasticsearch/ca/ca.crt
#最久未使用(LRU)的 fielddata 会被回收为新数据腾出空间
indices.fielddata.cache.size:  40%
indices.breaker.request.limit: 80%
path.repo: /app/taishi/esrepo
logstash配置文件

input {
  elasticsearch {
    hosts => ["http://11.223.35.209:9200"]
    user => "elastic"
    index => "*,-.monitoring*,-.security*,-.kibana*"
    password => "5555"
    docinfo => true
  }
}
filter {
}
output {
  elasticsearch {
    hosts => ["http://11.223.35.210:9200"]
    user => "elastic"
    password => "5555"
    index => "%{[@metadata][_index]}"
    document_type => "%{[@metadata][_type]}"
    document_id => "%{[@metadata][_id]}"
  }
}
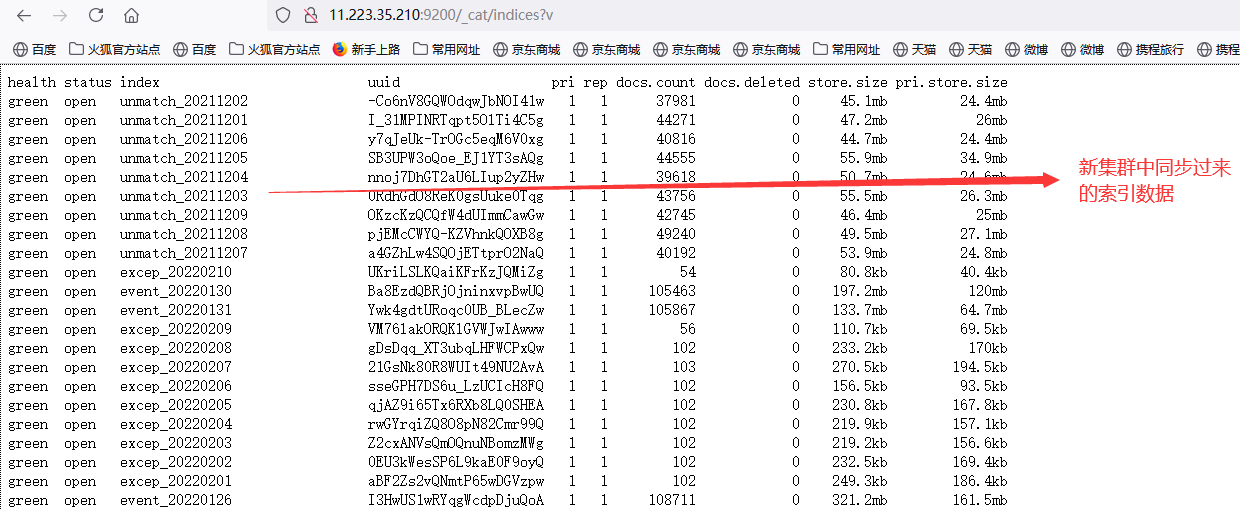
启动logstash
logstash -f /home/admin/ogstash-7.6.0/config/esbackup.conf

logstash连接https协议的es集群

input {
  elasticsearch {
    hosts => ["http://11.223.35.209:9200"]
    user => "elastic"
    index => "*,-.monitoring*,-.security*,-.kibana*"
    password => "bbbbb"
    docinfo => true
    ssl => true
    ssl_certificate_authorities => ["/etc/logstash/new_certs/ca.crt"]
    ssl_certificate => "/etc/logstash/new_certs/logstash.crt"
    ssl_key => "/etc/logstash/new_certs/logstash.pkcs8.key"

  }
}
filter {
}
output {
  elasticsearch {
    hosts => ["http://11.223.35.210:9200"]
    user => "elastic"
    password => "bbb"
    index => "%{[@metadata][_index]}"
    document_type => "%{[@metadata][_type]}"
    document_id => "%{[@metadata][_id]}"
    ssl => true
    ssl_certificate_authorities => ["/etc/logstash/new_certs/ca.crt"]
    ssl_certificate => "/etc/logstash/new_certs/logstash.crt"
    ssl_key => "/etc/logstash/new_certs/logstash.pkcs8.key
  }
}
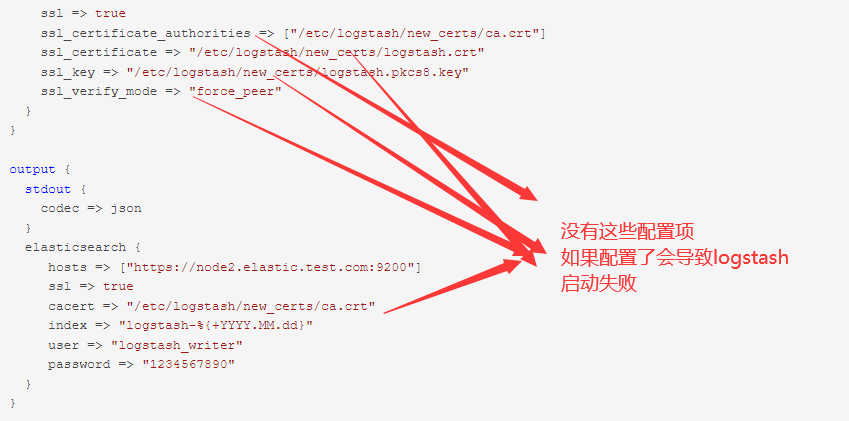

正确配置实例


input {
  elasticsearch {
    hosts => ["https://11.223.35.209:9200"]
    user => "elastic"
    index => "*,-.monitoring*,-.security*,-.kibana*"
    password => "6666"
    docinfo => true
    ssl => true
    ca_file => "/app/taishi/elasticsearch/ca/ca.crt"
  }

}
filter {
}
output {
  elasticsearch {
    hosts => ["http://11.223.35.210:9200"]
    user => "elastic"
    password => "666666"
    index => "%{[@metadata][_index]}"
    ssl => true
    ca_file => "/app/taishi/elasticsearch/ca2/ca.crt"
    document_type => "%{[@metadata][_type]}"
    document_id => "%{[@metadata][_id]}"
  }
}


# vi test.conf

input {
   elasticsearch {
      hosts => ["192.168.2.191:9200"]
      user => "elastic"
      index => "*,-.monitoring*,-.security*,-.kibana*"
      password => "bbb"
      docinfo => true
      ssl => true
      ca_file => "/app/taishi/elasticsearch/ca/ca.crt"
   }
}

filter {
}

output {
  stdout {
     codec => rubydebug
  }
}

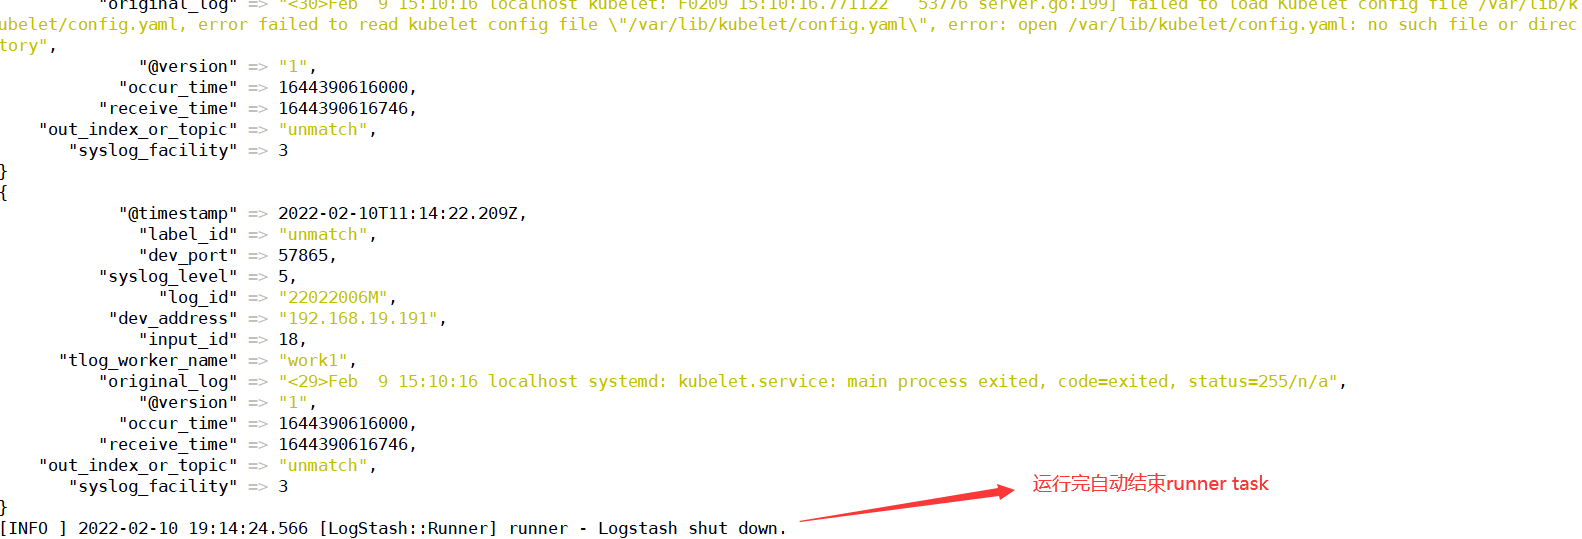

正确配置https input到https output
logstash 的input https和output https的配置语法不同
配置文件格式不能进行任何修改

input{
    elasticsearch{
        # 源端ES地址。
        hosts =>  ["10.246.131.68:9200"]
        # 安全集群配置登录用户名密码。
        user => "elastic"
        password => "123456"
        # 需要迁移的索引列表,多个索引以英文以逗号(,)分隔。
        index => "prob_assets_202401"
        # 以下三项保持默认即可,包含线程数和迁移数据大小和Logstash JVM配置相关。
        docinfo=>true
        slices => 5
        size => 5000
        ssl => true
        ca_file => "/home/secure/canew.crt"
    }
}

filter {
  # 去掉一些Logstash自己加的字段。
  mutate {
    remove_field => ["@timestamp", "@version"]
  }
}

output{
    elasticsearch{
        # 目标端ES地址,可在阿里云Elasticsearch实例的基本信息页面获取。
        hosts => ["https://10.30.90.147:9200"]
        # 安全集群配置登录用户名密码。
        user => "elastic"
        password => "12456"
        # 目标端索引名称,以下配置表示索引与源端保持一致。
        index => "%{[@metadata][_index]}"
        # 目标端索引type,以下配置表示索引类型与源端保持一致。
        document_type => "%{[@metadata][_type]}"
        # 目标端数据的id,如果不需要保留原id,可以删除以下这行,删除后性能会更好。
        # document_id => "%{[@metadata][_id]}"
        ilm_enabled => false
        manage_template => false
        ssl => true
        cacert => "/home/secure/ca.crt"
    }
}


#配置文件格式不能进行任何修改

成功执行完task
elasticsearch证书过期配置
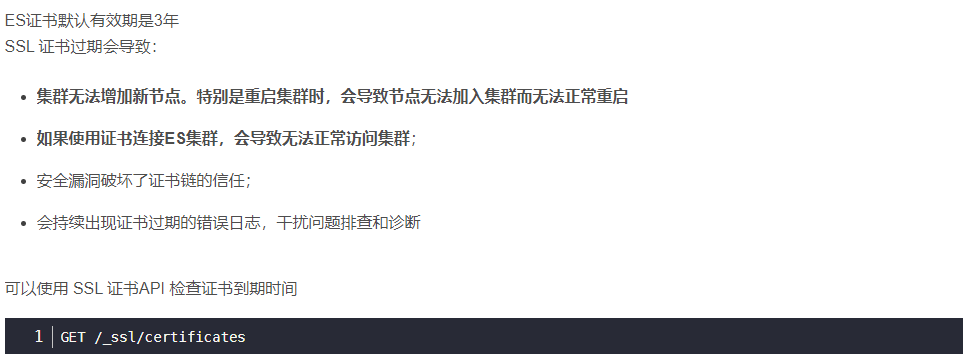
/home/taishi/elastic/elasticsearch-7.8.1/bin/elasticsearch-certutil cert --ip 192.168.100.21 --pem --days 36500 --days 表示证书的过期时间
openssl x509 -in ca/ca.crt -noout -dates

重启es集群的所有节点和相关调用es的服务即可
本文来自博客园,作者:不懂123,转载请注明原文链接:https://www.cnblogs.com/yxh168/p/15851877.html


【推荐】国内首个AI IDE,深度理解中文开发场景,立即下载体验Trae
【推荐】编程新体验,更懂你的AI,立即体验豆包MarsCode编程助手
【推荐】抖音旗下AI助手豆包,你的智能百科全书,全免费不限次数
【推荐】轻量又高性能的 SSH 工具 IShell:AI 加持,快人一步
· TypeScript + Deepseek 打造卜卦网站:技术与玄学的结合
· 阿里巴巴 QwQ-32B真的超越了 DeepSeek R-1吗?
· 【译】Visual Studio 中新的强大生产力特性
· 10年+ .NET Coder 心语 ── 封装的思维:从隐藏、稳定开始理解其本质意义
· 【设计模式】告别冗长if-else语句:使用策略模式优化代码结构