springboot之docker化
1、Docker安装
本人是centos7系统,安装也是按照官方文档进行安装。https://docs.docker.com/install/linux/docker-ce/centos/ ,即 1、sudo yum install -y yum-utils \ device-mapper-persistent-data \ lvm2 2、sudo yum-config-manager \ --add-repo \ https://download.docker.com/linux/centos/docker-ce.repo 3、sudo yum-config-manager --enable docker-ce-nightly 4、sudo yum install docker-ce docker-ce-cli containerd.io 5、yum list docker-ce --showduplicates | sort -r 6、sudo yum install docker-ce-18.09.1 docker-ce-cli-18.09.1 containerd.io 7、sudo systemctl start docker 8、sudo docker run hello-world
--------docker-compose安装
官网:https://docs.docker.com/compose/install/compose-plugin/#installing-compose-on-linux-systems
1、curl -SL https://github.com/docker/compose/releases/download/v2.6.1/docker-compose-linux-x86_64 -o /usr/local/bin/docker-compose
2、chmod +x/usr/local/bin/docker-compose
3、sudo ln -s /usr/local/bin/docker-compose /usr/bin/docker-compose
2、配置docker远程连接端口 (注意斜杠)
vim /usr/lib/systemd/system/docker.service
添加: -H tcp://0.0.0.0:2375 -H unix:///var/run/docker.sock

3.重启docker
 systemctl daemon-reload
 systemctl start docker
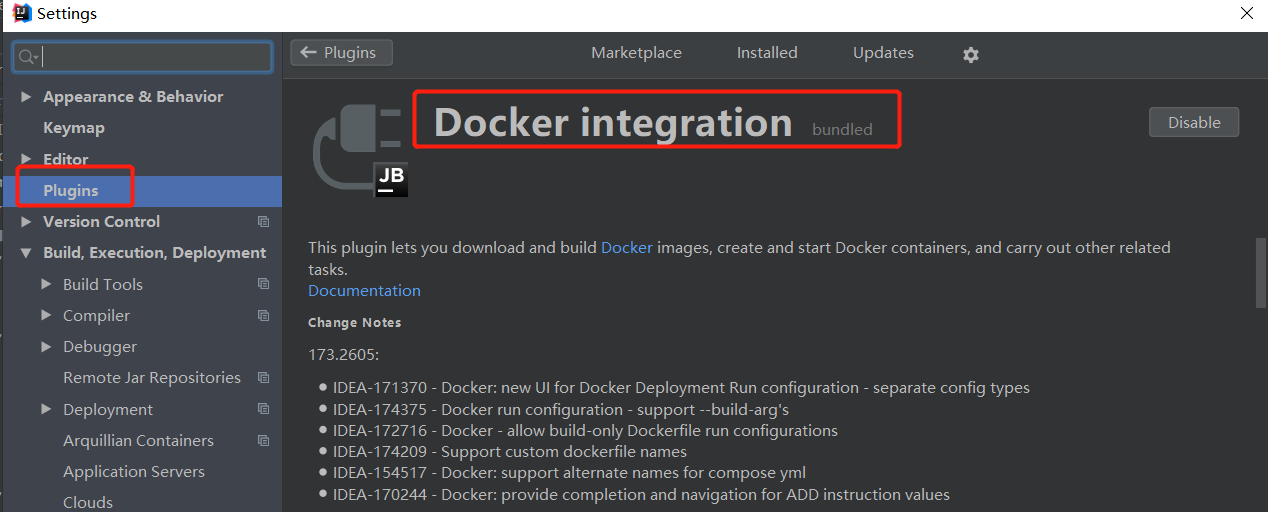
4、idea安装插件
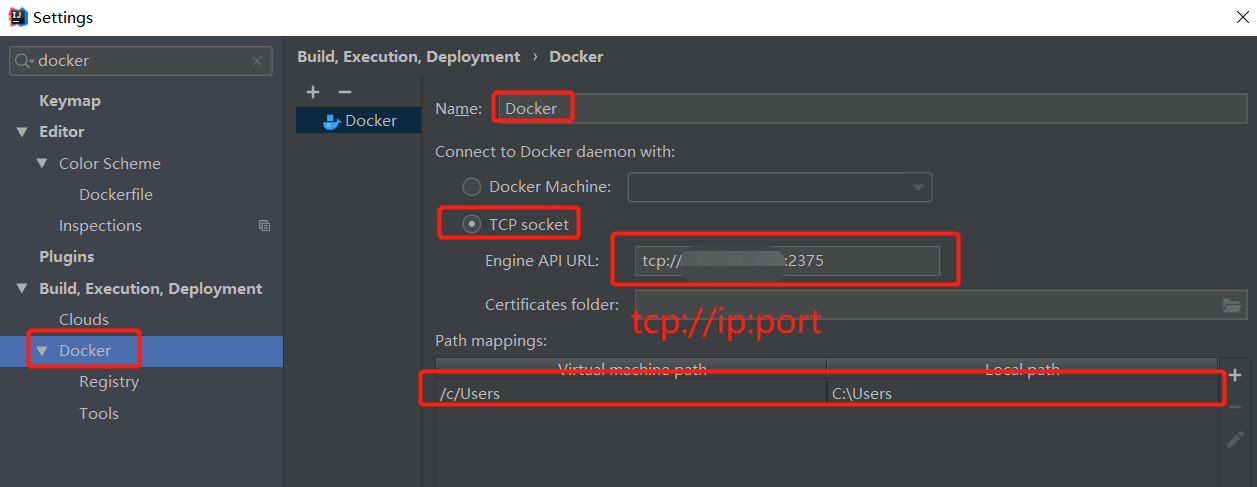
5、填写远程docker地址
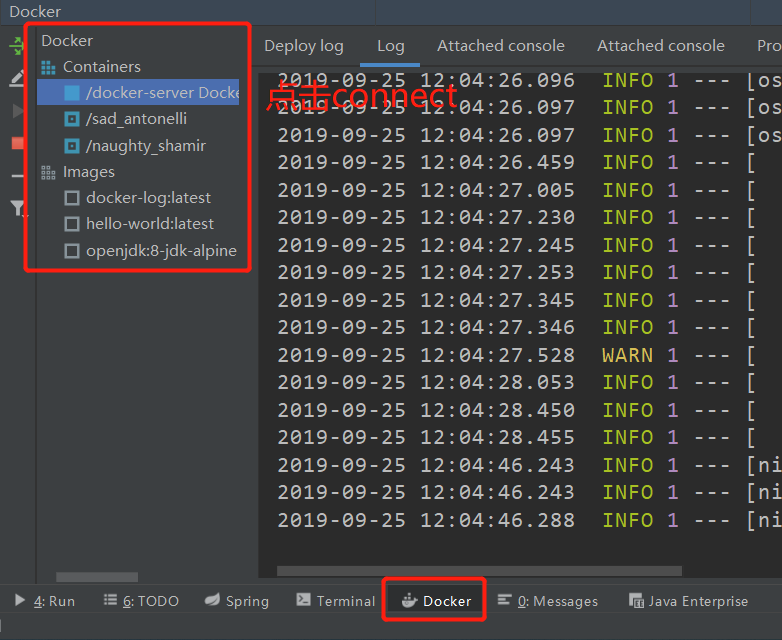
6、连接远程docker
7、创建一个springboot项目,这里不做介绍了
8、springboot pom配置文件

<?xml version="1.0" encoding="UTF-8"?>
<project xmlns="http://maven.apache.org/POM/4.0.0" xmlns:xsi="http://www.w3.org/2001/XMLSchema-instance"
         xsi:schemaLocation="http://maven.apache.org/POM/4.0.0 https://maven.apache.org/xsd/maven-4.0.0.xsd">
    <modelVersion>4.0.0</modelVersion>
    <parent>
        <groupId>org.springframework.boot</groupId>
        <artifactId>spring-boot-starter-parent</artifactId>
        <version>2.0.5.RELEASE</version>
        <relativePath/> <!-- lookup parent from repository -->
    </parent>
    <groupId>com.elk</groupId>
    <artifactId>log</artifactId>
    <version>0.0.1-SNAPSHOT</version>
    <name>log</name>
    <description>Demo project for Spring Boot</description>

    <properties>
        <java.version>1.8</java.version>
    </properties>

    <dependencies>
        <dependency>
            <groupId>org.springframework.boot</groupId>
            <artifactId>spring-boot-starter-web</artifactId>
        </dependency>

        <dependency>
            <groupId>mysql</groupId>
            <artifactId>mysql-connector-java</artifactId>
            <scope>runtime</scope>
        </dependency>
        <dependency>
            <groupId>org.springframework.boot</groupId>
            <artifactId>spring-boot-starter-test</artifactId>
            <scope>test</scope>
        </dependency>
        <dependency>
            <groupId>org.springframework.boot</groupId>
            <artifactId>spring-boot-starter-thymeleaf</artifactId>
        </dependency>
        <dependency>
            <groupId>com.alibaba</groupId>
            <artifactId>fastjson</artifactId>
            <version>1.2.58</version>
        </dependency>
    </dependencies>

    <build>
        <plugins>
            <plugin>
                <groupId>org.springframework.boot</groupId>
                <artifactId>spring-boot-maven-plugin</artifactId>
            </plugin>
            <plugin>
                <groupId>com.spotify</groupId>
                <artifactId>docker-maven-plugin</artifactId>
                <version>1.0.0</version>
                <configuration>
                    <dockerDirectory>src/main/docker</dockerDirectory>
                    <resources>
                        <resource>
                            <targetPath>/</targetPath>
                            <directory>${project.build.directory}</directory>
                            <include>${project.build.finalName}.jar</include>
                        </resource>
                    </resources>
                </configuration>
            </plugin>
            <plugin>
                <artifactId>maven-antrun-plugin</artifactId>
                <executions>
                    <execution>
                        <phase>package</phase>
                        <configuration>
                            <tasks>
                                <copy todir="src/main/docker" file="target/${project.artifactId}-${project.version}.${project.packaging}"></copy>
                            </tasks>
                        </configuration>
                        <goals>
                            <goal>run</goal>
                        </goals>
                    </execution>
                </executions>
            </plugin>

        </plugins>
    </build>

</project>
9、在src/main目录下创建docker目录,并创建Dockerfile文件
FROM openjdk:8-jdk-alpine
ADD *.jar app.jar
ENTRYPOINT ["java","-Djava.security.egd=file:/dev/./urandom","-jar","/app.jar"]
10、添加docker启动

具体解释:
-
Image tag : 指定镜像名称和tag,镜像名称为 docker-demo,tag为1.1
-
Bind ports : 绑定宿主机端口到容器内部端口。格式为[宿主机端口]:[容器内部端口]
-
Bind mounts : 将宿主机目录挂到到容器内部目录中。
格式为[宿主机目录]:[容器内部目录]。这个springboot项目会将日志打印在容器 /home/developer/app/logs/ 目录下,将宿主机目录挂载到容器内部目录后,那么日志就会持久化容器外部的宿主机目录中。
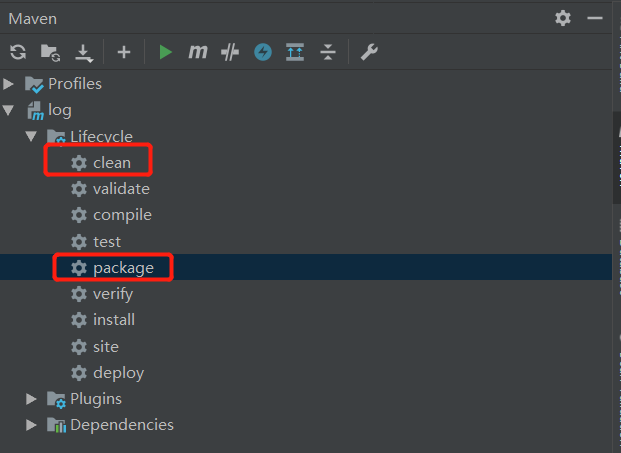
11、maven打包:先clean再package,如果是SUCESS,则可以进行下一步运行
12、运行
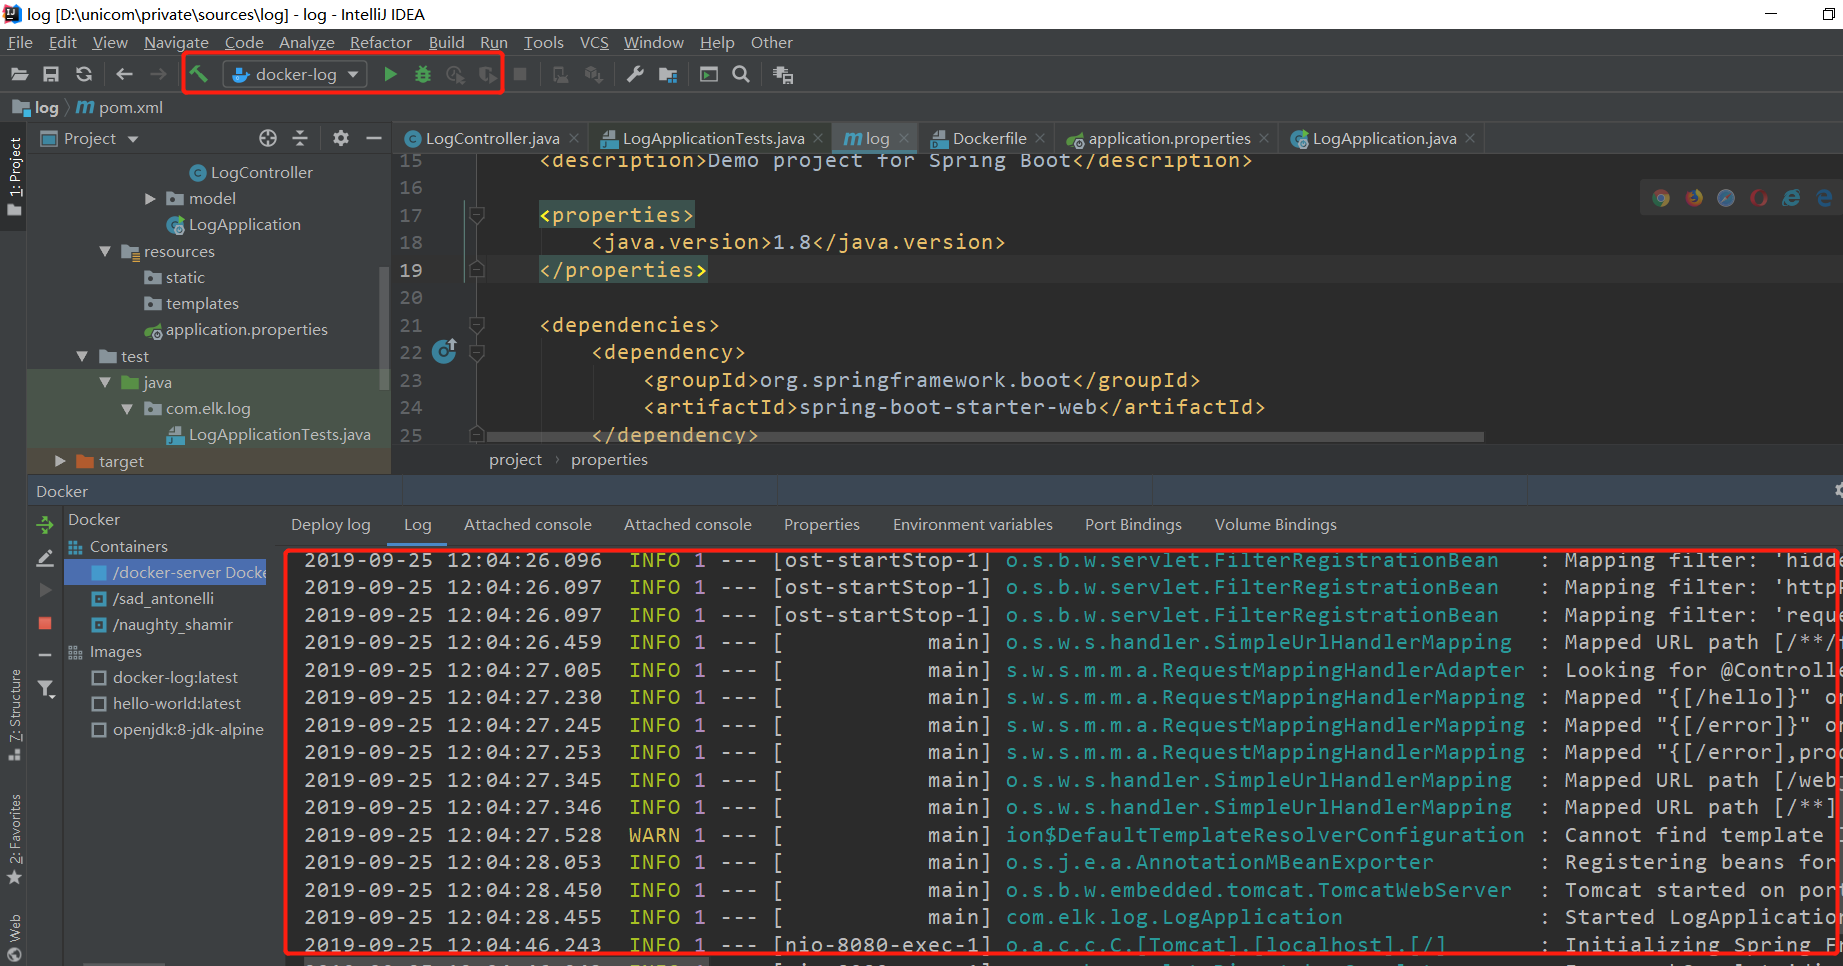
如果没有报错,则可以在centos上执行命令,看容器是否已经运行。

本文来自博客园,作者:小白啊小白,Fighting,转载请注明原文链接:https://www.cnblogs.com/ywjfx/p/11587232.html


