【Spring Boot】四、任务(定时,异步,邮件)
一.定时任务
开启定时任务(在Spring Boot项目主程序上添加如下注解)
@EnableScheduling //开启定时任务的注解
创建定时任务(创建一个Service如下)
@Service
public class TestScheduleService {
    //@Scheduled(cron = "* * * * * *")    //任意秒,任意分,任意时,任意天,任意月,任意周几执行计划
    @Scheduled(cron = "1/5 45-50 10-11 9,10 4 1-7")//周一到周日,4月份,9号和10号,10点到11点,45分到50分钟的1秒将会执行计划,并且每5s执行一次
    public void test(){
        System.out.println("定时器执行了");
    }
}
运行主程序,测试结果如下

二.异步任务
开启异步任务注解(在Spring Boot项目主程序上添加如下注解)
@EnableAsync //开启异步任务的注解
创建controller
@Controller
public class MyController {
    @Autowired
    TestAsynService testAsynService;
    @RequestMapping("/home")
    @ResponseBody
    public String home(){
        testAsynService.asynTask();
        return "welcome";
    }
}
创建service,并开启异步任务
@Service
public class TestAsynService {

    @Async  //开启异步任务
    public void asynTask(){
        try {
            Thread.sleep(6000);
            System.out.println("异步任务执行了");
        } catch (InterruptedException e) {
            e.printStackTrace();
        }
    }
}
访问http://localhost:8080/home发现立即进入页面,不需要等待6s,而6s后,控制台打印

三.邮件任务
导入相关的依赖:
<dependency>
            <groupId>org.springframework.boot</groupId>
            <artifactId>spring-boot-starter-mail</artifactId>
        </dependency>
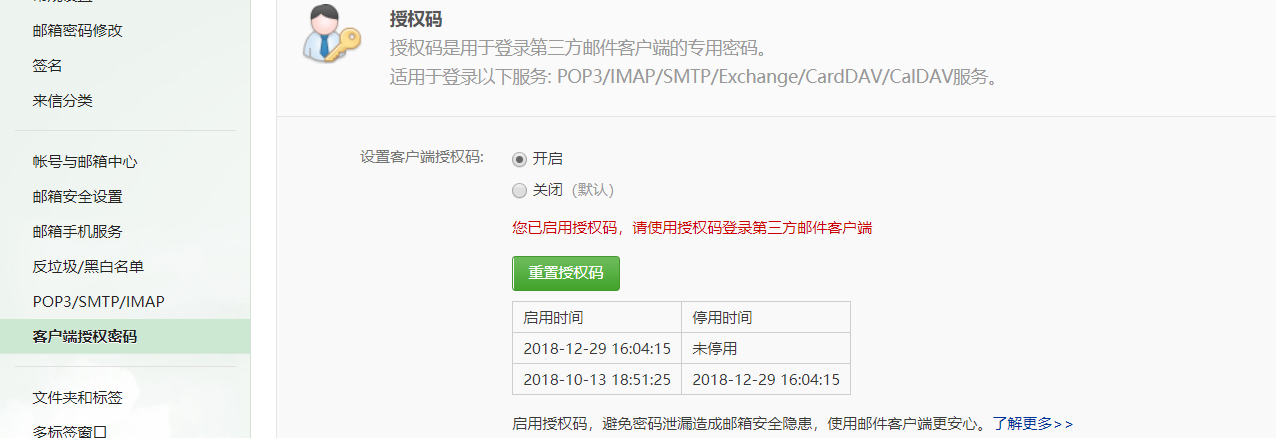
在邮箱中开启授权码:(以126邮箱为例)

设置一个授权码后开启客户端授权码,例如:

修改配置文件:
#发送者邮箱账号
spring.mail.username=*
#发送者邮箱客户端授权码
spring.mail.password=*
spring.mail.host=smtp.126.com
如果测试出现Error: A secure connection is required......
则可以添加一行配置:spring.mail.properties.mail.smtp.ssl.enable=true
编写代码测试:
@Autowired
    JavaMailSenderImpl javaMailSender;
    @Test
    public void contextLoads() {
        SimpleMailMessage message = new SimpleMailMessage();//简单邮件
        message.setTo("");//目标邮箱
        message.setFrom("");//发送者邮箱
        message.setSentDate(new Date());//发送时间
        message.setSubject("");//邮件的标题
        message.setText("");//发送邮件的内容
        javaMailSender.send(message);
    }

