
react组件
1,函数组件
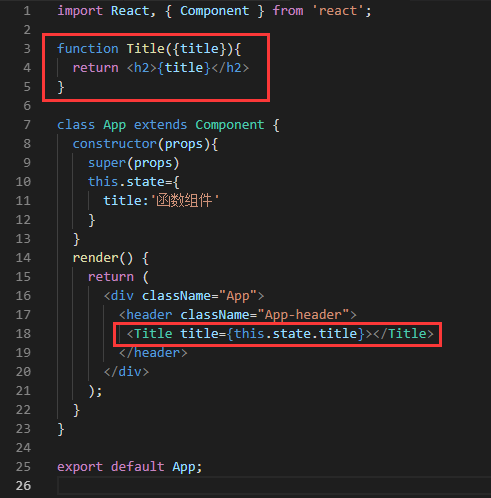
React 提供了两种方式来声明组件,一种是函数式,一种是类式,就是用es6 class, 我们所有的组件都继承自React.Component,函数式很简单,就像我们平常写函数一个,接受一个参数作为输入,然后进行相应的输出,只不过它输出的是jsx。如果一个组件只根据props渲染页面,没有内部的state,我们完全可以用函数组件的形式来实现。
 ,
,
2,容器组件&展示组件
在react中,为了将功能进行更好区分,通常将组件分为容器组件和展示组件:容器组件负责数据获取,展示组件负责根据props显示信息。这样进行区分以后,提高了复用性和可用性,项目更易于测试。
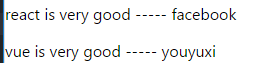
例如,我们需要展示一个列表,为此,需要新建组件List(无特别说明的情况下,本文的组件都是写在src文件夹目录下的components文件夹下面,然后在index.js中引入并使用该组件),那么该组件就是一个容器组件,展示的列表中的每一项都是统一格式,所以可以新建一个展示组件Comment,用来显示数据项:

import React, { Component} from "react";

function Comment({data}){
    return (
        <div>
            <p>{data.body} ----- {data.author}</p>
        </div>
    )
}

export default class CommentList extends Component {
  constructor(props) {
    super(props);
    this.state = {
        comments: [
            { body: "react is very good", author: "facebook" },
            { body: "vue is very good", author: "youyuxi" }
          ]
    };
  }

  render() {
    return (
      <div>
        {this.state.comments.map((c, i) => (
          <Comment key={i} data={c} />
        ))}
      </div>
    );
  }
}
3,PureComponent
3.1 shouldComponentUpdate
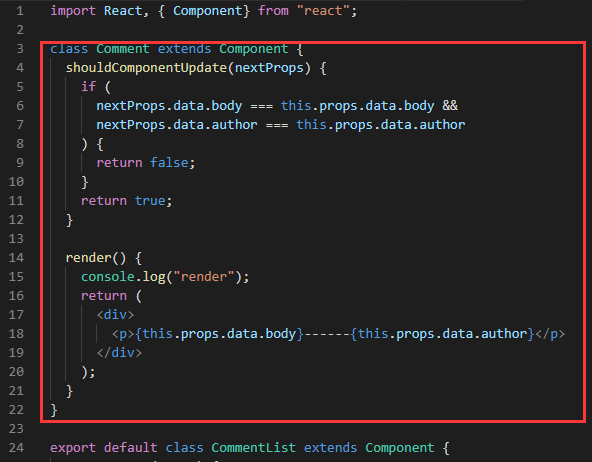
在上面的例子中,我们的数据是直接定义的,在实际的运用过程中,数据通常是动态获取的,但是有的时候,两次获取的数据是相同的,这个时候,我们希望节省开销,不再重新渲染DOM,但是在上面的例子,虽然DOM不会重新渲染,但是组件会重新render,这样依旧会产生新的开销。此时,我们可以借助生命周期函数shouldComponentUpdate来实现,既然是生命周期函数,就不能使用函数组件了,因此,需要对上面的组件进行下面这样的操作:
import React, { Component} from "react";

class Comment extends Component {
  shouldComponentUpdate(nextProps) {
    if (
      nextProps.data.body === this.props.data.body &&
      nextProps.data.author === this.props.data.author
    ) {
      return false;
    }
    return true;
  }

  render() {
    console.log("render");
    return (
      <div>
        <p>{this.props.data.body}------{this.props.data.author}</p>
      </div>
    );
  }
}

export default class CommentList extends Component {
  constructor(props) {
    super(props);
    this.state = {
        comments: []
    };
  }

  componentDidMount() {
    setInterval(() => {
      this.setState({
        comments: [
          { body: "react is very good", author: "facebook" },
          { body: "vue is very good", author: "youyuxi" }
        ]
      });
    }, 1000);
  }

  render() {
    return (
      <div>
        {this.state.comments.map((c, i) => (
          <Comment key={i} data={c} />
        ))}
      </div>
    );
  }
}

通过当前值和上一次值得比较,来决定shouldComponentUpdate的返回值:使用shouldComponentUpdate()以让React知道当前状态或属性的改变是否不影响组件的输出,默认返回ture,返回false时不会重写render,而且该方法并不会在初始化渲染或当使用forceUpdate()时被调用。
3.2 PureComponent
在上面的例子中,最后我们通过shouldComponentUpdate减少了不必要的render,节省了部分开销,但是,每次都要写比较判断语句,无疑增加了代码量,在react中,有一个更好的组件能解决当前的问题:PureComponent,这个组件和Component 几乎完全相同,但 PureComponent 通过props和state的浅对比来实现 shouldComponentUpate()。所谓的浅比较,意思就是如果对象包含复杂的数据结构,它可能会因深层的数据不一致而产生错误的否定判断(表现为对象深层的数据已改变视图却没有更新),这里,我们继续修改上面的代码:
修改前:
修改后:

修改以后,代码量的确减少了很多,但是,并没有实现我们的目的:

因为数据结构复杂,产生了错误判断,所以,还需要借助es6的语法,进行数据解套:
import React, { Component,PureComponent} from "react";

class Comment extends PureComponent {

  render() {
    console.log("render");
    return (
      <div>
        <p>{this.props.body}------{this.props.author}</p>
      </div>
    );
  }
}

export default class CommentList extends Component {
  constructor(props) {
    super(props);
    this.state = {
        comments: []
    };
  }

  componentDidMount() {
    setInterval(() => {
      this.setState({
        comments: [
          { body: "react is very good", author: "facebook" },
          { body: "vue is very good", author: "youyuxi" }
        ]
      });
    }, 1000);
  }

  render() {
    return (
      <div>
        {this.state.comments.map((c, i) => (
          <Comment key={i} {...c} />
        ))}
      </div>
    );
  }
}
这里,可以适当的总结一下PureComponent的使用原则:
1,数据是值类型;
2,如果数据是引用类型,需确保地址不变,同时不应当有深层次数据变化。
3,组件必须是class形式,不能是函数组件
4,React.memo
在React v16.6.0之后的版本,可以使用一个新功能React.memo来完美实现React组件,让函数式的组件,也有了PureComponent的功能。因为PureComponent能有效的减少不必要的render,但是不能使用函数式组件,React.memo就能解决这个问题了,继续修改上面的代码:
import React, { Component} from "react";

const Comment = React.memo(({ body, author }) => {
  console.log("render");

  return (
    <div>
      <p>{body}------{author}</p>
    </div>
  );
});

export default class CommentList extends Component {
  constructor(props) {
    super(props);
    this.state = {
        comments: []
    };
  }

  componentDidMount() {
    setInterval(() => {
      this.setState({
        comments: [
          { body: "react is very good", author: "facebook" },
          { body: "vue is very good", author: "youyuxi" }
        ]
      });
    }, 1000);
  }

  render() {
    return (
      <div>
        {this.state.comments.map((c, i) => (
          <Comment key={i} {...c} />
        ))}
      </div>
    );
  }
}

代码下载:点这里
5,组件复合而非组件继承
5.1 基本的组件复合
在components文件夹下面新建Composition.js组件文件,并在index.js中引入该组件,实现最基本的组件复合:
Composition.js
import React, { Component } from "react";

function Dialog(props) {
  return (
    <div style={{ border: '4px solid blue'}}>{props.children}</div>
  );
}

function WelcomeDialog() {
  return (
    <Dialog color="green" >
      <h1>欢迎光临</h1>
      <p>感谢使用react!!!</p>
    </Dialog>
  );
}

export default class Composition extends Component {
  render() {
    return (
      <div>
        <WelcomeDialog />
      </div>
    );
  }
}
index.js


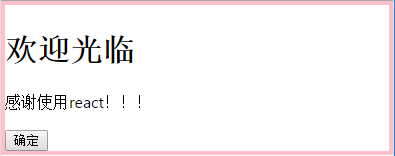
5.2 组件复合的交互
修改上面的Composition.js文件:
import React, { Component } from "react";

function Dialog(props) {
  return (
    <div style={{ border: `4px solid ${props.color || "blue"}` }}>
      {/* 等效vue中匿名插槽 */}
      {props.children}
      {/* 等效vue中具名插槽 */}
      <div className="abc">{props.footer}</div>
    </div>
  );
}

function WelcomeDialog() {
  const confirmBtn = (
    <button onClick={() => alert("react确实好!")}>确定</button>
  );
  return (
    <Dialog color="pink" footer={confirmBtn}>
      <h1>欢迎光临</h1>
      <p>感谢使用react!!!</p>
    </Dialog>
  );
}

export default class Composition extends Component {
  render() {
    return (
      <div>
        <WelcomeDialog />
      </div>
    );
  }
}
代码下载:点这里


【推荐】国内首个AI IDE,深度理解中文开发场景,立即下载体验Trae
【推荐】编程新体验,更懂你的AI,立即体验豆包MarsCode编程助手
【推荐】抖音旗下AI助手豆包,你的智能百科全书,全免费不限次数
【推荐】轻量又高性能的 SSH 工具 IShell:AI 加持,快人一步
· AI与.NET技术实操系列:向量存储与相似性搜索在 .NET 中的实现
· 基于Microsoft.Extensions.AI核心库实现RAG应用
· Linux系列:如何用heaptrack跟踪.NET程序的非托管内存泄露
· 开发者必知的日志记录最佳实践
· SQL Server 2025 AI相关能力初探
· 震惊!C++程序真的从main开始吗?99%的程序员都答错了
· winform 绘制太阳,地球,月球 运作规律
· 【硬核科普】Trae如何「偷看」你的代码?零基础破解AI编程运行原理
· 超详细:普通电脑也行Windows部署deepseek R1训练数据并当服务器共享给他人
· 上周热点回顾(3.3-3.9)