
SSH 框架整合(maven版本 xml配置方式)
如何整合Struts2 Hibernate 和Spring 首先你必须了解三个框架是如何独立运行的:
代码下载:http://download.csdn.net/detail/zhanglinlang/9775160
Struts2 是通过在web.xml 中 Filter拦截器来启动自己的核心类StrutsPrepareAndExecuteFilter,完成事件的分发。
Spring 是通过 在web.xml 注册监听器来监听ContextLoaderListener,监听web应用的启动事件来完成自己的框架启动工作。
Hibernate 是通过创建SessionFactory工厂手动加载配置文件来完成启动工作,Hibernate是可以通过代码创建SessionFactory,就可以交给Spring通过ioc来控制该类的实例化。
下面就是整合代码:目录结构如下
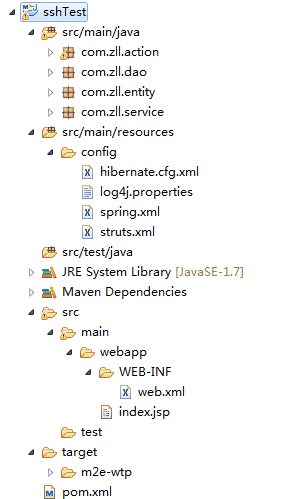
首先在resource目录下创建 config目录方便管理:
首先配置
Hibernate :
1 2 3 4 5 6 7 8 9 10 11 12 13 14 15 16 17 18 19 20 21 22 23 24 25 26 27 28 29 30 31 32 33 34 35 36 37 38 39 40 41 42 43 44 45 46 47 48 49 | <!DOCTYPE hibernate-configuration PUBLIC "-//Hibernate/Hibernate Configuration DTD 3.0//EN" "http://www.hibernate.org/dtd/hibernate-configuration-3.0.dtd"><hibernate-configuration> <session-factory name="foo"> <!-- 配置 打印sql语句到控制台 可选 --> <property name="hibernate.show_sql">true</property> <property name="hibernate.format_sql">true</property> <!-- (重要配置)Hibernate自动建表 配置 create:先删除,再创建 update:如果表不存在就创建,不一样就更新,一样就什么都不做。 create-drop:初始化时创建表,SessionFactory执行close()时删除表。 validate:验证表结构是否一致,如果不一致,就抛异常。 --> <property name="hbm2ddl.auto">update</property> <!-- 设置默认的事务隔离级别: 隔离级别 对应的整数表示 READ UNCOMMITED 1 READ COMMITED 2 REPEATABLE READ 4 SERIALIZEABLE 8 --> <property name="connection.isolation">4</property> <!-- 使用二级缓存,默认是未打开的。 --> <!-- 指定要使用的缓存的提供商,这也就打开了二级缓存 <property name="cache.provider_class">org.hibernate.cache.HashtableCacheProvider</property> <property name="cache.provider_class">org.hibernate.cache.EhCacheProvider</property> --> <!-- 开启使用查询缓存 <property name="cache.use_query_cache">true</property> --> <!-- 指定要使用二级缓存的实体类 <class-cache usage="read-write" class="cn.itcast.l_second_cache.Employee"/> <class-cache usage="read-write" class="cn.itcast.l_second_cache.Department"/> <collection-cache usage="read-write" collection="cn.itcast.l_second_cache.Department.employees"/> --> <!-- 导入映射文件 --> <mapping resource="com/zll/entity/User.hbm.xml"/> <mapping resource="com/zll/entity/Student.hbm.xml"/> </session-factory></hibernate-configuration> |
Struts.xml
1 2 3 4 5 6 7 8 9 10 11 | <?xml version="1.0" encoding="UTF-8" ?><!DOCTYPE struts PUBLIC "-//Apache Software Foundation//DTD Struts Configuration 2.0//EN" "http://struts.apache.org/dtds/struts-2.0.dtd"><struts> <package name="person" namespace="/" extends="struts-default"> <!-- (测试使用)action的创建交给Spring来管理,这里的class 只需要填写spring里对应action对象的bean的id --> <action name="userAction" class="userAction" /> </package></struts> |
Spring.xml:
1 2 3 4 5 6 7 8 9 10 11 12 13 14 15 16 17 18 19 20 21 22 23 24 25 26 27 28 29 30 31 32 33 34 35 36 37 38 39 40 41 | <?xml version="1.0" encoding="UTF-8"?><beans xmlns="http://www.springframework.org/schema/beans" xmlns:xsi="http://www.w3.org/2001/XMLSchema-instance" xmlns:context="http://www.springframework.org/schema/context" xmlns:aop="http://www.springframework.org/schema/aop" xmlns:tx="http://www.springframework.org/schema/tx" xsi:schemaLocation="http://www.springframework.org/schema/beans http://www.springframework.org/schema/beans/spring-beans-2.5.xsd http://www.springframework.org/schema/context http://www.springframework.org/schema/context/spring-context-2.5.xsd http://www.springframework.org/schema/aop http://www.springframework.org/schema/aop/spring-aop-2.5.xsd http://www.springframework.org/schema/tx http://www.springframework.org/schema/tx/spring-tx-2.5.xsd"> <!-- (重要步骤)c3p0连接池配置 --> <bean id="dataSource" class="com.mchange.v2.c3p0.ComboPooledDataSource"> <property name="driverClass" value="com.mysql.jdbc.Driver"></property> <property name="jdbcUrl" value="jdbc:mysql:///hibernate?characterEncoding=utf-8"></property> <property name="user" value="root"></property> <property name="password" value="root"></property> </bean> <!-- (重要步骤)spring整合Hibernate配置,这里将Hibernate创建sessionFactory的方法交给Spring管理。 --> <bean id="sessionFactory" class="org.springframework.orm.hibernate4.LocalSessionFactoryBean"> <property name="dataSource" ref="dataSource"></property> <property name="configLocations" value="classpath:config/hibernate.cfg.xml"></property> </bean> <!-- (重要步骤)配置Hibernate 事务 如果不开启,数据库是 read_only状态 --> <bean id="transactionManager" class="org.springframework.orm.hibernate4.HibernateTransactionManager"> <property name="sessionFactory" ref="sessionFactory"></property> </bean> <!-- 开启事务注解 --> <tx:annotation-driven transaction-manager="transactionManager"/> <!-- 配置Hibernate 的jdbc模板 --> <bean id="hibernateTemplate" class="org.springframework.orm.hibernate4.HibernateTemplate"> <property name="sessionFactory" ref="sessionFactory"></property> </bean> <!-- 测试代码,通过导入文件方式,可以将多个模块分开配置 --> <import resource="classpath:config/testTemple.xml"/></beans> |
testTemple.xml(这个不重要,看看如何配置就行)
1 2 3 4 5 6 7 8 9 10 11 12 13 14 15 16 17 18 19 20 21 22 23 24 25 26 | <?xml version="1.0" encoding="UTF-8"?><beans xmlns="http://www.springframework.org/schema/beans" xmlns:xsi="http://www.w3.org/2001/XMLSchema-instance" xmlns:context="http://www.springframework.org/schema/context" xmlns:aop="http://www.springframework.org/schema/aop" xmlns:tx="http://www.springframework.org/schema/tx" xsi:schemaLocation="http://www.springframework.org/schema/beans http://www.springframework.org/schema/beans/spring-beans-2.5.xsd http://www.springframework.org/schema/context http://www.springframework.org/schema/context/spring-context-2.5.xsd http://www.springframework.org/schema/aop http://www.springframework.org/schema/aop/spring-aop-2.5.xsd http://www.springframework.org/schema/tx http://www.springframework.org/schema/tx/spring-tx-2.5.xsd"> <!-- 配置测试用的实体类 --> <bean id="userAction" class="com.zll.action.UserAction" scope="prototype"> <property name="userService" ref="userService"></property> </bean> <bean id="userService" class="com.zll.service.UserService"> <property name="userDao" ref="userDaoImp"></property> </bean> <bean id="userDaoImp" class="com.zll.dao.UserDaoImp"> <property name="hibernateTemplate" ref="hibernateTemplate"></property> </bean></beans> |
最重要的:
web.xml
1 2 3 4 5 6 7 8 9 10 11 12 13 14 15 16 17 18 19 20 21 22 23 24 25 26 27 28 29 30 31 32 33 | <!DOCTYPE web-app PUBLIC "-//Sun Microsystems, Inc.//DTD Web Application 2.3//EN" "http://java.sun.com/dtd/web-app_2_3.dtd" ><web-app> <display-name>Archetype Created Web Application</display-name> <!-- Spring ContextLoaderListener 配置文件的设置,如果不配置 默认读取 WEB-INF下的applicationContext.xml --> <context-param> <param-name>contextConfigLocation</param-name> <param-value>classpath:config/spring.xml</param-value> </context-param> <!-- (重要配置) 注册struts的 StrutsPrepareAndExecuteFilter 类,拦截访问,并根据访问路径进行分发 --> <filter> <filter-name>struts2</filter-name> <filter-class>org.apache.struts2.dispatcher.ng.filter.StrutsPrepareAndExecuteFilter</filter-class> <init-param> <param-name>config</param-name> <param-value>struts-default.xml,struts-plugin.xml,config/struts.xml</param-value> </init-param> </filter> <!-- 拦截/* 的所有访问,都会交给 --> <filter-mapping> <filter-name>struts2</filter-name> <url-pattern>/*</url-pattern> </filter-mapping> <!-- (重要配置)Spring 启动代码,注册监听器,监听servlet启动, --> <listener> <listener-class>org.springframework.web.context.ContextLoaderListener</listener-class> </listener></web-app> |
最后pom.xml
1 2 3 4 5 6 7 8 9 10 11 12 13 14 15 16 17 18 19 20 21 22 23 24 25 26 27 28 29 30 31 32 33 34 35 36 37 38 39 40 41 42 43 44 45 46 47 48 49 50 51 52 53 54 55 56 57 58 59 60 61 62 63 64 65 66 67 68 69 70 71 72 73 74 75 76 77 78 79 80 81 82 83 84 85 86 87 88 89 90 91 92 93 94 95 96 97 98 99 100 101 102 103 104 105 106 107 108 109 110 111 112 113 114 115 116 117 118 119 120 121 122 123 124 125 126 127 128 129 130 131 132 133 134 135 136 137 138 139 140 141 142 143 144 145 146 147 148 149 150 151 152 153 154 155 156 157 158 159 160 161 162 163 164 165 166 167 168 169 170 171 172 173 174 175 176 177 178 179 180 181 182 183 184 185 186 187 188 189 190 191 192 193 194 195 196 197 198 199 200 201 202 203 204 205 206 207 208 209 210 211 212 213 214 215 216 217 218 219 220 221 222 223 224 225 226 227 228 229 230 231 232 233 234 235 236 237 238 239 240 241 242 243 244 245 | <project xmlns="http://maven.apache.org/POM/4.0.0" xmlns:xsi="http://www.w3.org/2001/XMLSchema-instance" xsi:schemaLocation="http://maven.apache.org/POM/4.0.0 http://maven.apache.org/maven-v4_0_0.xsd"> <modelVersion>4.0.0</modelVersion> <groupId>com.zll</groupId> <artifactId>sshTest</artifactId> <packaging>war</packaging> <version>0.0.1-SNAPSHOT</version> <name>sshTest Maven Webapp</name> <url>http://maven.apache.org</url> <properties> <project.build.sourceEncoding>UTF-8</project.build.sourceEncoding> <spring.version>4.1.4.RELEASE</spring.version> <hibernate.version>4.3.8.Final</hibernate.version> <struts2.version>2.3.20</struts2.version> <jackson.version>2.5.0</jackson.version> </properties> <dependencies> <!-- junit --> <dependency> <groupId>junit</groupId> <artifactId>junit</artifactId> <version>4.12</version> <scope>test</scope> </dependency> <!-- spring --> <dependency> <groupId>org.springframework</groupId> <artifactId>spring-core</artifactId> <version>${spring.version}</version> </dependency> <dependency> <groupId>org.springframework</groupId> <artifactId>spring-beans</artifactId> <version>${spring.version}</version> </dependency> <dependency> <groupId>org.springframework</groupId> <artifactId>spring-context</artifactId> <version>${spring.version}</version> </dependency> <dependency> <groupId>org.springframework</groupId> <artifactId>spring-tx</artifactId> <version>${spring.version}</version> </dependency> <dependency> <groupId>org.springframework</groupId> <artifactId>spring-web</artifactId> <version>${spring.version}</version> </dependency> <dependency> <groupId>org.springframework</groupId> <artifactId>spring-test</artifactId> <version>${spring.version}</version> <scope>provided</scope> </dependency> <!-- 关系型数据库整合时需配置 如hibernate jpa等 --> <dependency> <groupId>org.springframework</groupId> <artifactId>spring-orm</artifactId> <version>${spring.version}</version> </dependency> <!-- hibernate --> <dependency> <groupId>org.hibernate</groupId> <artifactId>hibernate-core</artifactId> <version>${hibernate.version}</version> </dependency> <dependency> <groupId>org.hibernate</groupId> <artifactId>hibernate-ehcache</artifactId> <version>${hibernate.version}</version> </dependency> <!-- struts2 --> <dependency> <groupId>org.apache.struts</groupId> <artifactId>struts2-core</artifactId> <version>${struts2.version}</version> <exclusions> <exclusion> <!-- Hibernate已经还有该包的依赖 --> <artifactId>javassist</artifactId> <groupId>javassist</groupId> </exclusion> </exclusions> </dependency> <dependency> <groupId>org.apache.struts</groupId> <artifactId>struts2-spring-plugin</artifactId> <version>${struts2.version}</version> </dependency> <dependency> <groupId>org.apache.struts</groupId> <artifactId>struts2-convention-plugin</artifactId> <version>${struts2.version}</version> </dependency> <!-- log4j --> <dependency> <groupId>log4j</groupId> <artifactId>log4j</artifactId> <version>1.2.17</version> </dependency> <!-- mysql连接 --> <dependency> <groupId>mysql</groupId> <artifactId>mysql-connector-java</artifactId> <version>5.1.34</version> </dependency> <!-- 数据源 c3p0 --> <dependency> <groupId>com.mchange</groupId> <artifactId>c3p0</artifactId> <version>0.9.5-pre8</version> </dependency> <dependency> <groupId>com.mchange</groupId> <artifactId>mchange-commons-java</artifactId> <version>0.2.12</version> </dependency> <!-- json --> <dependency> <groupId>com.alibaba</groupId> <artifactId>fastjson</artifactId> <version>1.2.3</version> </dependency> <dependency> <groupId>com.fasterxml.jackson.core</groupId> <artifactId>jackson-annotations</artifactId> <version>${jackson.version}</version> </dependency> <dependency> <groupId>com.fasterxml.jackson.core</groupId> <artifactId>jackson-core</artifactId> <version>${jackson.version}</version> </dependency> <dependency> <groupId>com.fasterxml.jackson.core</groupId> <artifactId>jackson-databind</artifactId> <version>${jackson.version}</version> </dependency> <!-- aop --> <dependency> <groupId>org.aspectj</groupId> <artifactId>aspectjweaver</artifactId> <version>1.8.4</version> </dependency> <!-- servlet --> <dependency> <groupId>javax.servlet</groupId> <artifactId>servlet-api</artifactId> <version>3.0-alpha-1</version> <scope>provided</scope> </dependency> <dependency> <groupId>javax.servlet</groupId> <artifactId>jstl</artifactId> <version>1.2</version> </dependency> </dependencies> <build> <finalName>spring_struts2_Hibernate_demo</finalName> <plugins> <!-- Run the JUnit unit tests in an isolated classloader --> <plugin> <groupId>org.apache.maven.plugins</groupId> <artifactId>maven-surefire-plugin</artifactId> <version>2.4.2</version> <configuration> <skipTests>true</skipTests> </configuration> </plugin> <plugin> <groupId>org.apache.maven.plugins</groupId> <artifactId>maven-war-plugin</artifactId> <version>2.3</version> <configuration> <webXml>src/main/webapp/WEB-INF/web.xml</webXml> </configuration> </plugin> <!-- generate java doc --> <plugin> <groupId>org.apache.maven.plugins</groupId> <artifactId>maven-javadoc-plugin</artifactId> <version>2.9.1</version> <configuration> <javadocDirectory>target/javadoc</javadocDirectory> <reportOutputDirectory>target/javadoc</reportOutputDirectory> <charset>UTF-8</charset> <encoding>UTF-8</encoding> <docencoding>UTF-8</docencoding> <show>private</show> </configuration> </plugin> <!-- 部署至本机 --> <plugin> <groupId>org.codehaus.cargo</groupId> <artifactId>cargo-maven2-plugin</artifactId> <version>1.0</version> <configuration> <container> <containerId>tomcat6x</containerId> <home>F:\apache-tomcat-7.0.27</home> </container> <configuration> <type>existing</type> <home>F:\apache-tomcat-7.0.27</home> </configuration> </configuration> </plugin> </plugins> </build></project> |
整合细节知识点(了解):
Struts2 和 Spring整合:就是将action的创建交由Spring管理。配置文件中class只需要配置Spring中bean的id就可以。
1 | <action name="userAction" class="SpringBeanId" /> |
Hibernate和Spring整合:
1、创建连接池的对象交由spring管理
2、Spring提供了SessionFactory的封装类LocalSessionFactory,配置该类,并将数据源配置给它。
3、配置Spring的HibernateTemplate,将SessionFactory配置给他。替代session完成数据操作。
4、spring 事务管理配置,替代Hibernate事务管理


【推荐】国内首个AI IDE,深度理解中文开发场景,立即下载体验Trae
【推荐】编程新体验,更懂你的AI,立即体验豆包MarsCode编程助手
【推荐】抖音旗下AI助手豆包,你的智能百科全书,全免费不限次数
【推荐】轻量又高性能的 SSH 工具 IShell:AI 加持,快人一步
· AI与.NET技术实操系列:向量存储与相似性搜索在 .NET 中的实现
· 基于Microsoft.Extensions.AI核心库实现RAG应用
· Linux系列:如何用heaptrack跟踪.NET程序的非托管内存泄露
· 开发者必知的日志记录最佳实践
· SQL Server 2025 AI相关能力初探
· winform 绘制太阳,地球,月球 运作规律
· 震惊!C++程序真的从main开始吗?99%的程序员都答错了
· AI与.NET技术实操系列(五):向量存储与相似性搜索在 .NET 中的实现
· 超详细:普通电脑也行Windows部署deepseek R1训练数据并当服务器共享给他人
· 【硬核科普】Trae如何「偷看」你的代码?零基础破解AI编程运行原理