gitlab持续集成和自动化部署
一、CICD
CICD是持续集成(Continuous Integration)和持续交付(Continuous Delivery)简称。
持续集成通过即时将最新的代码,集成到主干分支,并进行相关的测试(单元测试、集成测试等)和静态检查(代码格式、代码质量等),以期提早发现问题。
持续交付,在持续集成完成之后,即时生成生产环境可用的产物(如二进制文件、包、或者Docker镜像)、并准备随时部署,如果伴随着部署过程,则称为持续部署(Continuous Deployment)。
二、Gitlab CICD
Gitlab内置CICD工具,不需要使用第三方工具,是需要在Gitlab的仓库的根目录中添加.gitlab-ci.yml文件。
1.安装gitlab-runner
参照官方文档安装(https://docs.gitlab.com/runner/install/linux-manually.html)
注意一个问题:
官方教程新建了gitlab-runner用户,需要确保gitlab-runner用户有权限访问,服务器的前端构建环境(npm、node)和部署目录
如果还没创建和运行gitlab-runner,可以选择在第4个步骤时,把以下命令跳过:
sudo useradd --comment 'GitLab Runner' --create-home gitlab-runner --shell /bin/bash
然后把第5个步骤的命令改成:
# admin 用户默认的 home 目录是 /home/admin
sudo gitlab-runner install --user=admin --working-directory=/home/admin
2.注册runner
官方文档(https://docs.gitlab.com/runner/register/index.html)
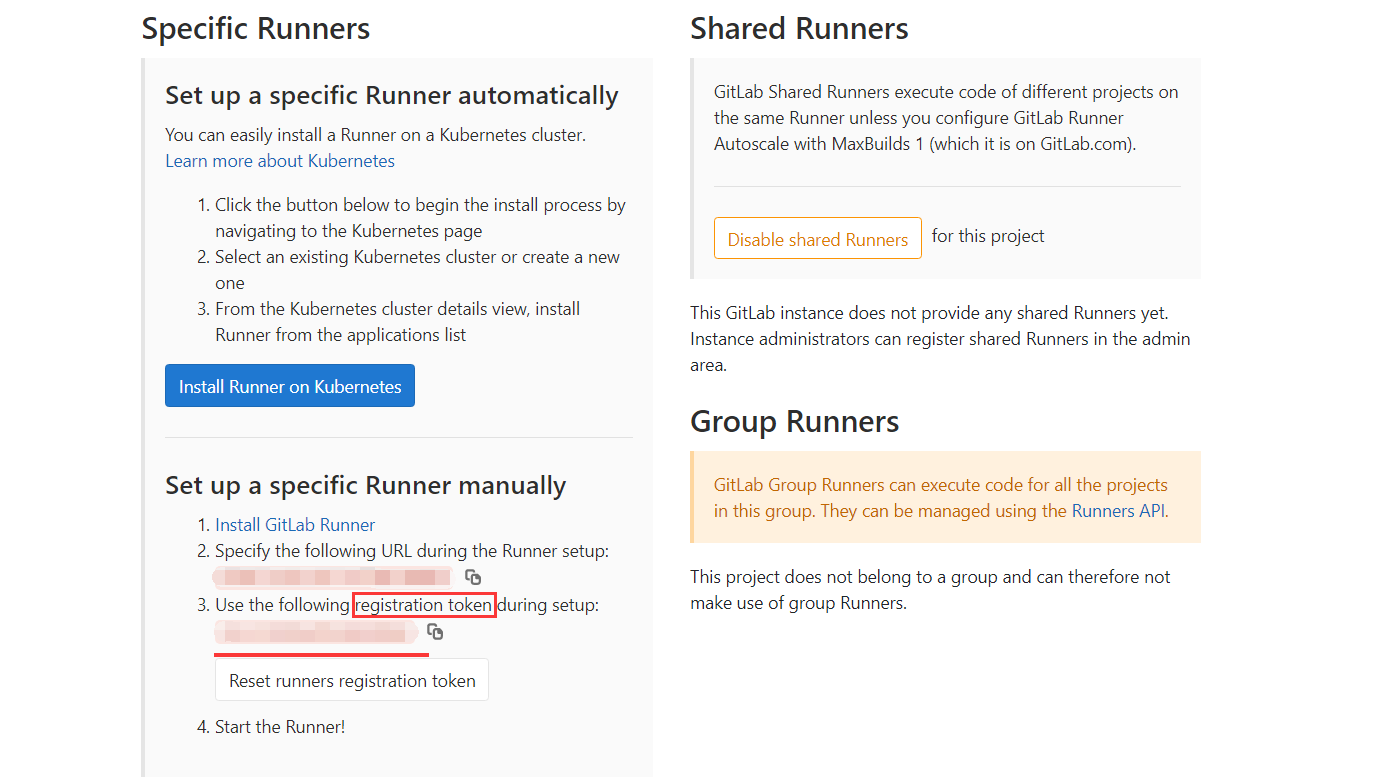
a.在gitlab的界面获取共享或者指定的runner的token
gitlab网站项目Settings ——CI / CD —— Runners下,复制3.Use the fololowing registration token during setup:下的token串

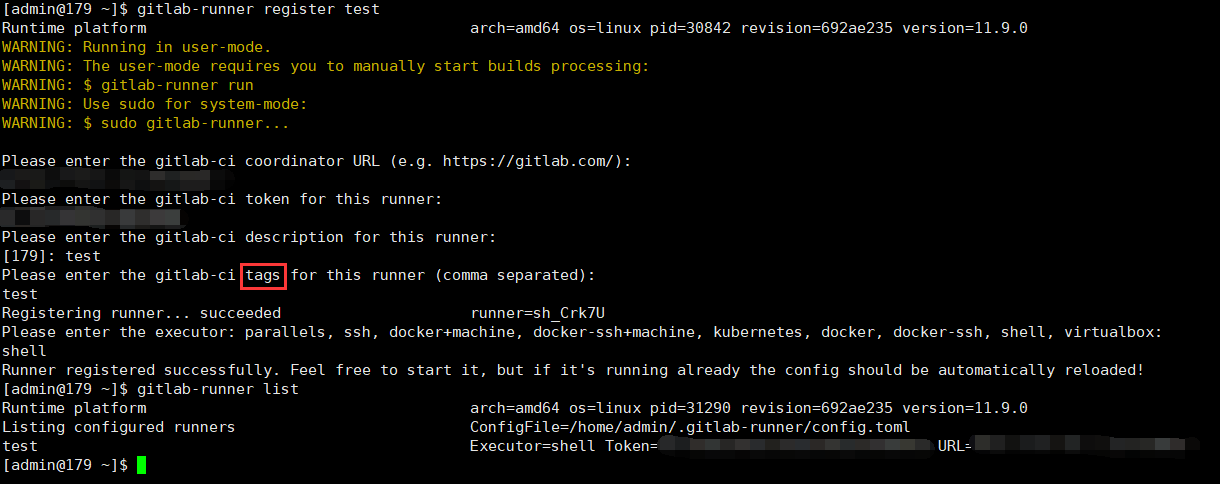
b.使用gitlab-runner register命令,注册一个runner

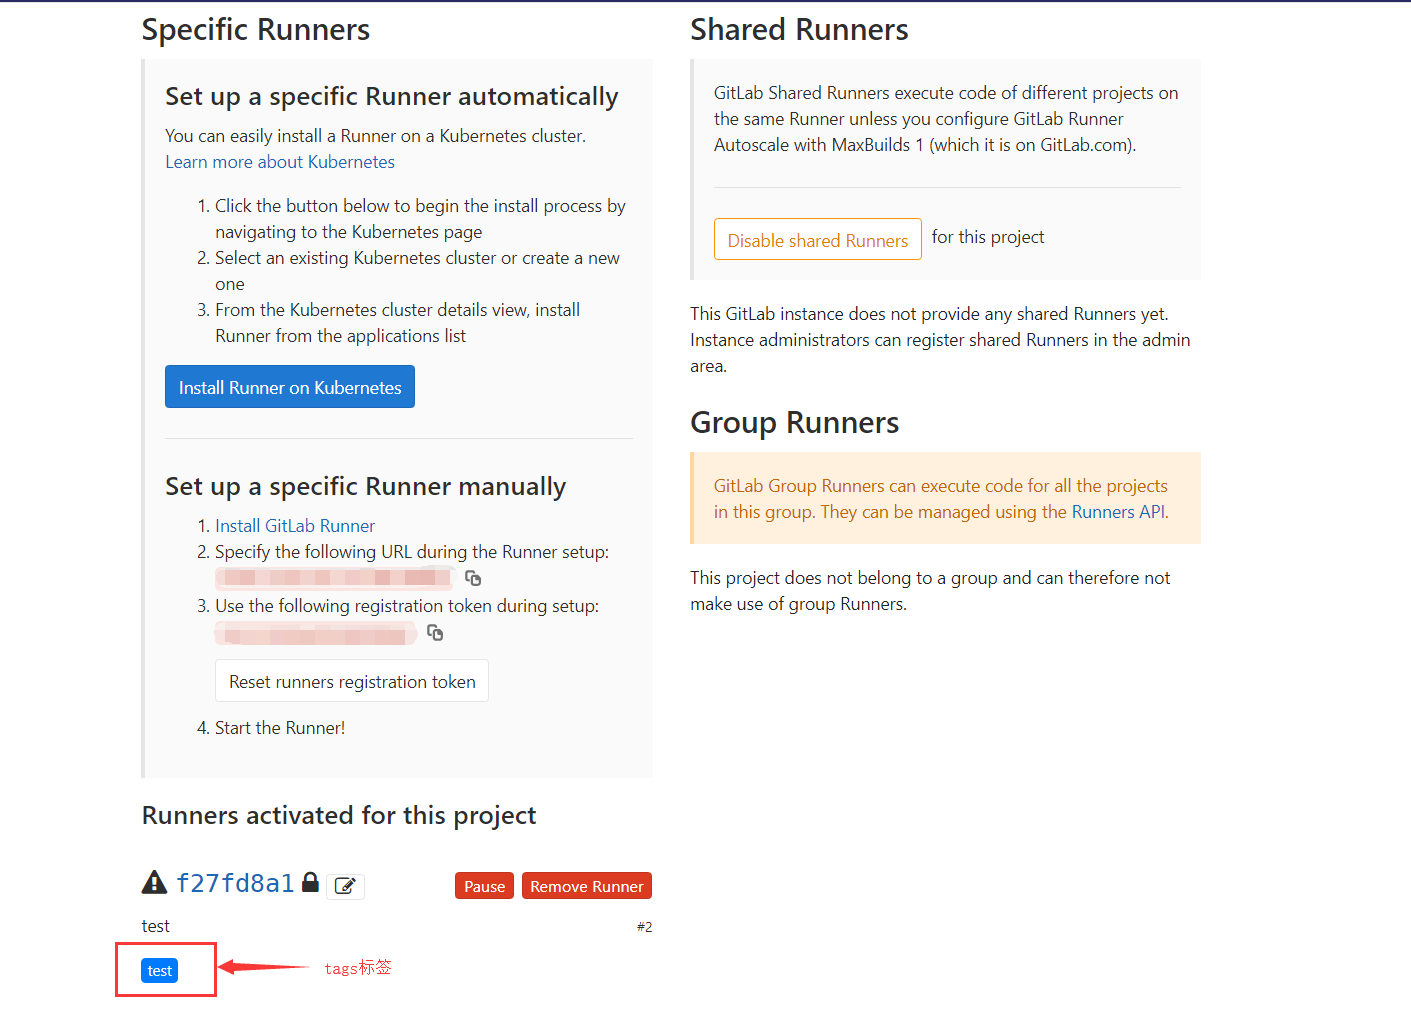
注意一下:在执行pipeline流水的时候,选择哪个runner是根据.gitlab-ci.yml配置文件中的tags来选择的,所以这里注册runner输入的tags是有用的,当然也可以在Gitlab网站上修改。
执行完步骤a,b操作,刷新gitlab网站,会在runners设置页面看到如下刚才步骤b注册的runner

点击“编辑”图标,可进行编辑,设置这个runner的相关信息。
4.存储库根目录添加.gitlab-ci.yml
Gitlab会根据该配置文件,在Runners上启动一个流水,执行相关作业。
详细配置参考官方文档(https://docs.gitlab.com/ee/ci/yaml/README.html)
三、使用Gitlab CICD实战
场景一
要求:自动构建+自动部署
这个比较简单,先不贴相关配置文件了。
场景二
要求:手动创建流水,输入环境变量,构建对应环境的前端包,产出构建产物并支持下载
stages:
   - build
   - package

cache:
  # untracked: true
  paths:
  - node_modules/
  - dist/

job_build:
  stage: build
  script:
    - pwd
    - echo "开始打包$ENV环境的前端包--------------"
    - echo "更新代码"
    - echo "开始编译"
    - npm install
    - aid build --env $ENV -N
    - echo "编译完成"
  when: manual
  artifacts:
    name: "base-portal.$ENV.$CI_COMMIT_SHORT_SHA"
    paths:
    - dist/
    expire_in: 1 day
  only:
    - web
  tags:
    - mzone-base-portal
参考文档
Gitlab CI/CD:https://docs.gitlab.com/ee/ci/README.html
Gitlab CI/CD 入门:https://docs.gitlab.com/ee/ci/quick_start/README.html

