任务调度的方式
任务调度的方式
一个简单任务的执行
开启一个线程,一直循环执行,通过sleep控制打印的延迟时间
public class ThreadTest {
    public static void main(String[] args) {
        Thread thread = new Thread(new Runnable() {
            @Override
            public void run() {
                while (true) {
                    System.out.println("任务执行");
                    try {
                        Thread.sleep(5000);
                    } catch (InterruptedException e) {
                        e.printStackTrace();
                    }
                }
            }
        });
        thread.start();
    }
}
Timer和TimerTask实现任务调度
三个参数:任务,延迟时间,周期时间
public class TimerTest {
    public static void main(String[] args) {
        new Timer().schedule(new TimerTask() {
            @Override
            public void run() {
                System.out.println("任务执行");
            }
        },1000,2000);
    }
}
ScheduledExecutor实现任务调度
每一个被调度的任务都会由线程池中一个线程去执行,因此任务是并发执行的,相互之间不会受到干扰。需要注意的是,只有当任务的执行时间到来时,ScheduedExecutor 才会真正启动一个线程,其余时间 ScheduledExecutor 都是在轮询任务的状态。
public class ScheduledExecutorTest implements Runnable{
    private String jobName="";

    public ScheduledExecutorTest(String jobName) {
        this.jobName = jobName;
    }

    @Override
    public void run() {
        System.out.println("executor "+jobName+Thread.currentThread().getName());
    }

    public static void main(String[] args) {
        ScheduledExecutorService threadPool = Executors.newScheduledThreadPool(10);
        ScheduledExecutorTest job1 = new ScheduledExecutorTest("job1");
        ScheduledExecutorTest job2 = new ScheduledExecutorTest("job2");
        threadPool.scheduleAtFixedRate(job1,1,1, TimeUnit.SECONDS);
        threadPool.scheduleAtFixedRate(job2,2,1,TimeUnit.SECONDS);
    }
}
结果:
executor job1pool-1-thread-1
executor job1pool-1-thread-2
executor job2pool-1-thread-1
executor job1pool-1-thread-3
executor job2pool-1-thread-6
executor job1pool-1-thread-1
executor job2pool-1-thread-2
executor job1pool-1-thread-5
executor job2pool-1-thread-4
executor job2pool-1-thread-6
executor job1pool-1-thread-3

从结果可以看出轮询的状态
用 ScheduledExecutor 和 Calendar 实现复杂任务调度
Timer 和 ScheduledExecutor 都仅能提供基于开始时间与重复间隔的任务调度,不能胜任更加复杂的调度需求。比如,设置每星期二的 16:22:11 执行任务。该功能使用 Timer 和 ScheduledExecutor 都不能直接实现,但我们可以借助 Calendar 间接实现该功能。
计算出间隔时间,计算从当前时间到最近一次执行时间的时间间隔
String data="2021-02-05 16:22:11";
        SimpleDateFormat sf = new SimpleDateFormat("yyyy-MM-dd HH:mm:ss");
        try {
            Date parse = sf.parse(data);
            Calendar calendar=Calendar.getInstance();
            Calendar calendar1=Calendar.getInstance();
            calendar1.setTime(new Date());

        } catch (ParseException e) {
            e.printStackTrace();
        }

//最近执行的时间减去当前时间
long delay = calendar.getTimeInMillis()-calendar1.getTimeInMillis();
//计算执行周期为一星期
long period = 7 * 24 * 60 * 60 * 1000;
ScheduledExecutorService service = Executors.newScheduledThreadPool(10);
//从现在开始delay毫秒之后,每隔一星期执行一次job1
service.scheduleAtFixedRate(test, delay, period,
TimeUnit.MILLISECONDS);
Spring使用Schedule任务调度
-
XML中引入命名空间
xmlns:task="http://www.springframework.org/schema/task" http://www.springframework.org/schema/task http://www.springframework.org/schema/task/spring-task-3.0.xsd " -
设置自动发现
<!-- 启动定时器 --> <task:annotation-driven/> -
添加注解
    @Scheduled(cron = "0/1 * * * * ?")
    public void printHello(){
        System.out.println("Hello world "+ new Date());
    }
Springboot中使用注解实现定时任务
Application:
@SpringBootApplication
@EnableScheduling    //添加EnableScheduling注解
public class DemoApplication {

    public static void main(String[] args) {
        SpringApplication.run(DemoApplication.class, args);
    }

}
具体实现的任务类:
package com.example.demo.com.example;

import org.springframework.scheduling.annotation.Scheduled;
import org.springframework.stereotype.Component;

import java.util.Date;

@Component
public class ScheduleTask {
    @Scheduled(cron = "0/1 * * * * ?")
    public void printHello(){
        System.out.println("Hello world "+ new Date());
    }

}
使用@Scheduled注解再填写正确的cron表达式正常运行就可以执行任务了
cron4j实现任务调度
- 添加依赖的jar包:
cron4j-2.2.5.jar - 添加配置文件,扩展名为txt
# cron 表达式由五部分组成:分 时 天 月 周
# 分 :从 0 到 59
# 时 :从 0 到 23
# 天 :从 1 到 31,字母 L 可以表示月的最后一天
# 月 :从 1 到 12,可以别名:jan", "feb", "mar", "apr", "may", "jun", "jul", "aug", "sep", "oct", "nov" and "dec"
# 周 :从 0 到 6,0 表示周日,6 表示周六,可以使用别名: "sun", "mon", "tue", "wed", "thu", "fri" and "sat"
#
# 数字 n:表示一个具体的时间点,例如 5 * * * * 表示 5 分这个时间点时执行
# 逗号 , :表示指定多个数值,例如 3,5 * * * * 表示 3 和 5 分这两个时间点执行
# 减号 -:表示范围,例如 1-3 * * * * 表示 1 分、2 分再到 3 分这三个时间点执行
# 星号 *:表示每一个时间点,例如 * * * * * 表示每分钟执行
# 除号 /:表示指定一个值的增加幅度。例如 n/m表示从 n 开始,每次增加 m 的时间点执行
# cron4j 集成cron 只有 分 时 天 月 周  没有秒

cron4j=test
test.cron=* * * * *
#test.class后面跟的是要执行的任务类
test.class=Task.FileReadTask
test.daemon=true
test.enable=true
- 编写任务类
package Task;


/**
* @Description
* @Author  ChengShaoFan
* @Date   2021/2/1 14:46
*
*/
public class FileReadTask implements Runnable{

    @Override
    public void run() {
        System.out.println("执行任务");
    }

}
这样就会根据配置信息定时启动任务
XXL-job实现任务调度
-
下载官方的源码Download
-
导入数据库文件,地址:/xxl-job/doc/db/tables_xxl_job.sql
-
解压源码,按照maven格式将源码导入IDE, 使用maven进行编译即可,源代码结构:
xxl-job-admin:调度中心 xxl-job-core:公共依赖 xxl-job-executor-samples:执行器Sample示例(选择合适的版本执行器,可直接使用,也可以参考其并将现有项目改造成执行器) :xxl-job-executor-sample-springboot:Springboot版本,通过Springboot管理执行器,推荐这种方式; :xxl-job-executor-sample-spring:Spring版本,通过Spring容器管理执行器,比较通用; :xxl-job-executor-sample-jfinal:jFinal版本 :xxl-job-executor-sample-frameless:无框架版本; -
修改xxl-job-admin下的application.properties,修改数据库参数为自己的
### xxl-job, datasource spring.datasource.url=jdbc:mysql://127.0.0.1:3306/xxl_job?useUnicode=true&characterEncoding=UTF-8&autoReconnect=true&serverTimezone=Asia/Shanghai #用户名 spring.datasource.username=root #密码 spring.datasource.password=root spring.datasource.driver-class-name=com.mysql.cj.jdbc.Driver -
运行springboot程序XxlJobAdminApplication,启动调度中心
-
调度中心访问地址:http://localhost:8080/xxl-job-admin 页面如图
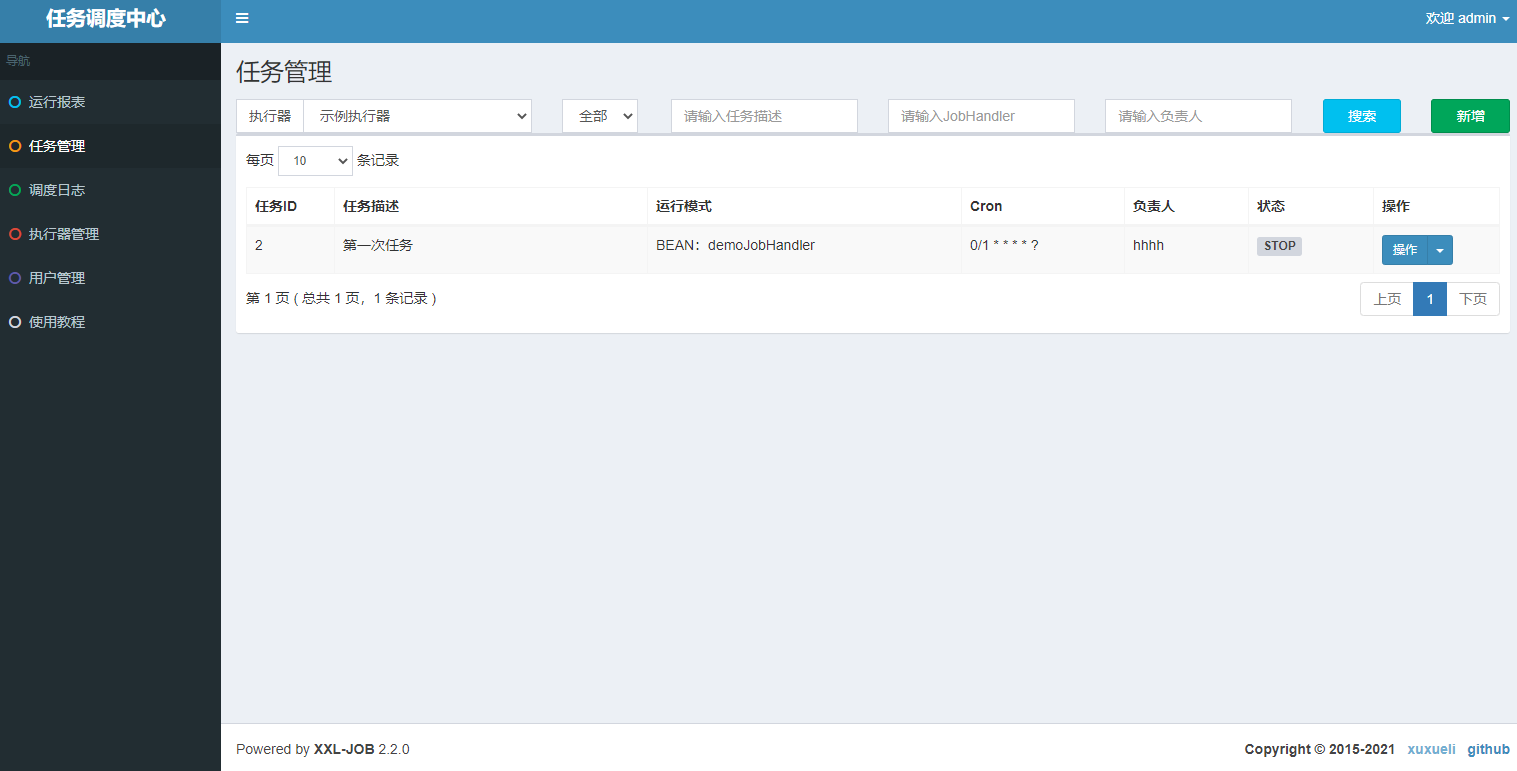
-
选用自己适合的执行器,我这里使用的是JFinal框架,也就是xxl-job-executor-sample-jfinal,官方已经写好了Demo
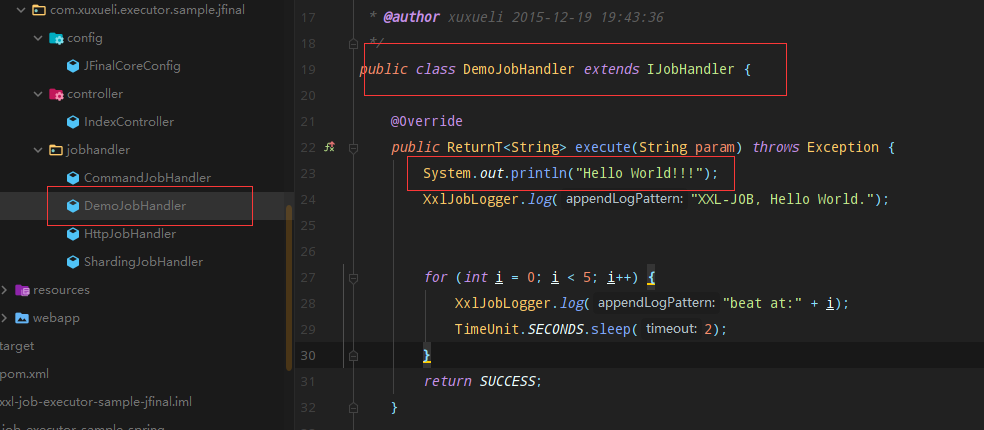
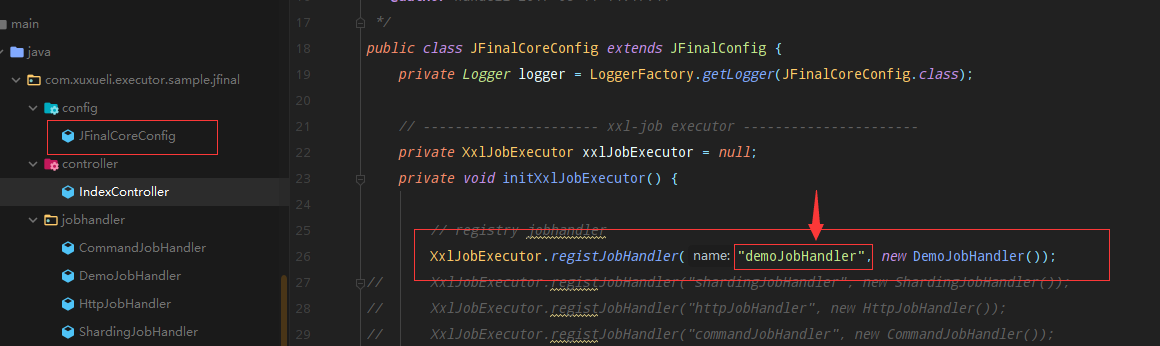
-
可以看到再JFinalCoreConfig下面对这个Handler进行了注册,注意这个demoJoHandler,在调度中心添加任务的时候要一一对应,配置tomcat并启动执行器
- 调度中心添加任务
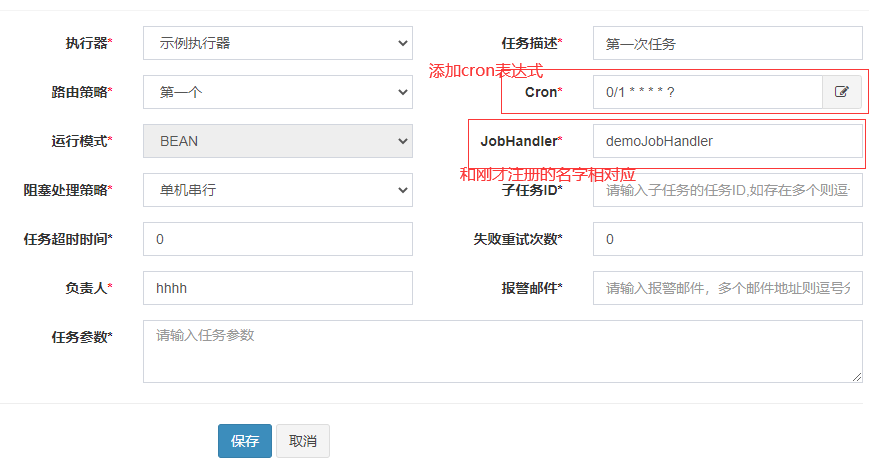
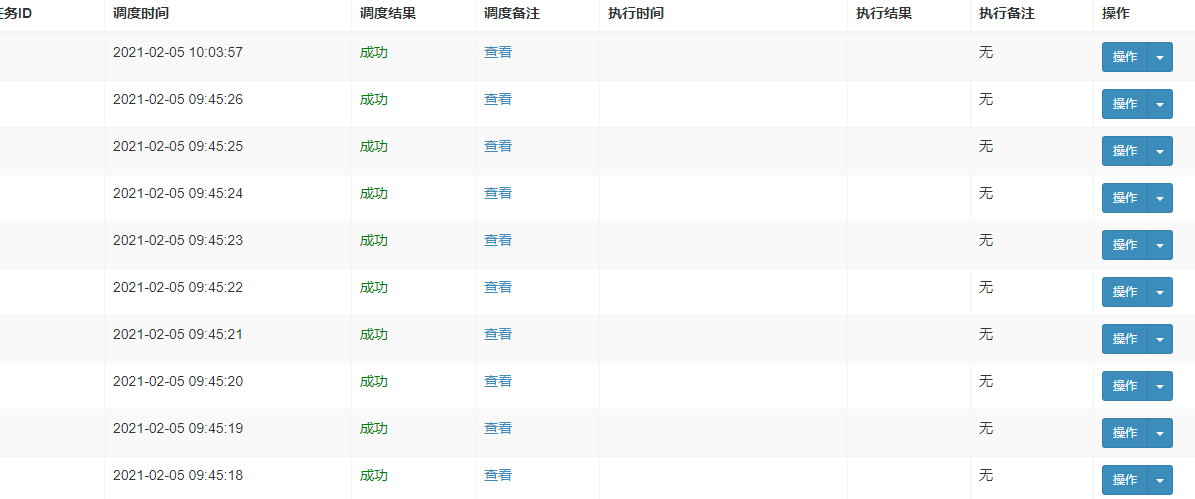
- 启动任务后就可以看到任务执行了,在调度日志也可以看到执行的记录

 浙公网安备 33010602011771号