springboot支持国际化
Spring Boot支持本地化的消息,这样你的应用程序就可以满足不同语言偏好的用户。 默认情况下,Spring Boot会在classpath的根部寻找 messages 资源包(resource bundle)的存在。
自动配置只有在资源包中存在默认的properties文件(默认为 messages.properties )时才生效。如果资源包中只有特定语言的properties,那你需要添加默认的。 没有没有找到任何base name和语言相匹配的文件,MessageSource 不会自动配置。
在application.properties加上如下配置
spring.messages.basename=messages,config.i18n.messages
spring.messages.fallback-to-system-locale=false
// Steps:
// --Understand Locale(know language codes)
// --Configure Locale resolver and interceptor in spring
// -- Create languge files(messages_XX.properties) messages.properties:default
// -- Update Thymeleaf views for i18n Print text:[[#{key}]] Attribute:th:value="#{key}"
// -- Switch between languages(Englich,Chinese..) URL paramter:?lang=xx1.获取语言对应的code
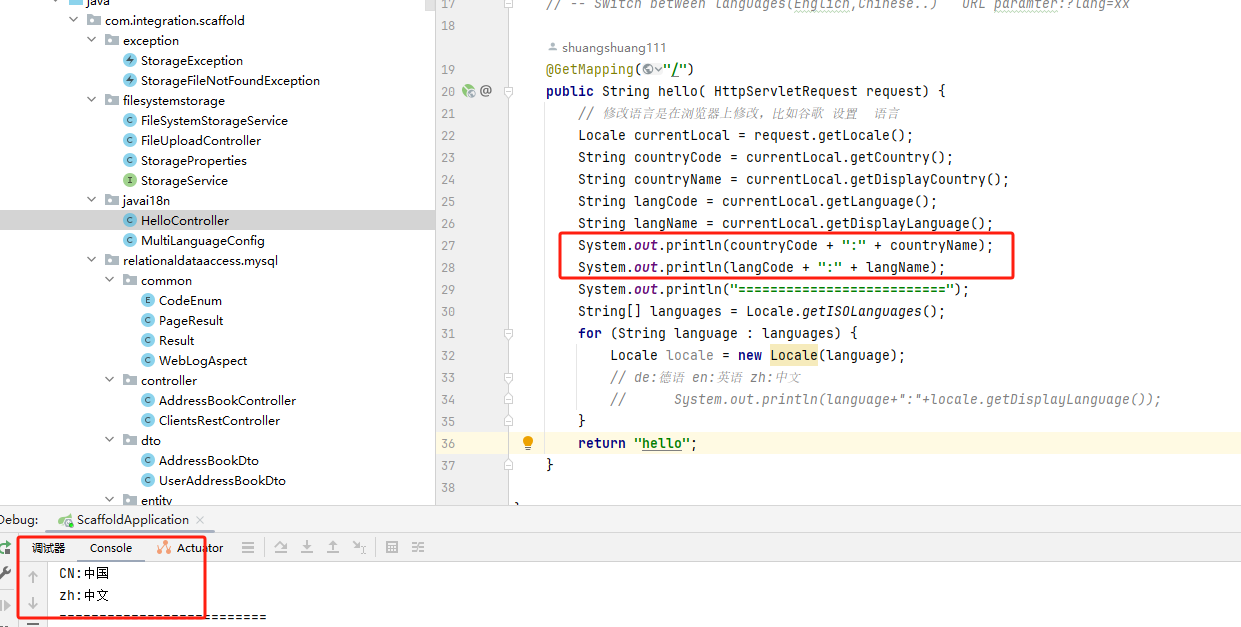
 @GetMapping("/")
    public String hello( HttpServletRequest request) {
        // 修改语言是在浏览器上修改,比如谷歌 设置  语言
        Locale currentLocal = request.getLocale();
        String countryCode = currentLocal.getCountry();
        String countryName = currentLocal.getDisplayCountry();
        String langCode = currentLocal.getLanguage();
        String langName = currentLocal.getDisplayLanguage();
        System.out.println(countryCode + ":" + countryName);
        System.out.println(langCode + ":" + langName);
        System.out.println("==========================");
        String[] languages = Locale.getISOLanguages();
        for (String language : languages) {
            Locale locale = new Locale(language);
            // de:德语 en:英语 zh:中文
            //      System.out.println(language+":"+locale.getDisplayLanguage());
        }
        return "hello";
    }
2.配置如下代码
package com.integration.scaffold.javai18n;

import org.springframework.context.annotation.Bean;
import org.springframework.context.annotation.Configuration;
import org.springframework.web.servlet.LocaleResolver;
import org.springframework.web.servlet.config.annotation.InterceptorRegistry;
import org.springframework.web.servlet.config.annotation.WebMvcConfigurer;
import org.springframework.web.servlet.i18n.LocaleChangeInterceptor;
import org.springframework.web.servlet.i18n.SessionLocaleResolver;

import java.util.Locale;
import java.util.TimeZone;

@Configuration
public class MultiLanguageConfig implements WebMvcConfigurer {

    @Bean
    public LocaleResolver localeResolver() {
        SessionLocaleResolver slr = new SessionLocaleResolver();
        slr.setDefaultLocale(Locale.US);
        // timezone to change datetime output
        slr.setDefaultTimeZone(TimeZone.getTimeZone("UTC"));
        return slr;
    }

    @Bean
    public LocaleChangeInterceptor localeChangeInterceptor() {
        LocaleChangeInterceptor lci = new LocaleChangeInterceptor();
        lci.setParamName("lang");

        return lci;
    }

    @Override
    public void addInterceptors(InterceptorRegistry registry) {
        registry.addInterceptor(localeChangeInterceptor());
    }
}
3.创建messages_xx.properties文件 如下示例代码
hello.title=New day, new weather
hello=Hello!
welcome=Welcome to my app
switch-en=Switch to English
switch-zh=Switch to Chinese
hello.title=新的一天新气象
hello=你好
welcome=欢迎来到APP
switch-en=切换到英语
switch-zh=切换到中文 
4.写一个Thymeleaf,格式为:
text:[[#{key}]] Attribute:th:value="#{key}"<!DOCTYPE html>
<html xmlns:th="http://www.thymeleaf.org">
<head>
<meta charset="UTF-8">
<title th:text="#{welcome}"></title>
</head>
<body>
<div>
<h1>[[#{hello.title}]]</h1>
</div>
<span th:text="#{hello}"></span><br>
<span th:text="#{welcome}"></span><br>
<button type="button" th:text="#{switch-en}"
onclick="window.location.href='http://localhost:8080/Scaffold/?lang=en'"></button>
<button type="button" th:text="#{switch-zh}"
onclick="window.location.href='http://localhost:8080/Scaffold/?lang=zh'"></button>
</body>
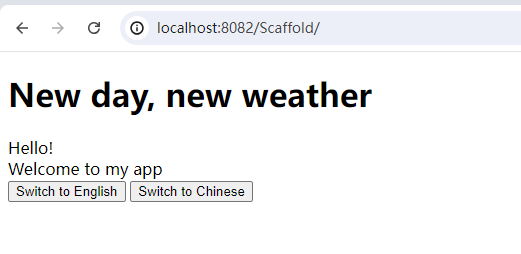
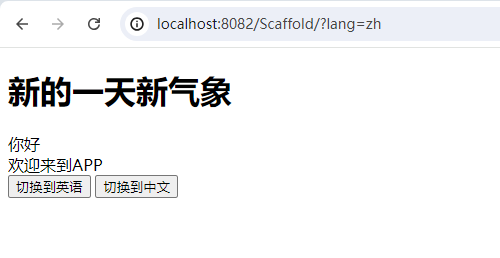
</html>在浏览器输入地址,既可以切换语言了

点击切换到中文

再点击切换到英文就可以切换到英文了
好了,国际化就做好了!


【推荐】国内首个AI IDE,深度理解中文开发场景,立即下载体验Trae
【推荐】编程新体验,更懂你的AI,立即体验豆包MarsCode编程助手
【推荐】抖音旗下AI助手豆包,你的智能百科全书,全免费不限次数
【推荐】轻量又高性能的 SSH 工具 IShell:AI 加持,快人一步
· TypeScript + Deepseek 打造卜卦网站:技术与玄学的结合
· Manus的开源复刻OpenManus初探
· AI 智能体引爆开源社区「GitHub 热点速览」
· 三行代码完成国际化适配,妙~啊~
· .NET Core 中如何实现缓存的预热?