WebGL进阶(8)灯光与阴影
1. 重要步骤
      // 目标:灯光与阴影
      // 灯光阴影
      // 1、材质要满足能够对光照有反应
      // 2、设置渲染器开启阴影的计算 this.renderer.shadowMap.enabled = true;
      // 3、设置光照投射阴影 directionalLight.castShadow = true;
      // 4、设置物体投射阴影 sphere.castShadow = true;
      // 5、设置物体接收阴影 plane.receiveShadow = true;
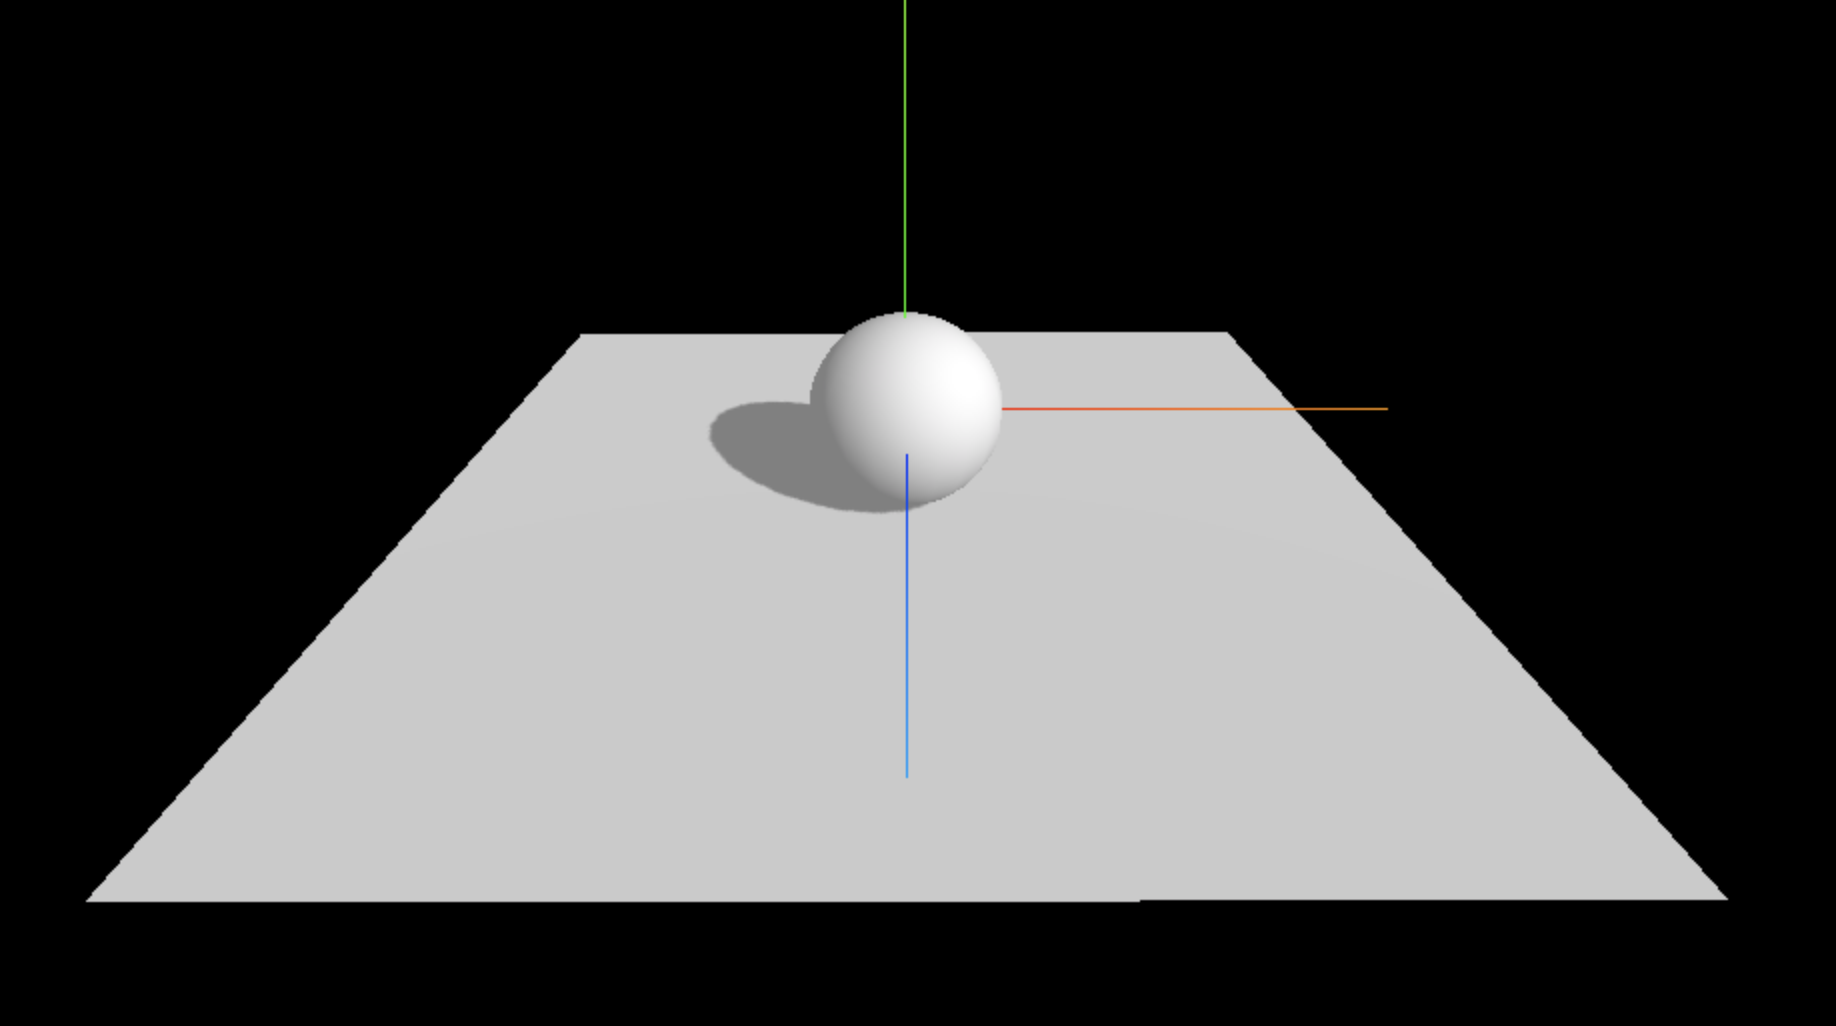
2. 效果图
3. 全部代码
<template>
  <div class="home">
    <div id="threeContainer" class="threeContainer"></div>
  </div>
</template>

<script>
import * as THREE from 'three'
import { OrbitControls } from 'three/examples/jsm/controls/OrbitControls' // 导入轨道控制器
// import { RGBELoader } from "three/examples/jsm/loaders/RGBELoader"

export default {
  name: 'Home',
  data () {
    return {
      scene: null,  //场景对象
      camera: null,  //相机对象
      cube: null, //物体
      controls: null, // 控制器
      renderer: null  //渲染器对象
    }
  },
  mounted () {
    this.init()
  },
  methods: {
    init () {

      // 目标:灯光与阴影
      // 灯光阴影
      // 1、材质要满足能够对光照有反应
      // 2、设置渲染器开启阴影的计算 this.renderer.shadowMap.enabled = true;
      // 3、设置光照投射阴影 directionalLight.castShadow = true;
      // 4、设置物体投射阴影 sphere.castShadow = true;
      // 5、设置物体接收阴影 plane.receiveShadow = true;

      // 1. 创建场景
      this.scene = new THREE.Scene()

      // 2. 创建相机
      this.camera = new THREE.PerspectiveCamera( 75, window.innerWidth / window.innerHeight, 0.1, 1000 )
      this.camera.position.set( 0, 0, 10 ) // 设置相机位置
      this.scene.add(this.camera)

      // 3. 添加物体

      // 创建一个物体 球
      const sphereGeometry = new THREE.SphereBufferGeometry(1, 20, 20)
      const material = new THREE.MeshStandardMaterial()

      const sphere = new THREE.Mesh(sphereGeometry, material);
      // 投射阴影
      sphere.castShadow = true
      this.scene.add(sphere)

      // 创建平面
      const planeGeometry = new THREE.PlaneBufferGeometry(10, 10)
      const plane = new THREE.Mesh(planeGeometry, material)
      plane.position.set(0, -1, 0)
      plane.rotation.x = - Math.PI / 2
      // 接收阴影
      plane.receiveShadow = true
      this.scene.add(plane)

      // 灯光
      // 环境光
      const light = new THREE.AmbientLight(0xffffff, 0.5); // soft white light
      this.scene.add(light);
      //直线光源
      const directionalLight = new THREE.DirectionalLight(0xffffff, 0.5)
      directionalLight.position.set(10, 10, 10)
      directionalLight.castShadow = true

      // 设置阴影贴图模糊度
      directionalLight.shadow.radius = 20
      // 设置阴影贴图的分辨率
      directionalLight.shadow.mapSize.set(4096, 4096)
      // 设置平行光投射相机的属性
      directionalLight.shadow.camera.near = 0.5
      directionalLight.shadow.camera.far = 500
      directionalLight.shadow.camera.top = 5
      directionalLight.shadow.camera.bottom = -5
      directionalLight.shadow.camera.left = -5
      directionalLight.shadow.camera.right = 5

      this.scene.add(directionalLight)

      // 4. 初始化渲染器
      this.renderer = new THREE.WebGLRenderer()
      // 设置渲染器的尺寸大小
      this.renderer.setSize( window.innerWidth, window.innerHeight )
      // 开启场景中的阴影贴图
      this.renderer.shadowMap.enabled = true
      // 将webgl渲染的canvas内容添加到body中
      document.getElementById('threeContainer').appendChild( this.renderer.domElement )

      // 创建轨道控制器
      this.controls = new OrbitControls( this.camera, this.renderer.domElement )
      // 设置控制器阻尼,让控制器更真实
      this.controls.enableDamping = true

      // 添加坐标轴辅助器
      const axesHelper = new THREE.AxesHelper( 5 )
      this.scene.add( axesHelper )

      // 渲染函数
      this.render()
      // 监听尺寸变化
      this.resize()
    },
    // 渲染函数
    render () {
      this.controls.update()
      this.renderer.render( this.scene, this.camera )
      // 渲染下一帧的时候就会调用render函数
      requestAnimationFrame( this.render )
    },
    // 监听尺寸变化,更新渲染页面
    resize () {
      window.addEventListener('resize', () => {
        // 更新摄像头
        this.camera.aspect = window.innerWidth / window.innerHeight
        // 更新摄像机的投影矩阵
        this.camera.updateProjectionMatrix()
        // 更新渲染器
        this.renderer.setSize( window.innerWidth, window.innerHeight )
        // 设置渲染器的像素比
        this.renderer.setPixelRatio(window.devicePixelRatio)
      })
    }
  }
}
</script>

 浙公网安备 33010602011771号