navigationbar
IOS 入门开发之创建标题栏UINavigationBar的使用
IOS 开发有关界面的东西不仅可以使用代码来编写,也可以使用Interface Builder可视化工具来编写。今天有个朋友问我这两个有什么区别,首先说 说IB ,使用它编辑出来的控件其实底层还是调用代码只是苹果封装出来让开发者更好使用而已。它的优点是方便、快捷最重要的是安全,因为控件的释放它会帮我们完成 不用手动释放。缺点是多人开发不好维护,就好比谁写的IB谁能看懂,别人看的话就比较费劲,不利于代码的维护。两种方式各有利弊,不过我个人还是比较喜欢 纯代码,因为任何程序语言,或者任何脚本语言,代码和可视化工具比起来永远是最底层的。
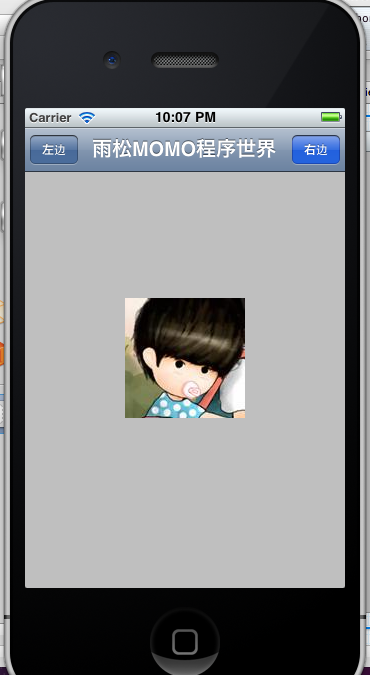
利用代码在屏幕中添加一个标题栏,并且在标题栏左右两方在添加两个按钮,点击后响应这两个按钮。
这里设置标题栏的显示范围。
- //创建一个导航栏
- UINavigationBar *navigationBar = [[UINavigationBar alloc] initWithFrame:CGRectMake(0, 0, 320, 44)];
有了标题栏后,须要在标题栏上添加一个集合Item用来放置 标题内容,按钮等。
- //创建一个导航栏集合
- UINavigationItem *navigationItem = [[UINavigationItem alloc] initWithTitle:nil];
在这个集合Item中添加标题,按钮。
style:设置按钮的风格,一共有3中选择。
action:@selector:设置按钮点击事件。
- //创建一个左边按钮
- UIBarButtonItem *leftButton = [[UIBarButtonItem alloc] initWithTitle:@"左边"
- style:UIBarButtonItemStyleBordered
- target:self
- action:@selector(clickLeftButton)];
- //创建一个右边按钮
- UIBarButtonItem *rightButton = [[UIBarButtonItem alloc] initWithTitle:@"右边"
- style:UIBarButtonItemStyleDone
- target:self
- action:@selector(clickRightButton)];
- //设置导航栏内容
- [navigationItem setTitle:@"雨松MOMO程序世界"];
将标题栏中的内容全部添加到主视图当中。
- //把导航栏添加到视图中
- [self.view addSubview:navigationBar];
最后将控件在内存中释放掉,避免内存泄漏。
- //释放对象
- [navigationItem release];
- [leftButton release];
- [rightButton release];
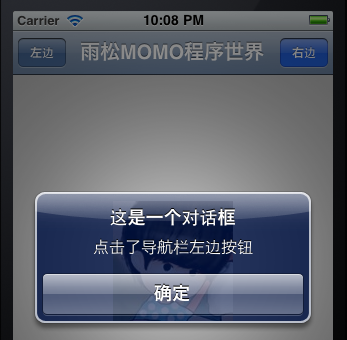
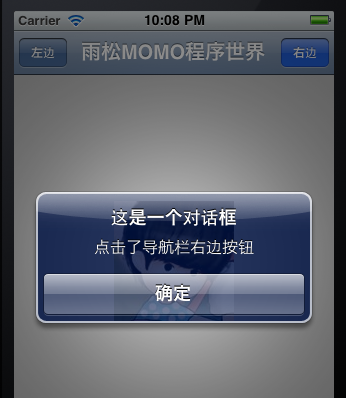
如图所示:添加这两个按钮的点击响应事件。
- -(void)clickLeftButton
- {
- [self showDialog:@"点击了导航栏左边按钮"];
- }
- -(void)clickRightButton
- {
- [self showDialog:@"点击了导航栏右边按钮"];
- }
点击后打开一个Dialog对话框,根据点击不同的按钮传入不同的显示内容。
- -(void)showDialog:(NSString *) str
- {
- UIAlertView * alert= [[UIAlertView alloc] initWithTitle:@"这是一个对话框" message:str delegate:self cancelButtonTitle:@"确定" otherButtonTitles: nil];
- [alert show];
- [alert release];
- }
最后贴上完整的代码
- #import "TitleViewController.h"
- @implementation TitleViewController
- - (void)didReceiveMemoryWarning
- {
- // Releases the view if it doesn't have a superview.
- [super didReceiveMemoryWarning];
- // Release any cached data, images, etc that aren't in use.
- }
- #pragma mark - View lifecycle
- // Implement viewDidLoad to do additional setup after loading the view, typically from a nib.
- - (void)viewDidLoad
- {
- [super viewDidLoad];
- //创建一个导航栏
- UINavigationBar *navigationBar = [[UINavigationBar alloc] initWithFrame:CGRectMake(0, 0, 320, 44)];
- //创建一个导航栏集合
- UINavigationItem *navigationItem = [[UINavigationItem alloc] initWithTitle:nil];
- //创建一个左边按钮
- UIBarButtonItem *leftButton = [[UIBarButtonItem alloc] initWithTitle:@"左边"
- style:UIBarButtonItemStyleBordered
- target:self
- action:@selector(clickLeftButton)];
- //创建一个右边按钮
- UIBarButtonItem *rightButton = [[UIBarButtonItem alloc] initWithTitle:@"右边"
- style:UIBarButtonItemStyleDone
- target:self
- action:@selector(clickRightButton)];
- //设置导航栏内容
- [navigationItem setTitle:@"雨松MOMO程序世界"];
- //把导航栏集合添加入导航栏中,设置动画关闭
- [navigationBar pushNavigationItem:navigationItem animated:NO];
- //把左右两个按钮添加入导航栏集合中
- [navigationItem setLeftBarButtonItem:leftButton];
- [navigationItem setRightBarButtonItem:rightButton];
- //把导航栏添加到视图中
- [self.view addSubview:navigationBar];
- //释放对象
- [navigationItem release];
- [leftButton release];
- [rightButton release];
- }
- -(void)clickLeftButton
- {
- [self showDialog:@"点击了导航栏左边按钮"];
- }
- -(void)clickRightButton
- {
- [self showDialog:@"点击了导航栏右边按钮"];
- }
- -(void)showDialog:(NSString *) str
- {
- UIAlertView * alert= [[UIAlertView alloc] initWithTitle:@"这是一个对话框" message:str delegate:self cancelButtonTitle:@"确定" otherButtonTitles: nil];
- [alert show];
- [alert release];
- }
- - (void)viewDidUnload
- {
- [super viewDidUnload];
- // Release any retained subviews of the main view.
- // e.g. self.myOutlet = nil;
- }
- - (BOOL)shouldAutorotateToInterfaceOrientation:(UIInterfaceOrientation)interfaceOrientation
- {
- // Return YES for supported orientations
- return (interfaceOrientation == UIInterfaceOrientationPortrait);
- }
- @end


