每年一次Exchange2016和O365混合部署环境下更换证书
Renew certificate in Exchange Hybrid
How to renew a certificate in Exchange Hybrid? You have a new third-party certificate installed on the Exchange Server. Now that you finished that task,
you like to remove the old certificate. But, you get a message that these certificates are tagged with the Outbound to Office 365 send connector. Why is this happening, and what is the solution?
Invalid Exchange certificate
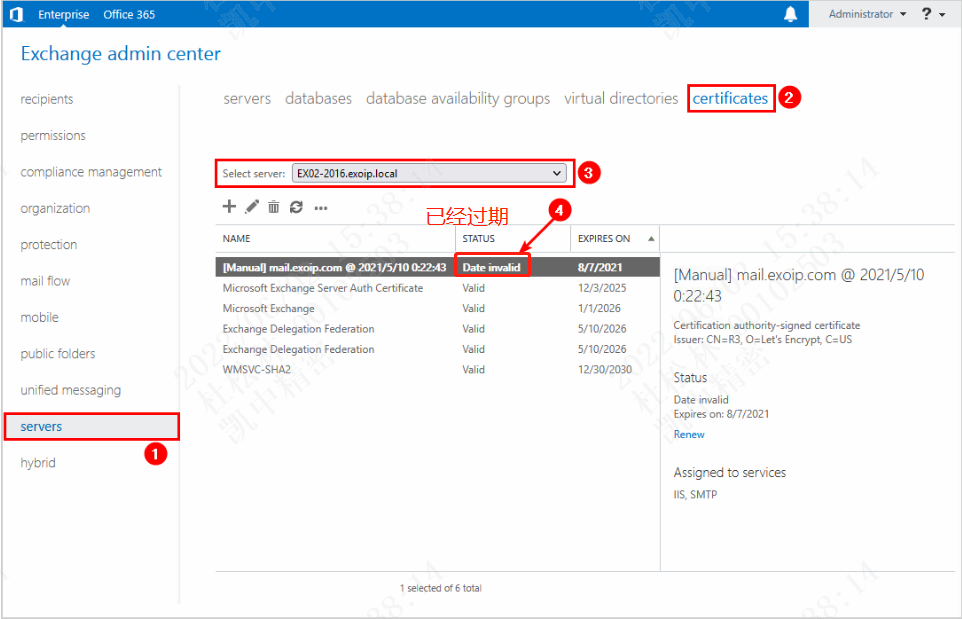
Sign in to the Exchange Server. Navigate to servers > certificates. Select the Exchange Server from the drop-down menu if you have multiple Exchange Servers.
In our example, we have an invalid certificate.
Important: In production environments, you need to renew the certificate before it gets invalid. Otherwise, mail flow will not work.
Install Exchange certificate
We did install a free Let’s Encrypt certificate on the Exchange Server. Also, we did assign it to the services IMAP, ISS, and SMTP. The certificate shows the status Valid.
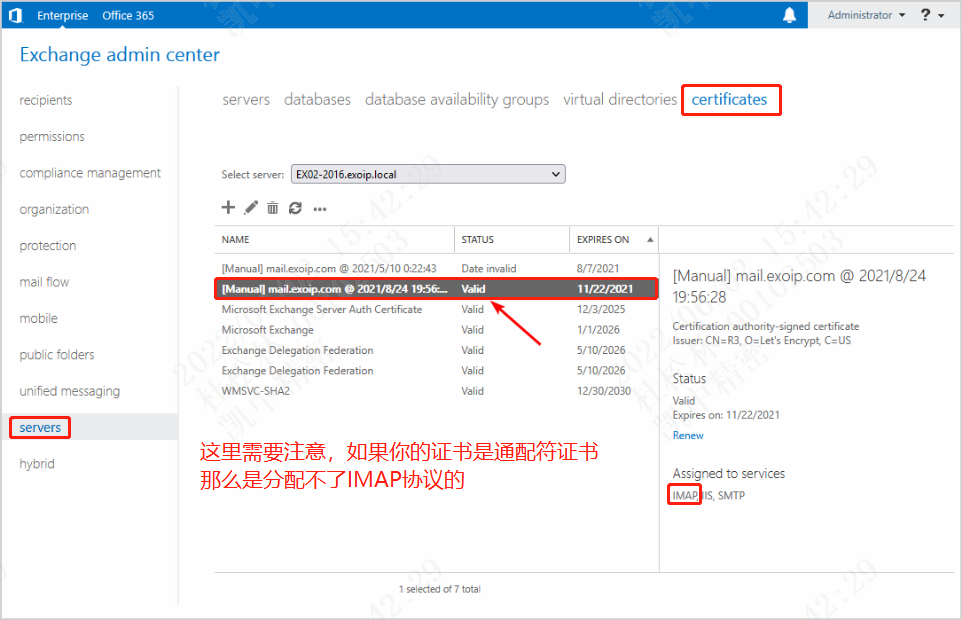
These certificates are tagged with following Send Connectors
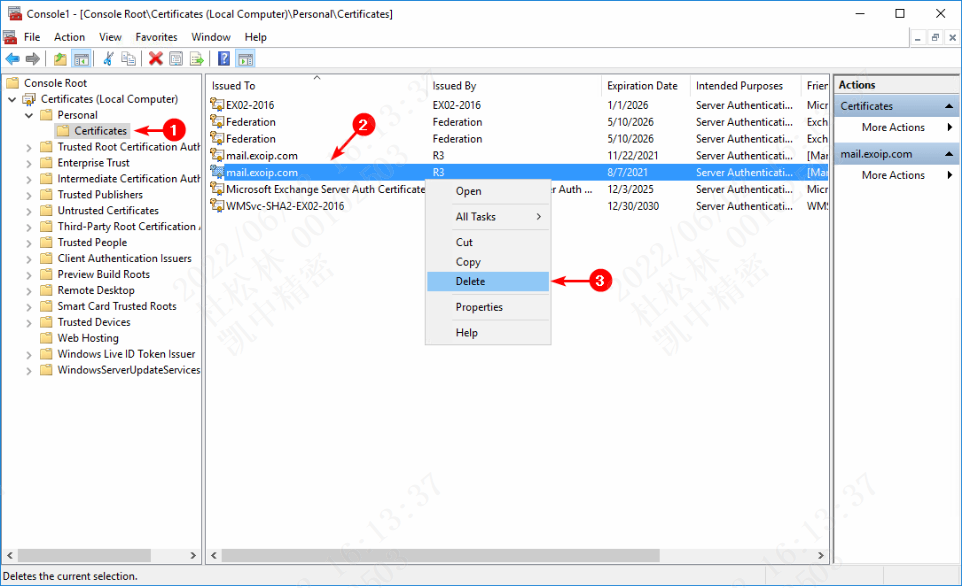
The new certificate is installed and valid. However, the old certificate is invalid. Let’s remove the old certificate on the Exchange Server to keep everything tidy.
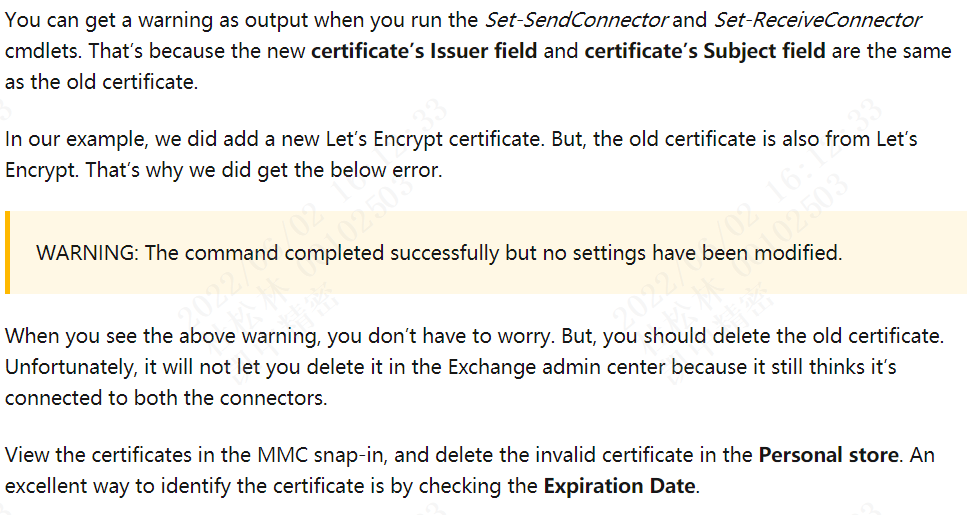
When we want to remove the invalid Exchange certificate, we do get an error.
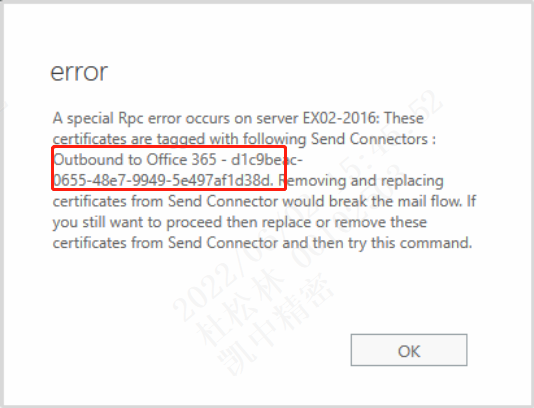

Why do we get this error, and what is the solution for removing the certificates that are tagged with the send connector Outbound to Office 365?
Renew certificate in Exchange Hybrid with PowerShell
The solution to this error is that we need to assign the new certificate to the:
- Send connector: Outbound to Office 365
- Receive connector: Default frontend
Important: Do the same steps on the other Exchange Servers.
Follow these steps:
Step 1. Collect information
Double-click the new certificate in the Exchange admin center. Copy the Thumbprint.
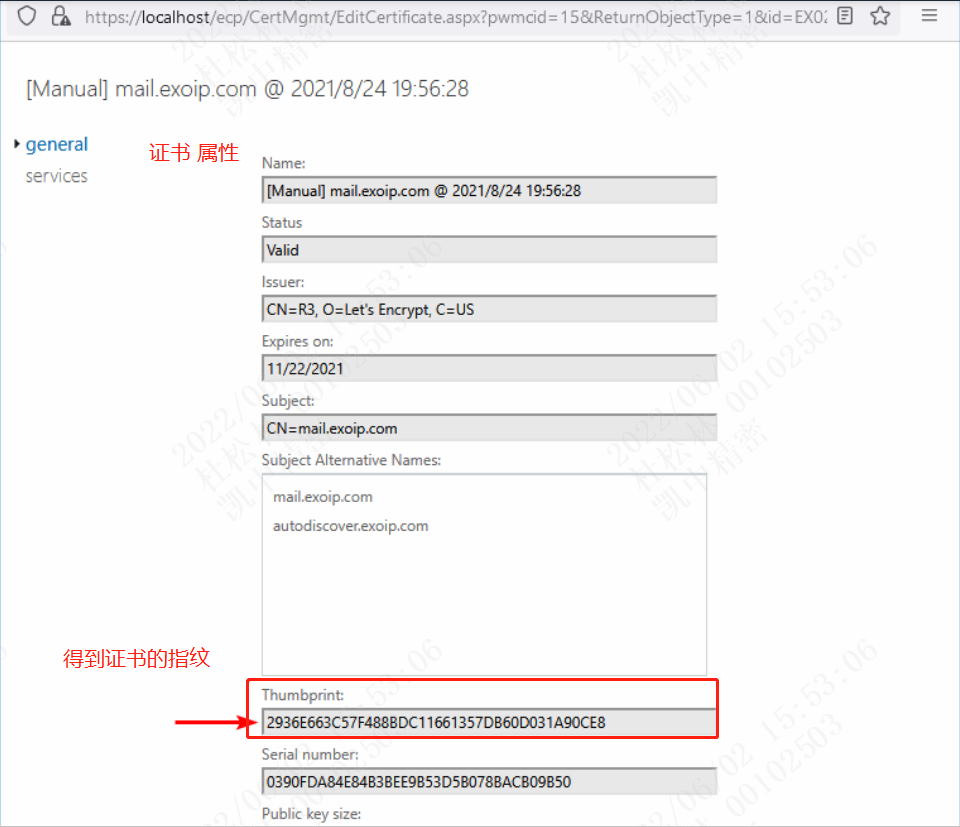
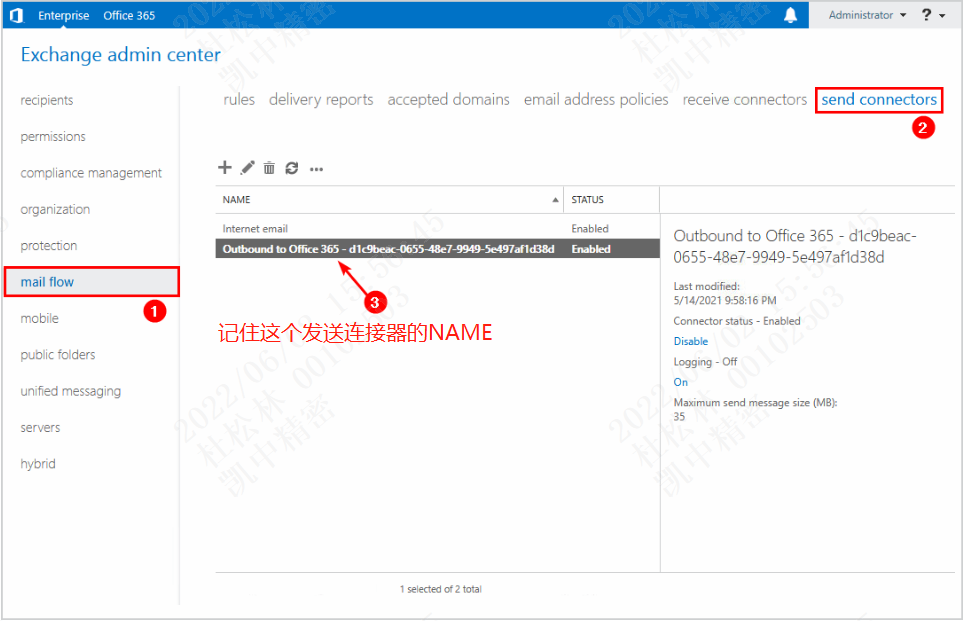
Go to mail flow > send connectors. Copy the Outbound to Office 365 send connector name. In our example, it’s Outbound to Office 365 – d1c9beac-0655-48e7-9949-5e497af1d38d.
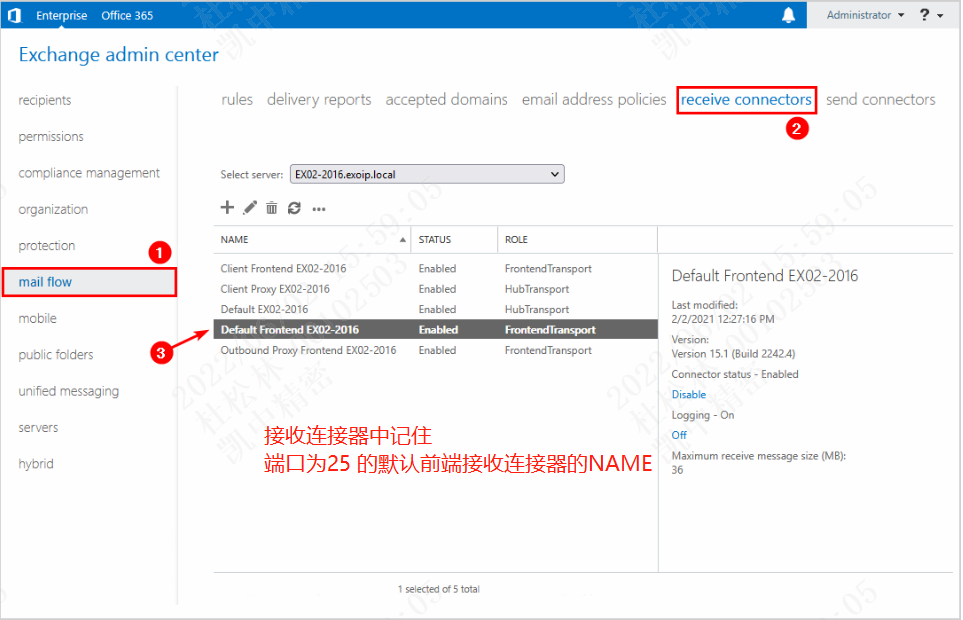
Go to mail flow > receive connectors. Copy the Default Frontend receive connector name. In our example, it’s Default Frontend EX02-2016.
Step 2. Set the new certificate
Run Exchange Management Shell as administrator. Get the Exchange certificate with the thumbprintthat you copied in the previous step.
PS] C:\>Get-ExchangeCertificate -Thumbprint "2936E663C57F488BDC11661357DB60D031A90CE8"
Thumbprint Services Subject
---------- -------- -------
2936E663C57F488BDC11661357DB60D031A90CE8 I..WS.. CN=mail.exoip.com
Store the value to the $TLSCert variable.
[PS] C:\>$TLSCert = Get-ExchangeCertificate -Thumbprint "2936E663C57F488BDC11661357DB60D031A90CE8"
Store the certificate issuer and certificate subject values to the $TLSCertName variable.
[PS] C:\>$TLSCertName = "<I>$($TLSCert.Issuer)<S>$($TLSCert.Subject)"
Run the Set-SendConnector cmdlet, including the TlsCertificateName parameter. Fill in the send connector name that you copied in the previous step.
[PS] C:\>Set-SendConnector "Outbound to Office 365 - d1c9beac-0655-48e7-9949-5e497af1d38d" -TlsCertificateName $TLSCertName
Run the Set-ReceiveConnector cmdlet, including the TlsCertificateName parameter. Fill in the receive connector name that you copied in the previous step.
[PS] C:\>Set-ReceiveConnector "EX02-2016\Default Frontend EX02-2016" -TlsCertificateName $TLSCertName
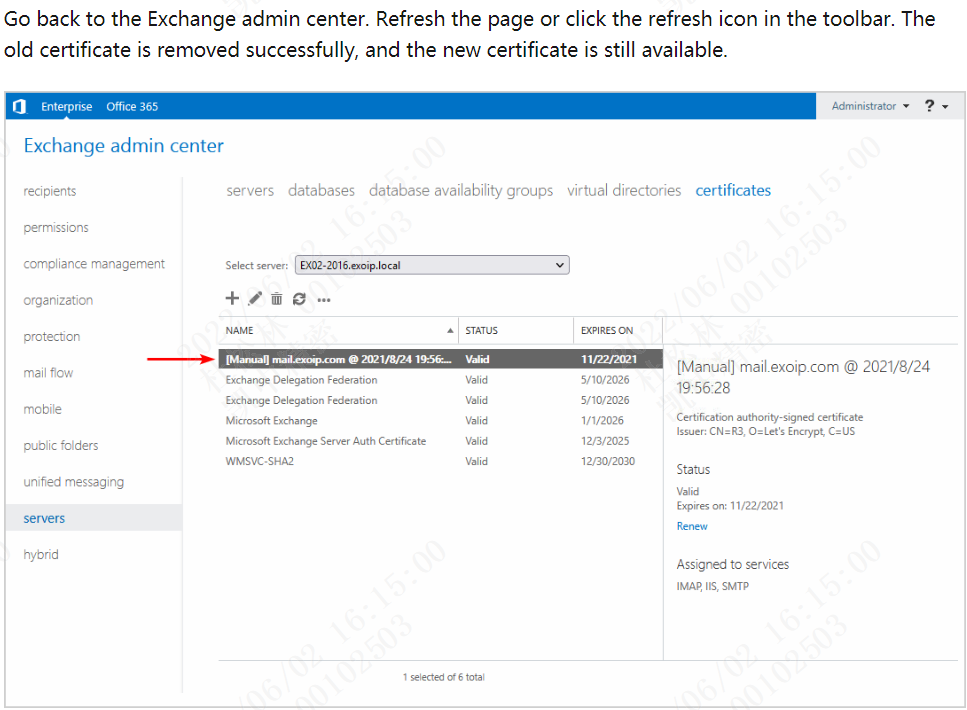
Step 3. Restart IIS
Restart the Internet Information Services (IIS) on the Exchange Server.
[PS] C:\>iisreset
Conclusion
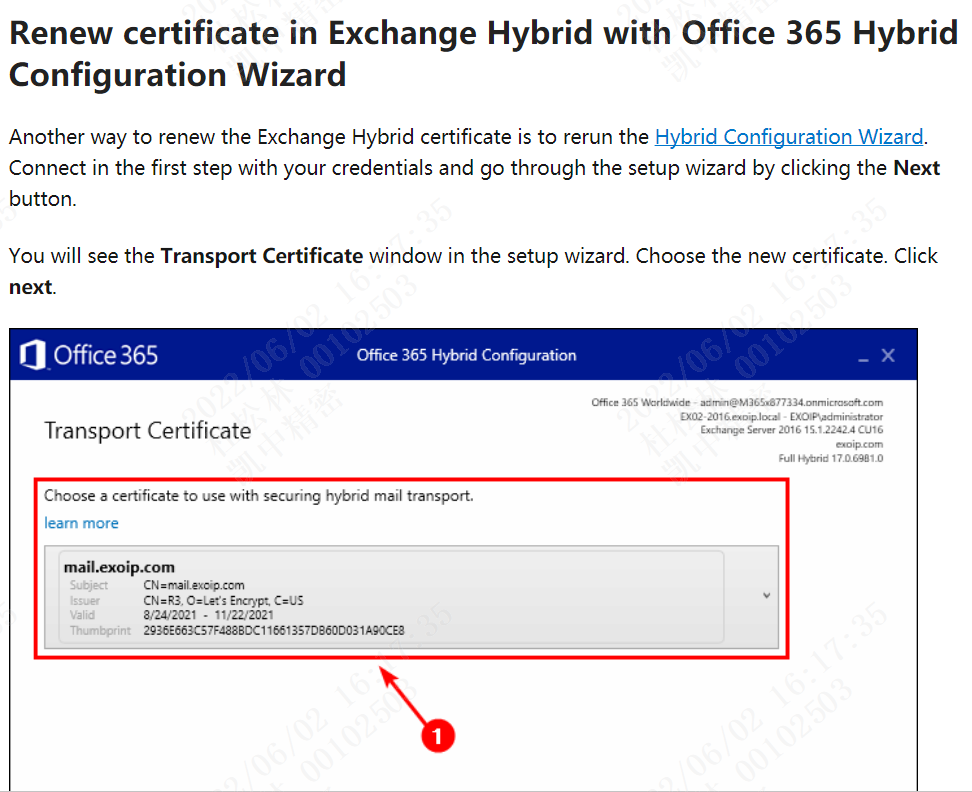
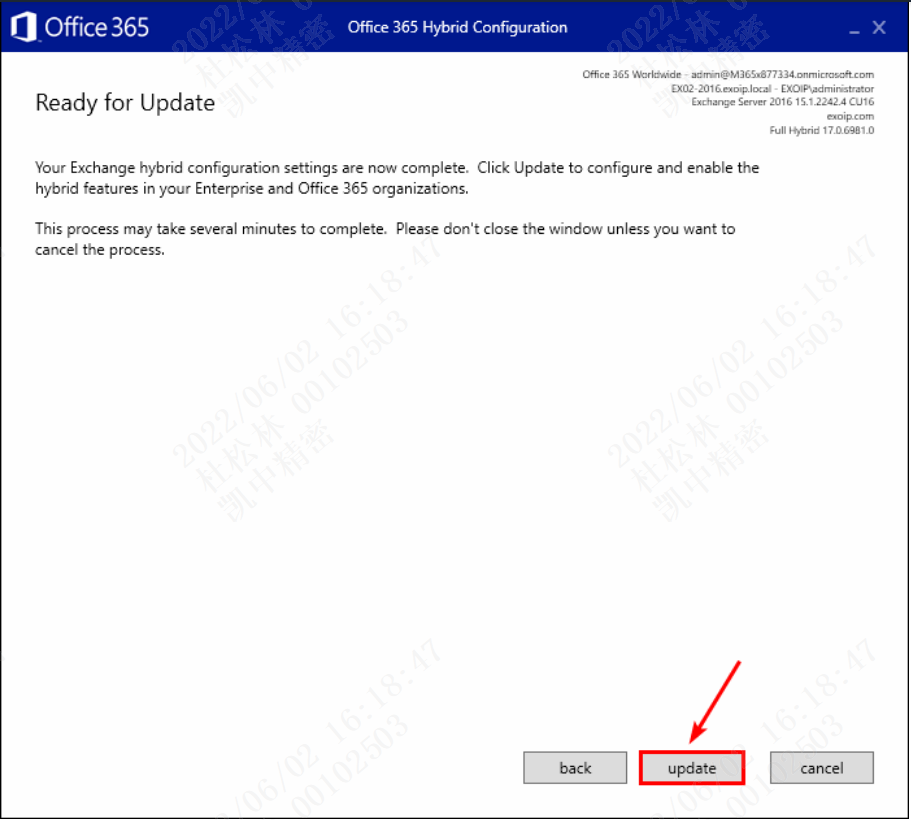
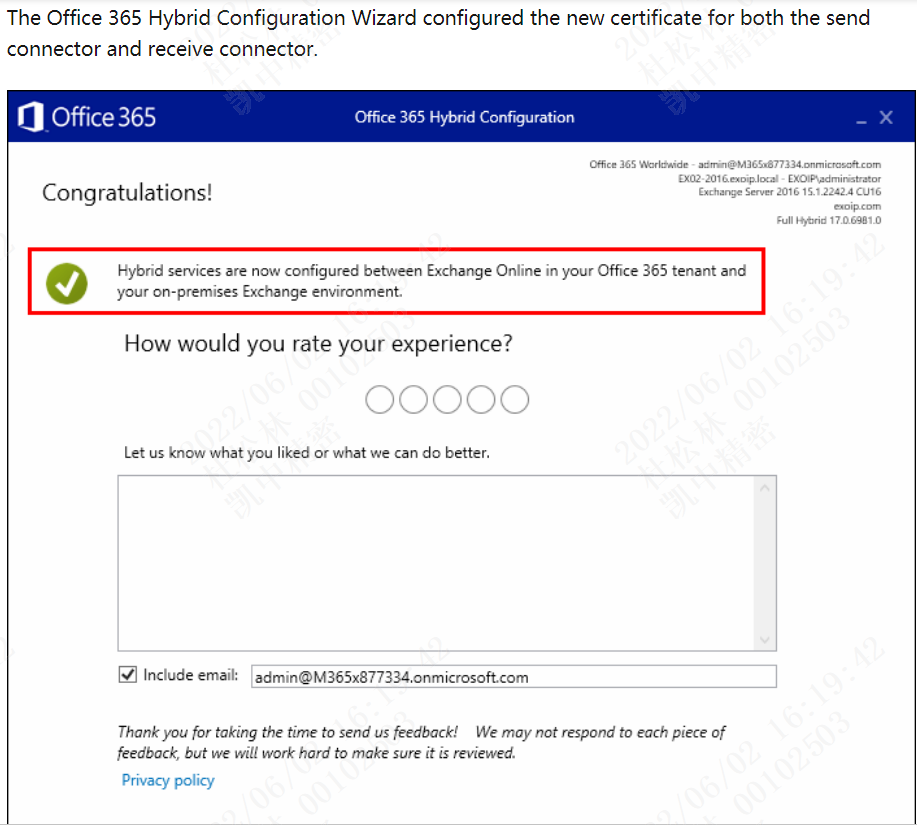
In this article, you learned how to renew the Exchange Hybrid certificate. Collect the new certificate information and run the commands to set the TLS certificate on the send connector and receive connector. Another way is to rerun the Office 365 Hybrid Configuration Wizard and select the new certificate.
文章出处: https://www.alitajran.com/renew-certificate-exchange-hybrid
更换完成后查询接收连接器和发送连接器所使用的证书
Get-ReceiveConnector -Identity "Default Frontend KZ-PSEX02" | Format-List Name,Fqdn,TlsCertificateName
Get-SendConnector "Outbound to Office 365 - 08736dc8-78b2-42f7-9a06-8ca269c4d911" | Format-List Name,Fqdn,TlsCertificateName


【推荐】国内首个AI IDE,深度理解中文开发场景,立即下载体验Trae
【推荐】编程新体验,更懂你的AI,立即体验豆包MarsCode编程助手
【推荐】抖音旗下AI助手豆包,你的智能百科全书,全免费不限次数
【推荐】轻量又高性能的 SSH 工具 IShell:AI 加持,快人一步
· 10年+ .NET Coder 心语 ── 封装的思维:从隐藏、稳定开始理解其本质意义
· 提示词工程——AI应用必不可少的技术
· 地球OL攻略 —— 某应届生求职总结
· 字符编码:从基础到乱码解决
· SpringCloud带你走进微服务的世界