King Of Bots - 蛇的设计
当前进度代码:https://git.acwing.com/yuezi2048/kob/-/tree/460ecc7920975f9172d38217fe9ab4c61b04ca47
一、前置bug解决
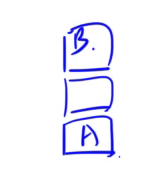
假设有一种情况,他们下一步会进入到同一个格子,这就会对优势方不利(有路可走),造成游戏不公平的情况

我们这里使用了头节点同一时刻不能走到同一个格子的策略
这里给出的方式是调整地图的长宽为13*14,这样一来,每回合蛇的坐标永远不会重合。

那么随之会引出另外一个问题:地图不是轴对称了
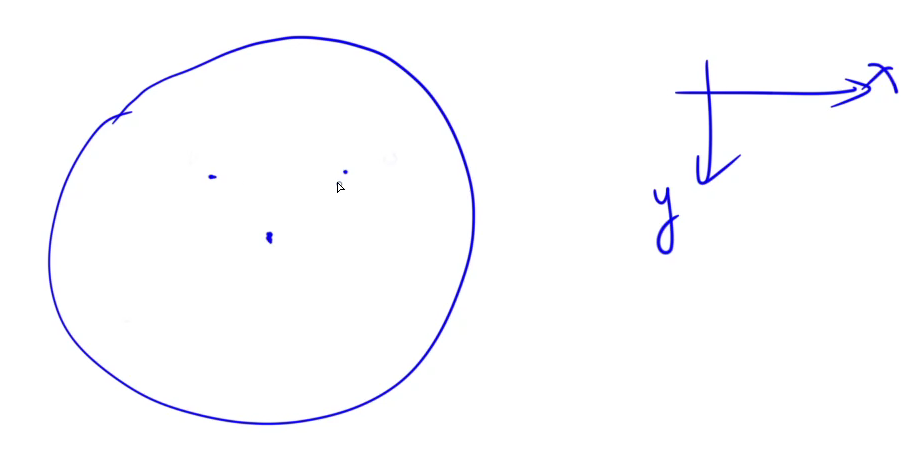
我们调整为中心对称,注意canvas坐标轴的定义

请注意,我们生成地图应当最终是在后端生成,否则会导致玩家可以修改前端代码,目前写在前端只是方便调试。

二、蛇的设计
2.1 初始创建蛇头
初始的时候是一个点,我们规定前10回合,每回合蛇长度加一,后面每三步变长一个
我们的蛇实质上是一堆圆圈的序列,我们先定义一个这个圈圈类cell.js
我们以圆心为单位,根据canvas坐标系我们可以得知x 和y坐标和canvas的对应关系

export class cell {
    constructor(r, c) {
        this.r = r;
        this.c = c;
        this.x = c + 0.5;
        this.y = r + 0.5;
    }
}
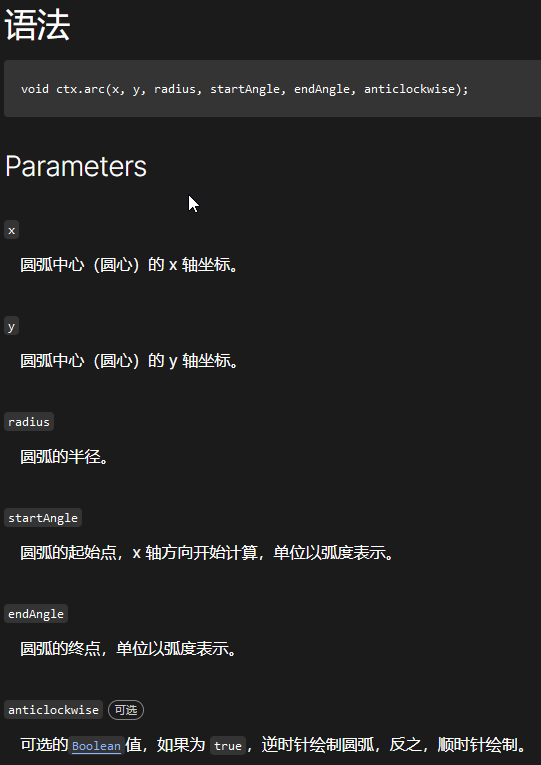
接下来我们定义蛇身,其中,关注一下ctx.arc的参数

beginPath() 方法开始一条路径,或重置当前的路径。
提示:请使用这些方法来创建路径 moveTo()、lineTo()、quadricCurveTo()、bezierCurveTo()、arcTo() 和 arc()。
import { ACGameObject } from "./ACGameObject";
import { cell } from "./cell";

export class Snake extends ACGameObject {
    constructor(info, gamemap) {
        super();

        this.id = info.id;
        this.color = info.color;
        this.gamemap = gamemap;

        this.cells = [new cell(info.r, info.c)];  // 存放蛇的身体,cells[0]存放蛇头

    }

    start() {

    }

    update() {
        this.render();
    }

    render() {
        const L = this.gamemap.L;
        const ctx = this.gamemap.ctx;

        ctx.fillStyle = this.color;
        for (const cell of this.cells) {
            ctx.beginPath();
            ctx.arc(cell.x * L, cell.y * L, L / 2, 0, Math.PI * 2);
            ctx.fill();
        }

    }
}
我们将其加入到我们的地图内
        this.snakes = [
            new Snake({id: 0, color: "#4D72E7", r: this.rows - 2, c: 1}, this),
            new Snake({id:1, color: "#E8364B", r: 1, c: this.cols - 2}, this),
        ]

2.2 蛇的构造
在设计蛇的构造前,我们想到一个关于蛇的连贯性问题,即如果按照我们的上述思路,蛇的路径是这样走的。

我们在头部 根据我们的方向 创建一个头,尾部向尾部后面一个元素移动就可以解决这个问题。
我们定义这个贪吃蛇是回合制游戏,每一步我们需要接收两个蛇的移动指令才能移动
对于指令部分,我们定义:
- 蛇的下一步方向direction:-1 没有指令 0 1 2 3 表示上右下左
- 蛇的当前状态status: idle move die 分别表示静止 移动 死亡
我们蛇的属性Snake.js构造如下:
    constructor(info, gamemap) {
        super();

        this.id = info.id;
        this.color = info.color;
        this.gamemap = gamemap;

        this.cells = [new cell(info.r, info.c)];  // 存放蛇的身体,cells[0]存放蛇头

        this.speed = 5;  // 蛇每秒走5个格子
        this.direction = -1;  // -1 表示没有指令 0123表示上右下左
        this.status = "idle";  // idle表示静止,move表示正在移动,die表示死亡
    }
2.2.1 造型优化:身体用矩阵填充
我们只需要在每个相邻两个蛇身cells之间填充这个矩形即可

    render() {
        const L = this.gamemap.L;
        const ctx = this.gamemap.ctx;

        ctx.fillStyle = this.color;
        for (const cell of this.cells) {
            ctx.beginPath();
            ctx.arc(cell.x * L, cell.y * L, L / 2 * 0.8, 0, Math.PI * 2);
            ctx.fill();
        }

        for (let i = 1; i < this.cells.length; i ++ ) {
            // 待对每个cell实现fillRect()函数
        }
    }
关键就是怎么填充这个矩阵。
我们回顾一下fillrect的参数,可以看到分别就是两个左上顶点坐标 + 宽 + 高

那么我们分成两种情况讨论,一种是水平的,一种是垂直的,当然根据经验,这种情况,我们到一定的允许误差内就认为不用画矩阵了。

        for (let i = 1; i < this.cells.length; i ++ ) {
            const a = this.cells[i - 1], b = this.cells[i];
            if (Math.abs(a.x - b.x) < this.eps && Math.abs(a.y - b.y) < this.eps)
                continue;
            if (Math.abs(a.x - b.x) < this.eps) {  // 竖直方向
                ctx.fillRect((a.x - 0.5) * L, Math.min(a.y, b.y) * L, L, Math.abs(a.y - b.y) * L);
            } else {  // 水平方向
                ctx.fillRect(Math.min(a.x, b.x) * L, (a.y - 0.5) * L, Math.abs(a.x - b.x) * L, L);
            }
        }

发现有点胖,我们让其瘦一点,但涉及到的内容比较多:
- 我们首先必须修改圆的半径,那么对应的起点位置我们也要修改(对应1,3)
- 由于半径小了,我们纵向的话,宽会受到影响,横向的高会受到影响,他不是原先一个半径的长度了

实验测试结果如下:
进行第一项修改的效果,仅修改圆的半径

进行第二项修改的效果,比如看横向,仅修改矩阵 横向的宽,那么可以看到下面突出来了圆

第一项和第二项同时修改的结果,我们加入圆的修改后,会发现横向矩阵的高依旧不对,这是因为偏移量也要缩放,否则会造成我们起点位置的纵向位置不对(横向情况)

加上偏移量的修改,可以看到横向的结果我们都成功修正了,那么纵向同理 我们对称一遍就实现了。

    render() {
        const zoom = 0.66;  // 对蛇进行瘦身的比例
        const L = this.gamemap.L;
        const ctx = this.gamemap.ctx;

        ctx.fillStyle = this.color;
        for (const cell of this.cells) {
            ctx.beginPath();
            ctx.arc(cell.x * L, cell.y * L, L / 2 * zoom, 0, Math.PI * 2);
            ctx.fill();
        }

        for (let i = 1; i < this.cells.length; i ++ ) {
            const a = this.cells[i - 1], b = this.cells[i];
            if (Math.abs(a.x - b.x) < this.eps && Math.abs(a.y - b.y) < this.eps)
                continue;
            if (Math.abs(a.x - b.x) < this.eps) {  // 竖直方向
                ctx.fillRect((a.x - 0.5 * zoom) * L, Math.min(a.y, b.y) * L, L * zoom, Math.abs(a.y - b.y) * L);
            } else {  // 水平方向
                ctx.fillRect(Math.min(a.x, b.x) * L, (a.y - 0.5 * zoom) * L, Math.abs(a.x - b.x) * L, L * zoom);
            }
        }
    }
2.2.2 造型优化:头部画两颗眼睛
我们需要存取方向,默认左下角朝上,右上角朝下(在构造器里设置一下)
        this.eye_direction = 0;
        if (this.id === 0) this.eye_direction = 0;  // 左下角的蛇朝上 右上角的蛇朝下
        if (this.id === 1) this.eye_direction = 2;  // 左下角的蛇朝上 右上角的蛇朝下
眼睛是随着我们的方向来画的,我们对蛇的方向对应的偏移量先预先打个表
以向上为例,我们x方向是-1 1, y方向是 -1 -1,其他同理

        this.eye_dx = [  // 蛇两个眼睛四个方向的x偏移量
            [-1, 1],
            [1, 1],
            [1, -1],
            [-1, -1],
        ];
        this.eye_dy = [  // 蛇两个眼睛四个方向的y偏移量
            [-1, -1],
            [-1, 1],
            [1, 1],
            [1, -1],
        ];
以及我们下一步的时候会改变方向,我们在next_step里加一句
this.eye_direction = d;
然后绘制圆,
        ctx.fillStyle = "black";
        for (let i = 0; i < 2; i ++ ) {
            const eye_x = (this.cells[0].x + this.eye_dx[this.eye_direction][i] * 0.15) * L;
            const eye_y = (this.cells[0].y + this.eye_dy[this.eye_direction][i] * 0.15) * L;
            // console.log(eye_x, eye_y);
            ctx.beginPath();
            ctx.arc(eye_x, eye_y, L * 0.05, 0, Math.PI * 2);
            ctx.fill();
        }

2.3 蛇的重要逻辑
2.3.1 回合制逻辑
我们还需要一个裁判,逻辑放在GameMap里面 check_ready() 判断两条蛇是否准备好了下一回合
只有当两只蛇都完成了操作后,我们才返回true
    check_ready() {  // 判断两条蛇是否准备好下一回合
        for (const snake of this.snakes) {
            if (snake.status !== "idle") return false;
            if (snake.direction === -1) return false;
        }
        return true;
    }
以及next_step() 来更新蛇的状态为下一步,需要记录偏移量
另外需要记录蛇的回合数
我们主逻辑就是 如果都准备好了,就进入下一回合
GameMap.js
    next_step() {  // 让两条蛇进入下一回合
        for (const snake of this.snakes) {
            snake.next_step();
        }
    }
    update() {
        this.update_size();
        if (this.check_ready()) {
            this.next_step();
        }
        this.render();
    }
2.3.2 蛇头基于状态的移动逻辑
要实现蛇头的移动,主要的逻辑就是:在每帧更新时更新蛇头的位置。
首先,我们定义了蛇的速度(每秒走多少个格子)
每一帧定义一个update_move()函数,怎么定义一帧走五格
我们具体在Snake.js里是这样实现的
这里思考为什么蛇会被墙覆盖掉。
    constructor(info, gamemap) {
        super();

        this.id = info.id;
        this.color = info.color;
        this.gamemap = gamemap;

        this.cells = [new cell(info.r, info.c)];  // 存放蛇的身体,cells[0]存放蛇头

        this.speed = 5;  // 蛇每秒走5个格子
    }

	update_move() {
        this.cells[0].x += this.speed * this.timedelta / 1000;
    }

    update() {
        this.update_move();
        this.render();
    }
这是一个静态的移动,我们要实现状态式的移动,这需要我们每一帧要走一个固定的距离,所以我们需要计算一下到底要移动多少距离。
请看,我们移动的逻辑是这样的,我们最终要实现蛇头沿着md的方向移动md距离
md是斜边距离,dx dy是单位时间分量的偏移量,我们这里设置一个误差,当两个点之间距离相差1e-2时就认为重合了。

关于蛇,完整的逻辑是这样的
- set_direction 修改方向的接口
- next_step 下一步的逻辑
- 每次更新时判断是否为move来进行移动逻辑update_move()
    set_direction(d) {  // 便于后端调用,使用统一接口
        this.direction = d;
    }

	next_step() {  // 将蛇的状态变为下一步
        const d = this.direction;
        this.next_cell = new Cell(this.cells[0].r + this.dr[d], this.cells[0].c + this.dc[d]);
        this.direction = -1;  // 清空操作
        this.status = "move";
        this.step ++ ;

        const k = this.cells.length;
        for (let i = k; i > 0; i -- ) {
            this.cells[i] = JSON.parse(JSON.stringify(this.cells[i - 1]));
        }
    }

	update_move() {
        // this.cells[0].x += this.speed * this.timedelta / 1000;
        const dx = this.next_cell.x - this.cells[0].x;
        const dy = this.next_cell.y - this.cells[0].y;
        const distance = Math.sqrt(dx * dx + dy * dy);

        if (distance < this.eps) {
            this.cells[0] = this.next_cell;  // 更换新蛇头
            this.next_cell = null;
            this.status = "idle";  // 走完了 停下来

        } else {
            const move_distance = this.speed * this.timedelta / 1000;  // 每两帧之间走过的距离
            this.cells[0].x += move_distance * dx / distance;
            this.cells[0].y += move_distance * dy / distance;
        }
    }

    update() {  // 每一帧执行一次
        if (this.status === 'move') {
            this.update_move();
        }

        this.render();
    }
2.3.3 用户修改蛇头方向逻辑
接下来我们要获取用户输入,我们在对应的组件里加上 tabindex="0" 属性,使其能输入用户操作。
<template>
    <div ref="parent" class="gamemap">
        <canvas ref="canvas" tabindex="0"></canvas>
    </div>
</template>
我们接下来对GameMap.js绑定一个输入的事件,在我们start的时候触发,根据我们的输入来改变方向
    add_listening_events() {
        this.ctx.canvas.focus();  // 聚焦

        const [snake0, snake1] = this.snakes;
        this.ctx.canvas.addEventListener("keydown", e => {
            if (e.key === 'w') snake0.set_direction(0);
            else if (e.key === 'd') snake0.set_direction(1);
            else if (e.key === 's') snake0.set_direction(2);
            else if (e.key === 'a') snake0.set_direction(3);
            else if (e.key === 'ArrowUp') snake1.set_direction(0);
            else if (e.key === 'ArrowRight') snake1.set_direction(1);
            else if (e.key === 'ArrowDown') snake1.set_direction(2);
            else if (e.key === 'ArrowLeft') snake1.set_direction(3);
        });
    }

	start() {
        for (let i = 0; i < 6666; i ++ ){
            if (this.create_walls())
                break;
        }
        this.add_listening_events();
    }
2.3.4 蛇尾的移动逻辑
接下来写蛇尾,我们规定:前10回合每回合加1个长度,后面3个回合加1个长度,我们可以用取模操作判断是否要增加长度,在不增加长度的回合中,我们需要进行去尾操作。
首先我们需要判断蛇所处的位置(默认蛇在移动 并且假设该回合是不增加长度的回合)
- 如果说到了我们所认为的终点,那么就直接去掉尾部,我们使用到了一个误差值来判断我们是否认为到终点
- 如果蛇在中间move,那么我们需要计算对应的偏移量,然后让蛇尾部的位置移动
    check_tail_increasing() {  // 检测当前回合 蛇的长度是否增加
        if (this.step <= 10) return true;
        if (this.step % 3 == 1) return true;
        return false;
    }

 	update_move() {
        // this.cells[0].x += this.speed * this.timedelta / 1000;
        const dx = this.next_cell.x - this.cells[0].x;
        const dy = this.next_cell.y - this.cells[0].y;
        const distance = Math.sqrt(dx * dx + dy * dy);

        if (distance < this.eps) {  // 走到了目标点
            this.cells[0] = this.next_cell;  // 更换新蛇头
            this.next_cell = null;
            this.status = "idle";  // 走完了 停下来

            if (!this.check_tail_increasing()) {
                this.cells.pop();
            }
        } else {
            const move_distance = this.speed * this.timedelta / 1000;  // 每两帧之间走过的距离
            this.cells[0].x += move_distance * dx / distance;
            this.cells[0].y += move_distance * dy / distance;

            if (!this.check_tail_increasing()) {
                const k = this.cells.length;
                const tail = this.cells[k - 1], tail_target = this.cells[k - 2];
                const tail_dx = tail_target.x - tail.x;
                const tail_dy = tail_target.y - tail.y;
                tail.x += move_distance * tail_dx / distance;
                tail.y += move_distance * tail_dy / distance;
            }
        }
    }
可以看到,他到了第11回合的时候,长度不增加了

12回合

13回合,长度增加,尾巴不变,符合我们的要求

2.4.5 基于蛇的合法性实现对应事件
接下来我们要实现检测合法性功能
撞到两条蛇的身体和墙
- 枚举墙
- 枚举蛇
- 这里要判断蛇尾有没有缩,蛇尾前进的时候 跳过检测
如果非法,就进入停止状态
    check_valid(cell) {  // 检测目标位置是否合法:蛇的身体和墙
        for (const wall of this.walls) {
            if (wall.r === cell.r && wall.c === cell.c)
                return false;
        }

        for (const snake of this.snakes) {
            let k = snake.cells.length;
            if (!snake.check_tail_increasing()) {  // 当蛇尾前进的时候 蛇尾不用判断
                k --;
            }
            for (let i = 0; i < k; i ++) {
                if (snake.cells[i].r === cell.r && snake.cells[i].c === cell.c)
                    return false;
            }
        }

        return true;
    }
我们修改next_step的逻辑,只要判断非法了,蛇就死亡,游戏结束
	next_step() {  // 将蛇的状态变为下一步
        const d = this.direction;
        this.next_cell = new Cell(this.cells[0].r + this.dr[d], this.cells[0].c + this.dc[d]);
        this.direction = -1;  // 清空操作
        this.status = "move";
        this.step ++ ;

        const k = this.cells.length;
        for (let i = k; i > 0; i -- ) {
            this.cells[i] = JSON.parse(JSON.stringify(this.cells[i - 1]));
        }

        if (!this.gamemap.check_valid(this.next_cell)) {  // 只要非法操作就死亡
            this.status = "die";
        }
    }
可以看到,我们的逻辑是只有在move的状态下,我们的ready函数才能返回true,才能进行后续操作
    check_ready() {  // 判断两条蛇是否准备好下一回合
        for (const snake of this.snakes) {
            if (snake.status !== "idle") return false;
            if (snake.direction === -1) return false;
        }
        return true;
    }
    update() {
        this.update_size();
        if (this.check_ready()) {
            this.next_step();
        }
        this.render();
    }
蛇死了,就改颜色,我们在render部分添加一句
        if (this.status == "die") {
            ctx.fillStyle = "white";
        }
最终实现效果


