C# WebAPI开发及发布IIS
备注:(swagger/index.html)(部署参考IIS:https://www.cnblogs.com/become/p/15796204.html)
对于C# 开发人员,接口服务大部分是WCF(需要配置很多),WebService(走的XML,相比json同样的内容大很多) ,一般应用程序(大量接口可能会有点麻烦),WebAPi则借鉴了以上的有点,屏蔽了缺点,而且调试也可以完全摆脱PostMan;
一、.NetCore WebApi项目开发Demo
接下来我新增一个(开发工具VS2019)
1,新增项目
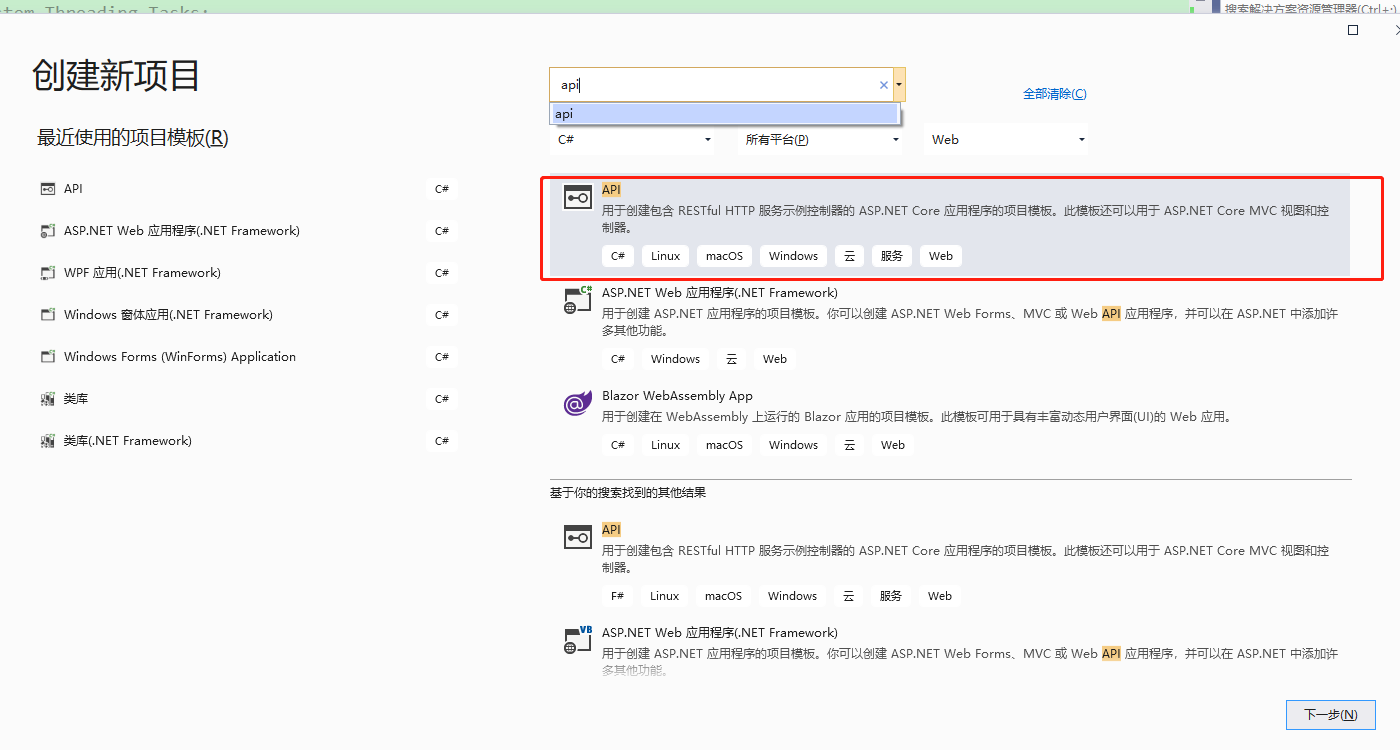
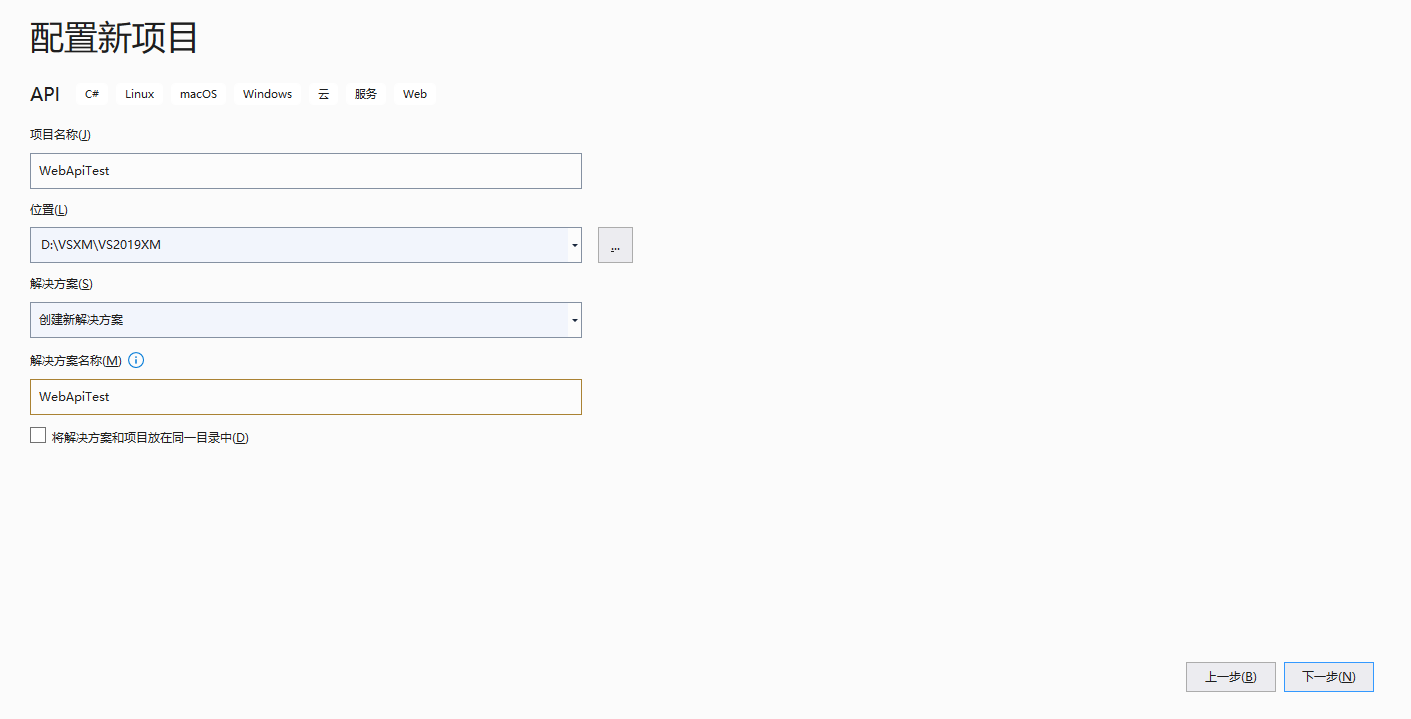
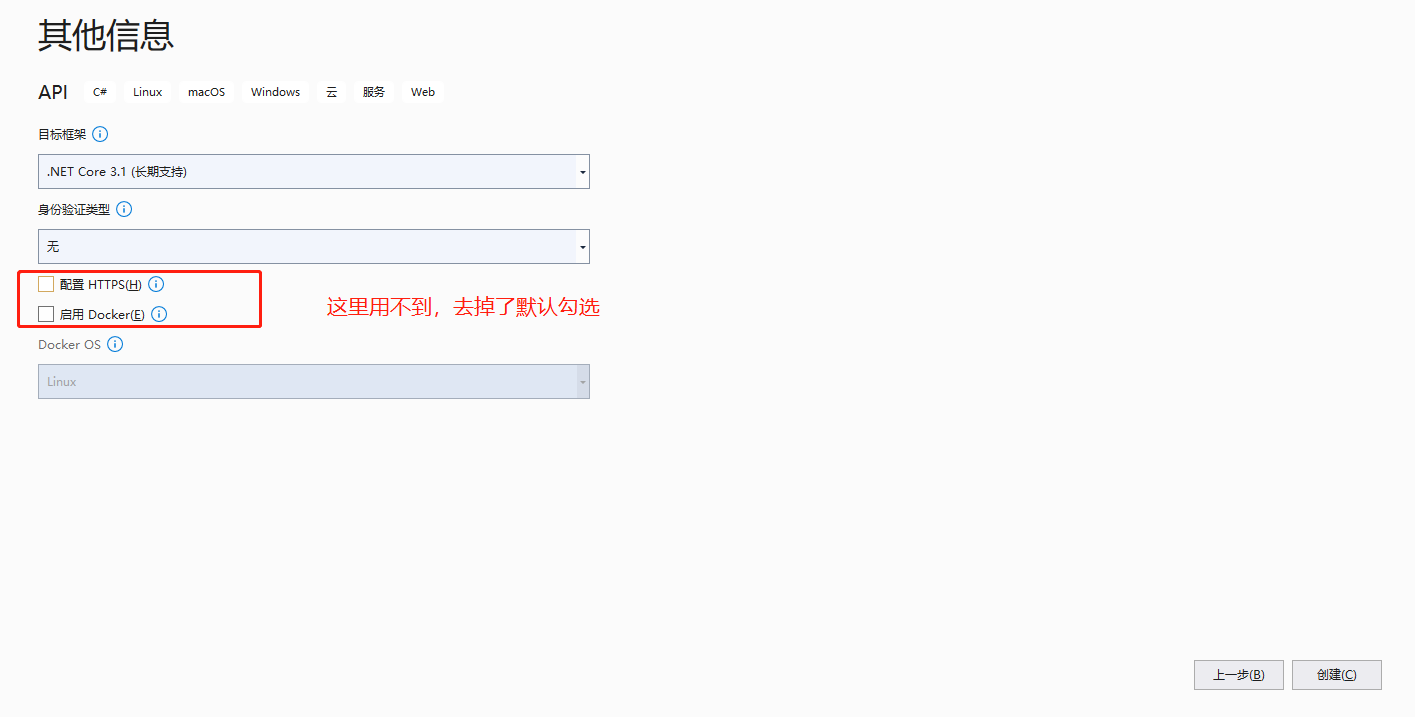
项目简单介绍:接口类都以Controller结尾,
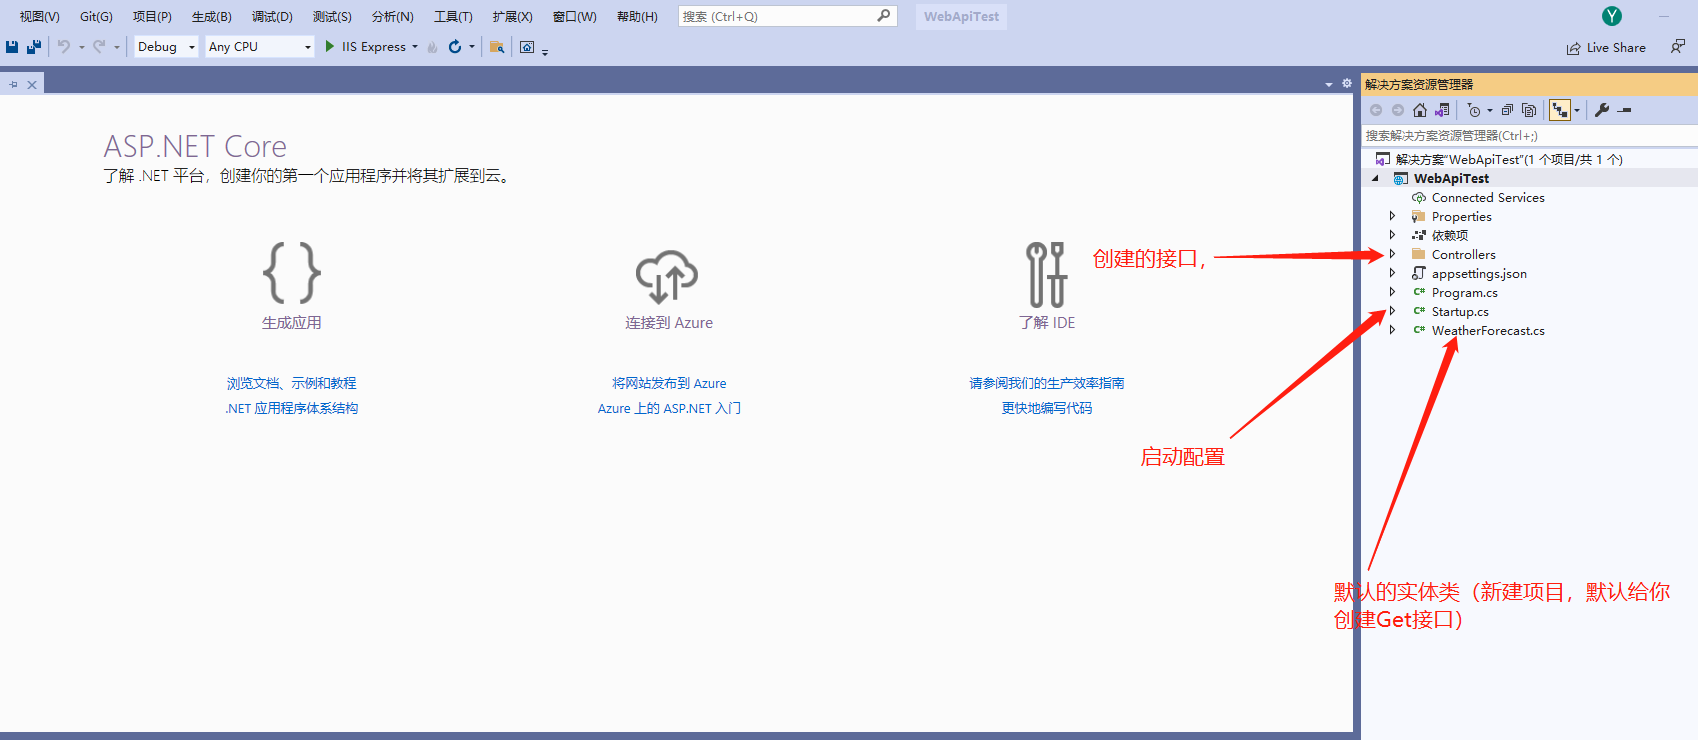
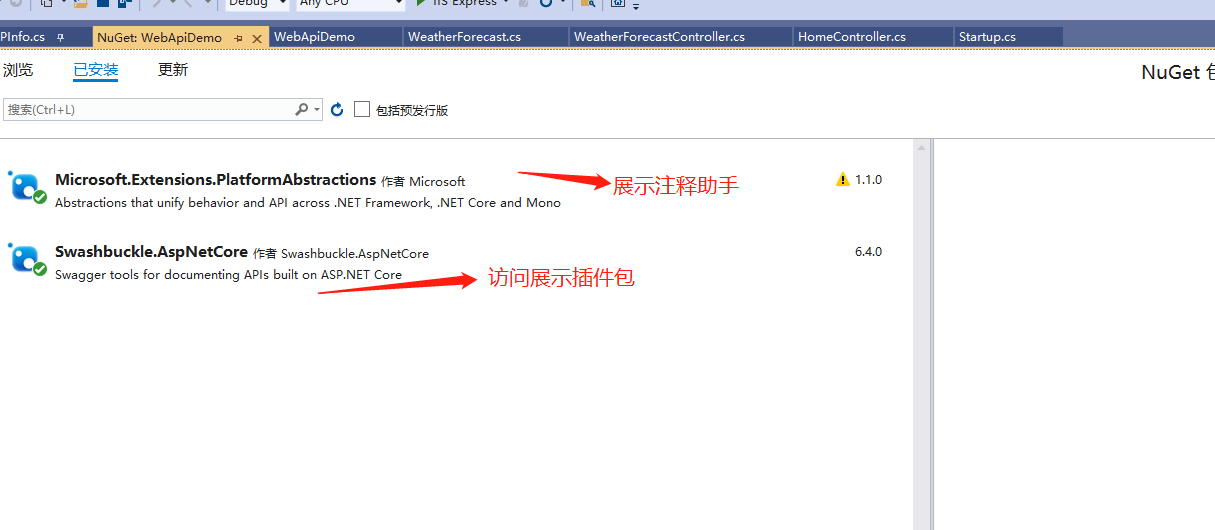
1、安装Nuget包(项目/管理NuGet包)
(主要安装两个,一个为了展示所有接口,一个为了展示接口XML注释)
Microsoft.Extensions.PlatformAbstraction
Swashbuckle.AspNetCore
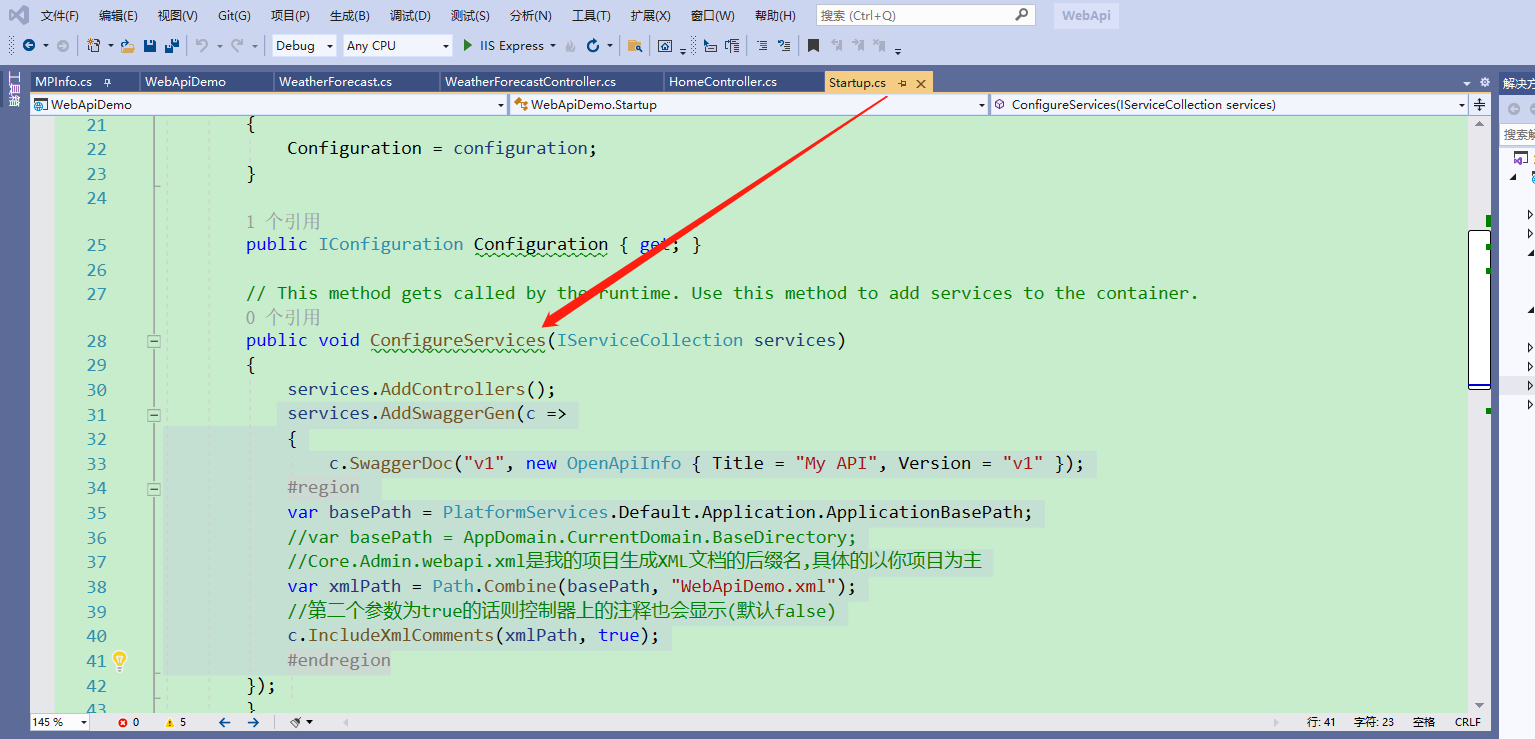
调整配置
 public void ConfigureServices(IServiceCollection services)
        {
            services.AddControllers();
            services.AddSwaggerGen(c =>
            {
                c.SwaggerDoc("v1", new OpenApiInfo { Title = "My API", Version = "v1" });
            #region
            var basePath = PlatformServices.Default.Application.ApplicationBasePath;
            //var basePath = AppDomain.CurrentDomain.BaseDirectory;
            //Core.Admin.webapi.xml是我的项目生成XML文档的后缀名,具体的以你项目为主
            var xmlPath = Path.Combine(basePath, "WebApiDemo.xml");
            //第二个参数为true的话则控制器上的注释也会显示(默认false)
            c.IncludeXmlComments(xmlPath, true);
            #endregion
        });
        }
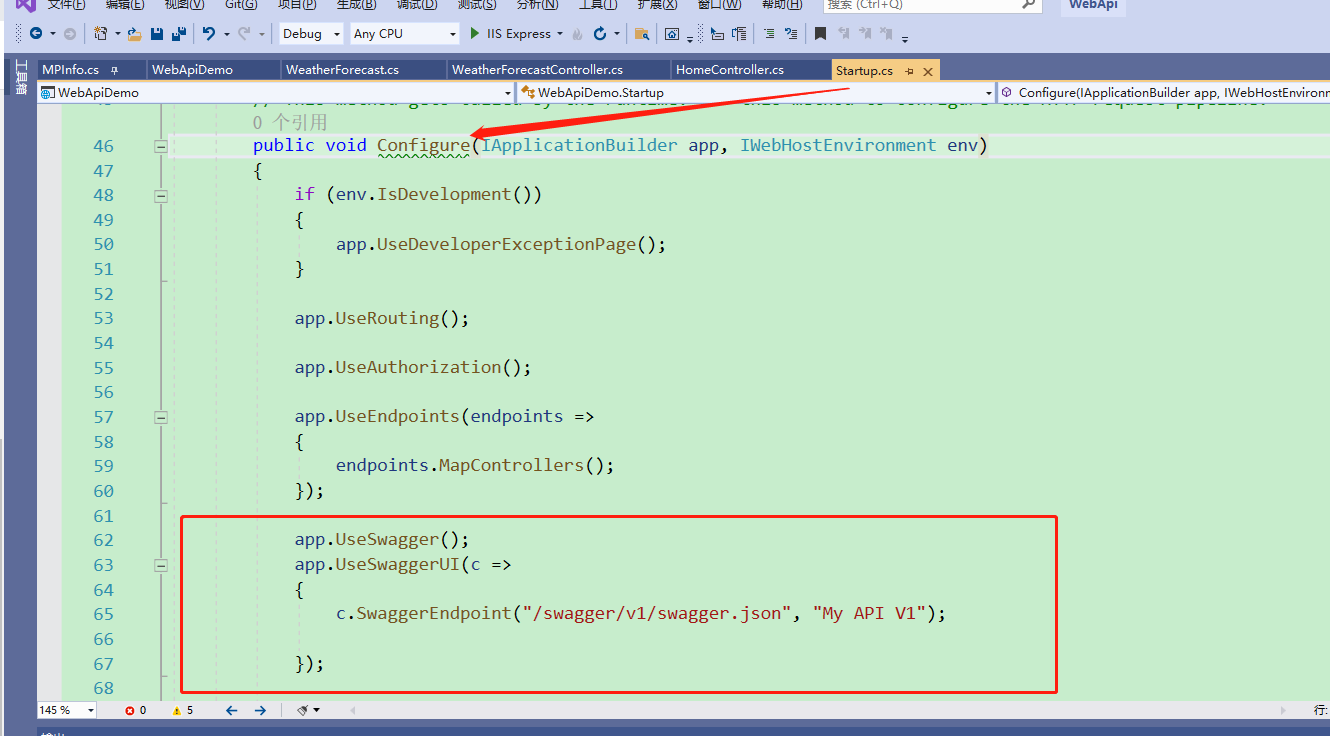
 public void Configure(IApplicationBuilder app, IWebHostEnvironment env)
        {
            if (env.IsDevelopment())
            {
                app.UseDeveloperExceptionPage();
            }

            app.UseRouting();

            app.UseAuthorization();

            app.UseEndpoints(endpoints =>
            {
                endpoints.MapControllers();
            });

            app.UseSwagger();
            app.UseSwaggerUI(c =>
            {
                c.SwaggerEndpoint("/swagger/v1/swagger.json", "My API V1");

            });


        }
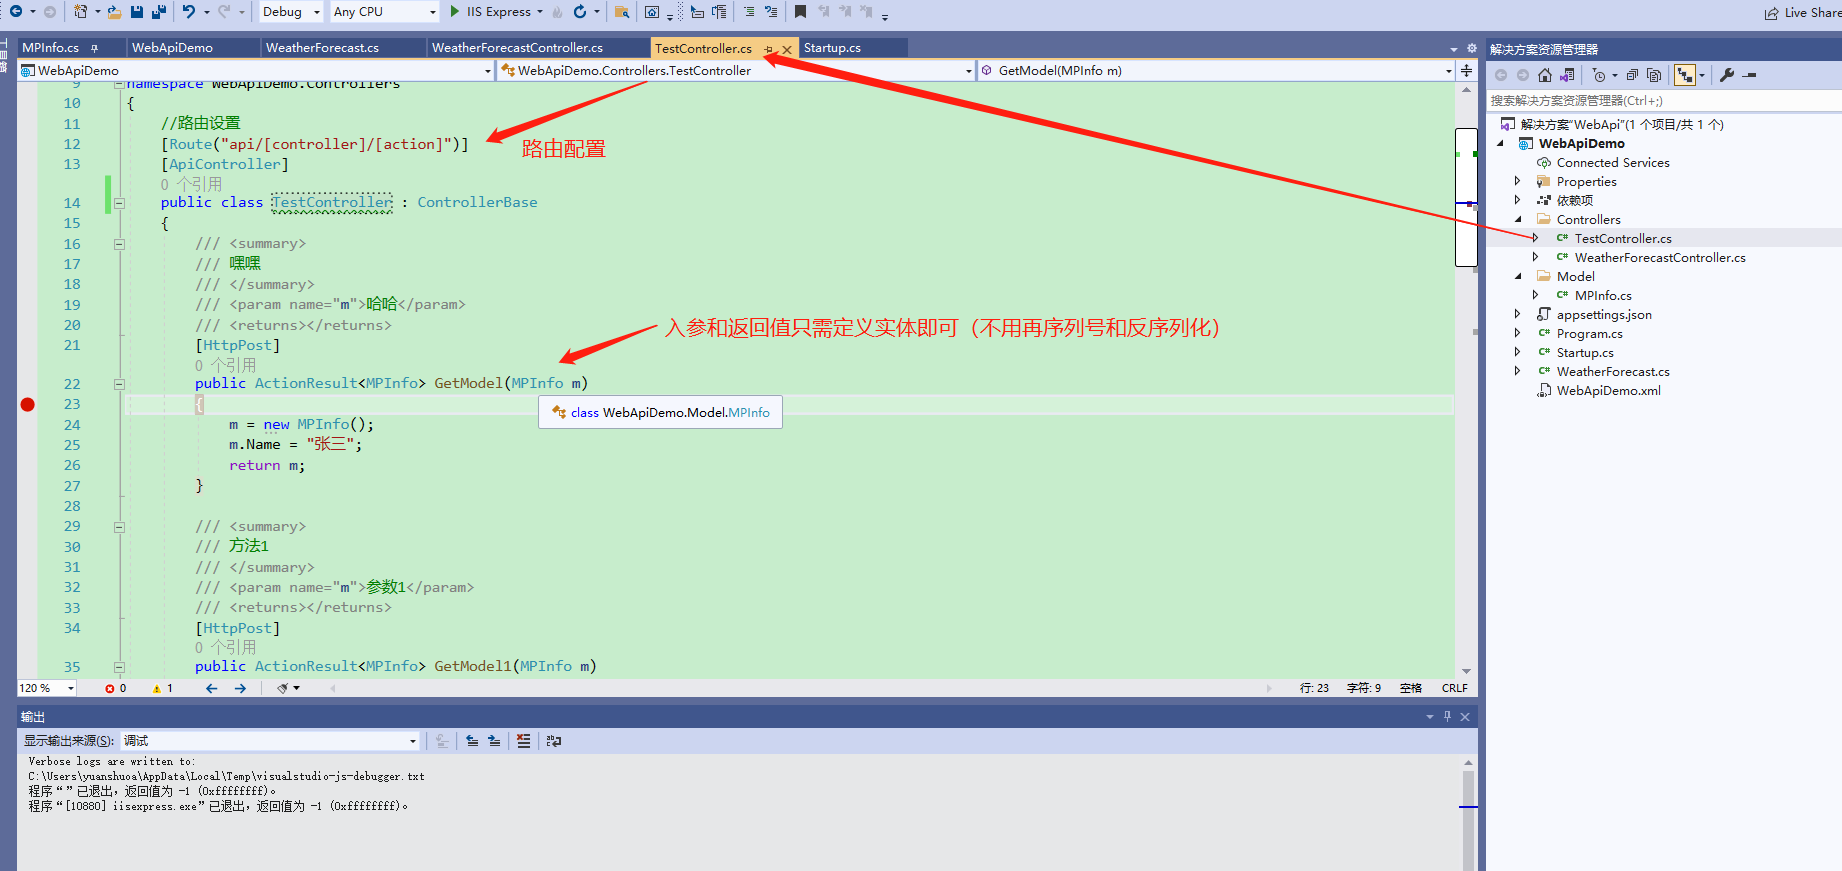
2、增加自己接口方法,类名以Controller结尾
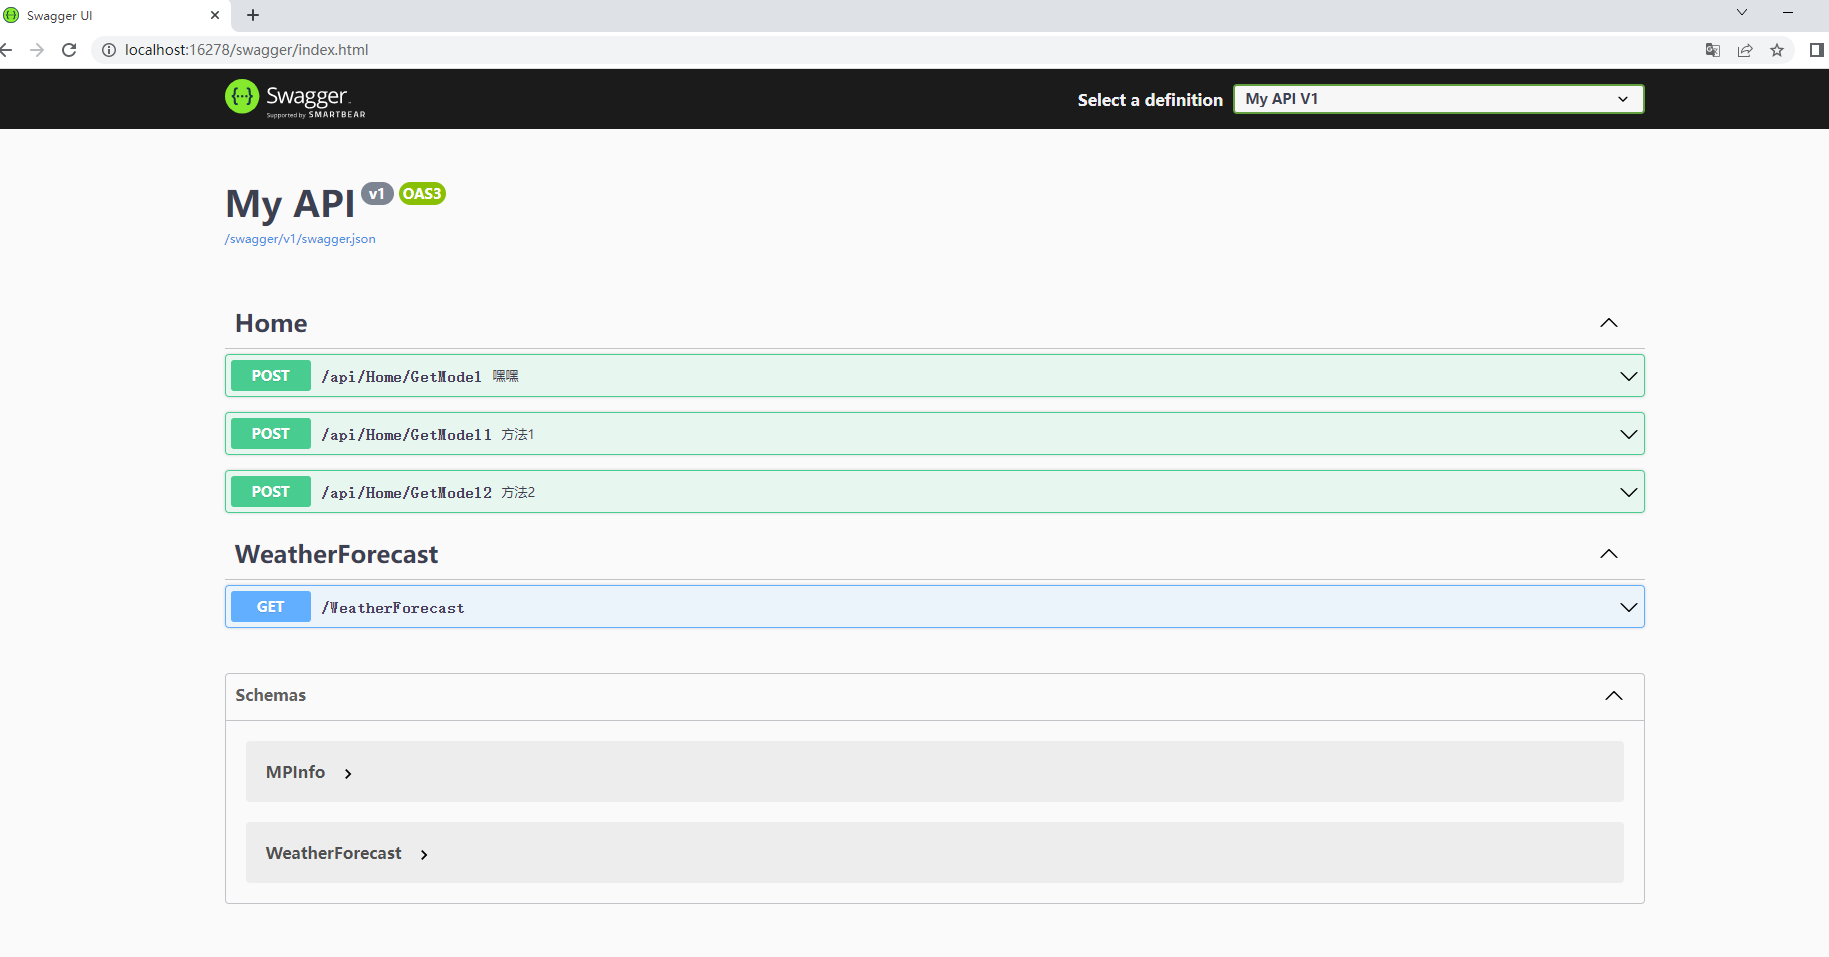
访问路径改为:
swagger/index.html
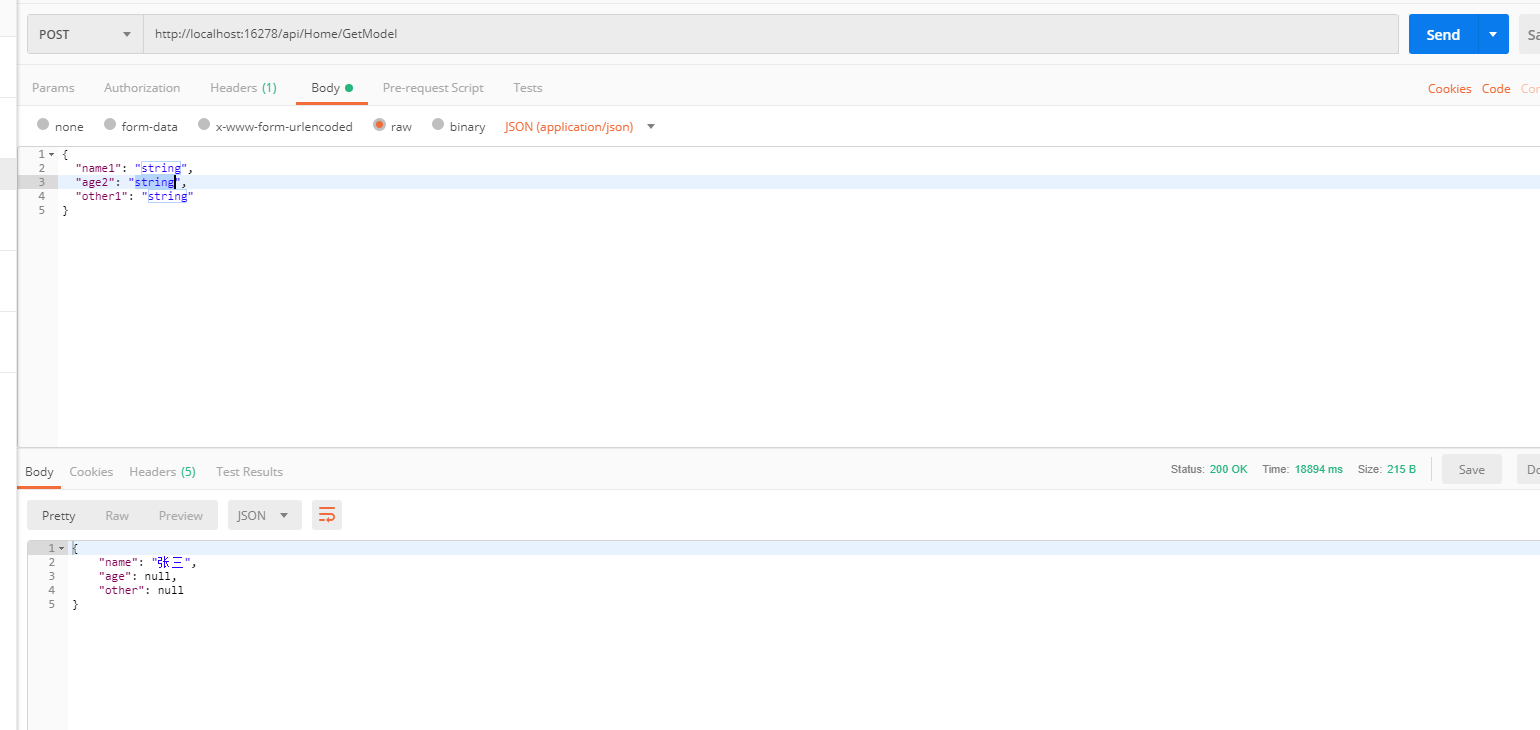
postMan测试
二、.NetCore WebApi 部署IIS
环境安装(部署IIS)
链接:https://pan.baidu.com/s/1hqS0EIW0ru0W2WTtTdfZHg
提取码:WApi
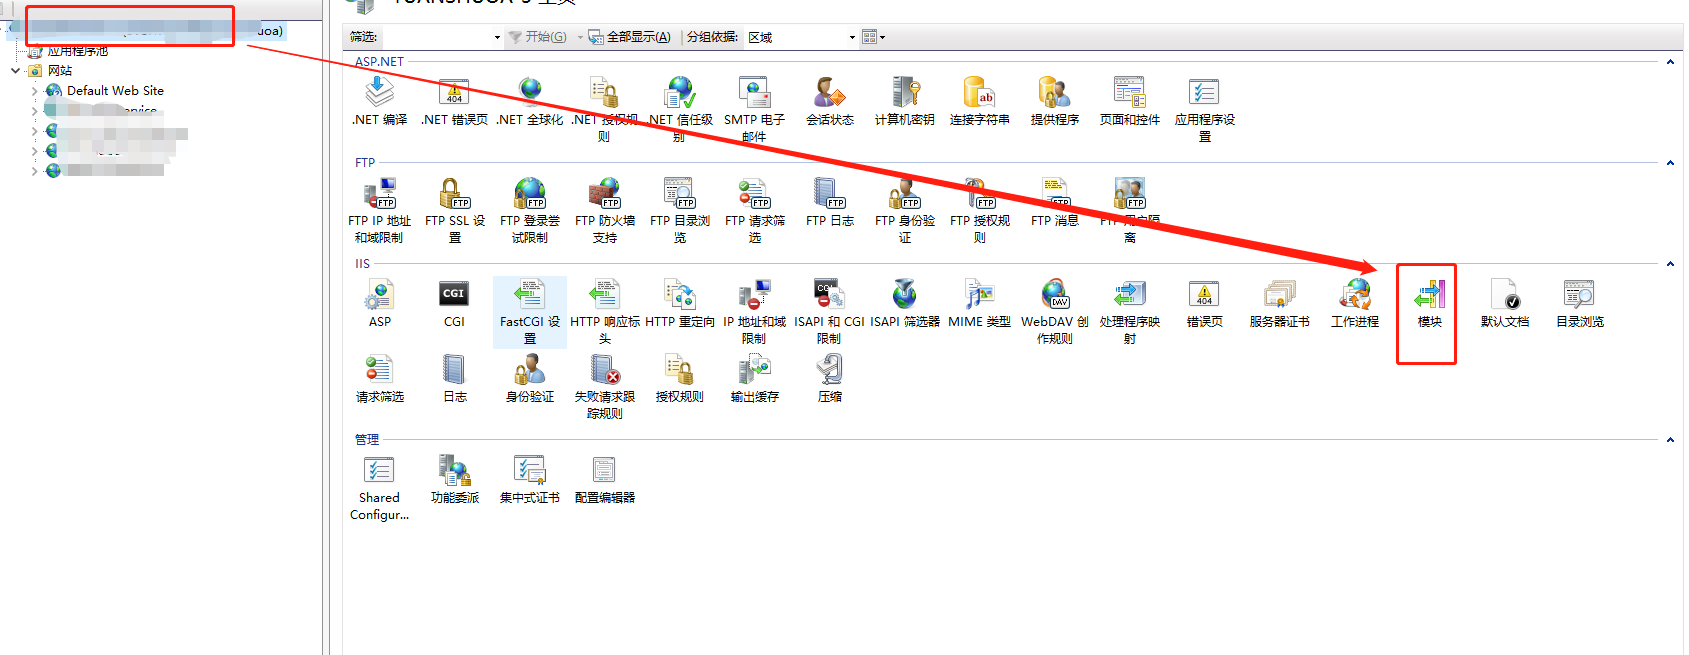
安装完有此模块
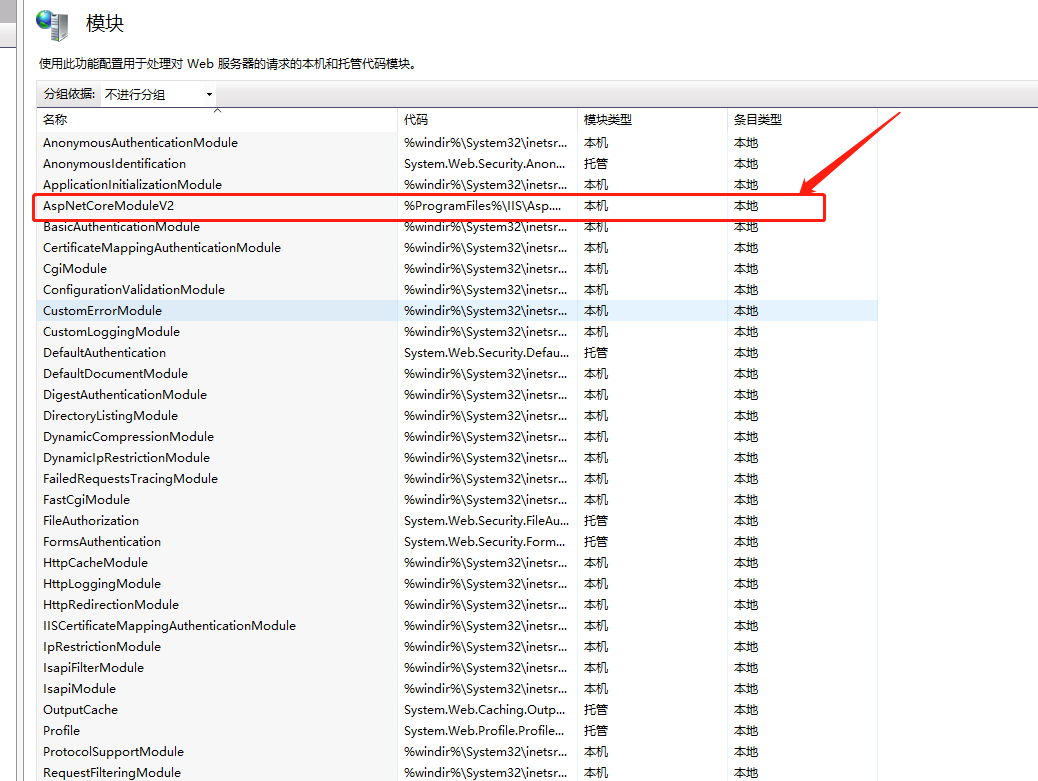
环境安装完毕,新增网站应用程序池(用默认4.0也可以)
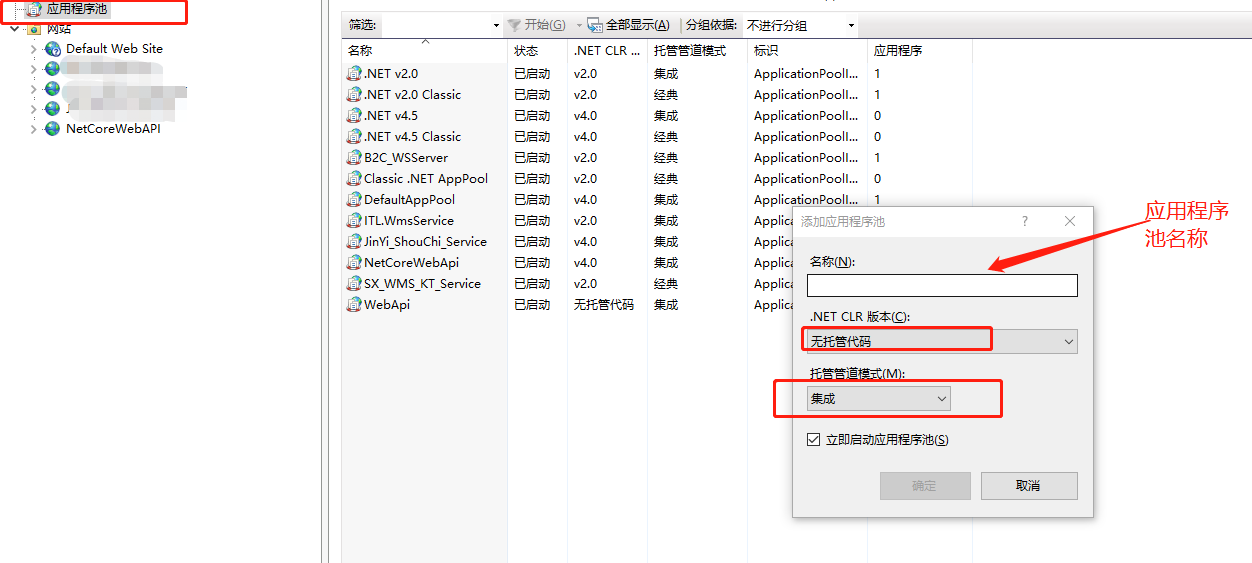
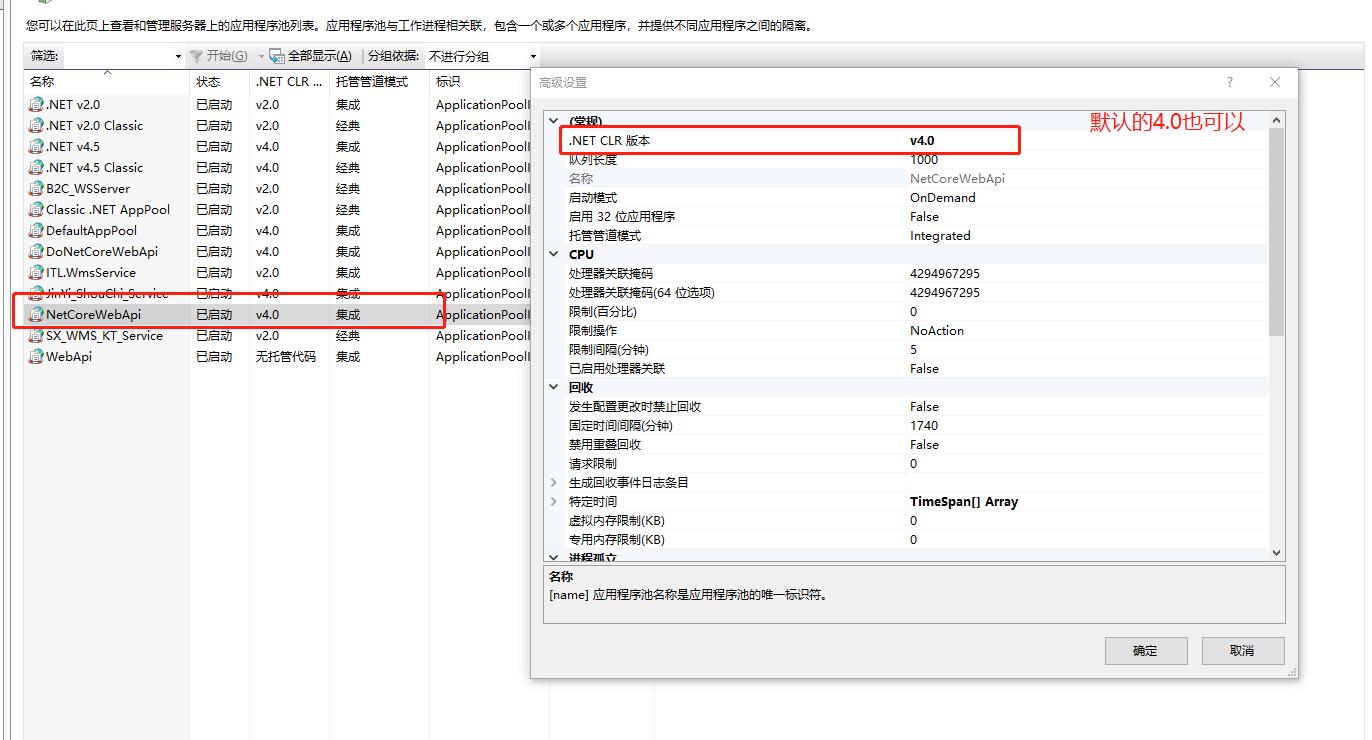
然后像正常部署到IIS网站一样选择上述新建该程序池部署即可(用生成的编译包和右击点击发布都是可以的)
异常报错处理,我遇到是500或者异常报错;
1、设置访问权限,点击IIS站点右击【编辑权限】【安全】增加Everyone完全控制权限;
2、增加配置节点
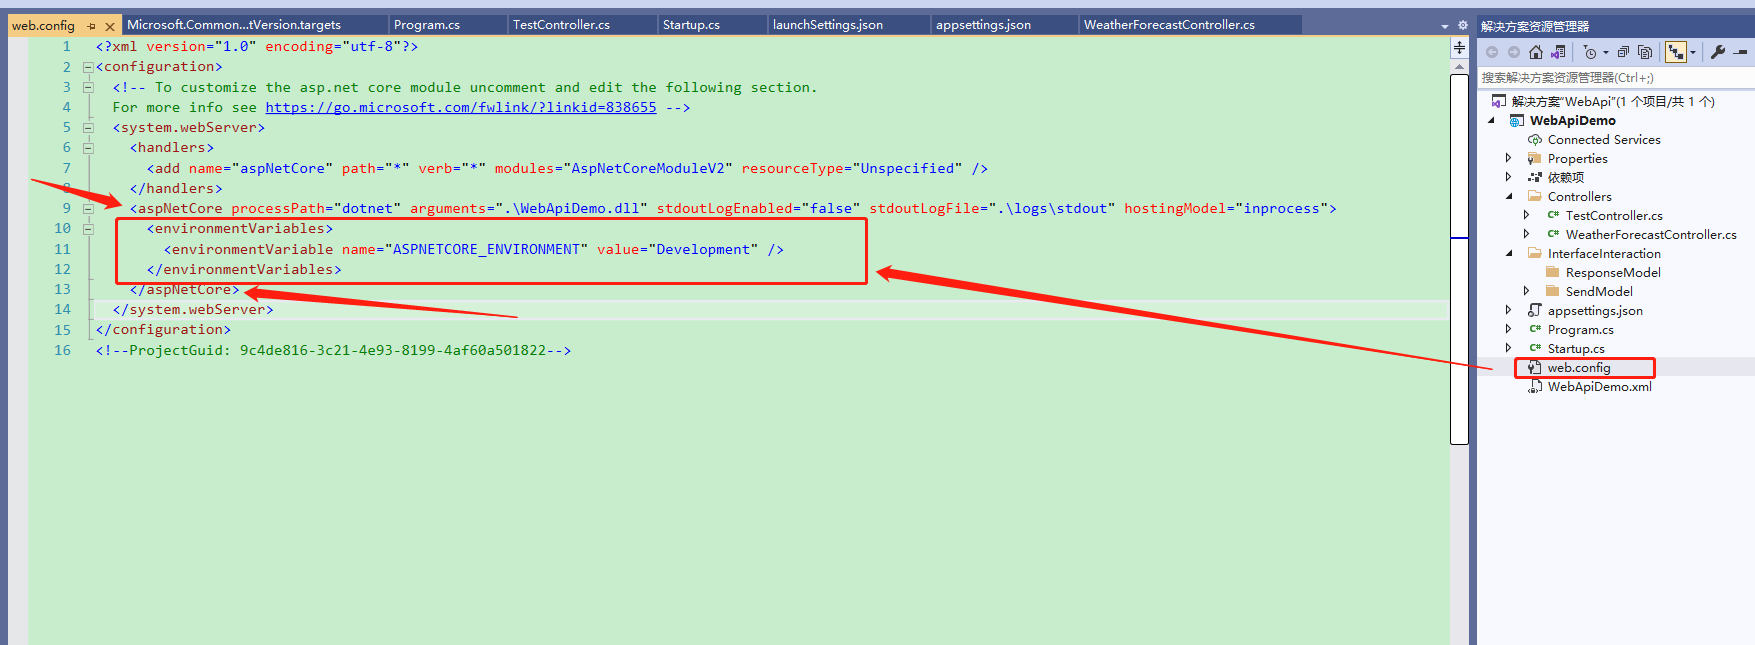
配置文件信息
<?xml version="1.0" encoding="utf-8"?>
<configuration>
  <!-- To customize the asp.net core module uncomment and edit the following section.
  For more info see https://go.microsoft.com/fwlink/?linkid=838655 -->
  <system.webServer>
    <handlers>
      <add name="aspNetCore" path="*" verb="*" modules="AspNetCoreModuleV2" resourceType="Unspecified" />
    </handlers>
    <aspNetCore processPath="dotnet" arguments=".\WebApiDemo.dll" stdoutLogEnabled="false" stdoutLogFile=".\logs\stdout" hostingModel="inprocess">
      <environmentVariables>
        <environmentVariable name="ASPNETCORE_ENVIRONMENT" value="Development" />
      </environmentVariables>
    </aspNetCore>
  </system.webServer>
</configuration>
<!--ProjectGuid: 9c4de816-3c21-4e93-8199-4af60a501822-->
访问即可解决
测试结果如下:http://127.0.0.1:1111/swagger/index.html
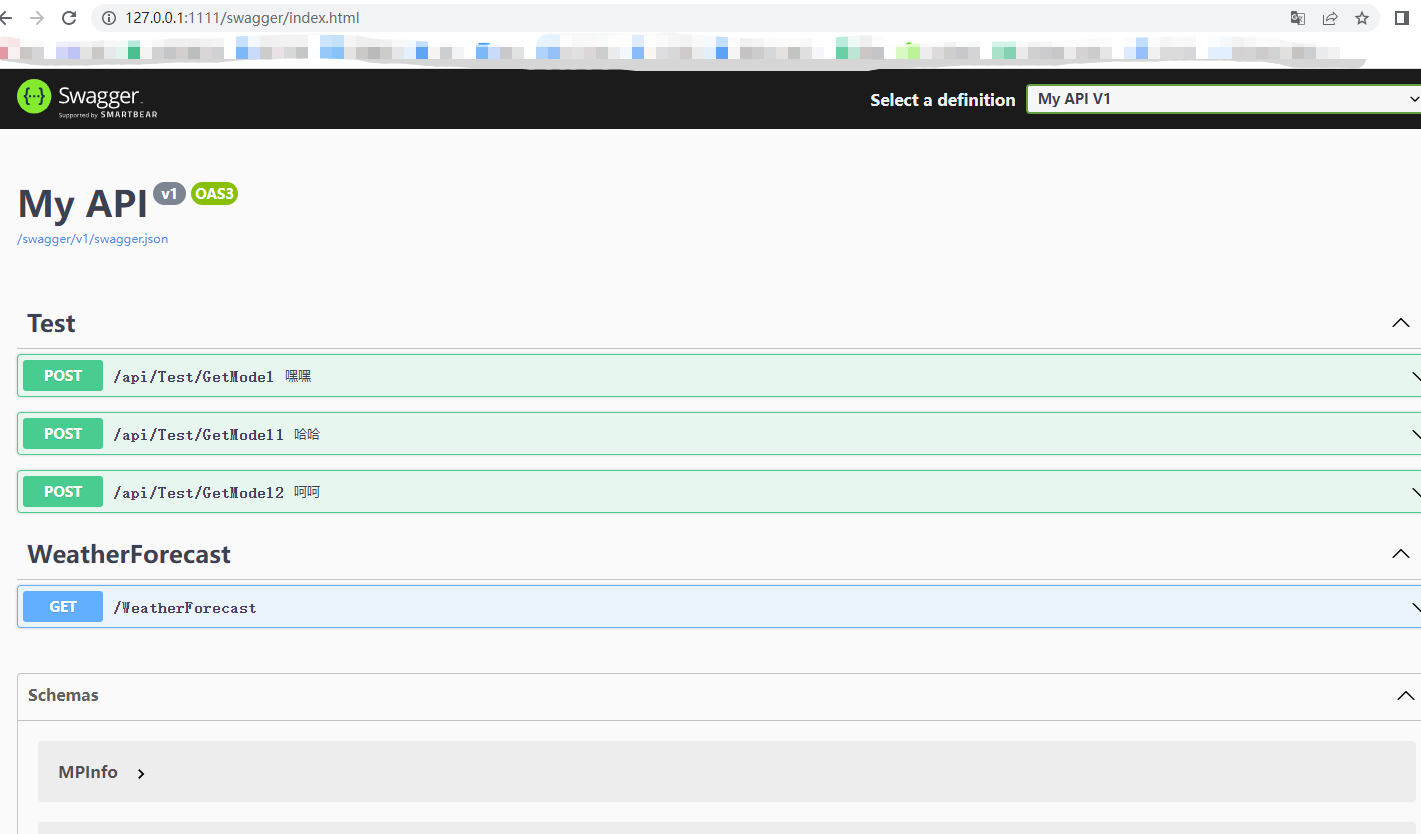
postman测试
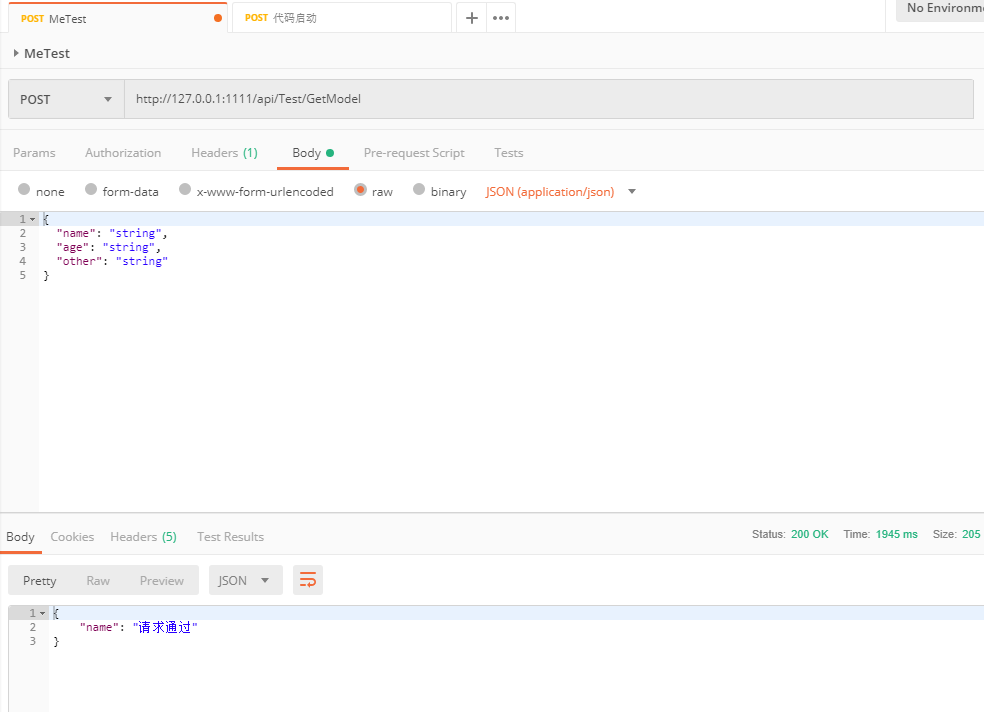
三、设置返回报文节点显示样式
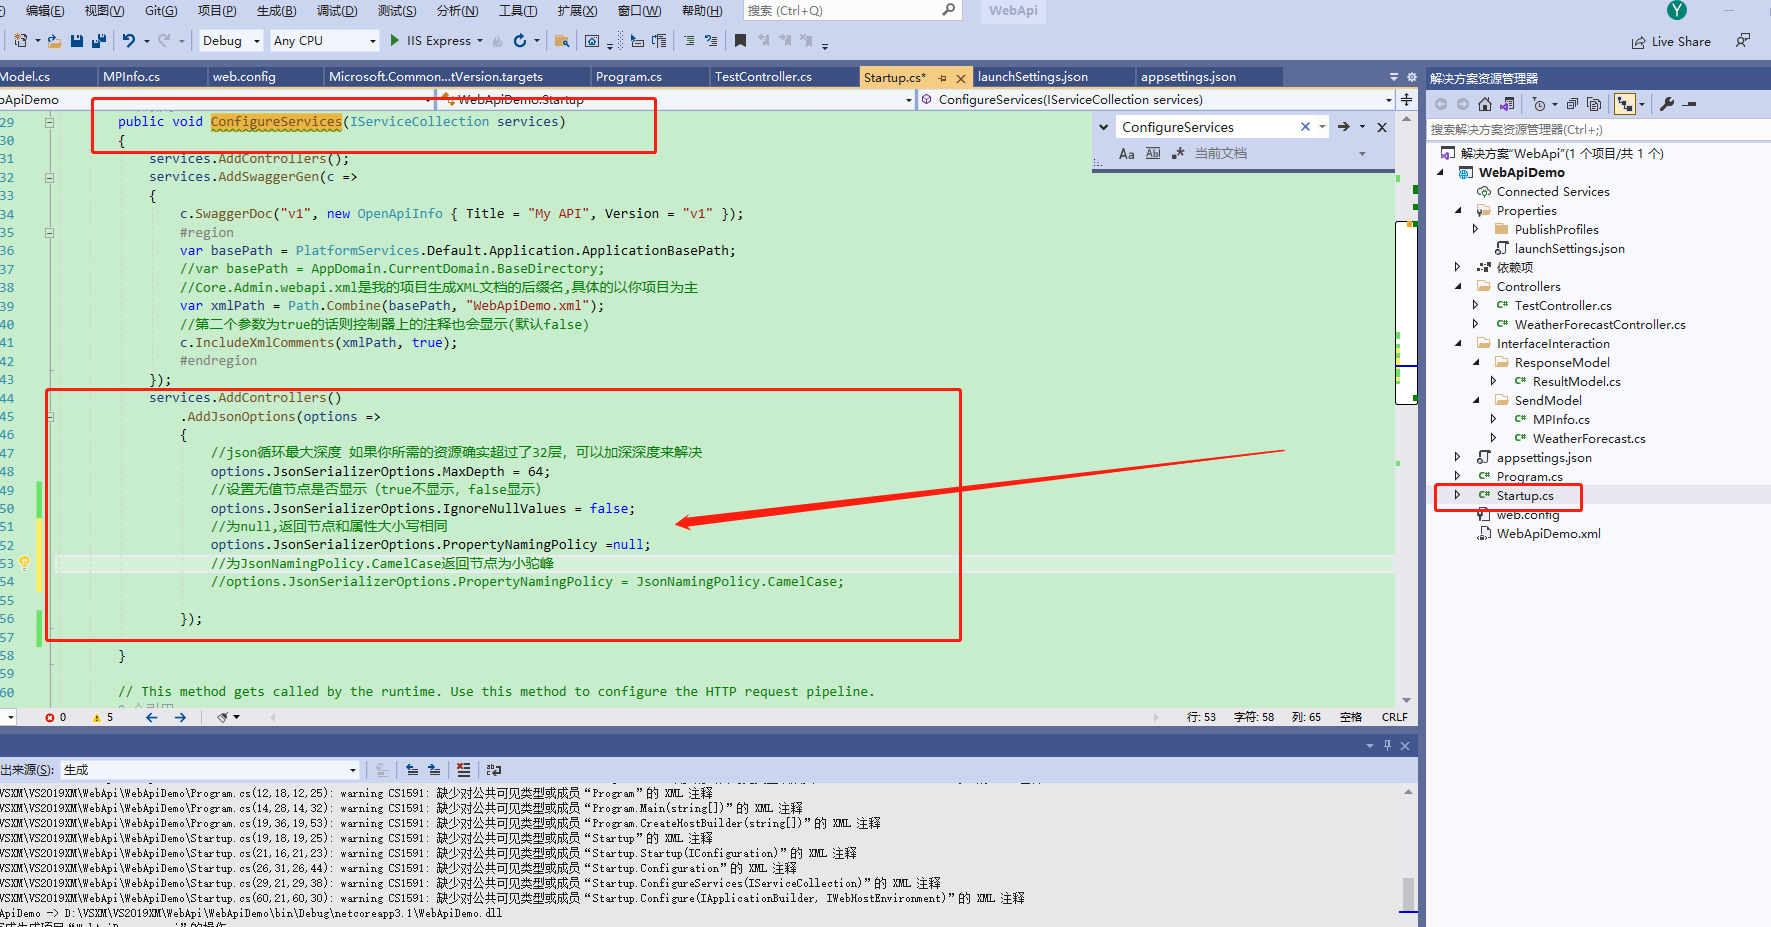
Startup类
using Microsoft.AspNetCore.Builder;
using Microsoft.AspNetCore.Hosting;
using Microsoft.AspNetCore.Mvc;
using Microsoft.Extensions.Configuration;
using Microsoft.Extensions.DependencyInjection;
using Microsoft.Extensions.Hosting;
using Microsoft.Extensions.Logging;
using Microsoft.Extensions.PlatformAbstractions;
using Microsoft.OpenApi.Models;
using System;
using System.Collections.Generic;
using System.IO;
using System.Linq;
using System.Text.Json;
using System.Threading.Tasks;

namespace WebApiDemo
{
    public class Startup
    {
        public Startup(IConfiguration configuration)
        {
            Configuration = configuration;
        }

        public IConfiguration Configuration { get; }

        // This method gets called by the runtime. Use this method to add services to the container.
        public void ConfigureServices(IServiceCollection services)
        {
            services.AddControllers();
            services.AddSwaggerGen(c =>
            {
                c.SwaggerDoc("v1", new OpenApiInfo { Title = "My API", Version = "v1" });
                #region
                var basePath = PlatformServices.Default.Application.ApplicationBasePath;
                //var basePath = AppDomain.CurrentDomain.BaseDirectory;
                //Core.Admin.webapi.xml是我的项目生成XML文档的后缀名,具体的以你项目为主
                var xmlPath = Path.Combine(basePath, "WebApiDemo.xml");
                //第二个参数为true的话则控制器上的注释也会显示(默认false)
                c.IncludeXmlComments(xmlPath, true);
                #endregion
            });
            services.AddControllers()
                .AddJsonOptions(options =>
                {
                    //json循环最大深度 如果你所需的资源确实超过了32层,可以加深深度来解决
                    options.JsonSerializerOptions.MaxDepth = 64;
                    //设置无值节点是否显示(true不显示,false显示)
                    options.JsonSerializerOptions.IgnoreNullValues = false;
                    //为null,返回节点和属性大小写相同
                    options.JsonSerializerOptions.PropertyNamingPolicy =null;
                    //为JsonNamingPolicy.CamelCase返回节点为小驼峰
                    //options.JsonSerializerOptions.PropertyNamingPolicy = JsonNamingPolicy.CamelCase;

                });

        }

        // This method gets called by the runtime. Use this method to configure the HTTP request pipeline.
        public void Configure(IApplicationBuilder app, IWebHostEnvironment env)
        {
            if (env.IsDevelopment())
            {
                app.UseDeveloperExceptionPage();
            }

            app.UseRouting();

            app.UseAuthorization();

            app.UseEndpoints(endpoints =>
            {
                endpoints.MapControllers();
            });

            app.UseSwagger();
            app.UseSwaggerUI(c =>
            {
                c.SwaggerEndpoint("../swagger/v1/swagger.json", "My API V1");

            });


        }


    }
}


【推荐】国内首个AI IDE,深度理解中文开发场景,立即下载体验Trae
【推荐】编程新体验,更懂你的AI,立即体验豆包MarsCode编程助手
【推荐】抖音旗下AI助手豆包,你的智能百科全书,全免费不限次数
【推荐】轻量又高性能的 SSH 工具 IShell:AI 加持,快人一步
· 开源Multi-agent AI智能体框架aevatar.ai,欢迎大家贡献代码
· Manus重磅发布:全球首款通用AI代理技术深度解析与实战指南
· 被坑几百块钱后,我竟然真的恢复了删除的微信聊天记录!
· 没有Manus邀请码?试试免邀请码的MGX或者开源的OpenManus吧
· 园子的第一款AI主题卫衣上架——"HELLO! HOW CAN I ASSIST YOU TODAY
2019-10-24 写入Txt文本信息