
三:简单的数据录入程序
一个晚会邀请程序
- 显示晚会内容
- 可以回复的表单
- 表单完成后显示完成页面
- 完成后发送一个电子邮件
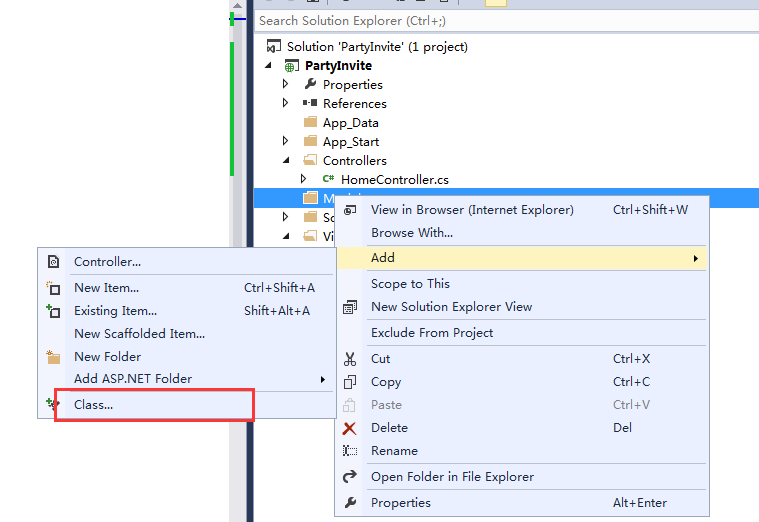
1:新建一个空的MVC项目;并新建一个空的控制器HomeController;
2:右键HomeController中的Index方法,新建View。并修改View视图的内容
@{
    ViewBag.Title = "Index";
}
<!DOCTYPE html>
<html>
<head>
    <title>邀请函</title>
</head>
<body>
    <div>
        @ViewBag.Greeting (from the view)
        <p>这里将会有一个聚会邀请</p>
    </div>
</body>
</html>
3:设计模型
namespace PartyInvite.Models
{
    public class GuestReponse
    {
        public string Name { get;set;};
        public string Email{get;set;}
        public string Phone{get;set;}
        public bool? WillAttend{get;set;}
    }
}
4:链接动作方法
修改Index视图,添加一个链接方法@Html.ActionLink
@{
    ViewBag.Title = "Index";
}
<!DOCTYPE html>
<html>
<head>
    <title>邀请函</title>
</head>
<body>
    <div>
        @ViewBag.Greeting (from the view)
        <p>这里将会有一个聚会邀请</p>
        @Html.ActionLink("现在参加","RsvpForm")
    </div>
</body>
</html>
Html.ActionLink是一个HTML辅助方法,MVC内置了一组内置辅助方法。这些方法的作用是能够渲染HTML链接,文本输入框,复选框,选择框等内容。
5:创建动作方法
修改HomeController,新增RsvpForm方法
using System;
using System.Collections.Generic;
using System.Linq;
using System.Web;
using System.Web.Mvc;

namespace PartyInvite.Controllers
{
    public class HomeController : Controller
    {
        public ActionResult Index()
        {
            return View();
        }

        public ActionResult RsvpForm()
        {
            return View();
        }
    }
}
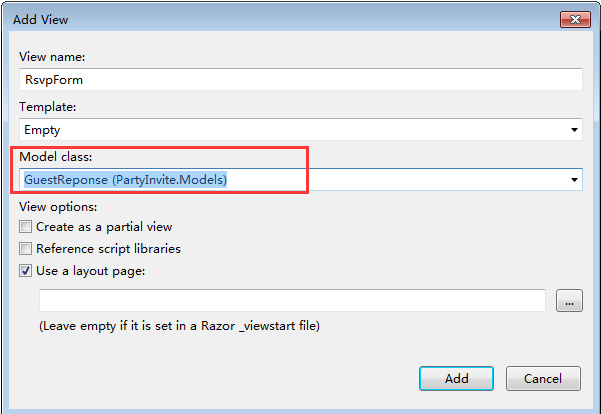
6:新增强类型视图,右键方法RsvpForm创建View。这个View要选择Model Class
7:修改RsvpForm.cshtml
@model PartyInvite.Models.GuestReponse

@{
    ViewBag.Title = "RsvpForm";
}

<!DOCTYPE html>
<html>
<head><h2>RsvpForm</h2></head>
<body>
    @using((Html.BeginForm())
    {
    <p>姓名:@Html.TextBoxFor(item=>item.Name)</p>
    <p>邮箱:@Html.TextBoxFor(item => item.Email)</p>
    <p>电话:@Html.TextBoxFor(item => item.Phone)</p>
    <p>是否参加:@Html.DropDownListFor(
           item => item.WillAttend, new[] { new SelectListItem() { Text = "参加",Value=true.ToString() },
               new SelectListItem() { Text="不参加",Value=false.ToString()},},"选择是否参加"
    )</p>
    <input type="submit" value="提交申请" />
    }
</body>
</html>
8:处理提交表单
由于在提交时没有指定提交页面,所以提交的地址仍然是RsvpForm。但是默认的RsvpForm的方法是处理Get请求的。
所以需要在HomeController中新增Post方法
using PartyInvite.Models;
using System;
using System.Collections.Generic;
using System.Linq;
using System.Web;
using System.Web.Mvc;

namespace PartyInvite.Controllers
{
    public class HomeController : Controller
    {
        public ActionResult Index()
        {
            return View();
        }

        public ActionResult RsvpForm()
        {
            return View();
        }

        [HttpPost]
        public ActionResult RsvpForm(GuestReponse guest)
        {
            return View("Thanks",guest);
        }
    }
}
9:创建一个视图Thanks.cshtml
@model PartyInvite.Models.GuestReponse

@{
    ViewBag.Title = "Thanks";
}

<h2>Thanks</h2>
@Model.Name 欢迎您参加!
如果现在运行可以发现页面之间可以正确的跳转,但是问题在于在提交时,如果不填写内容,仍然可以提交。
10:验证
修改模型类GuestResponse
using System.ComponentModel.DataAnnotations;
namespace PartyInvite.Models
{
    public class GuestReponse
    {
        [Required(ErrorMessage="请填写姓名")]
        public string Name { get; set; }
        [Required(ErrorMessage="请填写邮箱地址")]
        [RegularExpression(".+\\@.+\\..+")]
        public string Email { get; set; }
        [Required(ErrorMessage = "填写电话")]
        public string Phone { get; set; }
        [Required(ErrorMessage = "确定是否参加")]
        public bool? WillAttend { get; set; }
    }
}
11:再次修改方法RsvpForm(GuestResponse guest)
        [HttpPost]
        public ActionResult RsvpForm(GuestReponse guest)
        {
            if (ModelState.IsValid) {
                return View("Thanks",guest);
            }
            else
            {
                return View();
            }
        }
12:运行该项目,可以看到该项目可以正确的跳转,验证和运行。
自定义格式样式
虽然程序可以正确的运行,但是和一般网站的外观比起来太丑了,现在需要对程序进行润色。
13:给项目新建文件夹Context并右键新增Style Sheet,文件名命名MyStyle.css
.field-validation-error{color:#f00;}
.field-validation-valid{display:none}
.input-validation-error{border:1px solid #f00;background-color:#fee;}
.validation-summary-errors {
    font-weight:bold;color:#f00;
}
.validation-summary-valid{
    display:none;
}
14:在RsvpForm.cshtml中添加css引用
<link href="~/Content/MyStyle.css" rel="stylesheet" />
使用NuGet安装Bootstrap
15:Visual Studio的Tools->Library Package Manager->Package Manager Console
输入命令Install-Package -version 3.0.0 bootstrap
16:修改主页Index.cshtml
@{
    ViewBag.Title = "Index";
    Layout = null;
}
<!DOCTYPE html>
<html>
<head>
    <title>邀请函</title>
    <link href="~/Content/bootstrap.css" rel="stylesheet" />
    <link href="~/Content/bootstrap-theme.css" rel="stylesheet" />
    <style>
        .btn a {
            color: white;
            text-decoration: none;
        }

        body {
            background-color: #F1F1F1;
        }
    </style>
</head>
<body>
    <div class="text-center">
        @ViewBag.Greeting (from the view)
        <p>这里将会有一个聚会邀请</p>
        <div class="btn btn-success">
            @Html.ActionLink("现在参加", "RsvpForm")
        </div>
    </div>
</body>
</html>
17:再次运行项目,可以看到显示变得漂亮一点,像是一个正规网站的样子了

说明
1:Html辅助方法TextBoxFor,该方法会生成一个input,使用的是Lambda表达式
如@Html.TextBoxFor(x=>x.Name)生成的的Html标记是<input id="Name" name="Name" type="text" value="" />
2:HttpPost方法,Form请求时默认是使用Post方法,所以需要新建一个专门处理Post请求的方法。
但是这个方法的特殊之处在于它有一个参数GuestReponse。这是一种MVC特性,叫做模型绑定(Model Binding)。
使用它可以解析输入的数据。并将Http请求的键值填充模型的属性。这一过程和Html辅助方法相反。
3:View("Thanks",guest)返回的View如果没有参数,则含义是返回和方法名同名的View,如果指定了参数则可以返回指定的View。
示例含义是返回View是Thanks
4:ModelState用来测试验证模型是否正确。
