HTML5----canvas
如何创造一个画布呢?
首先在html页面中声明
<canvas id='canvas'></canvas>
然后再js中获取这个标签
var canvas = document.getElementById('canvas');
var context =canvas.getContext('2d');
//使用context进行绘制
1.首先从绘制直线说说起
canvas.html
<!DOCTYPE html>
<html lang="en">
<head>
    <meta charset="UTF-8">
    <title>canvas详解</title>
    <script src="canvas.js"type="text/javascript"></script>
</head>
<body>
<canvas id="canvas" style="border:1px solid black;margin:300px"></canvas>
</body>
</html>
canvas.js
/**
 * Created by Administrator on 2016/9/26.
 */
window.onload=function(){
    var canvas = document.getElementById('canvas');

    canvas.width = 500;
    canvas.height = 500;
    var context = canvas.getContext('2d');
    context.moveTo(100,100);
    context.lineTo(400,400);
    context.lineWidth =5;
    context.strokeStyle ='#058'
    context.stroke();
}
canvas是一种基于状态的绘制,所以先设置状态
1 2 3 4 | context.moveTo(100,100);设置从哪里开始绘制context.lineTo(400,400);//设置绘制到什么位置context.lineWidth =5;线段的宽度context.strokeStyle ='#058'设置绘制的颜色<br> context.stroke()绘制线段; |
如何画折线
    context.moveTo(100,100);
    context.lineTo(400,400);
    context.lineTo(400,100);//多加一条就可以画出折线,这时会连接(400,400)到(400,100)
    context.lineWidth =5;
    context.strokeStyle ='#058'
    context.stroke();
在看下面的一个例子
    context.moveTo(100,200);
    context.lineTo(300,400);
    context.lineTo(100,600);

    context.moveTo(300,200);
    context.lineTo(500,400);
    context.lineTo(300,600);

    context.moveTo(500,200);
    context.lineTo(700,400);
    context.lineTo(500,600);
    context.lineWidth =5;
    context.strokeStyle ='#058'
    context.stroke();
结果:

moveTo表示的是把画笔放在什么位置,lineTo表示画到什么位置
canvas陷阱
   context.moveTo(100,200);
    context.lineTo(300,400);
    context.lineTo(100,600);
    context.strokeStyle ='red'
    context.stroke();

    context.moveTo(300,200);
    context.lineTo(500,400);
    context.lineTo(300,600);
    context.strokeStyle ='blue'
    context.stroke();

    context.moveTo(500,200);
    context.lineTo(700,400);
    context.lineTo(500,600);
    context.lineWidth =5;
    context.strokeStyle ='green'
    context.stroke();
这个时候绘制的不是三条不同颜色的线,而是三种颜色相同的线段,因为canvas是基于状态的绘制,所以每次stroke时都会把之前所以的状态绘制一边,所以最后的颜色是green
如何解决这个bug呢
此时就要引入beginPath(),这个表示的是从新开始绘制,此时开始一条新的路径
context.beginPath()
    context.moveTo(100,200);
    context.lineTo(300,400);
    context.lineTo(100,600);
    context.lineWidth =5;
    context.strokeStyle ='red'
    context.stroke();

    context.beginPath()
    context.moveTo(300,200);
    context.lineTo(500,400);
    context.lineTo(300,600);
    context.lineWidth =5;
    context.strokeStyle ='blue'
    context.stroke();

    context.beginPath()
    context.moveTo(500,200);
    context.lineTo(700,400);
    context.lineTo(500,600);
    context.lineWidth =5;
    context.strokeStyle ='green'
    context.stroke();
此时绘制的是三条不同颜色的线段
还有注意一下beginPath()下面的moveTo可以改为lineTo
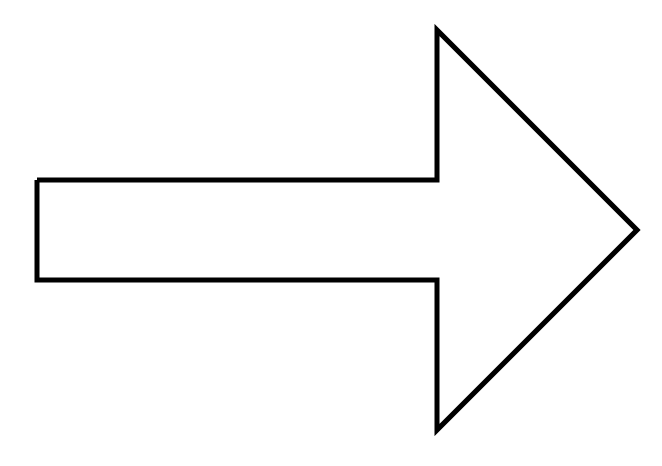
如何实现封闭线
    context.beginPath();
    context.lineTo(100,350);
    context.lineTo(500,350);
    context.lineTo(500,200);
    context.lineTo(700,400);
    context.lineTo(500,600);
    context.lineTo(500,450);
    context.lineTo(100,450);
    context.lineTo(100,350);
    context.lineWidth =5;
    context.strokeStyle ="#58";
    context.stroke();
这样就连成一条封闭的图形

但是放大后可以看出最后连接处有点小瑕疵
如何避免这种问题呢
其实如果要绘制封闭的图形,最标准的方法是最后还要加上context.closePath(),这样就会把连接处的问题处理掉。
此外如何你用了closePath()的话,最有一句lineTo()写不写无所谓的,因为他会自动帮你封闭起来。
填充色
如何给封闭的图形填充颜色呢?
    context.lineWidth =10;
    context.strokeStyle ="#58";
    context.fillStyle ='yellow';
    context.fill();
    context.stroke();
通过fillStyle ,fill()就可以给封闭的图形填充相应的颜色,此外,千万要注意一点就是,如果我们把fill()写在stroke()的后面的话,此时边框虽然为10px但是内部的5px被填充色给覆盖了,所以要将stroke放在fill后面
编写绘制矩形的函数
 var canvas = document.getElementById('canvas');
    canvas.width = 800;
    canvas.height = 800;
    var context = canvas.getContext('2d');
    DrawRect(context,100,100,300,300,10,'red','blue')
    function DrawRect(txt,x,y,width,height,strokeWidth,strokeStyle,fillStyle){
        txt.beginPath()
        txt.lineTo(x,y);
        txt.lineTo(x+width,y);
        txt.lineTo(x+width,y+height);
        txt.lineTo(x,y+height);
        txt.closePath();

        txt.strokeStyle =strokeStyle;
        txt.fillStyle =fillStyle;
        txt.lineWidth = strokeWidth;
        txt.fill();
        txt.stroke();
    }
其实canvas中有专门的绘制矩形的借口
rect(x,y,width,height);//这一句话是给出了矩形的状态,相当于
        txt.lineTo(x,y);
        txt.lineTo(x+width,y);
        txt.lineTo(x+width,y+height);
        txt.lineTo(x,y+height);
        txt.beginPath()
        txt.rect(x,y,width,height);
        txt.closePath();

        txt.strokeStyle =strokeStyle;
        txt.fillStyle =fillStyle;
        txt.lineWidth = strokeWidth;
        txt.fill();
        txt.stroke();
还有两种方法:fillRect(x,y,width,height);strokeRect(x,y,width,height);
这两种方法不仅定义了状态了实现了绘制。
        txt.strokeStyle =strokeStyle;
        txt.fillStyle =fillStyle;
        txt.lineWidth = strokeWidth;
        txt.fillRect(x,y,width,height);
        txt.strokeRect(x,y,width,height);
线条的属性
对于线条的属性:lineWidth就是其中一个,其次接着讲lineCap字面的意思是线条的帽子,也就是线条结尾处和开始出的形状(即使是折线也只会在整个线段的开始和结尾处添加,折线处不会)
lineCap有三个取值:butt(default) , round(圆形), square(正方形),注意对于round和square来说,是在原来的基础上添加的,也就是线段会变长。
小小例子-----绘制五角星
如何绘制一个小小的五角星来着

如何实现状态的连接呢?
function DrawStar(txt,R,r,x,y,rot){
    txt.beginPath()
    for(var i=0;i< 5;i++){
        txt.lineTo(Math.cos((18 + 72*i - rot)/180 * Math.PI ) * R + x,
            -Math.sin((18+ 72 * i - rot)/180 * Math.PI) * R+ y);
        txt.lineTo(Math.cos((54 + 72 * i - rot)/180 * Math.PI) * r + x,
            -Math.sin((54+ 72*i  - rot)/180 * Math.PI) * r + y);
    }
    txt.closePath();
}
这样就可以实现
具体代码
window.onload=function(){
    var canvas = document.getElementById('canvas');
    canvas.width = 800;
    canvas.height = 800;
    var context = canvas.getContext('2d');
    context.lineWidth =5;
    DrawStar(context,300,150,400,400,30);
    context.stroke();
}

function DrawStar(txt,R,r,x,y,rot){
    txt.beginPath()
    for(var i=0;i< 5;i++){
        txt.lineTo(Math.cos((18 + 72*i - rot)/180 * Math.PI ) * R + x,
            -Math.sin((18+ 72 * i - rot)/180 * Math.PI) * R+ y);
        txt.lineTo(Math.cos((54 + 72 * i - rot)/180 * Math.PI) * r + x,
            -Math.sin((54+ 72*i  - rot)/180 * Math.PI) * r + y);
    }
    txt.closePath();
}
线条属性之lineJoin
这个属性表示的线条连接时的状态
默认有三个取值(miter,bevel,round)默认值是miter表示尖角,会一直延伸到两条先交到一起。
还有一个属性miterLimit,这个属性只有当lineJoin选择miter的时候才有效,表示的是连接线的内接点与外接点的距离。
fillStyle属性:注意这个属性不光光可以设置颜色,还可以设置渐变色,如何设置渐变色呢?(渐变色分为线性渐变色,和径向渐变色)
首先以线性渐变色为例子来说
第一步:var grd =context.createLinearGradient(xstart,ystart,xend,yend);
第二步:grd.addColorStop(stop,color);其中stop表示的是位置(值取0-1之间);
   var linearGrad = context.createLinearGradient(0,0,800,800);
    linearGrad.addColorStop(0.0,'#FFF');
   linearGrad.addColorStop(1.0,'#000');
   context.fillStyle =linearGrad;
其中
addColorGradient可以取很多,此外如果没有在整个画布内渐变的话,剩余的部分会以最后的颜色填充。此外我们开始渐变的位置和结束的位置可以超出画布的部分
2, 径向渐变
步骤一:var grd = context.createRadiaGradient(x,y,r1,x,y,r2);
步骤二: grd.addColorStop(0.0,'white');
grd.addColorStop(0.25,'yellow');
grd.addColorStop(0.5,'green');
grd.addColorStop(0.75,'blue');
grd.addColorStop(1.0,'block')
context.fillStyle = grd;
渐变色在第一个圆与第二个圆之间渐变。
3.重点注意
createPattern(img,repeat-style);
repeat-style:no-repeat;
repeat-x;
repeat-y;
repeat
具体实现:
var backgroundImage =new Image();

backgroundImage.src ='1.jpg';

backgroundImage.onload = function(){
    var pattern = context.createPattern(backgroundImage,'repeat');
    context.fillStyle = pattern;

    context.fillRect(0,0,800,800);

}
此外createPattern(canvas,repeat-style)不仅可以引入图片,也可以让另外一个画布作为背景);
还可以creatPattern(video,repeat-style);
绘制圆弧
context.arc(centerX,centerY,radius,startingAngle,endindAngle,anticlockwise=false)
参数的意思:圆心的X坐标,Y坐标,起点角度,终点角度,是否顺时针(默认情况下是顺时针);

此时无论是顺时针还是逆时针,角度都是不变的,比如逆时针的话,0.5pi是在下面的那个位置如图所示,而不是上面的1.5pi位置
第二种绘制弧线的方法:arcTo(x1,y1,x2,y2,radius);

这个方法是如何绘制弧线的呢?
其实他是以最近的moveTo或者lineTo为起点,然后连接(x1,y1)和点(x2,y2)形成一个折线,然后以(x0,y0)为起点,相切于这两条线的弧线就是我们要绘制的弧线,此外,弧线的终点不一定是(x2,y2);此外(x0,y0)也不一定是切点,千万要注意了。
二次贝塞尔曲线

其实贝塞尔曲线跟arcTo差不多,但是也有区别
首先也是以最近的一个moveTo或者lineTo为起点开始的,

context.moveTo(x0,y0);
context.quadraticCurveTo(x1,y1,x2,y2);
区别在于曲线是以(x0,y0)为起点的,以(x2,y2)为重点的,并且相切于这两个点。

三次贝塞尔曲线,
context.move(x0,y0)
context.bezierCurveTo(x1,y1,x2,y2,x3,y3);
此时原理还是一样,只不过这时候控制点就是(x1,y1),(x2,y2);


【推荐】还在用 ECharts 开发大屏?试试这款永久免费的开源 BI 工具!
【推荐】国内首个AI IDE,深度理解中文开发场景,立即下载体验Trae
【推荐】编程新体验,更懂你的AI,立即体验豆包MarsCode编程助手
【推荐】轻量又高性能的 SSH 工具 IShell:AI 加持,快人一步