vue常用插件集合(常用,但一般UI库又不太能满足)
# v-base-plugins
``` bash
# install
npm i v-base-plugins --save
npm start
#引入
import myPlugin from 'v-base-plugins'
Vue.use(myPlugin)
##topbar组件
###在相应页面引入组件
#```
<topbar :isBack="true" :defclass="defTopbarClass()" title="标题信息" :fixed="fixed" search>
<div slot="back">
<span class="p-title">中国</span>
<i class="iconfont arrow-up icon-style" style="color: #fff;font-size: 20px;"></i>
</div>
<div slot="search">
<input slot="search" class="uni_searchIpt flex1" @input="bindInput" type="text" placeholder="搜索" placeholder-style="color: rgba(255,255,255,.5);" />
<i class=" iconfont sousuo search-icon"></i>
</div>
<i @click="gohaoyou" slot="string" class="iconfont dingwei icon-style" style="color: #fff;font-size: 20px;"></i>
<span slot="string" class="p-title" style="padding-left: 0.5rem;">找车</span>
</topbar>
#```
###topbar组件传入参数
#```
isBack: { type: [Boolean, String], default: true },//左侧是否显示返回按钮
fixed: {type: Boolean, default: true},//是否固定
title: { type: String, default: '' },//中间标题
search: { type: [Boolean, String], default: false },//是否需要搜索框,有搜索框,则不会显示中间标题
topStyle: {type:String, default:''}, //自定义样式
#```
###topbar使用组件插槽slot
1. name="back" //左侧块插槽
2. name="search" //中间块插槽
3. name="iconfont" name="string" name="image" //右侧图标、文字、logo插槽
***topbar组件分为左、中、右三块,根据以上配置可以最大程度灵活的自定义顶部导航栏***
效果展示


##mult-pop组件
###在相应页面引入组件:<mult-pop ref="multPop"></mult-pop>
###mult-pop组件根据需求传入opts参数对象,会与默认defaultOptions参数对象进行合并处理
#```
{
defaultOptions: { //默认对象参数
isVisible: false, //是否显示弹窗,Boolean类型
title: '', //标题,String类型
titleStyle: '', //标题样式,String类型
content: '', //内容,String类型,可以传入富文本
contentClass: '', //内容样式,String类型
style: null, //自定义弹窗样式,String类型
skin: '', //弹窗风格,String类型 weixin(默认)| toast
icon: '', //弹窗图标,String类型 success(默认) | info | error | loading
iconStyle: '', //图标样式,String类型
xclose: '', //自定义关闭按钮,String类型, btn | icon 可以传入富文本
shade: true, //遮罩层,Boolean类型
shadeClose: false, //点击遮罩关闭,Boolean类型
opacity: '', //遮罩透明度,String类型
time: 0, //自动关闭秒数,Number类型
endCallback: null, //销毁弹窗回调函数 Function
anim: 'scaleIn', //弹窗动画 scaleIn(默认) | fadeIn | shake | top | right | bottom | left
position: '', //弹窗位置 top | right | bottom | left
btnsColumn: false, //按钮是否换行竖直排列
btns: [ //按钮数组集合,默认null
{
text: '取消',
style: 'color: #2a83f2',
onTap() {
multPop.close();
}
},
{
text: '确定',
style: 'color: #2a83f2',
onTap() {
.....
}
}
],
},
opts: {},//传入对象参数
timer: null
}
#```
###mult-pop组件传入参数示例
#```
let multPop = this.$refs.multPop
this.$refs.multPop.show({
skin: 'toast',
content: 'success',
icon: 'success', //success | info | error | loading
shade: false,
time: 3,
})
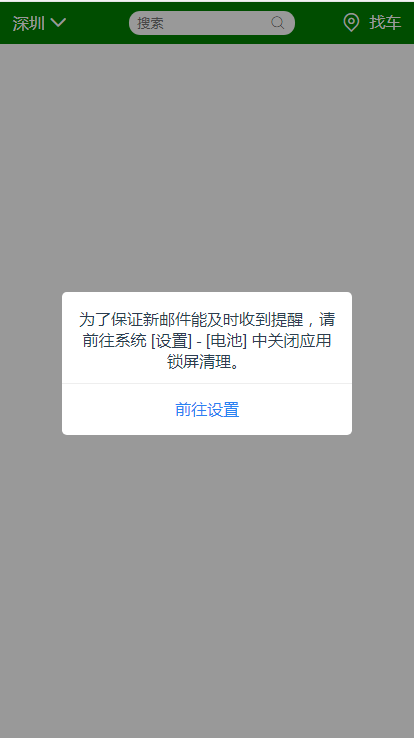
multPop.show({
skin: 'weixin',
title: '开启新邮件提醒',
content: '为了保证新邮件能及时收到提醒,请前往系统 [设置] - [电池] 中关闭应用锁屏清理。',
shadeClose: false,
btns: [
{
text: '取消',
style: 'color: #2a83f2',
onTap() {
multPop.close();
}
},
{
text: '前往设置',
style: 'color: #2a83f2',
onTap() {
console.log('您点击了前往设置!');
}
}
]
})
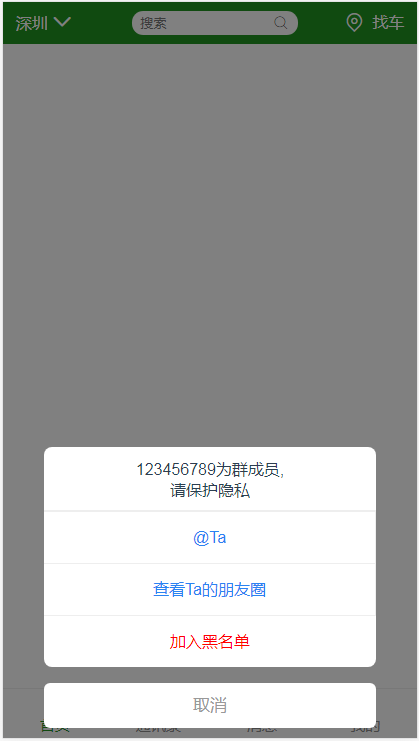
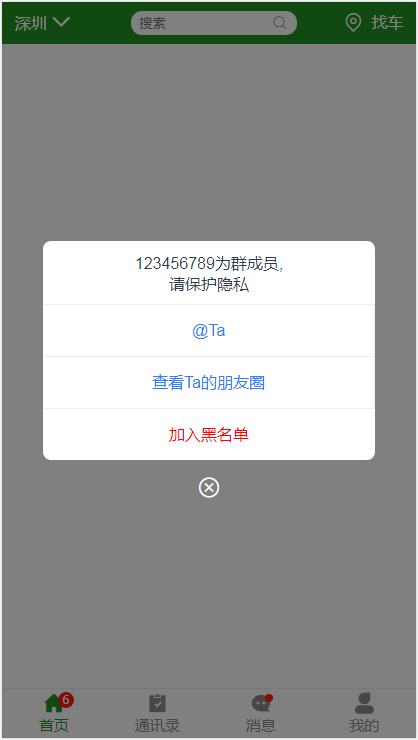
multPop.show({
skin: 'weixin',
//title: '发现新版本',
titleStyle:"padding-bottom: 0;text-align: left;",
content: '123456789为群成员,<br/>请保护隐私',
style:"width:80%",
shadeClose: true,
opacity:0.5,
position:"center",
btnsColumn:true,
xclose:'btn',
btns: [
{
text: '@Ta',
style: 'color: #2a83f2;width: 100%;',
onTap() {
console.log('关注');
multPop.close();
}
},
{
text: '查看Ta的朋友圈',
style: 'color: #2a83f2;border-top: 1px solid #eee;width: 100%;',
onTap() {
console.log('加入黑名单');
}
},
{
text: '加入黑名单',
style: 'color: red;border-top: 1px solid #eee;width: 100%;',
onTap() {
console.log('加入黑名单');
}
}
],
endCallback:function(){
console.log('销毁了!');
}
})
#```
效果展示


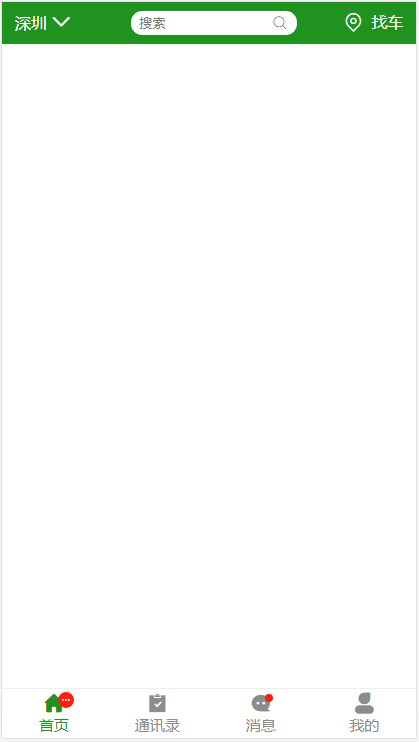
##bottomTab组件
###在相应页面引入组件:<mubottom-tab :tabsArr="tabsArr"></mubottom-tab>
###bottomTab组件传入参数
#```
exact:false //是否启用router-link严格匹配模式
tabStyle:{},//自定义tabs样式,String类型
tabsArr:[
{
text:"",//tab文字,String类型,默认空
path:"",//路由地址,String类型,默认空
iconName:"",//tab字体图标名字,String类型,默认空
color: '',//自定义tab文字、图标颜色,String类型,默认空
num:6,//badge中数字,[Boolean, Number]类型,默认false,
***num:false不显示badge;num:true显示badge,不带数字;num:number显示badge,带数字,大于99显示···***
},
]
#```
***tabsArr参数最好存储在vuex中,如果没有使用vuex,建议上升为全局变量***
###topbar组件传入参数示例
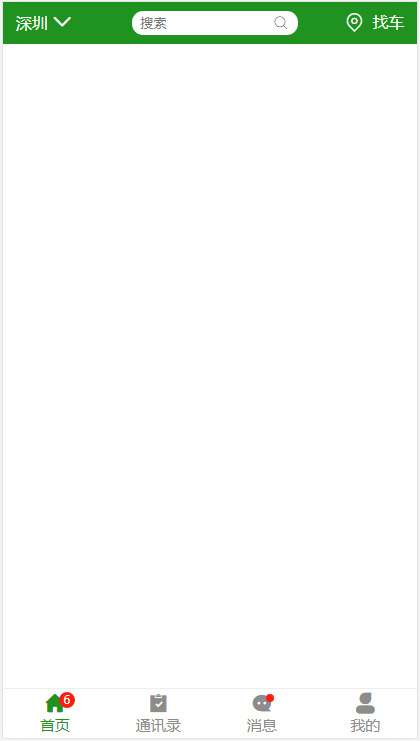
#```
tabsArr=[
{text:"首页",path:"/index",iconName:"shouye",color: 'rgb(31, 146, 31)',style:{},num:6},
{text:"通讯录",path:"/dev-text",iconName:"renwu",color: 'rgb(31, 146, 31)' },
{text:"消息",path:"/dev-text2",iconName:"xiaoxi",color: 'rgb(31, 146, 31)',num:true},
{text:"我的",path:"/dev-text3",iconName:"wode", color: 'rgb(31, 146, 31)'}
]
#```
效果展示
##calendar组件
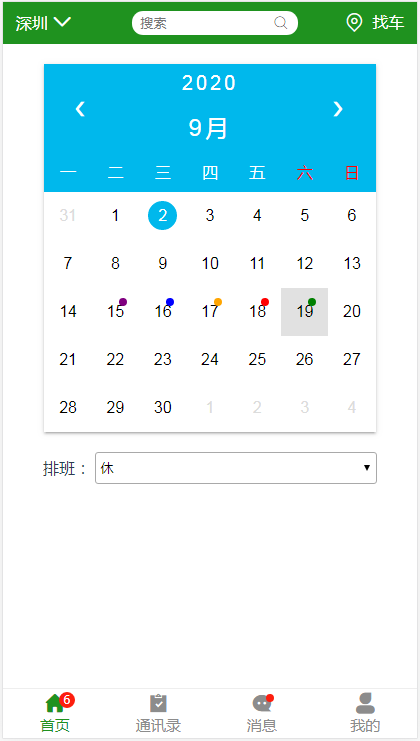
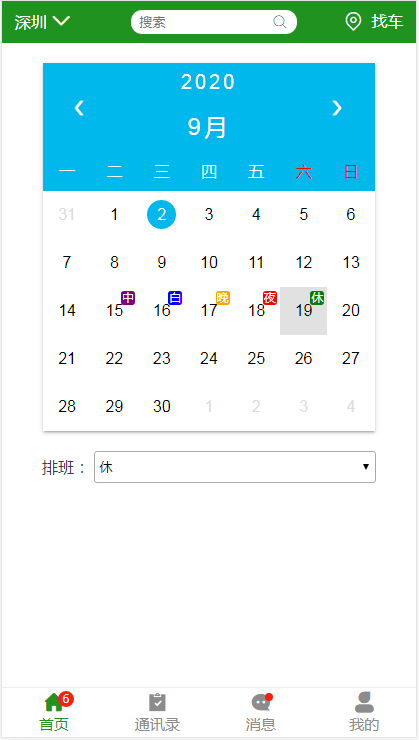
###在相应页面引入组件:<calendar :caleShow="caleShow" :caleData="calendarObj" @getChooseDate="chooseDate"></calendar>
###calendar组件传入参数
#```
caleShow:{ type: Boolean, default: false },//是否显示日历
textShow:{ type: Boolean, default: false },//是否显示选中日期的标识文字
caleData: {type:Object, default:{ //选中日期的标识数据对象
key:{ type: String, default: "" }, //数据对象id
text:{ type: String, default: "" }, //日期的文字标识
style:{ type: String, default: "" }, //日期标识的样式控制
show:{ type: Boolean, default: false } //日期标识的显示控制
}},
getChooseDate:{type: Function, default: } //选中日期回调函数 Function
#```
***calendar可以根据传入的不同参数caleData进而对选择日期进行标识,通过自定义事件拿到标识的日期,非常灵活***
###calendar组件传入参数示例
#```
<div class="select-cale">
<span>排班:</span>
<select class="cale-select" @change="selectVal">
<option>请选择</option>
<option v-for="(item,index) in selectsArr" :key="index" :value="item.key">{{ item.text }}</option>
</select>
</div>
this.selectsArr=[
{key:"1",text:"中",style:"width:8px;height:8px;border-radius:4px;top:10px;right:12px;",show:false},
{key:"2",text:"白",style:"width:8px;height:8px;border-radius:4px;top:10px;right:12px;",show:false},
{key:"3",text:"晚",style:"width:8px;height:8px;border-radius:4px;top:10px;right:12px;",show:false},
{key:"4",text:"夜",style:"width:8px;height:8px;border-radius:4px;top:10px;right:12px;",show:false},
{key:"5",text:"休",style:"width:8px;height:8px;border-radius:4px;top:10px;right:12px;",show:false}
]
methods:{
selectVal(ele){
var that=this;
for(let i=0;i<that.selectsArr.length;i++){
if(that.selectsArr[i].key==ele.target.value){
that.selectsArr[i].show=true;
that.calendarObj=that.selectsArr[i];
}
}
},
chooseDate(val){
console.log(val)
}
}
效果展示
#```
##toast插件
###toast插件传入参数
#```
option={
message: '',//toast文字提示,String类型,默认空
icon: 'loading',//toast图标,String类型 success(默认) | info | error | loading
time:1, //toast显示时间/s,Number类型,默认空
}
#```
###toast插件调用示例
#```
this.$Toast({message: '显示成功',icon: 'success',time:3 })
this.$Toast.close();//手动关闭
#```
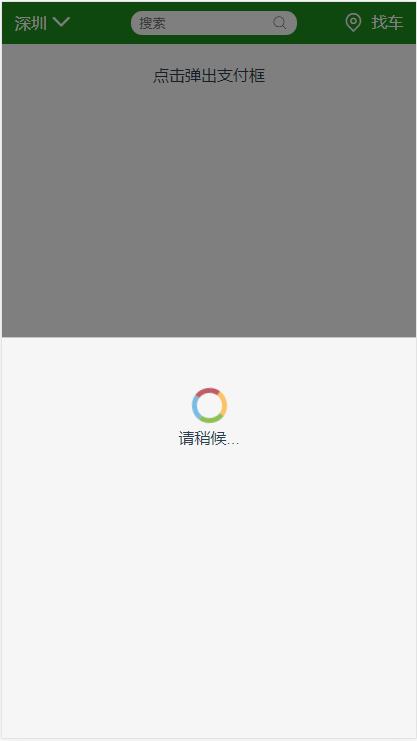
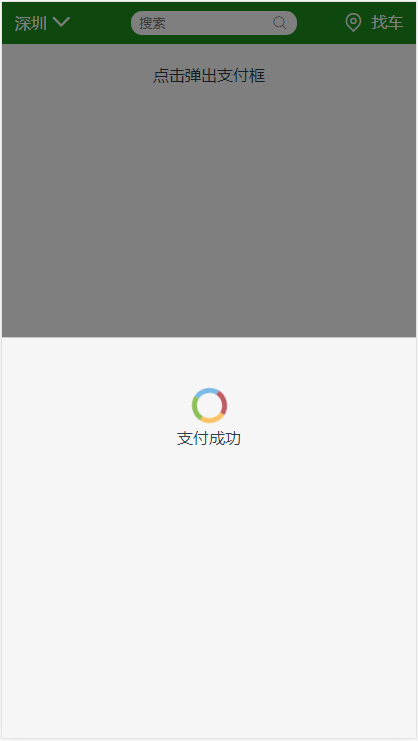
##mpay组件
###mpay组件传入参数
#```
inputOver:{type: Function, default: } //输入成功回调函数(必须),Function类型
payPopOptions={
title: '', //顶部文字,String类型,默认"请输入支付密码"
pwdLength: 6, //密码长度,Number类型,默认6
del: '' , //底部删除按钮,String类型,默认svg删除按钮图片
loadingTxt: '', //默认等候文字,String类型,默认'请稍候...'
loadingTime: 1000, //默认等候时间,Number类型,默认1000/ms
resultTime:1000, //显示结果后,多久重回默认,Number类型,默认1000/ms
successTxt: '', //成功文字,String类型,默认'支付成功'
failTxt: '', //失败文字,String类型,默认'支付失败'
}
#```
###mpay组件调用示例
#```
payPopOptions: {
isShow: false
}
<mpay ref="pay" :payPopOptions="payPopOptions" @inputOver="inputOver"></mpay>
methods: {
inputOver (val) {
if (val == '111111') {
this.$refs.pay.$payStatus(true)//支付成功
} else {
this.$refs.pay.$payStatus(false)//支付失败
}
},
}
#```
效果展示

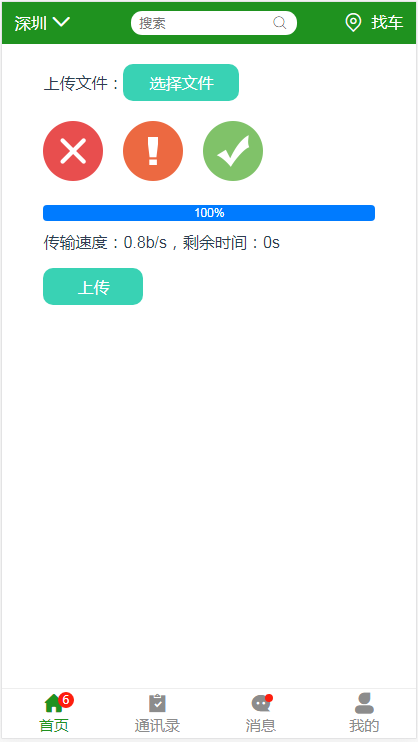
## hupload使用组件必须传递的参数 options
options: {
'showProgress': true, // 是否显示进度控制
'imagePreview': true, // 是否显示图片预览
'url': 'str', // 上传接口url
'fileUploadName': 'ajax-upload', // 后台采用是什么名字就传递什么名字
'limitSize': 1, // 限制文件上传的大小单位是 M
'receiveUploadMsg': null, //上传状态回调函数 Function
}
## dom 组件使用
<hupload :options=options v-on:receiveUploadMsg="receiveUploadMsg"> </hupload>
#js 接受的信息判断
methods: {
receiveUploadMsg (msg) {
// msg ....
}
}
```.........................................................
# hupload使用组件必须传递的参数 options
Options: {
isShow: false
}
#js 接受的信息判断
inputDown (val) {
setTimeout(() => {
console.log(val)
if (val == '111111') {
this.$refs.pay.$payStatus(true)
} else {
this.$refs.pay.$payStatus(false)
}
}, 1000)
},
效果展示

#添加全局资源(自定义指令)
##v-out-click点击DOM元素外事件
#```
Vue.directive('out-click', {
bind (el, binding, vnode, oldVnode) {
// 逻辑...
}
...
})
#```
## v-out-click自定义指令使用示例
<div v-out-click="bindOutClick"></div>
##v-out-click点击DOM元素外事件
#```
methods:{
bindOutClick(e){
...
},
}
#```
## v-load-more指令使用示例
***v-load-more是监听有固定高度的盒子的滚动加载更多事件,比如可以用在不适合有页码的表格就可以使用下拉加载更多***
<ul v-load-more="bindLoadmore"><li></li>...</ul>
***v-load-more必须绑定在有样式overflow-y:auto的DOM上,即滚动的DOM上,否则监听不到滚动***
#```
methods:{
bindLoadmore(e){
...//加载更多数据
},
}
#```
#防抖函数debounce
##debounce使用示例
#```
Vue.debounce(fn,time) //fn需要防抖函数,time超出这个时间阈值,也得给客户一个反应的限值
#```
#节流函数throttle
##throttle使用示例
#```
Vue.throttle(fn,wait) //fn需要节流函数,wait时间间隔
#```
***以上使用图标均为阿里图标库中图标,如需自定义图标,替换class类名即可,若显示图标与自定义图标不符,可能是与阿里图标Unicode重复了,更改即可***


