一、队列和线程
1、tensorflow解决读取数据
计算密集型:IO速度稍慢、一次性读取消耗内存。
解决:tensorflow能够多线程并行的执行任务(真正的多线程):队列、文件的改善(tfrecords)
2、队列
在训练样本的时候,希望读入的训练样本是有序的
tf.FIFOQueue 先进先出队列,按顺序出队列
tf.RandomShuffleQueue 随机出队列
FIFOQueue(capacity, dtypes, name='fifo_queue')
- 创建一个以先进先出的顺序对元素进行排队的队列
- capacity:整数。可能存储在此队列中的元素数量的上限
- dtypes:DType对象列表。长度dtypes必须等于每个队列元素中的张量数,dtype的类型形状,决定了后面进队列元素形状
- dequeue(name=None) 出队
- enqueue(vals, name=None): 入队
- enqueue_many(vals, name=None) vals列表或者元组
- 返回一个进队列操作
- size(name=None)
案例:完成一个 出队列、+1、入队列 操作(同步操作)
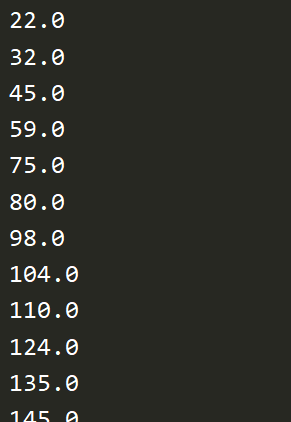
import tensorflow as tf
import os
os.environ['TF_CPP_MIN_LOG_LEVEL'] = '2'
# 模拟同步(完成一个 出队列、+1、入队列 操作)

# 1 定义队列
Q = tf.FIFOQueue(3, tf.float32)
# enm_op = Q.enqueue_many([0.1, 0.2, 0.3]) # 这么写传入的数据会被当成张量而不是数组
enm_op = Q.enqueue_many([[0.1, 0.2, 0.3], ])
# 2 定义一些处理数据的op
de_op = Q.dequeue()
data = de_op + 1  # 重载+
en_op = Q.enqueue(data)

with tf.Session() as sess:
    # 初始化队列
    sess.run(enm_op)
    # 处理数据
    for i in range(100):
        # tensorflow中运行操作有依赖性
        sess.run(en_op)
    # 模拟训练数据
    for i in range(Q.size().eval()): # size是个op必须运行
        print(sess.run(Q.dequeue()))
分析:当数据量很大时,入队操作从硬盘中读取数据,放入内存中,主线程需要等待入队操作完成,才能进行训练。会话里可以运行多个线程,实现异步读取。
3、队列管理器
tf.train.QueueRunner(queue, enqueue_ops=None)
- 创建一个QueueRunner队列管理器
- queue:A Queue
- enqueue_ops:添加线程的队列操作列表,[]*2,指定两个线程
- create_threads(sess, coord=None,start=False) 创建线程来运行给定会话的入队操作
- start:布尔值,如果True启动线程;如果为False调用者必须调用start()启动线程
- coord:线程协调器,后面线程管理需要用到
import tensorflow as tf
import os
os.environ['TF_CPP_MIN_LOG_LEVEL'] = '2'
# 模拟异步子线程存入样本,主线程读取样本

# 1 定义一个队列 1000
Q = tf.FIFOQueue(1000, tf.float32)

# 2 定义子线程要做的事,循环值+1,放入队列当中
var = tf.Variable(0.0)
# data = var + 1 这样每次都是0+1
# 实现一个自增op tf.assign_add
data = tf.assign_add(var, tf.constant(1.0))
en_q = Q.enqueue(data)

# 3 定义队列管理器op,指定多少个子线程、子线程该干的事情
# 定义子线程操作只用传en_q(利用依赖性)
qr = tf.train.QueueRunner(Q, enqueue_ops=[en_q] * 2)

# 4 开启会话
# 初始化变量op
init_op = tf.global_variables_initializer()
with tf.Session() as sess:
    # 初始化变量
    sess.run(init_op)
    # 开启子线程
    threads = qr.create_threads(sess, start=True)
    # 主线程不断地读取数据训练
    for i in range(300):
        print(sess.run(Q.dequeue()))
分析:这时候有一个问题就是,入队(子线程)自顾自的去执行,在需要的出队(主线程)操作完成之后,程序没法结束。需要一个实现线程间的同步,终止其他线程。
4、线程协调器
tf.train.Coordinator()
- 线程协调员,实现一个简单的机制来协调一组线程的终止
- return:线程协调员实例
- request_stop() 请求停止
- should_stop() 检查是否请求停止
- join(threads=None, stop_grace_period_secs=120) 等待线程终止
with tf.Session() as sess:
    # 初始化变量
    sess.run(init_op)
    # 开启线程管理器
    coord = tf.train.Coordinator()
    # 开启子线程
    threads = qr.create_threads(sess, coord=coord, start=True)
    # 主线程不断地读取数据训练
    for i in range(300):
        print(sess.run(Q.dequeue()))
    # 回收子线程
    coord.request_stop()
    coord.join(threads)
二、文件读取
1、文件读取流程
整个过程在子线程中:
① 构造一个文件队列
② 构造文件阅读器,读取队列内容read:
csv:读取一行
二进制文件:制定一个样本的bytes
图片文件:一张一张读取
③ 解码样本内容到张量:decode
④ 批处理:样本数量满一批,主线程取一批样本数据训练

2、文件读取API
文件队列构造
tf.train.string_input_producer(string_tensor,shuffle=True)
- 将输出字符串(例如文件名)输入到管道队列
- string_tensor:含有文件名的1阶张量(就是一个装着文件名的列表)
- shuffle:读取的时候是否乱序,一般不改
- num_epochs:过几遍数据,默认无限过数据
- return:具有输出字符串的队列
构造文件阅读器
根据文件格式,选择对应的文件阅读器
class tf.TextLineReader
- 阅读文本文件逗号分隔值(CSV)格式,默认按行读取
- return:读取器实例
tf.FixedLengthRecordReader(record_bytes)
- 要读取每个记录是固定数量字节的二进制文件
- record_bytes:整型,指定每次读取的字节数
- return:读取器实例
tf.TFRecordReader
- 读取TfRecords文件
以上有一个共同的读取方法:
- read(file_queue):从队列中指定数量内容
- 返回一个Tensors元组(key文件名字,value默认的内容(行,字节))
文件内容解码器
由于从文件中读取的是字符串,需要函数去解析这些字符串到张量
tf.decode_csv(records,record_defaults=None,field_delim = None,name = None)
- 将CSV转换为张量,与tf.TextLineReader搭配使用
- records:tensor型字符串,每个字符串是csv中的记录行(就是上面的value)
- field_delim:默认分割符“,”
- record_defaults:指定每一个样本的每一列的类型,并设置一个值在输入字符串中作为缺省值
tf.decode_raw(bytes,out_type,little_endian = None,name = None)
- 将字节转换为一个数字向量表示,字节为一字符串类型的张量,与函数tf.FixedLengthRecordReader搭配使用
- 二进制读取为uint8格式
3、文件读取案例
开启线程操作
tf.train.start_queue_runners(sess=None,coord=None)
- 收集所有图中的队列线程,并启动线程
- sess:所在的会话中
- coord:线程协调器
- return:返回所有线程队列
管道读端批处理
tf.train.batch(tensors,batch_size,num_threads = 1,capacity = 32,name=None)
- 读取指定大小(个数)的张量
- tensors:可以是包含张量的列表
- batch_size:从队列中读取的批处理大小
- num_threads:进入队列的线程数
- capacity:整数,队列中元素的最大数量
- return:tensors
tf.train.shuffle_batch(tensors,batch_size,capacity,min_after_dequeue, num_threads=1,)
- 乱序读取指定大小(个数)的张量
- min_after_dequeue:留下队列里的张量个数,能够保持随机打乱
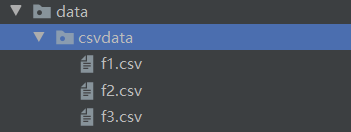
import tensorflow as tf
import os
os.environ['TF_CPP_MIN_LOG_LEVEL'] = '2'


def csvRead(filelist):
    """
    读取csv文件
    :param filelist:文件路径+名字的列表
    :return:读取的内容
    """
    # 1 构造文件名队列
    file_queue = tf.train.string_input_producer(filelist)
    # 2 构造csv阅读器读取队列(一行)
    reader = tf.TextLineReader()
    key, value = reader.read(file_queue)
    # 3 对这行内容解码
    # record_defaults指定每一列类型和默认值,如[[1.0],[3]]
    records = [["None"],["None"]]  # 指定两列都是字符串,默认值都是None
    example, label = tf.decode_csv(value, record_defaults=records)
    # 4 想要读取多个数据就需要批处理
    # 批处理大小batch_size,跟队列、数据的数量没有关系,只决定这批次取多少数据
    # capacity表示批处理队列的容量,若容量少于批处理大小,就会先取出来等子线程再取,取够一批了再用
    # 一般设为相同的值
    example_batch, label_batch = tf.train.batch([example, label], batch_size=9, num_threads=1, capacity=9)

    return example_batch, label_batch


if __name__ == '__main__':
    # 找到文件,放入列表 路径+名字
    file_name = os.listdir("./data/csvdata")
    # 路径拼接函数os.path.join
    # 列表推导式:[表达式 for 循环计数器 in 可迭代对象]
    file_list = [os.path.join("./data/csvdata", file) for file in file_name]
    # example, label = csvRead(file_list)
    example_batch, label_batch = csvRead(file_list)

    # 开启会话运行
    with tf.Session() as sess:
        # 定义一个线程协调器
        coord = tf.train.Coordinator()
        # 开启读取文件的线程(固定写法)
        # 不用再指定线程做的操作和开启线程
        threads = tf.train.start_queue_runners(sess, coord=coord)
        # 打印读取的内容
        print(sess.run([example_batch, label_batch]))
        # 回收线程
        coord.request_stop()
        coord.join(threads)

三、图像读取与二进制读取
1、图像基本知识
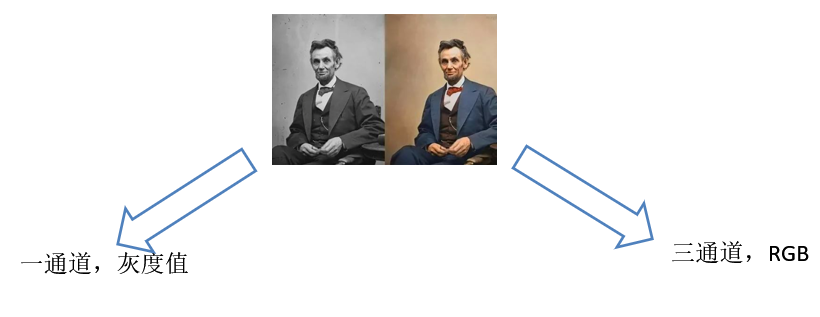
一通道:一个像素点由一个值组成; 三通道:一个像素点由三个值(特征)组成;
有多少个像素点就有多少个特征,三通道再乘三
图像数字化三要素:长度、宽度、通道数
三要素表示成张量,指定三维张量:[height, width, channels] [长度,宽度,通道数]
如[200, 200, 1] [200, 200, 3]
2、图像的基本操作
每一个样本必须保证特征值数量一样,因此所有图片要统一特征数量(像素值一样),此外还可以减少数据量
缩小图片大小的目的:
1)增加图片数据的统一性
2)所有图片转换成指定大小
3)缩小图片数据量,防止增加开销
tf.image.resize_images(images, size)
- 缩小图片
- images:4-D形状[batch, height, width, channels]或3-D形状的张量[height, width, channels]的图片数据
- size:1-D int32张量:new_height, new_width,图像的新尺寸
- 返回4-D格式或者3-D格式图片
图像读取器
tf.WholeFileReader
- 将文件的全部内容作为值输出的读取器
- return:读取器实例
- read(file_queue):输出将是一个文件名(key)和该文件的内容(值)
图像解码器
tf.image.decode_jpeg(contents)
- 将JPEG编码的图像解码为uint8张量
- return:uint8张量,3-D形状[height, width, channels]
tf.image.decode_png(contents)
- 将PNG编码的图像解码为uint8或uint16张量
- return:张量类型,3-D形状[height, width, channels]
import tensorflow as tf
import os
os.environ['TF_CPP_MIN_LOG_LEVEL'] = '2'


def picread(filelist):
    """
    图片文件读取并转换成张量
    :param filelist: 文件路径+名字 的列表
    :return: 每张图片的张量
    """
    # 1 构造文件队列
    file_queue = tf.train.string_input_producer(filelist)
    # 2 阅读器读取(默认读取一张图片)
    reader = tf.WholeFileReader()
    key, value = reader.read(file_queue)
    # 3 对读取的数据解码
    image = tf.image.decode_jpeg(value)
    # 4 处理图片的大小(统一特征数)
    image_resize = tf.image.resize_images(image, [200, 200])
    # 注意:一定要把样本的形状固定[200,200,3],在批处理时要求所有数据必须形状固定
    image_resize.set_shape([200, 200, 3])
    # 5 进行批处理
    image_batch = tf.train.batch([image_resize], batch_size=20, num_threads=1, capacity=20)
    return image_batch


if __name__ == '__main__':
    file_name = os.listdir("./data/img/")
    file_list = [os.path.join("./data/img/", file) for file in file_name]
    image_batch = picread(file_list)
    with tf.Session() as sess:
        coord = tf.train.Coordinator()
        threads = tf.train.start_queue_runners(sess, coord=coord)
        print(sess.run([image_batch]))
        coord.request_stop()
        coord.join()
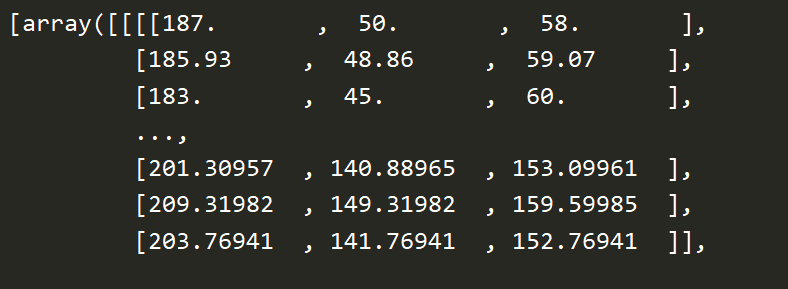
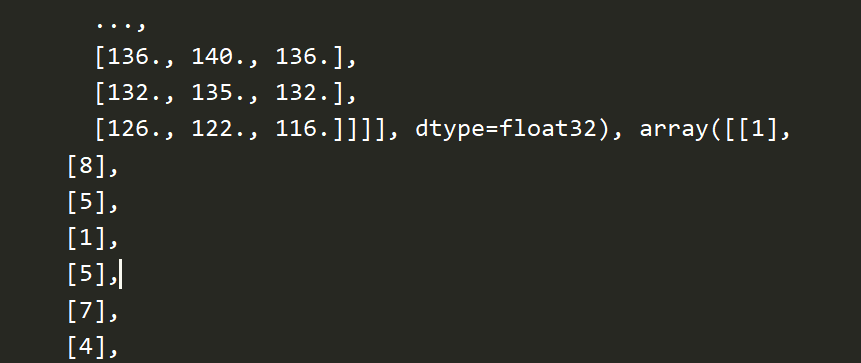
图片存储:uint8(节约空间)
图片矩阵计算:float32(提高精度)
3、二进制文件读取
CIFAR数据集:6万张32X32的彩色图像,10个类别
https://www.cs.toronto.edu/~kriz/cifar.html
下载二进制版本文件,其中每一个样本格式为<1x标签><3072x像素>
第一个字节是图像的标签(0-9),接下来的3072字节是图像像素的值,前1024字节是红色通道,所以前32个字节是图像第一行的红色通道值。
因此读取时按照3072个字节一个样本来处理
tf.FixedLengthRecordReader(record_bytes)
- 要读取每个记录是固定数量字节的二进制文件
- record_bytes:整型,指定每次读取的字节数
- return:读取器实例
tf.decode_raw(bytes,out_type,little_endian = None,name = None)
- 将字节转换为一个数字向量表示,字节为一字符串类型的张量,与函数tf.FixedLengthRecordReader搭配使用
- 二进制读取为uint8格式
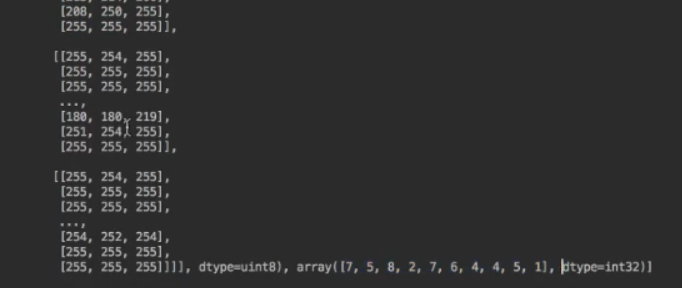
import tensorflow as tf
import os
os.environ['TF_CPP_MIN_LOG_LEVEL'] = '2'

# 定义命令行参数
FLAGS = tf.app.flags.FLAGS
tf.app.flags.DEFINE_string("cifar_dir", "./data/cifar-10-batches-bin/", "文件的目录")


class CifarRead(object):
    """
    完成读取二进制文件,写进tfrecords,读取tfrecords
    """
    def __init__(self, file_list):
        # 文件列表
        self.file_list = file_list
        # 定义读取图片的一些属性
        self.width = 32
        self.height = 32
        self.channel = 3
        # 图片标签和图片所占字节
        self.label_bytes = 1
        self.images_bytes = self.width * self.height * self.channel
        self.bytes = self.images_bytes + self.label_bytes

    def read_and_decode(self):
        # 1 构造文件队列
        file_queue = tf.train.string_input_producer(self.file_list)
        # 2 构造二进制文件读取器
        # 传入每个样本的字节数
        reader = tf.FixedLengthRecordReader(self.bytes)
        key, value = reader.read(file_queue)
        # 3 解码
        label_image = tf.decode_raw(value, tf.uint8)
        # 4 分割成特征值和目标值
        # 切割操作(切割的对象,[起始位置], [结束位置])
        # cast 用来转换类型
        label = tf.cast(tf.slice(label_image, [0], [self.label_bytes]), tf.int32)
        image = tf.cast(tf.slice(label_image, [self.label_bytes], [self.images_bytes]), tf.float32)
        # 5 对图片的特征数据进行形状的改变
        image_reshape = tf.reshape(image, [self.height, self.width, self.channel])
        # 6 批处理
        image_batch, label_batch = tf.train.batch([image_reshape, label], batch_size=10, num_threads=1, capacity=10)
        return image_batch, label_batch


if __name__ == '__main__':
    # file_name = os.listdir(FLAGS.cifar_dir)
    file_name = os.listdir("./data/cifar-10-batches-bin/")
    # 为了只读取bin结尾的文件,需要加一个判断
    file_list = [os.path.join("./data/cifar-10-batches-bin/", file) for file in file_name if file[-3:]=="bin"]
    cf = CifarRead(file_list)
    image_batch, label_batch = cf.read_and_decode()

    with tf.Session() as sess:
        coord = tf.train.Coordinator()
        threads = tf.train.start_queue_runners(sess, coord=coord)
        print(sess.run([image_batch, label_batch]))
        coord.request_stop()
        coord.join()
四、TFRecords文件的存储与读取
TFRecords是Tensorflow设计的一种内置文件格式,是一种二进制文件,它能更好的利用内存,更方便复制和移动
为了将二进制数据和标签(训练的类别标签)数据存储在同一个文件中
文件格式:*.tfrecords
写入文件内容:Example协议块----一种类字典格式
每个样本都是一个example,如:{“image”:“图片内容”, “label”:“标签”}
建立TFRecord存储器
tf.python_io.TFRecordWriter(path)
- 写入tfrecords文件
- path: TFRecords文件的路径
- return:写文件
- method
- write(record):向文件中写入一个字符串记录(字符串为一个序列化的Example,Example.SerializeToString())
- close():关闭文件写入器
对于每一个样本,都要构造example协议。
构造每个样本的Example协议块
tf.train.Example(features=None)
- features:tf.train.Features类型的特征实例
- return:example格式协议块
tf.train.Features(feature=None)
构建每个样本的信息键值对
feature:字典数据,key为要保存的名字,value为tf.train.Feature实例
return:Features类型

tf.train.Feature(**options)
- **options:例如
- bytes_list=tf.train. BytesList(value=[Bytes])
- int64_list=tf.train. Int64List(value=[Value])
- 有三种:
- tf.train. Int64List(value=[Value])
- tf.train. BytesList(value=[Bytes])
- tf.train. FloatList(value=[value])

import tensorflow as tf
import os
os.environ['TF_CPP_MIN_LOG_LEVEL'] = '2'

# 定义命令行参数
FLAGS = tf.app.flags.FLAGS
tf.app.flags.DEFINE_string("cifar_dir", "./data/cifar-10-batches-bin/", "文件的目录")


class CifarRead(object):
    """
    完成读取二进制文件,写进tfrecords,读取tfrecords
    """
    def __init__(self, file_list):
        # 文件列表
        self.file_list = file_list
        # 定义读取图片的一些属性
        self.width = 32
        self.height = 32
        self.channel = 3
        # 图片标签和图片所占字节
        self.label_bytes = 1
        self.images_bytes = self.width * self.height * self.channel
        self.bytes = self.images_bytes + self.label_bytes

    def read_and_decode(self):
        # 1 构造文件队列
        file_queue = tf.train.string_input_producer(self.file_list)
        # 2 构造二进制文件读取器
        # 传入每个样本的字节数
        reader = tf.FixedLengthRecordReader(self.bytes)
        key, value = reader.read(file_queue)
        # 3 解码
        label_image = tf.decode_raw(value, tf.uint8)
        # 4 分割成特征值和目标值
        # 切割操作(切割的对象,[起始位置], [结束位置])
        # cast 用来转换类型
        label = tf.cast(tf.slice(label_image, [0], [self.label_bytes]), tf.int32)
        image = tf.cast(tf.slice(label_image, [self.label_bytes], [self.images_bytes]), tf.float32)
        print(label, image)
        # 5 对图片的特征数据进行形状的改变
        image_reshape = tf.reshape(image, [self.height, self.width, self.channel])
        print(image_reshape)
        # 6 批处理
        image_batch, label_batch = tf.train.batch([image_reshape, label], batch_size=10, num_threads=1, capacity=10)
        print(image_batch, label_batch)
        return image_batch, label_batch

    def write_to_tfrecords(self, image_batch, label_batch):
        """
        将图片的特征值和目标值存入tfrecords
        :param image_batch: 10张图片的特征值
        :param label_batch: 10张图片的目标值
        :return: None
        """
        # 1 构造一个tfrecords文件,即建立存储器
        writer = tf.python_io.TFRecordWriter("./tmp/cifar.tfcecords")
        # 2 循环将所有样本写入文件,每张图片样本都要构造example协议
        for i in range(10):
            # 取出第i个图片的特征值和目标值,所以必须用eval,所以必须在session中运行
            image = image_batch[i].eval().tostring() # 要转成字符串
            label = label_batch[i].eval()[0]  # 它是一个二维列表
            # 构造一个样本的example
            example = tf.train.Example(features=tf.train.Features(feature={
                "image":tf.train.Feature(bytes_list=tf.train.BytesList(value=[image])),
                "label":tf.train.Feature(int64_list=tf.train.Int64List(value=[label])),
            }))
            # 写入单独的样本,需要序列化再写入
            writer.write(example.SerializeToString())
        # 3 关闭
        writer.close()
        return None


if __name__ == '__main__':
    # file_name = os.listdir(FLAGS.cifar_dir)
    file_name = os.listdir("./data/cifar-10-batches-bin/")
    # 为了只读取bin结尾的文件,需要加一个判断
    file_list = [os.path.join("./data/cifar-10-batches-bin/", file) for file in file_name if file[-3:]=="bin"]
    cf = CifarRead(file_list)
    image_batch, label_batch = cf.read_and_decode()

    with tf.Session() as sess:
        coord = tf.train.Coordinator()
        threads = tf.train.start_queue_runners(sess, coord=coord)
        # print(sess.run([image_batch, label_batch]))
        # 存进tfrecords文件
        print("开始存储")
        cf.write_to_tfrecords(image_batch, label_batch)
        print("结束存储")
        coord.request_stop()
        coord.join()

TFRecords读取过程
同文件阅读器流程,中间需要解析过程
tf.TFRecordReader
- 读取TfRecords文件
- read()
解析TFRecords的example协议内存块
tf.parse_single_example(serialized,features=None,name=None)
- 解析一个单一的Example原型
- serialized:标量字符串Tensor,一个序列化的Example
- features:dict字典数据,键为读取的名字,值为FixedLenFeature
- return:一个键值对组成的字典,键为读取的名字
tf.FixedLenFeature(shape,dtype)
- shape:输入数据的形状,一般不指定,为空列表
- dtype:输入数据类型,与存储进文件的类型要一致
- 类型只能是float32,int64,string
import tensorflow as tf
import os
os.environ['TF_CPP_MIN_LOG_LEVEL'] = '2'

# 定义命令行参数
FLAGS = tf.app.flags.FLAGS
tf.app.flags.DEFINE_string("cifar_dir", "./data/cifar-10-batches-bin/", "文件的目录")


class CifarRead(object):
    """
    完成读取二进制文件,写进tfrecords,读取tfrecords
    """
    def __init__(self, file_list):
        # 文件列表
        self.file_list = file_list
        # 定义读取图片的一些属性
        self.width = 32
        self.height = 32
        self.channel = 3
        # 图片标签和图片所占字节
        self.label_bytes = 1
        self.images_bytes = self.width * self.height * self.channel
        self.bytes = self.images_bytes + self.label_bytes

    def read_and_decode(self):
        # 1 构造文件队列
        file_queue = tf.train.string_input_producer(self.file_list)
        # 2 构造二进制文件读取器
        # 传入每个样本的字节数
        reader = tf.FixedLengthRecordReader(self.bytes)
        key, value = reader.read(file_queue)
        # 3 解码
        label_image = tf.decode_raw(value, tf.uint8)
        # 4 分割成特征值和目标值
        # 切割操作(切割的对象,[起始位置], [结束位置])
        # cast 用来转换类型
        label = tf.cast(tf.slice(label_image, [0], [self.label_bytes]), tf.int32)
        image = tf.cast(tf.slice(label_image, [self.label_bytes], [self.images_bytes]), tf.float32)
        print(label, image)
        # 5 对图片的特征数据进行形状的改变
        image_reshape = tf.reshape(image, [self.height, self.width, self.channel])
        print(image_reshape)
        # 6 批处理
        image_batch, label_batch = tf.train.batch([image_reshape, label], batch_size=10, num_threads=1, capacity=10)
        print(image_batch, label_batch)
        return image_batch, label_batch

    def write_to_tfrecords(self, image_batch, label_batch):
        """
        将图片的特征值和目标值存入tfrecords
        :param image_batch: 10张图片的特征值
        :param label_batch: 10张图片的目标值
        :return: None
        """
        # 1 构造一个tfrecords文件,即建立存储器
        writer = tf.python_io.TFRecordWriter("./tmp/cifar.tfcecords")
        # 2 循环将所有样本写入文件,每张图片样本都要构造example协议
        for i in range(10):
            # 取出第i个图片的特征值和目标值,所以必须用eval,所以必须在session中运行
            image = image_batch[i].eval().tostring() # 要转成字符串
            label = label_batch[i].eval()[0]  # 它是一个二维列表
            # 构造一个样本的example
            example = tf.train.Example(features=tf.train.Features(feature={
                "image":tf.train.Feature(bytes_list=tf.train.BytesList(value=[image])),
                "label":tf.train.Feature(int64_list=tf.train.Int64List(value=[label])),
            }))
            # 写入单独的样本,需要序列化再写入
            writer.write(example.SerializeToString())
        # 3 关闭
        writer.close()
        return None

    def read_from_tfrecords(self):
        # 1 构造文件队列
        file_queue = tf.train.string_input_producer(["./tmp/cifar.tfrecords"])
        # 2 构造文件阅读器,读取内容example
        reader = tf.TFRecordReader()
        key, value = reader.read(file_queue)  # value是一个样本的序列化example
        # 3 解析example
        features = tf.parse_single_example(value, features={
            "image": tf.FixedLenFeature([], tf.string),
            "label": tf.FixedLenFeature([], tf.int64),
        })
        print(features["image"], features["label"])
        # 4 解码内容
        # string需要解码,float32,int64不需要
        image = tf.decode_raw(features["image"], tf.uint8)
        label = tf.cast(features["label"], tf.int32)
        # 固定图片的形状,方便批处理
        image_reshape = tf.reshape(image, [self.height, self.width, self.channel])
        print(image_reshape, label)
        # 5 进行批处理
        image_batch, label_batch = tf.train.batch([image_reshape, label], batch_size=10, num_threads=1, capacity=10)
        return image_batch, label_batch

if __name__ == '__main__':
    # file_name = os.listdir(FLAGS.cifar_dir)
    file_name = os.listdir("./data/cifar-10-batches-bin/")
    # 为了只读取bin结尾的文件,需要加一个判断
    file_list = [os.path.join("./data/cifar-10-batches-bin/", file) for file in file_name if file[-3:]=="bin"]
    cf = CifarRead(file_list)
    image_batch, label_batch = cf.read_from_tfrecords()

    with tf.Session() as sess:
        coord = tf.train.Coordinator()
        threads = tf.train.start_queue_runners(sess, coord=coord)
        # 打印从tfrecords中读取的内容
        print(sess.run([image_batch, label_batch]))
        coord.request_stop()
        coord.join()