PyQt5 使用 QStackedWidget 实现轮播展示动画(自动与手动)
1.PyQt5 使用 QFrame 绘制聊天(三角)气泡,并显示文字
2.PyQt5 使用 QStackedWidget 实现轮播展示动画(自动与手动)
3.PyQt5 使用 QStackedWidget 实现轮播展示动画,但是鼠标移入却疯狂闪烁的解决办法4.PyQt5 使用 QLabel 实现对图片圆角或者圆形图片5.PyQt5 使用 QFrame 实现页面类抽屉式的进入与退出的动画6.PyQt5 使用 QLabel 实现图像 360度 不间断旋转7.PyQt5/6 PySide2/6 在系统底部任务栏编程,用于显示文字(图片)信息8.PyQt5 使用 aiohttp 发送异步请求9.PyQt5 使用 Pyinstaller+multiprocessing 打包多进程应用时,引发的一些问题10.PyQt5 使用 QPlainTextEdit/QTextBrowser 与 Logging 结合后显示日志信息PyQt5 使用 QStackedWidget 实现轮播展示动画(自动与手动)
在 PyQt5 中,如果需要用QStackedWidget展示图片比较生硬,参考网络上的一些内容,发现用QPropertyAnimation属性动画可实现想要的效果,于是记录在这里
代码结构
本文中全部代码全在test_QStackedWidget_Animation.py这一个文件中编码,步骤中有变动的地方会注释标注,无改动的不会重复显示出来,需要看完整代码的,可直接移步到末尾。
需要注意的时,此处是用的 背景色 代替的图片,如需要,就在QStackedWidget对应页面中添加QLabel显示图片
一. 创建测试页面
添加QStackedWidget,并增加3个页面,然后动态添加几个QLabel用于显示页码,最后添加两个QPushButton按钮
#!/usr/bin/env python3
# -*- coding: UTF-8 -*-
"""
@ File        : test_QStackedWidget_Animation.py
@ Author      : yqbao
@ Version     : V1.0.0
@ Description : 图片轮播动画
"""
from PyQt5.QtWidgets import QApplication, QWidget, QStackedWidget, QVBoxLayout, QPushButton, QLabel
from PyQt5.QtCore import QPropertyAnimation, QEasingCurve, QRect, QEvent, Qt, QTimer


class Ui_DemoApp(object):
    def setupUi(self, DemoApp):
        DemoApp.setWindowTitle("轮播动画")
        DemoApp.resize(800, 200)
        self.stacked_widget = QStackedWidget(DemoApp)

        # 创建布局
        self.layout = QVBoxLayout(DemoApp)
        self.layout.addWidget(self.stacked_widget)

        # 添加页面
        page1 = QWidget()
        page1.setStyleSheet("background-color: #81bc88;")
        self.stacked_widget.addWidget(page1)
        page2 = QWidget()
        page2.setStyleSheet("background-color: #7a9dbc;")
        self.stacked_widget.addWidget(page2)
        page3 = QWidget()
        page3.setStyleSheet("background-color: #bc91a9;")
        self.stacked_widget.addWidget(page3)

        # 创建标签显示页码
        self.page_labels = [QLabel(f"{i + 1}", DemoApp) for i in range(self.stacked_widget.count())]
        for label in self.page_labels:
            label.setStyleSheet("color: gray;")  # 初始设置为暗淡的颜色
            label.setFixedSize(15, 15)
            label.setAlignment(Qt.AlignCenter)

        # 创建按钮
        self.button_next = QPushButton("下一页", DemoApp)
        self.button_prev = QPushButton("上一页", DemoApp)


class DemoApp(QWidget, Ui_DemoApp):
    def __init__(self):
        super().__init__()
        self.setupUi(self)


if __name__ == "__main__":
    import sys

    app = QApplication(sys.argv)
    demo = DemoApp()
    demo.show()
    sys.exit(app.exec_())
运行后,QLabel标签与QPushButton按钮会显示在左上角,但是不用着急,下一步就处理
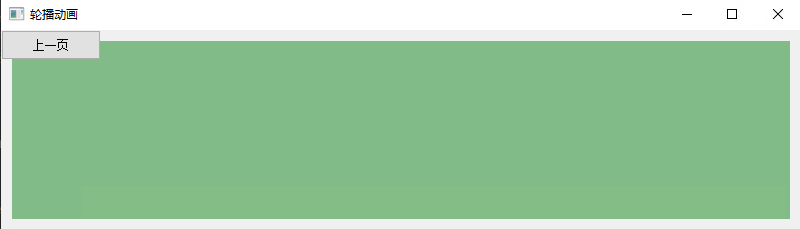
二. 对QLabel标签与QPushButton按钮布局
这一步,需要对 QLabel标签与QPushButton按钮进行布局,具体效果就是使其悬浮在 QStackedWidget上,并且鼠标移入(进入)时才显示,移出(离开)时,隐藏,为了实现这个能力,我们需要使用eventFilter与resizeEvent事件
#!/usr/bin/env python3
# -*- coding: UTF-8 -*-
"""
@ File        : test_QStackedWidget_Animation.py
@ Author      : yqbao
@ Version     : V1.0.0
@ Description : 图片轮播动画
"""
from PyQt5.QtWidgets import QApplication, QWidget, QStackedWidget, QVBoxLayout, QPushButton, QLabel
from PyQt5.QtCore import QPropertyAnimation, QEasingCurve, QRect, QEvent, Qt, QTimer


class Ui_DemoApp(object):
    ... # 忽略,本步骤没变化


class DemoApp(QWidget, Ui_DemoApp):
    def __init__(self):
        super().__init__()
        self.setupUi(self)

        # 隐藏按钮和标签初始状态
        self.button_next.hide()
        self.button_prev.hide()
        self.hide_current_page()

        # 安装事件过滤器到窗口
        self.installEventFilter(self)

    def show_current_page(self):
        """显示标签页"""
        for label in self.page_labels:
            label.show()

    def hide_current_page(self):
        """隐藏标签页"""
        for label in self.page_labels:
            label.hide()

    def set_geometry_current_page(self):
        """设置标签页位置"""
        for i, label in enumerate(self.page_labels):
            label.setGeometry(self.width() // 2 + i * 15 - 30, self.height() - 45, 60, 30)

    def eventFilter(self, obj, event):
        """事件过滤,鼠标移入与移出"""
        if event.type() == QEvent.Enter and obj is self:
            # 鼠标进入时显示按钮
            self.button_next.show()
            self.button_prev.show()
            self.show_current_page()
        elif event.type() == QEvent.Leave and obj is self:
            # 鼠标离开时隐藏按钮
            self.button_next.hide()
            self.button_prev.hide()
            self.hide_current_page()
        return super().eventFilter(obj, event)

    def resizeEvent(self, event):
        """更新按钮位置"""
        super().resizeEvent(event)
        self.button_next.setGeometry(self.width() - 80, self.height() // 2 - 15, 60, 30)
        self.button_prev.setGeometry(20, self.height() // 2 - 15, 60, 30)
        self.set_geometry_current_page()

三. 继承QStackedWidget添加属性动画方法
上两步,已经把页面准备的差不多了,接下来就是要开始添加动画,以及QPuahButton按钮槽函数了
1. 继承QStackedWidget并添加方法
#!/usr/bin/env python3
# -*- coding: UTF-8 -*-
"""
@ File        : test_QStackedWidget_Animation.py
@ Author      : yqbao
@ Version     : V1.0.0
@ Description : 图片轮播动画
"""
from PyQt5.QtWidgets import QApplication, QWidget, QStackedWidget, QVBoxLayout, QPushButton, QLabel
from PyQt5.QtCore import QPropertyAnimation, QEasingCurve, QRect, QEvent, Qt, QTimer


class AnimatedStackedWidget(QStackedWidget):
    def __init__(self, parent):
        super().__init__(parent)
        self.animation_duration = 500  # 动画持续时间(毫秒)
        self.current_animation = None  # 用于防止动画重叠

    def set_current_index_with_animation(self, index, direction='left'):
        current_index = self.currentIndex()

        if current_index == index or self.current_animation is not None:
            return

        # 获取当前页面和目标页面
        current_widget = self.currentWidget()
        next_widget = self.widget(index)

        # 确保目标页面的背景填充
        next_widget.setGeometry(self.rect())  # 使目标页面填充整个QStackedWidget
        next_widget.show()

        # 定义动画起始和结束位置
        width = self.width()
        if direction == 'left':
            current_end_pos = QRect(-width, 0, width, self.height())
            next_start_pos = QRect(width, 0, width, self.height())
        else:  # 'right'
            current_end_pos = QRect(width, 0, width, self.height())
            next_start_pos = QRect(-width, 0, width, self.height())

        # 当前页面退出动画
        self.current_animation = QPropertyAnimation(current_widget, b"geometry")
        self.current_animation.setDuration(self.animation_duration)
        self.current_animation.setStartValue(current_widget.geometry())
        self.current_animation.setEndValue(current_end_pos)
        self.current_animation.setEasingCurve(QEasingCurve.OutCubic)

        # 下个页面进入动画
        self.next_animation = QPropertyAnimation(next_widget, b"geometry")
        self.next_animation.setDuration(self.animation_duration)
        self.next_animation.setStartValue(next_start_pos)
        self.next_animation.setEndValue(self.rect())
        self.next_animation.setEasingCurve(QEasingCurve.OutCubic)

        # 动画结束时切换到目标页面
        def on_animation_finished():
            self.setCurrentIndex(index)
            current_widget.hide()
            self.current_animation = None  # 解除动画锁定

        # 连接动画结束信号到切换函数
        self.current_animation.finished.connect(on_animation_finished)

        # 启动动画
        self.current_animation.start()
        self.next_animation.start()
2. 替换stacked_widget
#!/usr/bin/env python3
# -*- coding: UTF-8 -*-
"""
@ File        : test_QStackedWidget_Animation.py
@ Author      : yqbao
@ Version     : V1.0.0
@ Description : 图片轮播动画
"""
class Ui_DemoApp(object):
    # self.stacked_widget = QStackedWidget(DemoApp)  # 把这句注释,使用我们自己的 AnimatedStackedWidget 类
    self.stacked_widget = AnimatedStackedWidget(DemoApp)
3. 为QPuahButton按钮添加槽函数,切换页面
#!/usr/bin/env python3
# -*- coding: UTF-8 -*-
"""
@ File        : test_QStackedWidget_Animation.py
@ Author      : yqbao
@ Version     : V1.0.0
@ Description : 图片轮播动画
"""
class DemoApp(QWidget, Ui_DemoApp):
    def __init__(self):
        super().__init__()
        self.setupUi(self)

        # 添加 按钮信号
        self.button_next.clicked.connect(self.next_page)
        self.button_prev.clicked.connect(self.prev_page)

    def next_page(self):
        """下一页"""
        current_index = self.stacked_widget.currentIndex()
        next_index = (current_index + 1) % self.stacked_widget.count()
        self.stacked_widget.set_current_index_with_animation(next_index, direction='left')

    def prev_page(self):
        """上一页"""
        current_index = self.stacked_widget.currentIndex()
        prev_index = (current_index - 1) % self.stacked_widget.count()
        self.stacked_widget.set_current_index_with_animation(prev_index, direction='right')
此时已经可以手动切换页面了,但是会发现标签页没有任何变化,别着急,下一步继续处理

四. 对QLabel标签页,当前页码进行高亮处理
#!/usr/bin/env python3
# -*- coding: UTF-8 -*-
"""
@ File        : test_QStackedWidget_Animation.py
@ Author      : yqbao
@ Version     : V1.0.0
@ Description : 图片轮播动画
"""
class DemoApp(QWidget, Ui_DemoApp):
    def __init__(self):
        super().__init__()
        self.setupUi(self)

        # 高亮当前页码
        self.highlight_current_page()


    def highlight_current_page(self, index=0):
        """更新标签样式"""
        for i, label in enumerate(self.page_labels):
            if i == index:
                label.setStyleSheet("color: black; font-weight: bold;")  # 高亮当前页码
            else:
                label.setStyleSheet("color: gray;")  # 暗淡其他页码

    def next_page(self):
        """下一页"""
        current_index = self.stacked_widget.currentIndex()
        next_index = (current_index + 1) % self.stacked_widget.count()
        self.stacked_widget.set_current_index_with_animation(next_index, direction='left')
        self.highlight_current_page(next_index)  # 添加了这句

    def prev_page(self):
        """上一页"""
        current_index = self.stacked_widget.currentIndex()
        prev_index = (current_index - 1) % self.stacked_widget.count()
        self.stacked_widget.set_current_index_with_animation(prev_index, direction='right')
        self.highlight_current_page(prev_index)  # 添加了这句
接下来还差什么呢?自动轮播?
五. 添加QTimer,定时自动切换(轮播)
#!/usr/bin/env python3
# -*- coding: UTF-8 -*-
"""
@ File        : test_QStackedWidget_Animation.py
@ Author      : yqbao
@ Version     : V1.0.0
@ Description : 图片轮播动画
"""
class DemoApp(QWidget, Ui_DemoApp):
    def __init__(self):
        super().__init__()
        self.setupUi(self)

        # 定时器设置
        self.timer = QTimer(self)
        self.timer.timeout.connect(self.auto_next_page)  # 自动轮播
        self.timer.start(3000)  # 每3秒切换一次

    def auto_next_page(self):
        """自动切换到下一页"""
        self.next_page()

    def reset_timer(self):
        """重置定时器,以保持自动轮播"""
        self.timer.start(3000)

    def next_page(self):
        """下一页"""
        current_index = self.stacked_widget.currentIndex()
        next_index = (current_index + 1) % self.stacked_widget.count()
        self.stacked_widget.set_current_index_with_animation(next_index, direction='left')
        self.highlight_current_page(next_index)
        self.reset_timer()  # 重置定时器

    def prev_page(self):
        """上一页"""
        current_index = self.stacked_widget.currentIndex()
        prev_index = (current_index - 1) % self.stacked_widget.count()
        self.stacked_widget.set_current_index_with_animation(prev_index, direction='right')
        self.highlight_current_page(prev_index)
        self.reset_timer()  # 重置定时器
六. 完整代码
七. 可能遇到的问题
此方法可能遇到,当我把鼠标移动到 "下一页" 和 "上一页" 按钮,又或者是 Qlabel标签页时,就会疯狂闪烁,这个问题在另一篇解决(否则篇幅太长了)下篇见这里
本文来自博客园作者:星尘的博客,转载请注明出处:https://www.cnblogs.com/yqbaowo/p/18418439
合集:
PyQt5 使用笔记
分类:
PyQt5


【推荐】国内首个AI IDE,深度理解中文开发场景,立即下载体验Trae
【推荐】编程新体验,更懂你的AI,立即体验豆包MarsCode编程助手
【推荐】抖音旗下AI助手豆包,你的智能百科全书,全免费不限次数
【推荐】轻量又高性能的 SSH 工具 IShell:AI 加持,快人一步
· 25岁的心里话
· 闲置电脑爆改个人服务器(超详细) #公网映射 #Vmware虚拟网络编辑器
· 基于 Docker 搭建 FRP 内网穿透开源项目(很简单哒)
· 零经验选手,Compose 一天开发一款小游戏!
· 一起来玩mcp_server_sqlite,让AI帮你做增删改查!!