python 代码如何打包成.exe文件(Pyinstaller)
前言
python写的代码如何打包成.exe可执行程序,让别人电脑上没安装过 python 的小伙伴也可以直接运行?
本篇讲如何用PyInstaller库一步步打包python代码。
PyInstaller 环境准备
我的电脑环境:
1.系统windows 10
2.python 3.6.6
PyInstaller 环境需依赖pywin32包,先安装pywin32, 推荐pip安装
pip install pywin32 --index-url https://pypi.douban.com/simple
如果没安装pywin32,后面打包会报错:FileNotFoundError: [Errno 2] No such file or directory: 'lib\site-packages\win32\win32wnet.pyd'
使用pip安装PyInstaller
pip install PyInstaller --index-url https://pypi.douban.com/simple
安装完查看版本号
C:\Users\dell>pip show pywin32
Name: pywin32
Version: 228

C:\Users\dell>pip show PyInstaller
Name: pyinstaller
Version: 4.3
Requires: setuptools, importlib-metadata, altgraph, pywin32-ctypes, pyinstaller-hooks-contrib, pefile
pywin32离线包下载地址,需匹配对应的python和系统版本https://www.lfd.uci.edu/~gohlke/pythonlibs/#pip
打包.exe文件
我写了一段简单的 requests 代码yoyoblog.py
"""
使用requests库获取我的博客首页文章地址
上海-悠悠 blog:https://www.cnblogs.com/yoyoketang/
"""
import requests
import re


r = requests.get("https://www.cnblogs.com/yoyoketang/")
# 匹配首页blog地址
res = re.findall(r'class="postTitle2 vertical-middle" href="(.+?)"', r.text)
for i in res:
    print("blog:", i)
命令行运行结果
D:\demo\myblog>python yoyoblog.py
blog: https://www.cnblogs.com/yoyoketang/p/14811325.html
blog: https://www.cnblogs.com/yoyoketang/p/14500093.html
blog: https://www.cnblogs.com/yoyoketang/p/14084401.html
blog: https://www.cnblogs.com/yoyoketang/p/10302295.html
blog: https://www.cnblogs.com/yoyoketang/p/14891200.html
blog: https://www.cnblogs.com/yoyoketang/p/14891142.html
blog: https://www.cnblogs.com/yoyoketang/p/14890723.html
blog: https://www.cnblogs.com/yoyoketang/p/14890583.html
blog: https://www.cnblogs.com/yoyoketang/p/14888404.html
blog: https://www.cnblogs.com/yoyoketang/p/14887668.html
blog: https://www.cnblogs.com/yoyoketang/p/14887087.html
blog: https://www.cnblogs.com/yoyoketang/p/14884606.html
blog: https://www.cnblogs.com/yoyoketang/p/14873194.html
blog: https://www.cnblogs.com/yoyoketang/p/14869348.html
这段代码依赖第三方库requests,需在python目录Lib\site-packages下找到requests

找到后整个文件夹全部复制到代码根目录

cd到项目跟目录myblog下执行命令
pyinstaller -F yoyoblog.py
执行过程如下
D:\demo\myblog>pyinstaller -F yoyoblog.py
275 INFO: PyInstaller: 4.3
275 INFO: Python: 3.6.6
275 INFO: Platform: Windows-10-10.0.17134-SP0
276 INFO: wrote D:\demo\myblog\yoyoblog.spec
...
14480 INFO: Writing RT_ICON 7 resource with 1128 bytes
14486 INFO: Updating manifest in D:\demo\myblog\build\yoyoblog\run.exe.l_fhvf3j
14486 INFO: Updating resource type 24 name 1 language 0
14490 INFO: Appending archive to EXE D:\demo\myblog\dist\yoyoblog.exe
16213 INFO: Building EXE from EXE-00.toc completed successfully.
看到successfully 就是成功了
pyinstaller 一些常用参数命令
- -F 表示生成单个可执行文件
- -w 表示去掉控制台窗口,这在GUI界面时非常有用。不过如果是命令行程序的话那就把这个选项删除吧!
- -p 表示你自己自定义需要加载的类路径,一般情况下用不到
- -i 表示可执行文件的图标
更多参数可以通过pyinstaller -h查看
执行.exe文件
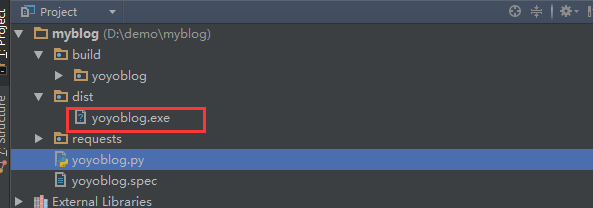
打包完成后会在 dist 目录看到一个 yoyoblog.exe 文件

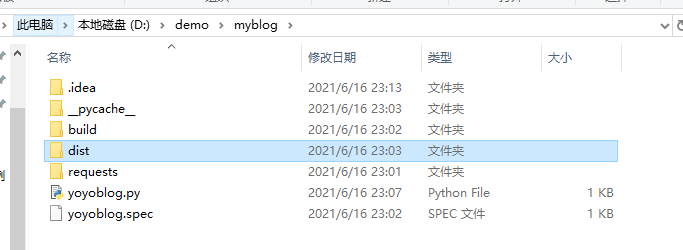
可以打开到对应目录

双击运行yoyoblog.exe

双击运行发现代码运行很快,一闪就没有了,这是因为代码运行完就自动结束了,导致啥都没看到。
解决办法1:可以在cmd窗口执行.exe文件
D:\demo\myblog\dist>yoyoblog.exe
blog: https://www.cnblogs.com/yoyoketang/p/14811325.html
blog: https://www.cnblogs.com/yoyoketang/p/14500093.html
blog: https://www.cnblogs.com/yoyoketang/p/14084401.html
blog: https://www.cnblogs.com/yoyoketang/p/10302295.html
blog: https://www.cnblogs.com/yoyoketang/p/14891200.html
blog: https://www.cnblogs.com/yoyoketang/p/14891142.html
blog: https://www.cnblogs.com/yoyoketang/p/14890723.html
blog: https://www.cnblogs.com/yoyoketang/p/14890583.html
blog: https://www.cnblogs.com/yoyoketang/p/14888404.html
blog: https://www.cnblogs.com/yoyoketang/p/14887668.html
blog: https://www.cnblogs.com/yoyoketang/p/14887087.html
blog: https://www.cnblogs.com/yoyoketang/p/14884606.html
blog: https://www.cnblogs.com/yoyoketang/p/14873194.html
blog: https://www.cnblogs.com/yoyoketang/p/14869348.html
解决办法2:加一句代码按任意键退出
"""
使用requests库获取我的博客首页文章地址
上海-悠悠 blog:https://www.cnblogs.com/yoyoketang/
"""
import requests
import re


r = requests.get("https://www.cnblogs.com/yoyoketang/")
# 匹配首页blog地址
res = re.findall(r'class="postTitle2 vertical-middle" href="(.+?)"', r.text)
for i in res:
    print("blog:", i)

input("press any key to exit!")
重新执行pyinstaller -F yoyoblog.py 打包,这样就可以双击运行了

icon 制作
-i参数打包的时候可以自定义icon图标
-i <FILE.ico or FILE.exe,ID or FILE.icns or "NONE">, --icon <FILE.ico or FILE.exe,ID or FILE.icns or "NONE">
                        FILE.ico: apply that icon to a Windows executable.
                        FILE.exe,ID, extract the icon with ID from an exe.
                        FILE.icns: apply the icon to the .app bundle on Mac OS
                        X. Use "NONE" to not apply any icon, thereby making
                        the OS to show some default (default: apply
                        PyInstaller's icon)
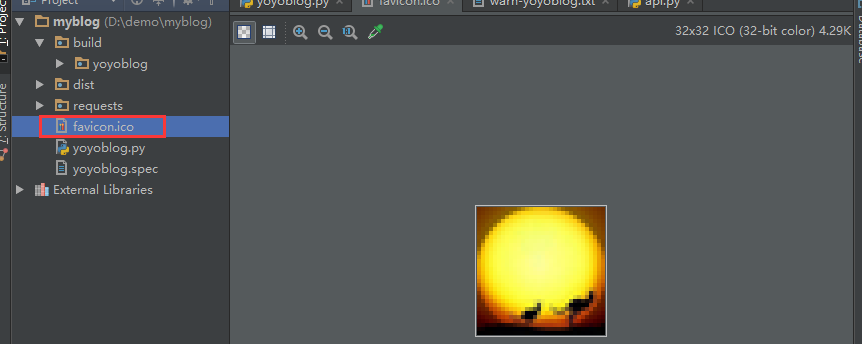
先找一张icon图片放到项目跟目录(注意并不是每个图片格式都可以,必须是icon格式)

加 -i 参数打包
pyinstaller -F yoyoblog.py -i favicon.ico
打包完成重新双击运行,会看到左上角有自己的icon了

icon在线制作https://www.bitbug.net/


【推荐】国内首个AI IDE,深度理解中文开发场景,立即下载体验Trae
【推荐】编程新体验,更懂你的AI,立即体验豆包MarsCode编程助手
【推荐】抖音旗下AI助手豆包,你的智能百科全书,全免费不限次数
【推荐】轻量又高性能的 SSH 工具 IShell:AI 加持,快人一步
· 开发者必知的日志记录最佳实践
· SQL Server 2025 AI相关能力初探
· Linux系列:如何用 C#调用 C方法造成内存泄露
· AI与.NET技术实操系列(二):开始使用ML.NET
· 记一次.NET内存居高不下排查解决与启示
· 阿里最新开源QwQ-32B,效果媲美deepseek-r1满血版,部署成本又又又降低了!
· 开源Multi-agent AI智能体框架aevatar.ai,欢迎大家贡献代码
· Manus重磅发布:全球首款通用AI代理技术深度解析与实战指南
· 被坑几百块钱后,我竟然真的恢复了删除的微信聊天记录!
· AI技术革命,工作效率10个最佳AI工具
2019-06-16 第9期《python3接口自动化测试》课程,6月29号开学!