基于Xshell使用密钥方式连接远程主机
基于Xshell使用密钥方式连接远程主机,具体内容如下
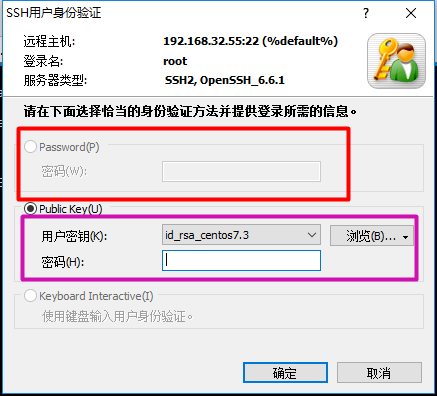
连接远程主机,就验证身份而言,一般有两种方式,一种是通过用户密码;另一种通过公钥的方式(Public Key)。

图1、xshell支持验证登录用户的方式
下面就使用Public Key的方式来实现连接,通过工具ssh-kengen生成密钥对。
注意:操作之前需要ping通本机和目的主机(如果ping不通,可能的原因是防火墙、SELinux没关闭,或者网关设置有问题等)
使用XShell,这里使用的是XShell manager 5,目的主机为CentOS6,将需要连接的远程主机称为目的主机。
目的主机安装ssh服务端,并开启
|
1
2
3
4
5
6
|
[root@node1 ~]$ yum install -y openssh-server # 安装openssh服务端[root@node1 ~]$ yum install -y openssh-clients #安装openssh客户端,可以不安装 [root@node1 ~]$ service sshd start # 临时开启sshd服务[root@node1 ~]$ chkconfig sshd on # 永久开启sshd服务,服务器重启也生效[root@node1 ~]$service sshd status # 查看sshd服务运行状态openssh-daemon (pid 1384) 正在运行... # 显示正在运行 |
生成ssh密钥对(包括私钥和公钥)
|
1
2
3
4
5
6
7
8
9
10
11
12
13
14
15
16
17
18
19
20
21
22
23
24
25
26
27
|
[root@node1 ~]$ (umask 0077; ssh-keygen) # 生成ssh密钥对,并将权限设置为600Generating public/private rsa key pair.Enter file in which to save the key (/root/.ssh/id_rsa): # 回车Enter passphrase (empty for no passphrase): Enter same passphrase again: Your identification has been saved in /root/.ssh/id_rsa.Your public key has been saved in /root/.ssh/id_rsa.pub.The key fingerprint is:fd:72:10:50:a6:7d:83:c7:93:d2:26:3d:12:0e:38:2f root@node1The key's randomart image is:+--[ RSA 2048]----+| .o.+ || o B * . || o. O % || E .. O + || .S o || o || . o || o || |+-----------------+[root@node1 ~]$ cd .ssh/[root@node1 .ssh]$ ll # 查看密钥/公钥对信息,权限都为600总用量 8-rw-------. 1 root root 1675 5月 21 14:26 id_rsa # 私钥-rw-------. 1 root root 392 5月 21 14:26 id_rsa.pub # 公钥[root@node1 .ssh]$ |
修改sshd连接配置文件vim /etc/ssh/sshd_config
|
1
2
3
|
PasswordAuthentication no # 不允许密码验证登录PubkeyAuthentication yes # 允许公钥验证登录AuthorizedKeysFile .ssh/id_rsa.pub # 指定公钥文件路径 |
将ssh密钥对导出到本机,建议创建一个目录专用放置密钥对
|
1
2
|
#]sz id_rsa#]sz id_rsa.pub |
重载sshd服务
|
1
2
|
[root@node1 .ssh]$ service sshd reload重新载入 sshd: [确定] |
使用XShell连接
|
1
|
ssh root@IP |

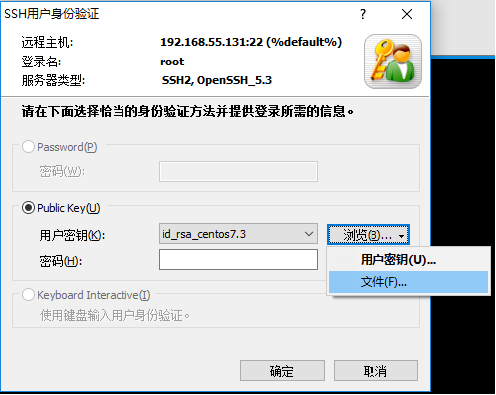
图2、选择密钥文件

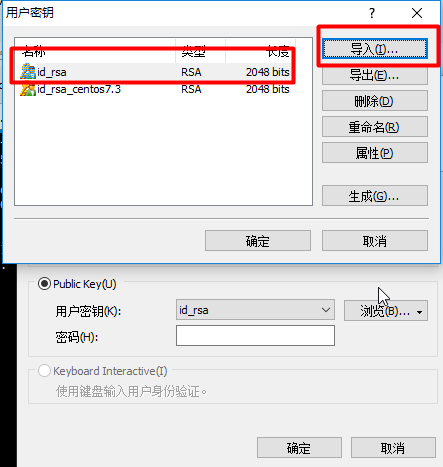
图3、导入私钥并确定
注意:点击确定之后还要重新连接一次
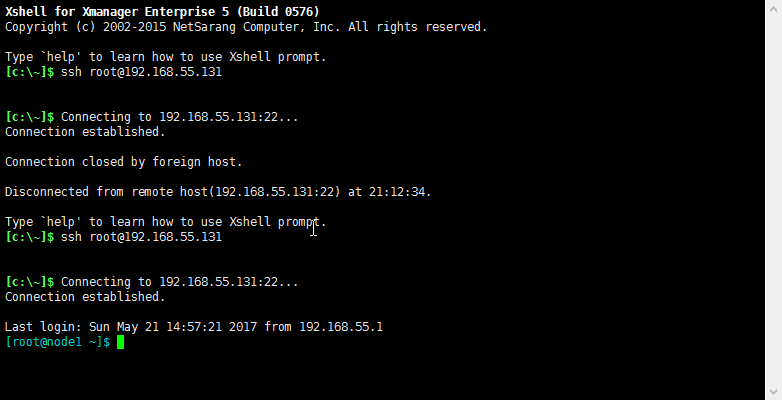
图4、连接成功
客户端使用私钥去验证,而远程主机使用公钥验证。


