Spring Cloud 系列之 Feign 声明式服务调用(二)

本篇文章为系列文章,未读第一集的同学请猛戳这里:Spring Cloud 系列之 Feign 声明式服务调用(一)

本篇文章讲解 Feign 性能优化的问题,Gzip压缩、HTTP连接池、请求超时等。


1|0Feign 性能优化


1|1Gzip 压缩


  gzip 介绍:gzip 是一种数据格式,采用 deflate 算法压缩数据;gzip 是一种流行的文件压缩算法,应用十分广泛,尤其是在 Linux 平台。

  gzip 能力:当 Gzip 压缩一个纯文本文件时,效果是非常明显的,大约可以减少 70% 以上的文件大小。

  gzip 作用:网络数据经过压缩后实际上降低了网络传输的字节数,最明显的好处就是可以加快网页加载的速度。网页加载速度加快的好处不言而喻,除了节省流量,改善用户的浏览体验外,另一个潜在的好处是 Gzip 与搜索引擎的抓取工具有着更好的关系。例如 Google 就可以通过直接读取 gzip 文件来比普通手工抓取更快地检索网页。


HTTP 协议关于压缩传输的规定


  1. 客户端向服务器请求中带有:Accept-Encoding:gzipdeflate 字段,向服务器表示客户端支持的压缩格式(gzip 或者 deflate),如果不发送该消息头,服务端默认是不会压缩的。
  2. 服务端在收到请求之后,如果发现请求头中含有 Accept-Encoding 字段,并且支持该类型压缩,就会对响应报文压缩之后返回给客户端,并且携带 Content-Encoding:gzip 消息头,表示响应报文是根据该格式进行压缩的。
  3. 客户端接收到请求之后,先判断是否有 Content-Encoding 消息头,如果有,按该格式解压报文。否则按正常报文处理。


Gzip 压缩案例


局部


  只配置 Consumer 通过 Feign 到 Provider 的请求与相应的 Gzip 压缩。

  服务消费者 application.yml

# Feign gzip 压缩 feign: compression: request: mime-types: text/xml,application/xml,application/json # 配置压缩支持的 MIME TYPE min-request-size: 512 # 配置压缩数据大小的最小阈值,默认 2048 enabled: true # 请求是否开启 gzip 压缩 response: enabled: true # 响应是否开启 gzip 压缩


全局


  对客户端浏览器的请求以及 Consumer 对 Provider 的请求与响应都实现 Gzip 压缩。

  服务消费者 application.yml

server: port: 9090 # 端口 compression: # 是否开启压缩 enabled: true # 配置压缩支持的 MIME TYPE mime-types: application/json,application/xml,text/html,text/xml,text/plain


测试


  访问:http://localhost:9090/order/1 结果如下:


1|2HTTP 连接池


  点击链接观看:HTTP 连接池视频(获取更多请关注公众号「哈喽沃德先生」)


  为什么 HTTP 连接池能提升性能?


HTTP 的背景原理


  • 两台服务器建立 HTTP 连接的过程是很复杂的一个过程,涉及到多个数据包的交换,很耗时间。
  • HTTP 连接需要的 3 次握手 4 次挥手开销很大,这一开销对于大量的比较小的 HTTP 消息来说更大。


解决方案


  采用 HTTP 连接池,可以节约大量的 3 次握手 4 次挥手,这样能大大提升吞吐量。

  Feign 的 HTTP 客户端支持 3 种框架:HttpURLConnectionHttpClientOkHttp;默认是 HttpURLConnection。可以通过查看源码 org.springframework.cloud.openfeign.ribbon.FeignRibbonClientAutoConfiguration.java 得知。

  • 传统的 HttpURLConnection 是 JDK 自带的,并不支持连接池,如果要实现连接池的机制,还需要自己来管理连接对象。对于网络请求这种底层相对复杂的操作,如果有可用的其他方案,没有必要自己去管理连接对象。
  • HttpClient 相比传统 JDK 自带的 HttpURLConnection,它封装了访问 HTTP 的请求头,参数,内容体,响应等等;它不仅使客户端发送 HTTP 请求变得容易,而且也方便了开发人员测试接口(基于 HTTP 协议的),既提高了开发的效率,又提高了代码的健壮性;另外高并发大量的请求网络的时候,也是用“连接池”提升吞吐量。


HttpClient


  将 Feign 的 Http 客户端工具修改为 HttpClient。


添加依赖


  修改 Consumer 项目,添加两个依赖,因为本文中使用的 Spring CLoud 版本已经默认集成了 apache httpclient 依赖,所以只需要添加一个依赖即可。

<!-- 当前版本已经默认集成了 apache httpclient 依赖 --> <dependency> <groupId>org.apache.httpcomponents</groupId> <artifactId>httpclient</artifactId> <version>4.5.11</version> </dependency> <!-- feign apache httpclient 依赖 --> <dependency> <groupId>io.github.openfeign</groupId> <artifactId>feign-httpclient</artifactId> <version>10.7.4</version> </dependency>


配置文件


feign: httpclient: enabled: true # 开启 httpclient

PS:如果使用 HttpClient 作为 Feign 的客户端工具。那么在定义接口上的注解是需要注意的,如果传递的参数是一个自定义的对象(对象会使用 JSON 格式来专递),需要配置参数类型,例如:@GetMapping(value = "/single/pojo", consumes = MediaType.APPLICATION_JSON_VALUE)本文中使用的 Spring CLoud 版本,已无需手动配置。并且使用了 HttpClient 客户端以后,我们还可以通过 GET 请求传递对象参数。


服务提供者


  我们主要演示如何通过 GET 请求传递对象参数,POST 请求的方式代码无需任何改变。

  ProductService.java

/** * 接收商品对象参数 * * @param product * @return */ Product selectProductByPojo(Product product);

  ProductServiceImpl.java

/** * 接收商品对象参数 * * @param product * @return */ public Product selectProductByPojo(Product product) { System.out.println(product); return product; }

  ProductController.java

package com.example.controller; import com.example.pojo.Product; import com.example.service.ProductService; import org.springframework.beans.factory.annotation.Autowired; import org.springframework.web.bind.annotation.*; import java.util.List; import java.util.Map; @RestController @RequestMapping("/product") public class ProductController { @Autowired private ProductService productService; /** * 接收商品对象参数 * * @param product * @return */ @GetMapping("/pojo") public Product selectUserByPojo(@RequestBody Product product) { return productService.selectProductByPojo(product); } }


服务消费者


  ProductService.java

package com.example.service; import com.example.pojo.Product; import org.springframework.cloud.openfeign.FeignClient; import org.springframework.web.bind.annotation.GetMapping; // 声明需要调用的服务 @FeignClient("service-provider") public interface ProductService { /** * 接收商品对象参数 * * @param product * @return */ @GetMapping("/product/pojo") Product selectProductByPojo(Product product); }

  ProductController.java

package com.example.controller; import com.example.pojo.Product; import com.example.service.ProductService; import org.springframework.beans.factory.annotation.Autowired; import org.springframework.web.bind.annotation.GetMapping; import org.springframework.web.bind.annotation.PostMapping; import org.springframework.web.bind.annotation.RequestMapping; import org.springframework.web.bind.annotation.RestController; import java.util.Map; @RestController @RequestMapping("/product") public class ProductController { @Autowired private ProductService productService; /** * 接收商品对象参数 * * @param product * @return */ @GetMapping("/pojo") public Product selectUserByPojo(Product product) { return productService.selectProductByPojo(product); } }


测试


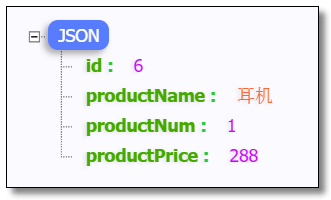
  访问:http://localhost:9090/product/pojo?id=6&productName=耳机&productNum=1&productPrice=288 结果如下:


1|3状态查看


  浏览器发起的请求我们可以借助 F12 Devtools 中的 Network 来查看请求和响应信息。对于微服务中每个接口我们又该如何查看 URL,状态码和耗时信息?我们可以使用配置日志的方式进行查看。


logback.xml


  Consumer 项目添加 logback.xml 日志文件,内容如下(logback 日志的输出级别需要是 DEBUG 级别):

<?xml version="1.0" encoding="UTF-8"?> <!-- 日志级别从低到高分为TRACE < DEBUG < INFO < WARN < ERROR < FATAL,如果设置为WARN,则低于WARN的信息都不会输出 --> <!-- scan: 当此属性设置为true时,配置文件如果发生改变,将会被重新加载,默认值为true --> <!-- scanPeriod: 设置监测配置文件是否有修改的时间间隔,如果没有给出时间单位,默认单位是毫秒。当scan为true时,此属性生效。默认的时间间隔为1分钟。 --> <!-- debug: 当此属性设置为true时,将打印出logback内部日志信息,实时查看logback运行状态。默认值为false。 --> <configuration scan="true" scanPeriod="10 seconds"> <!-- 日志上下文名称 --> <contextName>my_logback</contextName> <!-- name的值是变量的名称,value的值是变量定义的值。通过定义的值会被插入到logger上下文中。定义变量后,可以使“${}”来使用变量。 --> <property name="log.path" value="${catalina.base}/service-consumer/logs"/> <!-- 彩色日志 --> <!-- 彩色日志依赖的渲染类 --> <conversionRule conversionWord="clr" converterClass="org.springframework.boot.logging.logback.ColorConverter" /> <conversionRule conversionWord="wex" converterClass="org.springframework.boot.logging.logback.WhitespaceThrowableProxyConverter" /> <conversionRule conversionWord="wEx" converterClass="org.springframework.boot.logging.logback.ExtendedWhitespaceThrowableProxyConverter" /> <!-- 彩色日志格式 --> <property name="CONSOLE_LOG_PATTERN" value="${CONSOLE_LOG_PATTERN:-%clr(%d{yyyy-MM-dd HH:mm:ss.SSS}){faint} %clr(${LOG_LEVEL_PATTERN:-%5p}) %clr(${PID:- }){magenta} %clr(---){faint} %clr([%15.15t]){faint} %clr(%-40.40logger{39}){cyan} %clr(:){faint} %m%n${LOG_EXCEPTION_CONVERSION_WORD:-%wEx}}"/> <!-- 文件日志输入格式 --> <property name="FILE_LOG_PATTERN" value="%d{yyyy-MM-dd HH:mm:ss.SSS} [%thread] %-5level %logger{50} - %msg%n"/> <!--输出到控制台--> <appender name="CONSOLE" class="ch.qos.logback.core.ConsoleAppender"> <!--此日志appender是为开发使用,只配置最底级别,控制台输出的日志级别是大于或等于此级别的日志信息--> <filter class="ch.qos.logback.classic.filter.ThresholdFilter"> <level>DEBUG</level> </filter> <encoder> <pattern>${CONSOLE_LOG_PATTERN}</pattern> <!-- 设置字符集 --> <charset>UTF-8</charset> </encoder> </appender> <!-- 输出到文件 --> <!-- 时间滚动输出 level为 DEBUG 日志 --> <appender name="DEBUG_FILE" class="ch.qos.logback.core.rolling.RollingFileAppender"> <!-- 正在记录的日志文件的路径及文件名 --> <file>${log.path}/log_debug.log</file> <!--日志文件输出格式--> <encoder> <pattern>${FILE_LOG_PATTERN}</pattern> <charset>UTF-8</charset> <!-- 设置字符集 --> </encoder> <!-- 日志记录器的滚动策略,按日期,按大小记录 --> <rollingPolicy class="ch.qos.logback.core.rolling.TimeBasedRollingPolicy"> <!-- 日志归档 --> <fileNamePattern>${log.path}/debug/log-debug-%d{yyyy-MM-dd}.%i.log</fileNamePattern> <timeBasedFileNamingAndTriggeringPolicy class="ch.qos.logback.core.rolling.SizeAndTimeBasedFNATP"> <maxFileSize>100MB</maxFileSize> </timeBasedFileNamingAndTriggeringPolicy> <!--日志文件保留天数--> <maxHistory>15</maxHistory> </rollingPolicy> <!-- 此日志文件只记录debug级别的 --> <filter class="ch.qos.logback.classic.filter.LevelFilter"> <level>DEBUG</level> <onMatch>ACCEPT</onMatch> <onMismatch>DENY</onMismatch> </filter> </appender> <!-- 时间滚动输出 level为 INFO 日志 --> <appender name="INFO_FILE" class="ch.qos.logback.core.rolling.RollingFileAppender"> <!-- 正在记录的日志文件的路径及文件名 --> <file>${log.path}/log_info.log</file> <!--日志文件输出格式--> <encoder> <pattern>${FILE_LOG_PATTERN}</pattern> <charset>UTF-8</charset> </encoder> <!-- 日志记录器的滚动策略,按日期,按大小记录 --> <rollingPolicy class="ch.qos.logback.core.rolling.TimeBasedRollingPolicy"> <!-- 每天日志归档路径以及格式 --> <fileNamePattern>${log.path}/info/log-info-%d{yyyy-MM-dd}.%i.log</fileNamePattern> <timeBasedFileNamingAndTriggeringPolicy class="ch.qos.logback.core.rolling.SizeAndTimeBasedFNATP"> <maxFileSize>100MB</maxFileSize> </timeBasedFileNamingAndTriggeringPolicy> <!--日志文件保留天数--> <maxHistory>15</maxHistory> </rollingPolicy> <!-- 此日志文件只记录info级别的 --> <filter class="ch.qos.logback.classic.filter.LevelFilter"> <level>INFO</level> <onMatch>ACCEPT</onMatch> <onMismatch>DENY</onMismatch> </filter> </appender> <!-- 时间滚动输出 level为 WARN 日志 --> <appender name="WARN_FILE" class="ch.qos.logback.core.rolling.RollingFileAppender"> <!-- 正在记录的日志文件的路径及文件名 --> <file>${log.path}/log_warn.log</file> <!--日志文件输出格式--> <encoder> <pattern>${FILE_LOG_PATTERN}</pattern> <charset>UTF-8</charset> <!-- 此处设置字符集 --> </encoder> <!-- 日志记录器的滚动策略,按日期,按大小记录 --> <rollingPolicy class="ch.qos.logback.core.rolling.TimeBasedRollingPolicy"> <fileNamePattern>${log.path}/warn/log-warn-%d{yyyy-MM-dd}.%i.log</fileNamePattern> <!-- 每个日志文件最大100MB --> <timeBasedFileNamingAndTriggeringPolicy class="ch.qos.logback.core.rolling.SizeAndTimeBasedFNATP"> <maxFileSize>100MB</maxFileSize> </timeBasedFileNamingAndTriggeringPolicy> <!--日志文件保留天数--> <maxHistory>15</maxHistory> </rollingPolicy> <!-- 此日志文件只记录warn级别的 --> <filter class="ch.qos.logback.classic.filter.LevelFilter"> <level>WARN</level> <onMatch>ACCEPT</onMatch> <onMismatch>DENY</onMismatch> </filter> </appender> <!-- 时间滚动输出 level为 ERROR 日志 --> <appender name="ERROR_FILE" class="ch.qos.logback.core.rolling.RollingFileAppender"> <!-- 正在记录的日志文件的路径及文件名 --> <file>${log.path}/log_error.log</file> <!--日志文件输出格式--> <encoder> <pattern>${FILE_LOG_PATTERN}</pattern> <charset>UTF-8</charset> <!-- 此处设置字符集 --> </encoder> <!-- 日志记录器的滚动策略,按日期,按大小记录 --> <rollingPolicy class="ch.qos.logback.core.rolling.TimeBasedRollingPolicy"> <fileNamePattern>${log.path}/error/log-error-%d{yyyy-MM-dd}.%i.log</fileNamePattern> <timeBasedFileNamingAndTriggeringPolicy class="ch.qos.logback.core.rolling.SizeAndTimeBasedFNATP"> <maxFileSize>100MB</maxFileSize> </timeBasedFileNamingAndTriggeringPolicy> <!--日志文件保留天数--> <maxHistory>15</maxHistory> <!-- 日志量最大 10 GB --> <totalSizeCap>10GB</totalSizeCap> </rollingPolicy> <!-- 此日志文件只记录ERROR级别的 --> <filter class="ch.qos.logback.classic.filter.LevelFilter"> <level>ERROR</level> <onMatch>ACCEPT</onMatch> <onMismatch>DENY</onMismatch> </filter> </appender> <!-- 对于类路径以 com.example.logback 开头的Logger,输出级别设置为warn,并且只输出到控制台 --> <!-- 这个logger没有指定appender,它会继承root节点中定义的那些appender --> <!-- <logger name="com.example.logback" level="warn"/> --> <!--通过 LoggerFactory.getLogger("myLog") 可以获取到这个logger--> <!--由于这个logger自动继承了root的appender,root中已经有stdout的appender了,自己这边又引入了stdout的appender--> <!--如果没有设置 additivity="false" ,就会导致一条日志在控制台输出两次的情况--> <!--additivity表示要不要使用rootLogger配置的appender进行输出--> <logger name="myLog" level="INFO" additivity="false"> <appender-ref ref="CONSOLE"/> </logger> <!-- 日志输出级别及方式 --> <root level="DEBUG"> <appender-ref ref="CONSOLE"/> <appender-ref ref="DEBUG_FILE"/> <appender-ref ref="INFO_FILE"/> <appender-ref ref="WARN_FILE"/> <appender-ref ref="ERROR_FILE"/> </root> </configuration>


全局


  Consumer 项目启动类中注入 Feign 的 Logger 对象。

/* NONE:不记录任何信息,默认值 BASIC:记录请求方法、请求 URL、状态码和用时 HEADERS:在 BASIC 基础上再记录一些常用信息 FULL:记录请求和相应的所有信息 */ @Bean public Logger.Level getLog() { return Logger.Level.FULL; }


局部


  Consumer 项目 application.yml 中指定服务开启状态查看。

feign: client: config: service-provider: # 需要调用的服务名称 loggerLevel: FULL


测试


  项目运行以后会对不同级别的信息进行分类收集,效果如下:


  访问:http://localhost:9090/order/1 核心日志信息如下:

[nio-9090-exec-7] o.s.web.servlet.DispatcherServlet : GET "/order/1", parameters={} [nio-9090-exec-7] s.w.s.m.m.a.RequestMappingHandlerMapping : Mapped to com.example.controller.OrderController#selectOrderById(Integer) [nio-9090-exec-7] com.example.service.ProductService : [ProductService#selectProductById] ---> GET http://service-provider/product/1 HTTP/1.1 [nio-9090-exec-7] com.example.service.ProductService : [ProductService#selectProductById] ---> END HTTP (0-byte body) [nio-9090-exec-7] c.n.loadbalancer.ZoneAwareLoadBalancer : Zone aware logic disabled or there is only one zone [nio-9090-exec-7] c.n.loadbalancer.LoadBalancerContext : service-provider using LB returned Server: 192.168.31.103:7070 for request http:///product/1 [nio-9090-exec-7] o.a.h.client.protocol.RequestAuthCache : Auth cache not set in the context [nio-9090-exec-7] h.i.c.PoolingHttpClientConnectionManager : Connection request: [route: {}->http://192.168.31.103:7070][total kept alive: 0; route allocated: 0 of 50; total allocated: 0 of 200] [nio-9090-exec-7] h.i.c.PoolingHttpClientConnectionManager : Connection leased: [id: 2][route: {}->http://192.168.31.103:7070][total kept alive: 0; route allocated: 1 of 50; total allocated: 1 of 200] [nio-9090-exec-7] o.a.http.impl.execchain.MainClientExec : Opening connection {}->http://192.168.31.103:7070 [nio-9090-exec-7] .i.c.DefaultHttpClientConnectionOperator : Connecting to /192.168.31.103:7070 [nio-9090-exec-7] .i.c.DefaultHttpClientConnectionOperator : Connection established 192.168.31.103:12816<->192.168.31.103:7070 [nio-9090-exec-7] h.i.c.DefaultManagedHttpClientConnection : http-outgoing-2: set socket timeout to 3000 [nio-9090-exec-7] o.a.http.impl.execchain.MainClientExec : Executing request GET /product/1 HTTP/1.1 [nio-9090-exec-7] o.a.http.impl.execchain.MainClientExec : Target auth state: UNCHALLENGED [nio-9090-exec-7] o.a.http.impl.execchain.MainClientExec : Proxy auth state: UNCHALLENGED [nio-9090-exec-7] org.apache.http.headers : http-outgoing-2 >> GET /product/1 HTTP/1.1 [nio-9090-exec-7] org.apache.http.headers : http-outgoing-2 >> Accept: */* [nio-9090-exec-7] org.apache.http.headers : http-outgoing-2 >> Content-Length: 0 [nio-9090-exec-7] org.apache.http.headers : http-outgoing-2 >> Host: 192.168.31.103:7070 [nio-9090-exec-7] org.apache.http.headers : http-outgoing-2 >> Connection: Keep-Alive [nio-9090-exec-7] org.apache.http.headers : http-outgoing-2 >> User-Agent: Apache-HttpClient/4.5.10 (Java/11.0.6) [nio-9090-exec-7] org.apache.http.wire : http-outgoing-2 >> "GET /product/1 HTTP/1.1[\r][\n]" [nio-9090-exec-7] org.apache.http.wire : http-outgoing-2 >> "Accept: */*[\r][\n]" [nio-9090-exec-7] org.apache.http.wire : http-outgoing-2 >> "Content-Length: 0[\r][\n]" [nio-9090-exec-7] org.apache.http.wire : http-outgoing-2 >> "Host: 192.168.31.103:7070[\r][\n]" [nio-9090-exec-7] org.apache.http.wire : http-outgoing-2 >> "Connection: Keep-Alive[\r][\n]" [nio-9090-exec-7] org.apache.http.wire : http-outgoing-2 >> "User-Agent: Apache-HttpClient/4.5.10 (Java/11.0.6)[\r][\n]" [nio-9090-exec-7] org.apache.http.wire : http-outgoing-2 >> "[\r][\n]" [nio-9090-exec-7] org.apache.http.wire : http-outgoing-2 << "HTTP/1.1 200 [\r][\n]" [nio-9090-exec-7] org.apache.http.wire : http-outgoing-2 << "Content-Type: application/json[\r][\n]" [nio-9090-exec-7] org.apache.http.wire : http-outgoing-2 << "Transfer-Encoding: chunked[\r][\n]" [nio-9090-exec-7] org.apache.http.wire : http-outgoing-2 << "Date: Thu, 13 Feb 2020 10:53:35 GMT[\r][\n]" [nio-9090-exec-7] org.apache.http.wire : http-outgoing-2 << "Keep-Alive: timeout=60[\r][\n]" [nio-9090-exec-7] org.apache.http.wire : http-outgoing-2 << "Connection: keep-alive[\r][\n]" [nio-9090-exec-7] org.apache.http.wire : http-outgoing-2 << "[\r][\n]" [nio-9090-exec-7] org.apache.http.wire : http-outgoing-2 << "44[\r][\n]" [nio-9090-exec-7] org.apache.http.wire : http-outgoing-2 << "{"id":1,"productName":"[0xe5][0x86][0xb0][0xe7][0xae][0xb1]","productNum":1,"productPrice":2666.0}[\r][\n]" [nio-9090-exec-7] org.apache.http.headers : http-outgoing-2 << HTTP/1.1 200 [nio-9090-exec-7] org.apache.http.headers : http-outgoing-2 << Content-Type: application/json [nio-9090-exec-7] org.apache.http.headers : http-outgoing-2 << Transfer-Encoding: chunked [nio-9090-exec-7] org.apache.http.headers : http-outgoing-2 << Date: Thu, 13 Feb 2020 10:53:35 GMT [nio-9090-exec-7] org.apache.http.headers : http-outgoing-2 << Keep-Alive: timeout=60 [nio-9090-exec-7] org.apache.http.headers : http-outgoing-2 << Connection: keep-alive [nio-9090-exec-7] o.a.http.impl.execchain.MainClientExec : Connection can be kept alive for 60000 MILLISECONDS [nio-9090-exec-7] com.example.service.ProductService : [ProductService#selectProductById] <--- HTTP/1.1 200 (4ms) [nio-9090-exec-7] com.example.service.ProductService : [ProductService#selectProductById] connection: keep-alive [nio-9090-exec-7] com.example.service.ProductService : [ProductService#selectProductById] content-type: application/json [nio-9090-exec-7] com.example.service.ProductService : [ProductService#selectProductById] date: Thu, 13 Feb 2020 10:53:35 GMT [nio-9090-exec-7] com.example.service.ProductService : [ProductService#selectProductById] keep-alive: timeout=60 [nio-9090-exec-7] com.example.service.ProductService : [ProductService#selectProductById] transfer-encoding: chunked [nio-9090-exec-7] com.example.service.ProductService : [ProductService#selectProductById] [nio-9090-exec-7] org.apache.http.wire : http-outgoing-2 << "0[\r][\n]" [nio-9090-exec-7] org.apache.http.wire : http-outgoing-2 << "[\r][\n]" [nio-9090-exec-7] h.i.c.PoolingHttpClientConnectionManager : Connection [id: 2][route: {}->http://192.168.31.103:7070] can be kept alive for 60.0 seconds [nio-9090-exec-7] h.i.c.DefaultManagedHttpClientConnection : http-outgoing-2: set socket timeout to 0 [nio-9090-exec-7] h.i.c.PoolingHttpClientConnectionManager : Connection released: [id: 2][route: {}->http://192.168.31.103:7070][total kept alive: 1; route allocated: 1 of 50; total allocated: 1 of 200] [nio-9090-exec-7] com.example.service.ProductService : [ProductService#selectProductById] {"id":1,"productName":"冰箱","productNum":1,"productPrice":2666.0} [nio-9090-exec-7] com.example.service.ProductService : [ProductService#selectProductById] <--- END HTTP (68-byte body) [nio-9090-exec-7] o.s.w.c.HttpMessageConverterExtractor : Reading to [com.example.pojo.Product] [nio-9090-exec-7] m.m.a.RequestResponseBodyMethodProcessor : Using 'application/json;q=0.8', given [text/html, application/xhtml+xml, image/webp, image/apng, application/signed-exchange;v=b3, application/xml;q=0.9, */*;q=0.8] and supported [application/json, application/*+json, application/json, application/*+json] [nio-9090-exec-7] m.m.a.RequestResponseBodyMethodProcessor : Writing [Order(id=1, orderNo=order-001, orderAddress=中国, totalPrice=2666.0, productList=[Product(id=1, produc (truncated)...] [nio-9090-exec-7] o.s.web.servlet.DispatcherServlet : Completed 200 OK [ionManagerTimer] h.i.c.PoolingHttpClientConnectionManager : Closing expired connections


1|4请求超时


  Feign 的负载均衡底层用的就是 Ribbon,所以这里的请求超时配置其实就是配置 Ribbon。

  分布式项目中,服务压力比较大的情况下,可能处理服务的过程需要花费一定的时间,而默认情况下请求超时的配置是 1s 所以我们需要调整该配置延长请求超时时间。


全局


  Consumer 项目中配置请求超时的处理。

ribbon: ConnectTimeout: 5000 # 请求连接的超时时间 默认的时间为 1 秒 ReadTimeout: 5000 # 请求处理的超时时间


局部


  一般我们会根据服务的压力大小配置不同的服务超时处理,使用局部配置。

# service-provider 是需要调用的服务名称 service-provider: ribbon: OkToRetryOnAllOperations: true # 对所有请求都进行重试 MaxAutoRetries: 2 # 对当前实例的重试次数 MaxAutoRetriesNextServer: 0 # 切换实例的重试次数 ConnectTimeout: 3000 # 请求连接的超时时间 ReadTimeout: 3000 # 请求处理的超时时间

  至此 Feign 声明式服务调用所有的知识点就讲解结束了。

posted @ 2020-05-11 10:34  YoungDeng  阅读(233)  评论(0编辑  收藏  举报