Spring Cloud 系列之 Netflix Eureka 注册中心(二)

本篇文章为系列文章,未读第一集的同学请猛戳这里:Spring Cloud 系列之 Netflix Eureka 注册中心(一)

本篇文章讲解 Eureka 集群、架构原理、自我保护、优雅停服、安全认证等功能实现。


1|0高可用 Eureka 注册中心


  点击链接观看:高可用 Eureka 注册中心视频(获取更多请关注公众号「哈喽沃德先生」)


1|1注册中心 eureka-server


创建项目


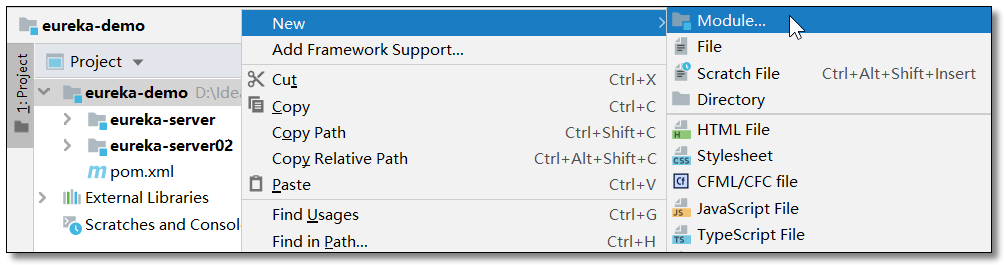
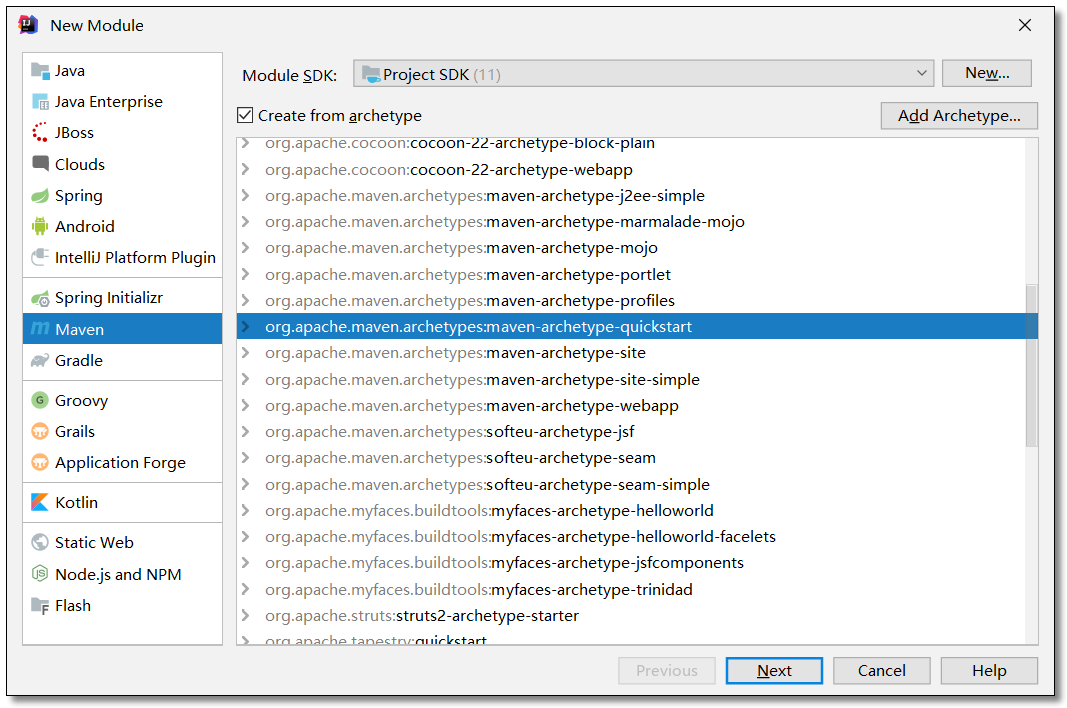
  在 Spring Cloud 系列之 Netflix Eureka 注册中心(一)的项目父工程下再创建一个 eureka-server02 注册中心的项目,如果是多机器部署不用修改端口,通过 IP 区分服务,如果在一台机器上演示需要修改端口区分服务。


添加依赖


  pom.xml

<?xml version="1.0" encoding="UTF-8"?> <project xmlns="http://maven.apache.org/POM/4.0.0" xmlns:xsi="http://www.w3.org/2001/XMLSchema-instance" xsi:schemaLocation="http://maven.apache.org/POM/4.0.0 http://maven.apache.org/xsd/maven-4.0.0.xsd"> <modelVersion>4.0.0</modelVersion> <groupId>com.example</groupId> <artifactId>eureka-server02</artifactId> <version>1.0-SNAPSHOT</version> <!-- 继承父依赖 --> <parent> <groupId>com.example</groupId> <artifactId>eureka-demo</artifactId> <version>1.0-SNAPSHOT</version> </parent> <!-- 项目依赖 --> <dependencies> <!-- netflix eureka server 依赖 --> <dependency> <groupId>org.springframework.cloud</groupId> <artifactId>spring-cloud-starter-netflix-eureka-server</artifactId> </dependency> <!-- spring boot web 依赖 --> <dependency> <groupId>org.springframework.boot</groupId> <artifactId>spring-boot-starter-web</artifactId> </dependency> <!-- spring boot test 依赖 --> <dependency> <groupId>org.springframework.boot</groupId> <artifactId>spring-boot-starter-test</artifactId> <scope>test</scope> <exclusions> <exclusion> <groupId>org.junit.vintage</groupId> <artifactId>junit-vintage-engine</artifactId> </exclusion> </exclusions> </dependency> </dependencies> </project>


配置文件


  集群配置下,注册中心需要相互注册实现信息的同步。

  eureka-server 的 application.yml

server: port: 8761 # 端口 spring: application: name: eureka-server # 应用名称(集群下相同) # 配置 Eureka Server 注册中心 eureka: instance: hostname: eureka01 # 主机名,不配置的时候将根据操作系统的主机名来获取 client: # 设置服务注册中心地址,指向另一个注册中心 service-url: # 注册中心对外暴露的注册地址 defaultZone: http://localhost:8762/eureka/


  eureka-server02 的 application.yml

server: port: 8762 # 端口 spring: application: name: eureka-server # 应用名称(集群下相同) # 配置 Eureka Server 注册中心 eureka: instance: hostname: eureka02 # 主机名,不配置的时候将根据操作系统的主机名来获取 client: # 设置服务注册中心地址,指向另一个注册中心 service-url: # 注册中心对外暴露的注册地址 defaultZone: http://localhost:8761/eureka/


启动类


  启动类不变,启动两个 server。


访问


  访问:http://localhost:8761/ 或者 http://localhost:8762/ 都出现如下图说明互相注册成功。

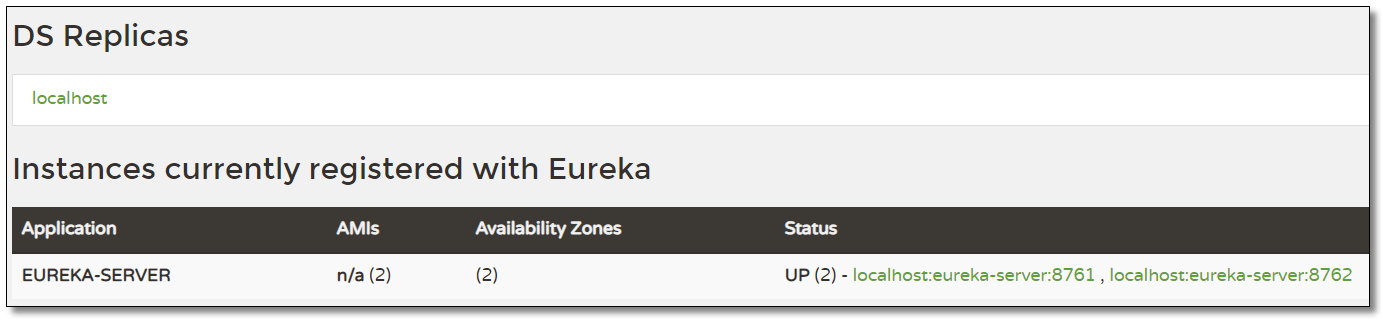
  Status 显示方式为默认值,如果想要清晰可见每个服务的 IP + 端口需要通过以下配置来实现。
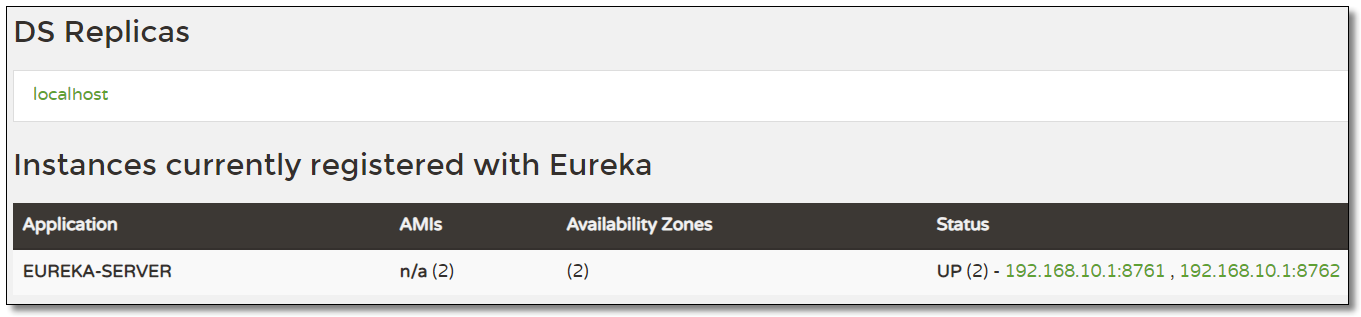
  

显示 IP + 端口


  一个普通的 Netflix Eureka 实例注册的 ID 等于其主机名(即,每个主机仅提供一项服务)。 Spring Cloud Eureka 提供了合理的默认值,定义如下:spring.cloud.client.hostname:spring.cloud.client.hostname:{spring.application.name}:\({spring.application.instance_id:\){server.port}}},也就是:主机名:应用名:应用端口。

  我们也可以可以自定义进行修改:

eureka: instance: prefer-ip-address: true # 是否使用 ip 地址注册 instance-id: ${spring.cloud.client.ip-address}:${server.port} # ip:port


1|2服务提供者 service-provider


  点击链接观看:服务提供者 service-provider 视频(获取更多请关注公众号「哈喽沃德先生」)


创建项目


  在刚才的父工程下创建一个 service-provider 服务提供者的项目。


添加依赖


  pom.xml

<?xml version="1.0" encoding="UTF-8"?> <project xmlns="http://maven.apache.org/POM/4.0.0" xmlns:xsi="http://www.w3.org/2001/XMLSchema-instance" xsi:schemaLocation="http://maven.apache.org/POM/4.0.0 http://maven.apache.org/xsd/maven-4.0.0.xsd"> <modelVersion>4.0.0</modelVersion> <groupId>com.example</groupId> <artifactId>service-provider</artifactId> <version>1.0-SNAPSHOT</version> <!-- 继承父依赖 --> <parent> <groupId>com.example</groupId> <artifactId>eureka-demo</artifactId> <version>1.0-SNAPSHOT</version> </parent> <!-- 项目依赖 --> <dependencies> <!-- netflix eureka client 依赖 --> <dependency> <groupId>org.springframework.cloud</groupId> <artifactId>spring-cloud-starter-netflix-eureka-client</artifactId> </dependency> <!-- spring boot web 依赖 --> <dependency> <groupId>org.springframework.boot</groupId> <artifactId>spring-boot-starter-web</artifactId> </dependency> <!-- lombok 依赖 --> <dependency> <groupId>org.projectlombok</groupId> <artifactId>lombok</artifactId> <scope>provided</scope> </dependency> <!-- spring boot test 依赖 --> <dependency> <groupId>org.springframework.boot</groupId> <artifactId>spring-boot-starter-test</artifactId> <scope>test</scope> <exclusions> <exclusion> <groupId>org.junit.vintage</groupId> <artifactId>junit-vintage-engine</artifactId> </exclusion> </exclusions> </dependency> </dependencies> </project>


配置文件


  application.yml

server: port: 7070 # 端口 spring: application: name: service-provider # 应用名称(集群下相同) # 配置 Eureka Server 注册中心 eureka: instance: prefer-ip-address: true # 是否使用 ip 地址注册 instance-id: ${spring.cloud.client.ip-address}:${server.port} # ip:port client: service-url: # 设置服务注册中心地址 defaultZone: http://localhost:8761/eureka/,http://localhost:8762/eureka/


实体类


  Product.java

package com.example.pojo; import lombok.AllArgsConstructor; import lombok.Data; import lombok.NoArgsConstructor; import java.io.Serializable; @Data @NoArgsConstructor @AllArgsConstructor public class Product implements Serializable { private Integer id; private String productName; private Integer productNum; private Double productPrice; }


编写服务


  ProductService.java

package com.example.service; import com.example.pojo.Product; import java.util.List; /** * 商品服务 */ public interface ProductService { /** * 查询商品列表 * * @return */ List<Product> selectProductList(); }

  ProductServiceImpl.java

package com.example.service.impl; import com.example.pojo.Product; import com.example.service.ProductService; import org.springframework.stereotype.Service; import java.util.Arrays; import java.util.List; /** * 商品服务 */ @Service public class ProductServiceImpl implements ProductService { /** * 查询商品列表 * * @return */ @Override public List<Product> selectProductList() { return Arrays.asList( new Product(1, "华为手机", 2, 5888D), new Product(2, "联想笔记本", 1, 6888D), new Product(3, "小米平板", 5, 2666D) ); } }


控制层


  ProductController.java

package com.example.controller; import com.example.pojo.Product; import com.example.service.ProductService; import org.springframework.beans.factory.annotation.Autowired; import org.springframework.web.bind.annotation.GetMapping; import org.springframework.web.bind.annotation.RequestMapping; import org.springframework.web.bind.annotation.RestController; import java.util.List; @RestController @RequestMapping("/product") public class ProductController { @Autowired private ProductService productService; /** * 查询商品列表 * * @return */ @GetMapping("/list") public List<Product> selectProductList() { return productService.selectProductList(); } }

该项目我们可以通过单元测试进行测试,也可以直接通过 url 使用 postman 或者浏览器来进行测试。


启动类


  ServiceProviderApplication.java

package com.example; import org.springframework.boot.SpringApplication; import org.springframework.boot.autoconfigure.SpringBootApplication; @SpringBootApplication // 开启 EurekaClient 注解,目前版本如果配置了 Eureka 注册中心,默认会开启该注解 //@EnableEurekaClient public class ServiceProviderApplication { public static void main(String[] args) { SpringApplication.run(ServiceProviderApplication.class, args); } }


注册中心


  访问注册中心,可以看到用户服务已经注册至注册中心。


1|3服务消费者 service-consumer


创建项目


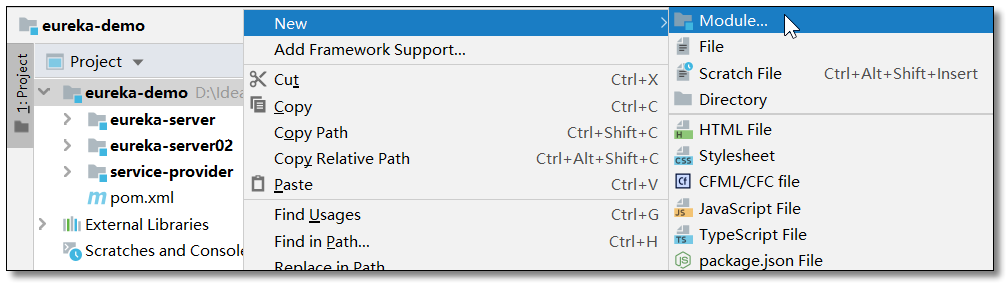
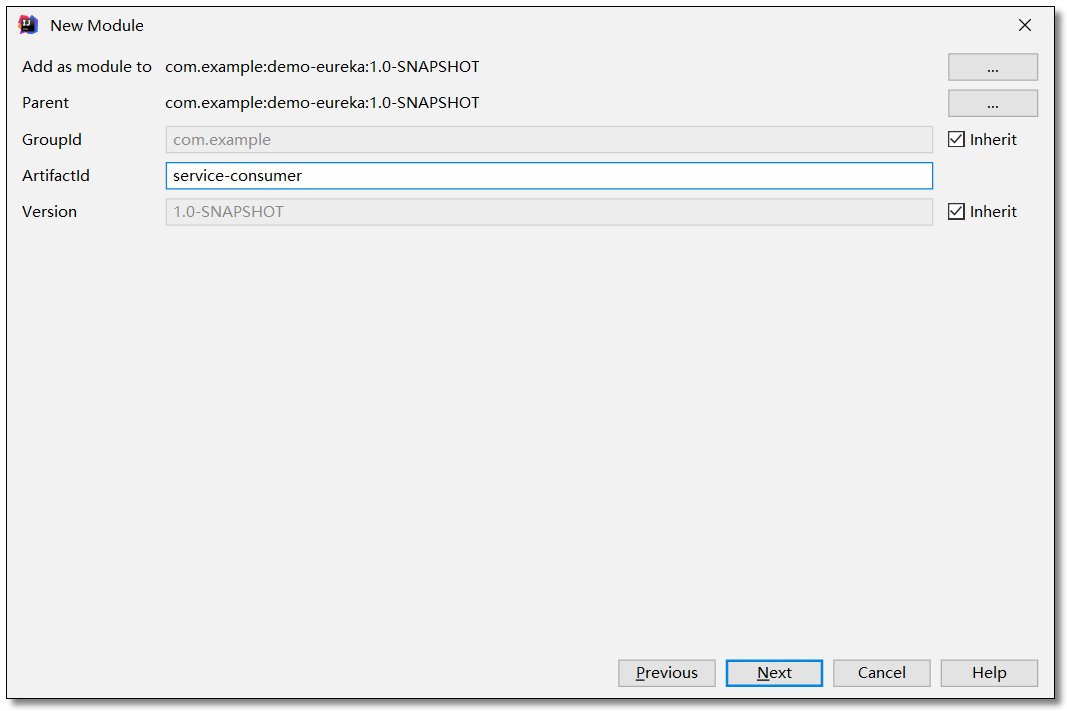
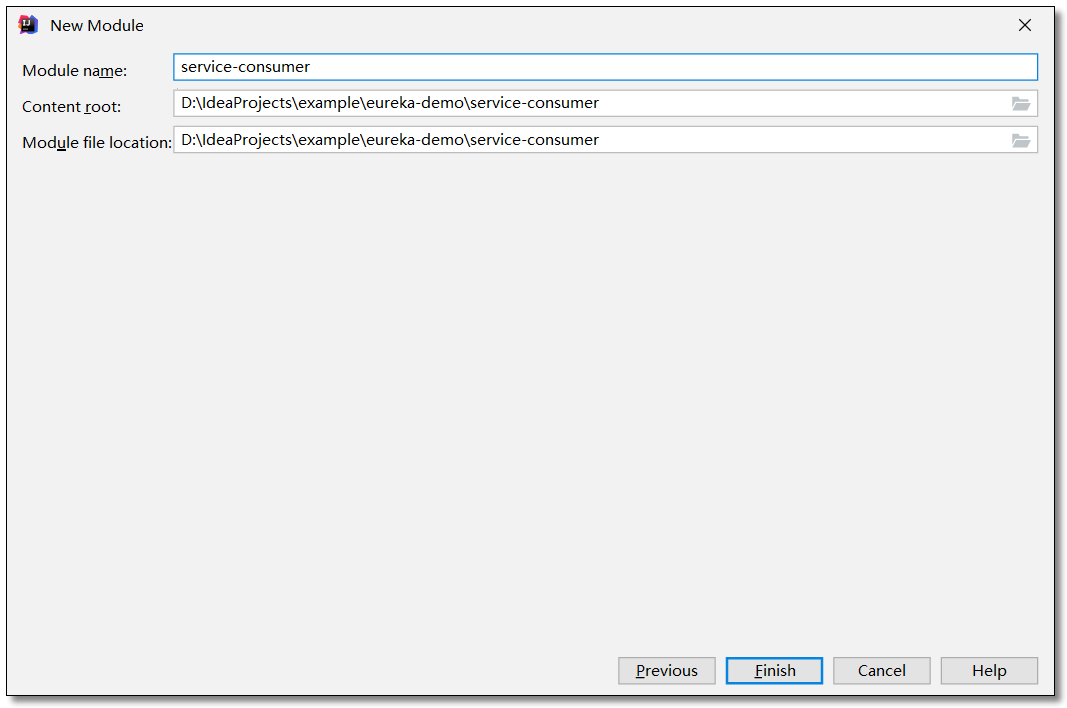
  在刚才的父工程下创建一个 service-consumer 服务消费者的项目。


添加依赖


  pom.xml

<?xml version="1.0" encoding="UTF-8"?> <project xmlns="http://maven.apache.org/POM/4.0.0" xmlns:xsi="http://www.w3.org/2001/XMLSchema-instance" xsi:schemaLocation="http://maven.apache.org/POM/4.0.0 http://maven.apache.org/xsd/maven-4.0.0.xsd"> <modelVersion>4.0.0</modelVersion> <groupId>com.example</groupId> <artifactId>service-consumer</artifactId> <version>1.0-SNAPSHOT</version> <!-- 继承父依赖 --> <parent> <groupId>com.example</groupId> <artifactId>eureka-demo</artifactId> <version>1.0-SNAPSHOT</version> </parent> <!-- 项目依赖 --> <dependencies> <!-- netflix eureka client 依赖 --> <dependency> <groupId>org.springframework.cloud</groupId> <artifactId>spring-cloud-starter-netflix-eureka-client</artifactId> </dependency> <!-- spring boot web 依赖 --> <dependency> <groupId>org.springframework.boot</groupId> <artifactId>spring-boot-starter-web</artifactId> </dependency> <!-- lombok 依赖 --> <dependency> <groupId>org.projectlombok</groupId> <artifactId>lombok</artifactId> <scope>provided</scope> </dependency> <!-- spring boot test 依赖 --> <dependency> <groupId>org.springframework.boot</groupId> <artifactId>spring-boot-starter-test</artifactId> <scope>test</scope> <exclusions> <exclusion> <groupId>org.junit.vintage</groupId> <artifactId>junit-vintage-engine</artifactId> </exclusion> </exclusions> </dependency> </dependencies> </project>


配置文件


  application.yml

server: port: 9090 # 端口 spring: application: name: service-consumer # 应用名称 # 配置 Eureka Server 注册中心 eureka: client: register-with-eureka: false # 是否将自己注册到注册中心,默认为 true registry-fetch-interval-seconds: 10 # 表示 Eureka Client 间隔多久去服务器拉取注册信息,默认为 30 秒 service-url: # 设置服务注册中心地址 defaultZone: http://localhost:8761/eureka/,http://localhost:8762/eureka/


实体类


  Product.java

package com.example.pojo; import lombok.AllArgsConstructor; import lombok.Data; import lombok.NoArgsConstructor; import java.io.Serializable; @Data @NoArgsConstructor @AllArgsConstructor public class Product implements Serializable { private Integer id; private String productName; private Integer productNum; private Double productPrice; }


  Order.java

package com.example.pojo; import lombok.AllArgsConstructor; import lombok.Data; import lombok.NoArgsConstructor; import java.io.Serializable; import java.util.List; @Data @NoArgsConstructor @AllArgsConstructor public class Order implements Serializable { private Integer id; private String orderNo; private String orderAddress; private Double totalPrice; private List<Product> productList; }


消费服务


  OrderService.java

package com.example.service; import com.example.pojo.Order; public interface OrderService { /** * 根据主键查询订单 * * @param id * @return */ Order selectOrderById(Integer id); }


  对于服务的消费我们这里讲三种实现方式:

  • DiscoveryClient:通过元数据获取服务信息
  • LoadBalancerClient:Ribbon 的负载均衡器
  • @LoadBalanced:通过注解开启 Ribbon 的负载均衡器


DiscoveryClient


  点击链接观看:DiscoveryClient 视频(获取更多请关注公众号「哈喽沃德先生」)


  Spring Boot 不提供任何自动配置的RestTemplate bean,所以需要在启动类中注入 RestTemplate

package com.example; import org.springframework.boot.SpringApplication; import org.springframework.boot.autoconfigure.SpringBootApplication; import org.springframework.context.annotation.Bean; import org.springframework.web.client.RestTemplate; @SpringBootApplication // 开启 Eureka Client 注解,目前版本如果配置了 Eureka 注册中心,默认会开启该注解 //@EnableEurekaClient public class ServiceConsumerApplication { @Bean public RestTemplate restTemplate() { return new RestTemplate(); } public static void main(String[] args) { SpringApplication.run(ServiceConsumerApplication.class, args); } }


  OrderServiceImpl.java

package com.example.service.impl; import com.example.pojo.Order; import com.example.pojo.Product; import com.example.service.OrderService; import org.springframework.beans.factory.annotation.Autowired; import org.springframework.cloud.client.ServiceInstance; import org.springframework.cloud.client.discovery.DiscoveryClient; import org.springframework.core.ParameterizedTypeReference; import org.springframework.http.HttpMethod; import org.springframework.http.ResponseEntity; import org.springframework.stereotype.Service; import org.springframework.util.CollectionUtils; import org.springframework.web.client.RestTemplate; import java.util.List; @Service public class OrderServiceImpl implements OrderService { @Autowired private RestTemplate restTemplate; @Autowired private DiscoveryClient discoveryClient; /** * 根据主键查询订单 * * @param id * @return */ @Override public Order selectOrderById(Integer id) { return new Order(id, "order-001", "中国", 31994D, selectProductListByDiscoveryClient()); } private List<Product> selectProductListByDiscoveryClient() { StringBuffer sb = null; // 获取服务列表 List<String> serviceIds = discoveryClient.getServices(); if (CollectionUtils.isEmpty(serviceIds)) return null; // 根据服务名称获取服务 List<ServiceInstance> serviceInstances = discoveryClient.getInstances("service-provider"); if (CollectionUtils.isEmpty(serviceInstances)) return null; ServiceInstance si = serviceInstances.get(0); sb = new StringBuffer(); sb.append("http://" + si.getHost() + ":" + si.getPort() + "/product/list"); // ResponseEntity: 封装了返回数据 ResponseEntity<List<Product>> response = restTemplate.exchange( sb.toString(), HttpMethod.GET, null, new ParameterizedTypeReference<List<Product>>() {}); return response.getBody(); } }


LoadBalancerClient


  点击链接观看:LoadBalancerClient 视频(获取更多请关注公众号「哈喽沃德先生」)


  OrderServiceImpl.java

package com.example.service.impl; import com.example.pojo.Order; import com.example.pojo.Product; import com.example.service.OrderService; import org.springframework.beans.factory.annotation.Autowired; import org.springframework.cloud.client.ServiceInstance; import org.springframework.cloud.client.loadbalancer.LoadBalancerClient; import org.springframework.core.ParameterizedTypeReference; import org.springframework.http.HttpMethod; import org.springframework.http.ResponseEntity; import org.springframework.stereotype.Service; import org.springframework.web.client.RestTemplate; import java.util.List; @Service public class OrderServiceImpl implements OrderService { @Autowired private RestTemplate restTemplate; @Autowired private LoadBalancerClient loadBalancerClient; // Ribbon 负载均衡器 /** * 根据主键查询订单 * * @param id * @return */ @Override public Order selectOrderById(Integer id) { return new Order(id, "order-001", "中国", 31994D, selectProductListByLoadBalancerClient()); } private List<Product> selectProductListByLoadBalancerClient() { StringBuffer sb = null; // 根据服务名称获取服务 ServiceInstance si = loadBalancerClient.choose("service-provider"); if (null == si) return null; sb = new StringBuffer(); sb.append("http://" + si.getHost() + ":" + si.getPort() + "/product/list"); // ResponseEntity: 封装了返回数据 ResponseEntity<List<Product>> response = restTemplate.exchange( sb.toString(), HttpMethod.GET, null, new ParameterizedTypeReference<List<Product>>() {}); return response.getBody(); } }


@LoadBalanced


  点击链接观看:@LoadBalanced 视频(获取更多请关注公众号「哈喽沃德先生」)


  启动类注入 RestTemplate 时添加 @LoadBalanced 负载均衡注解,表示这个 RestTemplate 在请求时拥有客户端负载均衡的能力。

package com.example; import org.springframework.boot.SpringApplication; import org.springframework.boot.autoconfigure.SpringBootApplication; import org.springframework.cloud.client.loadbalancer.LoadBalanced; import org.springframework.context.annotation.Bean; import org.springframework.web.client.RestTemplate; @SpringBootApplication // 开启 Eureka Client 注解,目前版本如果配置了 Eureka 注册中心,默认会开启该注解 //@EnableEurekaClient public class ServiceConsumerApplication { @Bean @LoadBalanced // 负载均衡注解 public RestTemplate restTemplate() { return new RestTemplate(); } public static void main(String[] args) { SpringApplication.run(ServiceConsumerApplication.class, args); } }


  OrderServiceImpl.java

package com.example.service.impl; import com.example.pojo.Order; import com.example.pojo.Product; import com.example.service.OrderService; import org.springframework.beans.factory.annotation.Autowired; import org.springframework.core.ParameterizedTypeReference; import org.springframework.http.HttpMethod; import org.springframework.http.ResponseEntity; import org.springframework.stereotype.Service; import org.springframework.web.client.RestTemplate; import java.util.List; @Service public class OrderServiceImpl implements OrderService { @Autowired private RestTemplate restTemplate; /** * 根据主键查询订单 * * @param id * @return */ @Override public Order selectOrderById(Integer id) { return new Order(id, "order-001", "中国", 31994D, selectProductListByLoadBalancerAnnotation()); } private List<Product> selectProductListByLoadBalancerAnnotation() { // ResponseEntity: 封装了返回数据 ResponseEntity<List<Product>> response = restTemplate.exchange( "http://service-provider/product/list", HttpMethod.GET, null, new ParameterizedTypeReference<List<Product>>() {}); return response.getBody(); } }


控制层


  OrderController.java

package com.example.controller; import com.example.pojo.Order; import com.example.service.OrderService; import org.springframework.beans.factory.annotation.Autowired; import org.springframework.web.bind.annotation.GetMapping; import org.springframework.web.bind.annotation.PathVariable; import org.springframework.web.bind.annotation.RequestMapping; import org.springframework.web.bind.annotation.RestController; @RestController @RequestMapping("/order") public class OrderController { @Autowired private OrderService orderService; /** * 根据主键查询订单 * * @param id * @return */ @GetMapping("/{id}") public Order selectOrderById(@PathVariable("id") Integer id) { return orderService.selectOrderById(id); } }


访问


  访问:http://localhost:9090/order/1


2|0Eureka 架构原理


  • Register(服务注册):把自己的 IP 和端口注册给 Eureka。
  • Renew(服务续约):发送心跳包,每 30 秒发送一次,告诉 Eureka 自己还活着。如果 90 秒还未发送心跳,宕机。
  • Cancel(服务下线):当 Provider 关闭时会向 Eureka 发送消息,把自己从服务列表中删除。防止 Consumer 调用到不存在的服务。
  • Get Registry(获取服务注册列表):获取其他服务列表。
  • Replicate(集群中数据同步):Eureka 集群中的数据复制与同步。
  • Make Remote Call(远程调用):完成服务的远程调用。


3|0CAP 原则


  CAP 原则又称 CAP 定理,指的是在一个分布式系统中具有以下其中两个特性:

  • Consistency (一致性)
  • Availability (可用性)
  • Partition tolerance(分区容错性)

  CAP 由 Eric Brewer 在 2000 年 PODC 会议上提出。该猜想在提出两年后被证明成立,成为我们熟知的 CAP 定理。CAP 三者不可兼得。

特性定理
Consistency 也叫做数据原子性,系统在执行某项操作后仍然处于一致的状态。在分布式系统中,更新操作执行成功后所有的用户都应该读到最新的值,这样的系统被认为是具有强一致性的。等同于所有节点访问同一份最新的数据副本。
Availability 每一个操作总是能够在一定的时间内返回结果,这里需要注意的是"一定时间内"和"返回结果"。一定时间内指的是,在可以容忍的范围内返回结果,结果可以是成功或者是失败。
Partition tolerance 在网络分区的情况下,被分隔的节点仍能正常对外提供服务(分布式集群,数据被分布存储在不同的服务器上,无论什么情况,服务器都能正常被访问)。


3|1取舍策略


  CAP 三个特性只能满足其中两个,那么取舍的策略就共有三种:

  • CA without P:如果不要求P(不允许分区),则C(强一致性)和A(可用性)是可以保证的。但放弃 P 的同时也就意味着放弃了系统的扩展性,也就是分布式节点受限,没办法部署子节点,这是违背分布式系统设计的初衷的。
  • CP without A:如果不要求A(可用),相当于每个请求都需要在服务器之间保持强一致,而P(分区)会导致同步时间无限延长(也就是等待数据同步完才能正常访问服务),一旦发生网络故障或者消息丢失等情况,就要牺牲用户的体验,等待所有数据全部一致了之后再让用户访问系统。设计成 CP 的系统其实不少,最典型的就是分布式数据库,如 Redis、HBase 等。对于这些分布式数据库来说,数据的一致性是最基本的要求,因为如果连这个标准都达不到,那么直接采用关系型数据库就好,没必要再浪费资源来部署分布式数据库。
  • AP without C:要高可用并允许分区,则需放弃一致性。一旦分区发生,节点之间可能会失去联系,为了高可用,每个节点只能用本地数据提供服务,而这样会导致全局数据的不一致性。典型的应用就如某米的抢购手机场景,可能前几秒你浏览商品的时候页面提示是有库存的,当你选择完商品准备下单的时候,系统提示你下单失败,商品已售完。这其实就是先在 A(可用性)方面保证系统可以正常的服务,然后在数据的一致性方面做了些牺牲,虽然多少会影响一些用户体验,但也不至于造成用户购物流程的严重阻塞。


3|2总结


  现如今,对于多数大型互联网应用的场景,主机众多、部署分散,而且现在的集群规模越来越大,节点只会越来越多,所以节点故障、网络故障是常态,因此分区容错性也就成为了一个分布式系统必然要面对的问题。那么就只能在 C 和 A 之间进行取舍。但对于传统的项目就可能有所不同,拿银行的转账系统来说,涉及到金钱的对于数据一致性不能做出一丝的让步,C 必须保证,出现网络故障的话,宁可停止服务,可以在 A 和 P 之间做取舍。

  总而言之,没有最好的策略,好的系统应该是根据业务场景来进行架构设计的,只有适合的才是最好的。


4|0Eureka 自我保护


4|1启动自我保护条件


  一般情况下,服务在 Eureka 上注册后,会每 30 秒发送心跳包,Eureka 通过心跳来判断服务是否健康,同时会定期删除超过 90 秒没有发送心跳的服务。


有两种情况会导致 Eureka Server 收不到微服务的心跳


  • 微服务自身的原因
  • 微服务与 Eureka 之间的网络故障


自我保护模式


  Eureka Server 在运行期间会去统计心跳失败比例在 15 分钟之内是否低于 85%,如果低于 85%,Eureka Server 会将这些实例保护起来,让这些实例不会过期,同时提示一个警告。这种算法叫做 Eureka Server 的自我保护模式。


4|2为什么要启动自我保护


  • 因为同时保留"好数据"与"坏数据"总比丢掉任何数据要更好,当网络故障恢复后,这个 Eureka 节点会退出"自我保护模式"。
  • Eureka 还有客户端缓存功能(也就是微服务的缓存功能)。即使 Eureka 集群中所有节点都宕机失效,微服务的 Provider 和 Consumer 都能正常通信。
  • 微服务的负载均衡策略会自动剔除死亡的微服务节点。


4|3如何关闭自我保护


  注册中心配置自我保护

eureka: server: enable-self-preservation: false # true:开启自我保护模式,false:关闭自我保护模式 eviction-interval-timer-in-ms: 60000 # 清理间隔(单位:毫秒,默认是 60*1000)


5|0Eureka 优雅停服


  配置了优雅停服以后,将不需要 Eureka Server 中配置关闭自我保护。本文使用 actuator 实现。


5|1添加依赖


  服务提供者添加 actuator 依赖

<!-- spring boot actuator 依赖 --> <dependency> <groupId>org.springframework.boot</groupId> <artifactId>spring-boot-starter-actuator</artifactId> </dependency>


5|2配置文件


  服务提供者配置度量指标监控与健康检查

# 度量指标监控与健康检查 management: endpoints: web: exposure: include: shutdown # 开启 shutdown 端点访问 endpoint: shutdown: enabled: true # 开启 shutdown 实现优雅停服


5|3优雅停服


  使用 POST 请求访问:http://localhost:7070/actuator/shutdown 效果如下


6|0Eureka 安全认证


6|1添加依赖


  注册中心添加 security 依赖

<!-- spring boot security 依赖 --> <dependency> <groupId>org.springframework.boot</groupId> <artifactId>spring-boot-starter-security</artifactId> </dependency>


6|2配置文件


  注册中心配置安全认证

spring: # 安全认证 security: user: name: root password: 123456


6|3修改访问集群节点的 url


  核心代码就是有色部分:http://root:123456@localhost:8762/eureka/

  注册中心的配置文件

# 配置 Eureka Server 注册中心 eureka: instance: hostname: eureka01 # 主机名,不配置的时候将根据操作系统的主机名来获取 prefer-ip-address: true # 是否使用 ip 地址注册 instance-id: ${spring.cloud.client.ip-address}:${server.port} # ip:port client: # 设置服务注册中心地址,指向另一个注册中心 service-url: # 注册中心对外暴露的注册地址 defaultZone: http://root:123456@localhost:8762/eureka/

  服务提供者的配置文件

# 配置 Eureka Server 注册中心 eureka: instance: prefer-ip-address: true # 是否使用 ip 地址注册 instance-id: ${spring.cloud.client.ip-address}:${server.port} # ip:port client: service-url: # 设置服务注册中心地址 defaultZone: http://root:123456@localhost:8761/eureka/,http://root:123456@localhost:8762/eureka/

  服务消费者的配置文件

# 配置 Eureka Server 注册中心 eureka: client: register-with-eureka: false # 是否将自己注册到注册中心,默认为 true registry-fetch-interval-seconds: 10 # 表示 Eureka Client 间隔多久去服务器拉取注册信息,默认为 30 秒 service-url: # 设置服务注册中心地址 defaultZone: http://root:123456@localhost:8761/eureka/,http://root:123456@localhost:8762/eureka/


6|4过滤 CSRF


  Eureka 会自动化配置 CSRF 防御机制,Spring Security 认为 POST, PUT, and DELETE http methods 都是有风险的,如果这些 method 发送过程中没有带上 CSRF token 的话,会被直接拦截并返回 403 forbidden。

  官方给出了解决的方法,具体可以参考 spring cloud issue 2754,里面有大量的讨论,这里提供两种解决方案。

  首先注册中心配置一个 @EnableWebSecurity 配置类,继承 org.springframework.security.config.annotation.web.configuration.WebSecurityConfigurerAdapter,然后重写 configure 方法。


方案一


  使 CSRF 忽略 /eureka/** 的所有请求

package com.example.config; import org.springframework.security.config.annotation.web.builders.HttpSecurity; import org.springframework.security.config.annotation.web.configuration.EnableWebSecurity; import org.springframework.security.config.annotation.web.configuration.WebSecurityConfigurerAdapter; /** * 安全认证配置类 */ @EnableWebSecurity public class WebSecurityConfig extends WebSecurityConfigurerAdapter { @Override protected void configure(HttpSecurity http) throws Exception { super.configure(http); // 加这句是为了访问 eureka 控制台和 /actuator 时能做安全控制 http.csrf().ignoringAntMatchers("/eureka/**"); // 忽略 /eureka/** 的所有请求 } }


方案二


  保持密码验证的同时禁用 CSRF 防御机制

package com.example.config; import org.springframework.security.config.annotation.web.builders.HttpSecurity; import org.springframework.security.config.annotation.web.configuration.EnableWebSecurity; import org.springframework.security.config.annotation.web.configuration.WebSecurityConfigurerAdapter; /** * 安全认证配置类 */ @EnableWebSecurity public class WebSecurityConfig extends WebSecurityConfigurerAdapter { @Override protected void configure(HttpSecurity http) throws Exception { // 注意,如果直接 disable 的话会把安全验证也禁用掉 http.csrf().disable().authorizeRequests() .anyRequest() .authenticated() .and() .httpBasic(); } }


6|5访问


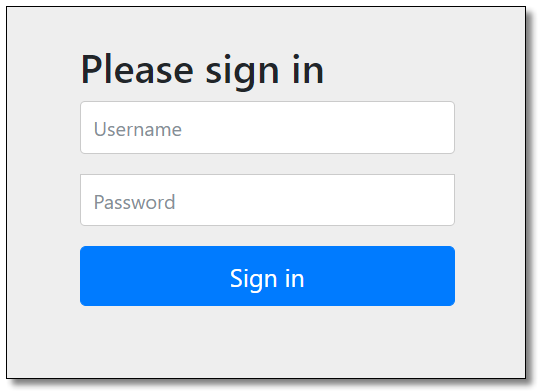
  使用配置好的用户名和密码登录以后可看到注册中心界面,启动服务提供者和服务消费者,功能正常使用,至此 Eureka 注册中心所有的知识点就讲解结束了。


posted @ 2020-05-11 10:26  YoungDeng  阅读(146)  评论(0编辑  收藏  举报