SceneKit to show 3D content in Swift 5

— In this history, I going to show how easy was show 3D content with SceneKit framework using high-level scene descriptions.
What Apple’s says about SceneKit framework?:
Create 3D games and add 3D content to apps using high-level scene descriptions. Easily add animations, physics simulation, particle effects, and realistic physically based rendering.
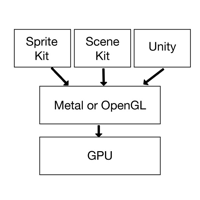
SceneKit combines a high-performance rendering engine with a descriptive API for import, manipulation, and rendering of 3D assets. Unlike lower-level APIs such as Metal and OpenGL that require you to implement in precise detail the rendering algorithms that display a scene, SceneKit requires only descriptions of your scene’s contents and the actions or animations you want it to perform.
This means that we can use SceneKit for easy things (normal development), and Metal or OpenGL to make high-level customization e.g.: Games or for a high level of images manipulation.
In addition, there is little documentation to use the metal and OpenGL, adding its complexity of use.
The next image represents the hierarchy between SceneKit, SpriteKit, Unity, Metal and OpenGL in front of the graphics processing unit (GPU):
fter putting ourselves in context and getting the theory, it’s time for the code 💻...
So, we going to make a simple detail view of any shopping app and our result should be the next:

I will show how to open .obj files, although SceneKit it is able to open more kinds of files like a .dae, .blend, .scn…
⇣⇣ I download ⇣⇣ the 3D model from this 🔗website🔗..
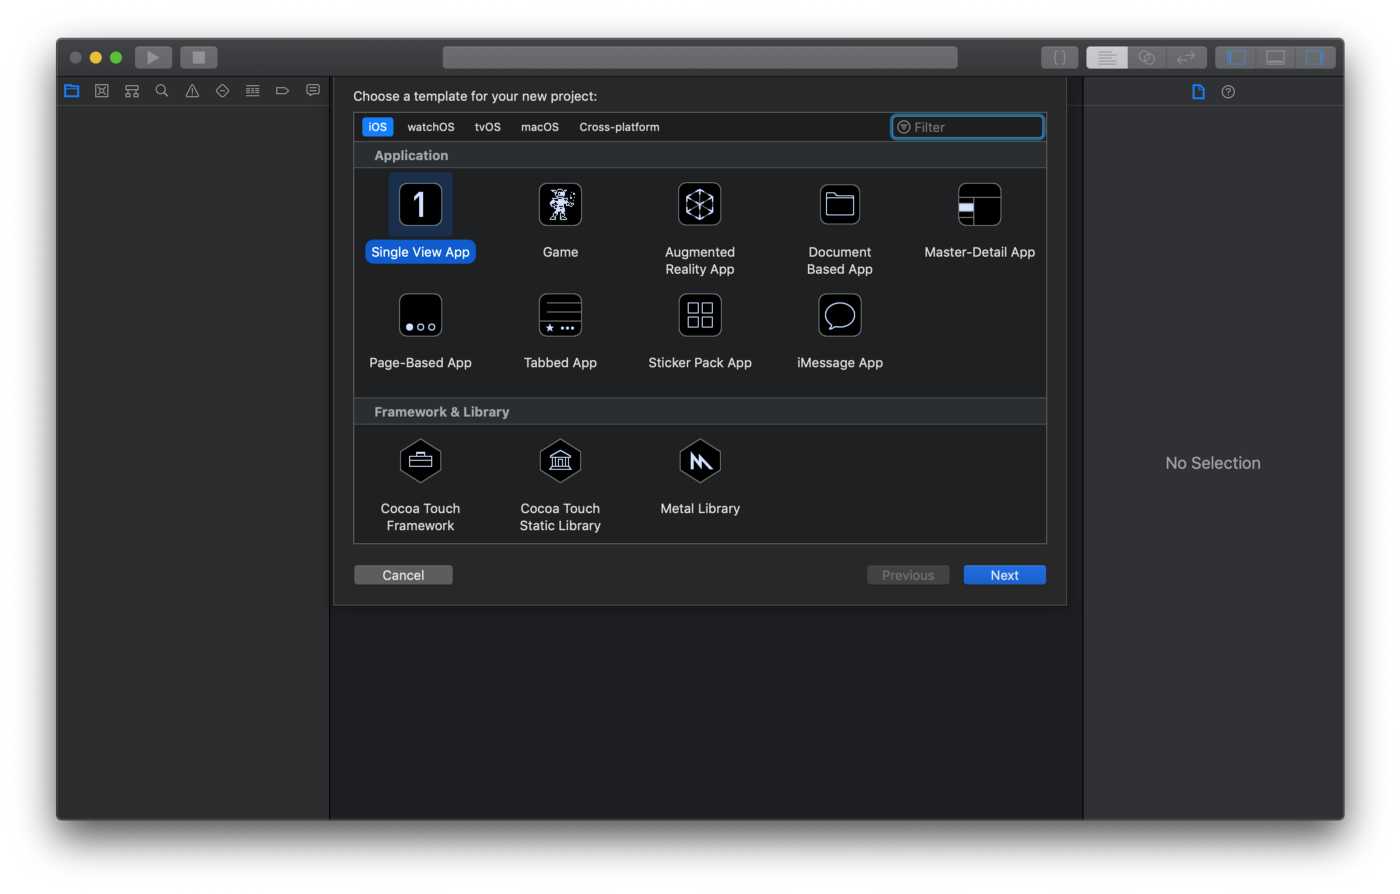
So, open Xcode… Create new project… Select Single View App…
⌨ TIME FOR CODING…
Go to your ViewController.swift and copy & paste below code:
import UIKit
import SceneKit

class ViewController: UIViewController {

    @IBOutlet weak var sceneView: SCNView!

    override func viewDidLoad() {
        super.viewDidLoad()

        // 1: Load .obj file
        let scene = SCNScene(named: "converse_obj.obj")

        // 2: Add camera node
        let cameraNode = SCNNode()
        cameraNode.camera = SCNCamera()
        // 3: Place camera
        cameraNode.position = SCNVector3(x: 0, y: 10, z: 35)
        // 4: Set camera on scene
        scene?.rootNode.addChildNode(cameraNode)

        // 5: Adding light to scene
        let lightNode = SCNNode()
        lightNode.light = SCNLight()
        lightNode.light?.type = .omni
        lightNode.position = SCNVector3(x: 0, y: 10, z: 35)
        scene?.rootNode.addChildNode(lightNode)

        // 6: Creating and adding ambien light to scene
        let ambientLightNode = SCNNode()
        ambientLightNode.light = SCNLight()
        ambientLightNode.light?.type = .ambient
        ambientLightNode.light?.color = UIColor.darkGray
        scene?.rootNode.addChildNode(ambientLightNode)

        // If you don't want to fix manually the lights
//        sceneView.autoenablesDefaultLighting = true

        // Allow user to manipulate camera
        sceneView.allowsCameraControl = true

        // Show FPS logs and timming
        // sceneView.showsStatistics = true

        // Set background color
        sceneView.backgroundColor = UIColor.white

        // Allow user translate image
        sceneView.cameraControlConfiguration.allowsTranslation = false

        // Set scene settings
        sceneView.scene = scene

    }


}
Step by step explanation
The main task is import SceneKit framework, next of that we can use all classes from SceneKit.
// 1: In order to load the .obj file, we need to use SCNScene class loading it
// 2: Next create a new SCNCamera object and assign it to the camera property
// 3: Then set the camera position with key points.
🎥 The SCNCamera works with this three-axis system to represent the position in 3D space.
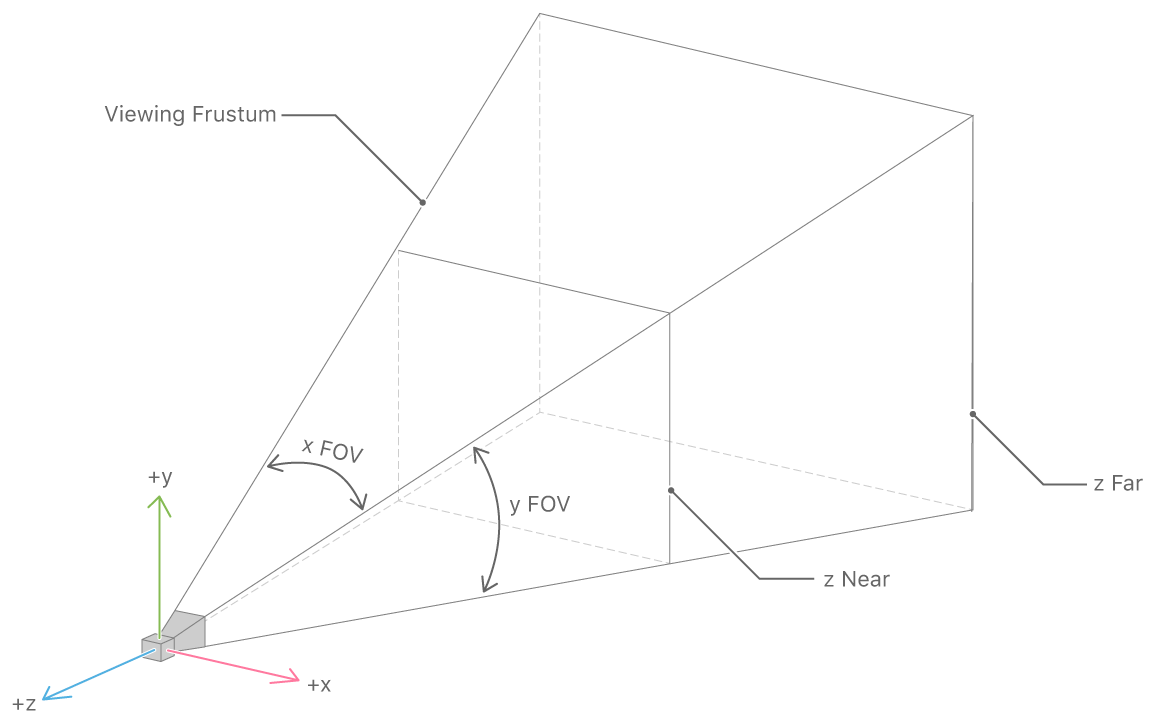
Apple’s information source SCNCamera
// 4: Next, you add cameraNode to the scene as a child node of the scene’s root node
// 5 & 6: You can use your custom lights or automatic lighting, in my case in order to improve the aspect of the image using better way, I preferred to use custom lights because .autoenablesDefaultLighting don’t isn’t enough. This two SCNLight will be added to the root node.
This is not mandatory, you can load a file without using lights, but for this history has more content about the different settings
//: The next points are self-explanatory, and you can play with all of them to try!
👁 The basic UI
Next, go to your storyboard and add from the Interface Builder a SceneKit View on your View dragging and drop it, and connecting the IBOutlets to your → @IBOutlet weak var sceneView: SCNView!
CONCLUSION
This it’s all, Apple 🍎 was right, was so simple working adding 3D content to apps using high-level scene descriptions…
You can download the demo project used for history
https://reefwing.medium.com/loading-3d-models-in-scenekit-c482a2218966

 浙公网安备 33010602011771号