
在ASP.NET Core 2.* Web应用程序项目中自定义Bootstrap(修改样式)
https://www.codeproject.com/Articles/1276979/Customising-Bootstrap-in-ASP-NET-Core-2-2-Web-Appl
步骤:
1、删除“wwwroot /lib/bootstrap”文件夹及其所有内容和子文件夹。
2、添加npm配置文件,进入项目工程目录,在mac 终端输入 npm init
生成了一个package.json文件
注意:使用npm安装软件包时,我们需要在项目文件夹中,而不是解决方案文件夹(如果不同)。
另外,请注意,在安装软件包时,您不会编辑npm配置文件,因为npm将尝试更新配置文件,如果将其锁定,可能无法执行此操作。
在项目的根文件夹中打开命令提示符并发出以下命令来安装我们将要使用的包:
npm install --save bootstrap popper.js jquery
npm install --save-dev webpack webpack-cli
npm install --save-dev sass-loader node-sass
npm install --save-dev babel-loader @babel/core @babel/preset-env
npm install --save-dev uglifyjs-webpack-plugin
更新package.json文件,使其包含一个包含命令的scripts部分,我们将用它来构建我们的捆绑文件
"scripts": {
    "bootstrap-js": "webpack --mode production --progress --profile --config webpack.bootstrap.js",
    "bootstrap-css": "node-sass --output-style compressed client/css/bootstrap.scss wwwroot/css/bootstrap.min.css",
    "bundles": "npm run bootstrap-js && npm run bootstrap-css"
}
在项目的根文件夹中创建“clients”文件夹,并在“client”文件夹中创建“js”和“css”文件夹。
使用以下测试内容创建“client/css/_custom.scss”(我们可以覆盖此文件中的任何Bootstrap sass变量以更改Bootstrap外观):
// Will change the backcolor of the body to yellow instead of white

$body-bg: #f9fbaf;
使用以下测试内容创建“client/css/bootstrap.scss”:
// import our application specific bootstrap overrides in _custom.scss
@import "custom";

// import whole of bootstrap
@import "~bootstrap/scss/bootstrap";

// or just import the bits of bootstrap we will be using
// (look in bootstrap's bootstrap.scss file for full list)
//@import "~bootstrap/scss/functions";
//@import "~bootstrap/scss/variables";
//@import "~bootstrap/scss/mixins";
//@import "~bootstrap/scss/root";
//@import "~bootstrap/scss/reboot";
//@import "~bootstrap/scss/type";
//@import "~bootstrap/scss/grid";
//@import "~bootstrap/scss/buttons";
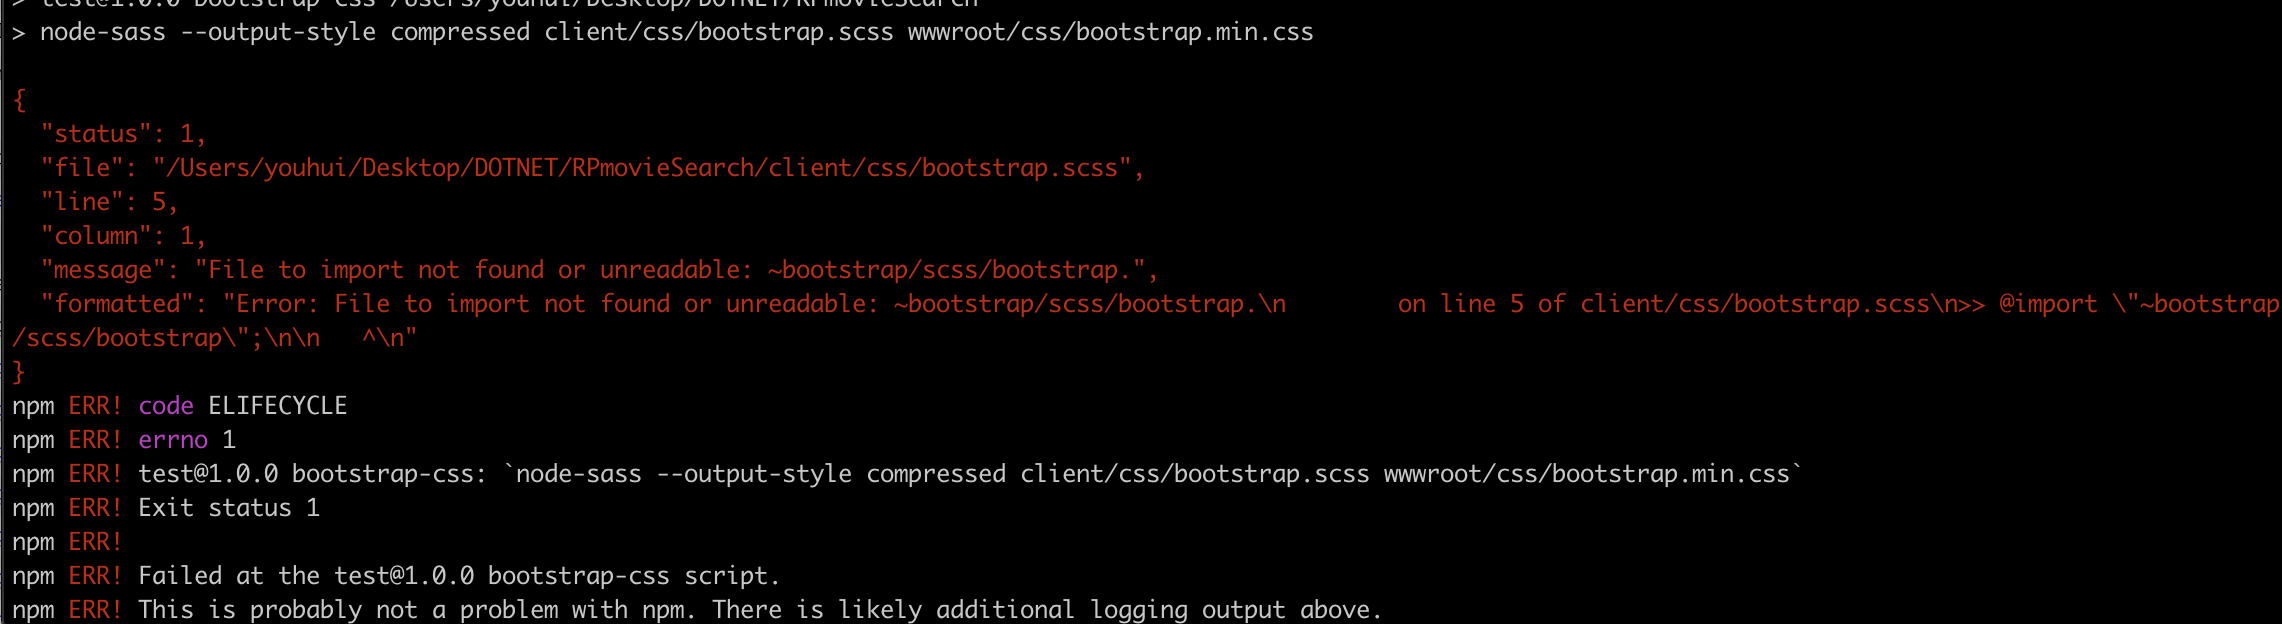
网上有教程用上面的方法,但在实际执行过程中发生了错误
后面改成如下方式
// import our application specific bootstrap overrides in _custom.scss
@import "custom";

//https://stackoverflow.com/questions/48434762/error-file-to-import-not-found-or-unreadable-bootstrap-scss-bootstrap
//When Sass is precompiled by its own CLI, it processes @imports by itself, and sometimes thus doesn’t understand ~ notation. So you can import "node_modules/bootstrap/scss/bootstrap"; in first place and replaced the ~ notation with node_modules/ instead.

// import whole of bootstrap
@import "node_modules/bootstrap/scss/bootstrap";

// or just import the bits of bootstrap we will be using
// (look in bootstrap's bootstrap.scss file for full list)
//@import "~bootstrap/scss/functions";
//@import "~bootstrap/scss/variables";
//@import "~bootstrap/scss/mixins";
//@import "~bootstrap/scss/root";
//@import "~bootstrap/scss/reboot";
//@import "~bootstrap/scss/type";
//@import "~bootstrap/scss/grid";
//@import "~bootstrap/scss/buttons";
在“client/js”中,创建此bootstrap.js文件:
// include all of bootstrap javascript
//import 'bootstrap';

// or include just the bits of bootstrap javascript we want
import 'bootstrap/js/dist/modal';
import 'bootstrap/js/dist/tooltip';
在项目的根文件夹中添加以下JavaScript文件; “ webpack.bootstrap.js ”:
// path is so we can resolve relative paths later regardless
// of operating system differences
const path = require('path');
// uglifyjs-webpack-plugin will allow us to minify our js
const UglifyJsPlugin = require('uglifyjs-webpack-plugin');

module.exports = {
    entry: {
        // js entry point
        bootstrap: './client/js/bootstrap.js'
    },
    // default mode
    mode: 'production',
    // apply rules
    module: {
        rules: [
            {
                // use babel to transpile latest js into
                // something earlier browsers understand
                // may not be needed depending on source
                test: /\.js$/,
                use: {
                    loader: 'babel-loader',
                    options: {
                        presets: ['@babel/preset-env']
                    }
                }
            }
        ]
    },
    optimization: {
        minimizer: [
            // js minification options
            new UglifyJsPlugin({
                cache: true,
                parallel: true,
                sourceMap: true
            })
        ]
    },
    output: {
        // output js and map filenames
        filename: 'js/[name].min.js',
        path: path.resolve(__dirname, 'wwwroot'),
        sourceMapFilename: 'js/[name].js.map'
    },
    // make sure a .map is created
    devtool: 'source-map'
};
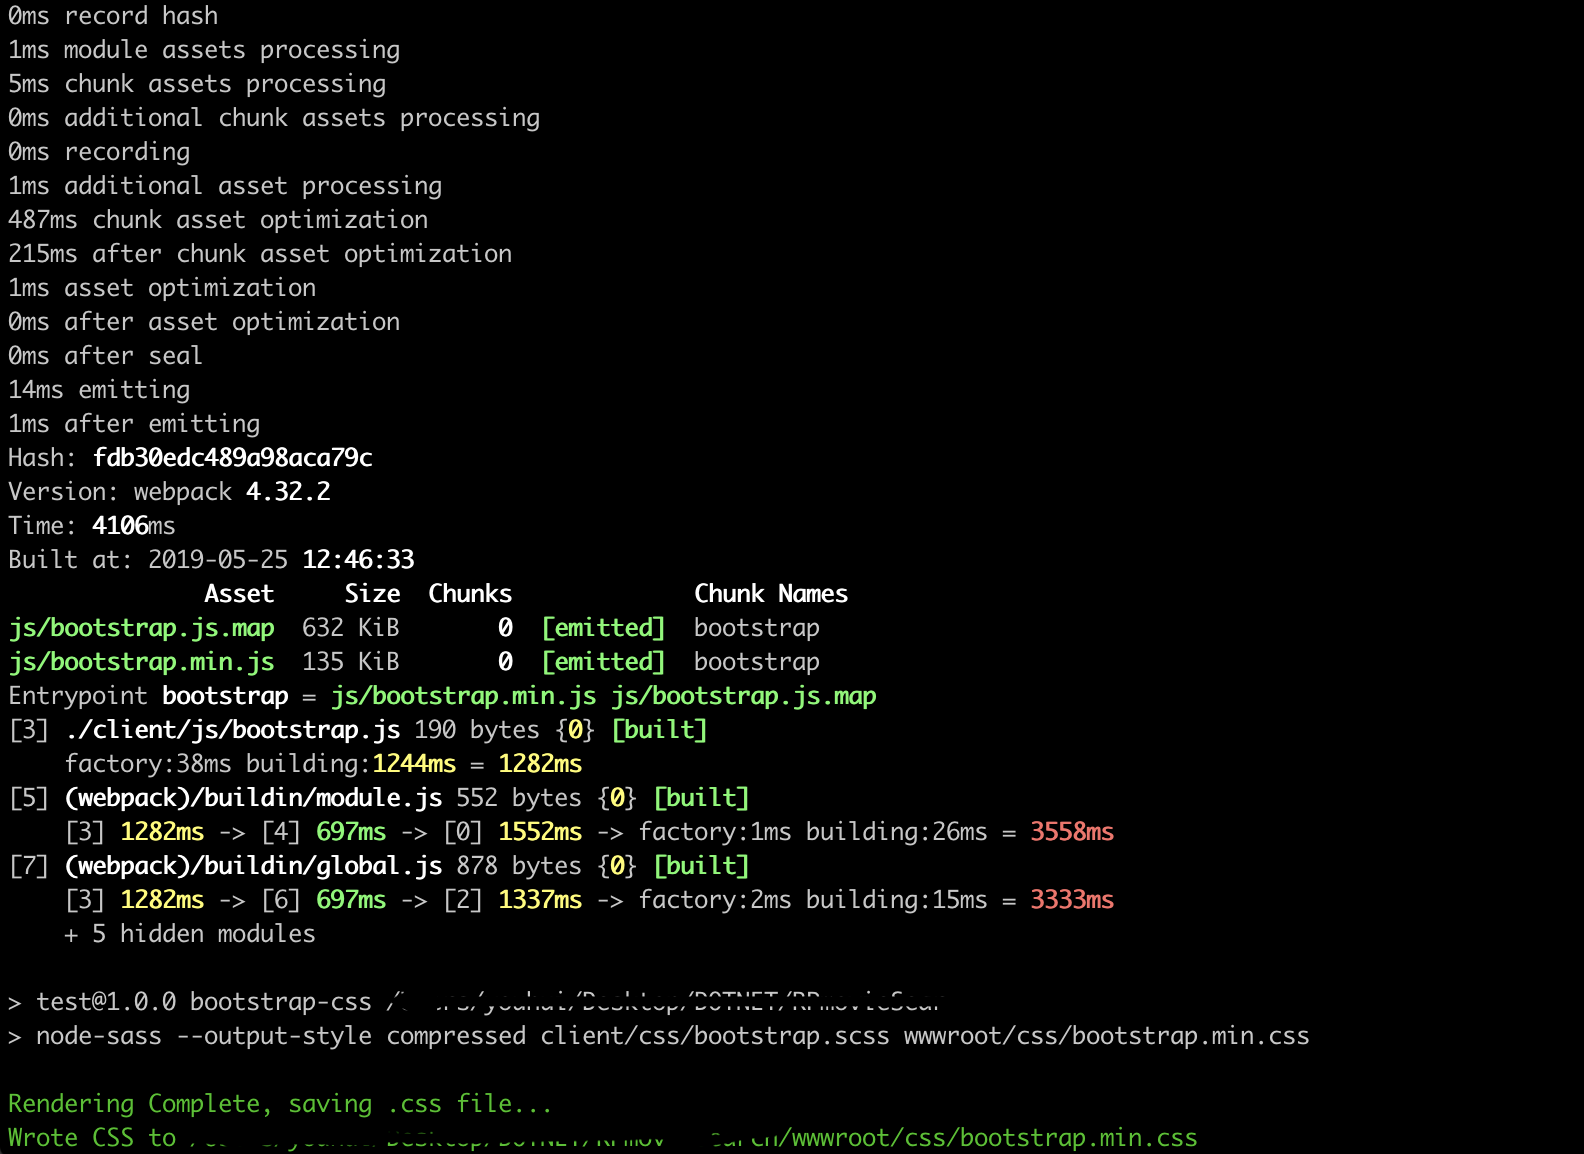
现在可以在项目的根文件夹中的命令提示符处使用以下命令来生成初始文件包:
npm run bundles
现在可以进行样式自定义了,例如,更改bootstrap中使用的颜色和字体,可能只包括用于模态(modals)和工具提示(tooltips)的JavaScript,并且仅包括我们将实际使用的Bootstrap CSS的选择。这是通过编辑“client/js/bootstrap.js”,“client/css/_custom.scss”和“client/css/bootstrap.scss”文件的内容,然后重新运行“npm run bundles”来重新创建我们的捆绑文件来完成的。
我们还需要更新“Pages/Shared/_Layout.cshtml”文件以引用我们的bootstrap文件而不是bootstrap cdn和lib文件夹中的JavaScript和CSS文件
...
    <link rel="stylesheet" href="~/css/bootstrap.min.css" asp-append-version="true" />
    <link rel="stylesheet" href="~/css/site.css" asp-append-version="true" />
...
    <script src="~/js/bootstrap.min.js" asp-append-version="true"></script>
    <script src="~/js/site.js" asp-append-version="true"></script>
...
https://blog.csdn.net/mzl87/article/details/87561000
https://www.codeproject.com/Articles/1276979/Customising-Bootstrap-in-ASP-NET-Core-2-2-Web-Appl

 浙公网安备 33010602011771号